automatic transmission CHRYSLER PACIFICA HYBRID 2023 Owners Manual
[x] Cancel search | Manufacturer: CHRYSLER, Model Year: 2023, Model line: PACIFICA HYBRID, Model: CHRYSLER PACIFICA HYBRID 2023Pages: 328, PDF Size: 16.37 MB
Page 6 of 328
4
STARTING AND OPERATING
STARTING THE ENGINE ................................................... 111
Normal Starting ........................................................ 111
AutoPark .................................................................... 111Cold Weather Operation
(Below –22°F Or −30°C) ........................................ 113After Starting — Warming Up The Engine ................ 113
If Engine Fails To Start ............................................. 114
To Turn Off The Engine Using The ENGINE
START/STOP Button.................................................. 114
ENGINE BLOCK HEATER — IF EQUIPPED ..................... 114
ENGINE BREAK-IN RECOMMENDATIONS .................... 114
PARKING BRAKE ............................................................. 115 Electric Park Brake (EPB) ........................................ 115
AUTOMATIC TRANSMISSION .......................................... 117 Ignition Park Interlock............................................... 118
Brake/Transmission Shift Interlock (BTSI) System....118
9-Speed Automatic Transmission ............................ 118
Gear Ranges.............................................................. 119
ALL-WHEEL DRIVE (AWD) — IF EQUIPPED .................. 120
ACTIVE NOISE CANCELLATION....................................... 121
POWER STEERING ........................................................... 121
STOP/START SYSTEM — IF EQUIPPED.......................... 121 Autostop Mode .......................................................... 121
Possible Reasons The Engine Does Not Autostop.. 122
To Start The Engine While In Autostop .................... 122
To Manually Turn Off The Stop/Start System ......... 122
To Manually Turn On The Stop/Start System.......... 123
System Malfunction .................................................. 123 CRUISE CONTROL SYSTEMS — IF EQUIPPED ............. 123
Cruise Control ........................................................... 123
Adaptive Cruise Control (ACC).................................. 124
PARKSENSE FRONT/REAR PARK ASSIST SYSTEM —
IF EQUIPPED .................................................................... 132 ParkSense Sensors .................................................. 132ParkSense Display.................................................... 132
ParkSense Warning Display ..................................... 135
Enabling And Disabling ParkSense ......................... 135
Service The ParkSense Park Assist System............ 135
Cleaning The ParkSense System ............................. 136ParkSense System Usage Precautions ................... 136
PARKSENSE ACTIVE PARK ASSIST SYSTEM —
IF EQUIPPED ..................................................................... 137 Enabling And Disabling The ParkSense Active Park
Assist System ............................................................ 137
Parallel/Perpendicular Parking Space Assistance
Operation................................................................... 138
LANESENSE — IF EQUIPPED ......................................... 140 LaneSense Operation............................................... 140
Turning LaneSense On Or Off .................................. 140
LaneSense Warning Message ................................. 140
Changing LaneSense Status.................................... 142 PARKVIEW REAR BACK UP CAMERA ........................... 142
SURROUND VIEW CAMERA SYSTEM —
IF EQUIPPED......................................................................143
FAMCAM SYSTEM — IF EQUIPPED .................................145
REFUELING THE VEHICLE ................................................146
VEHICLE LOADING ...........................................................146 Certification Label ..................................................... 146
TRAILER TOWING .............................................................147 Common Towing Definitions..................................... 147
Trailer Hitch Classification ........................................ 149Trailer Towing Weights (Maximum Trailer
Weight Ratings) ........................................................ 149
Vehicle Loading Chart ............................................... 150Trailer And Tongue Weight ....................................... 151Towing Requirements .............................................. 151Towing Tips ............................................................... 153
RECREATIONAL TOWING (BEHIND MOTORHOME) ..... 154 Towing This Vehicle Behind Another Vehicle ........... 154
DRIVING TIPS ....................................................................155 Driving On Slippery Surfaces .................................... 155
Driving Through Water ............................................. 156
23_RUP_OM_EN_USC_t.book Page 4
Page 8 of 328
6
SERVICING AND MAINTENANCE
SCHEDULED SERVICING ................................................ 259
Maintenance Plan ..................................................... 260
ENGINE COMPARTMENT................................................. 262 3.6L Engine ............................................................... 262
Checking Oil Level ..................................................... 263
Adding Washer Fluid ................................................ 263Maintenance-Free Battery ....................................... 263
Pressure Washing ..................................................... 264
VEHICLE MAINTENANCE ................................................ 264 Engine Oil .................................................................. 264
Engine Oil Filter ......................................................... 265
Engine Air Cleaner Filter .......................................... 265
Accessory Drive Belt Inspection ............................... 265
Air Conditioner Maintenance ................................... 266
Body Lubrication ....................................................... 268Windshield Wiper Blades.......................................... 268
Exhaust System ........................................................ 270
Cooling System.......................................................... 271
Brake System ........................................................... 273
Automatic Transmission .......................................... 274
Fuses ......................................................................... 275
Bulb Replacement .................................................... 282
TIRES ................................................................................ 283 Tire Safety Information ............................................ 283
Tires — General Information .................................... 291
Tire Types................................................................... 294
Spare Tires — If Equipped ........................................ 295Wheel And Wheel Trim Care .................................... 296
Snow Traction Devices ............................................ 297
Tire Rotation Recommendations ............................. 298 DEPARTMENT OF TRANSPORTATION UNIFORM TIRE
QUALITY GRADES ........................................................... 298
Treadwear ................................................................. 298Traction Grades ........................................................ 299Temperature Grades ................................................ 299
STORING THE VEHICLE ................................................... 299
BODYWORK ...................................................................... 300 Protection From Atmospheric Agents ...................... 300Body And Underbody Maintenance ......................... 300
Preserving The Bodywork ......................................... 300
INTERIORS ....................................................................... 301 Seats And Fabric Parts ............................................. 301
Plastic And Coated Parts .......................................... 301Leather Surfaces ...................................................... 302
Glass Surfaces ......................................................... 302
TECHNICAL SPECIFICATIONS
VEHICLE IDENTIFICATION NUMBER (VIN)..................... 303
BRAKE SYSTEM ............................................................... 303
WHEEL AND TIRE TORQUE SPECIFICATIONS .............. 303 Torque Specifications ............................................... 303
FUEL REQUIREMENTS ..................................................... 304 3.6L Engine ............................................................... 304Reformulated Gasoline ........................................... 304Gasoline/Oxygenate Blends .................................... 304Do Not Use E-85 In Non-Flex Fuel Vehicles ............ 305
CNG And LP Fuel System Modifications.................. 305
Methylcyclopentadienyl Manganese Tricarbonyl
(MMT) In Gasoline .................................................... 305
Materials Added To Fuel .......................................... 305Fuel System Cautions ............................................... 305
FLUID CAPACITIES .......................................................... 306
ENGINE FLUIDS AND LUBRICANTS .............................. 306
CHASSIS FLUIDS AND LUBRICANTS ............................ 307
CUSTOMER ASSISTANCE
SUGGESTIONS FOR OBTAINING SERVICE FOR YOUR
VEHICLE ............................................................................308 Prepare For The Appointment .................................. 308
Prepare A List ............................................................ 308Be Reasonable With Requests ................................. 308
IF YOU NEED ASSISTANCE ..............................................308 Roadside Assistance ................................................. 308
FCA US LLC Customer Center ................................... 309
FCA Canada Inc. Customer Center........................... 309
Mexico ........................................................................ 310
Puerto Rico And US Virgin Islands............................ 310
Customer Assistance For The Hearing Or Speech
Impaired(TDD/TTY).................................................... 310
Service Contract ........................................................ 310
WARRANTY INFORMATION.............................................310
MOPAR® PARTS ..............................................................311
REPORTING SAFETY DEFECTS ......................................311 In The 50 United States And Washington, D.C........ 311
In Canada................................................................... 311
PUBLICATION ORDER FORMS .......................................311
CHANGE OF OWNERSHIP OR ADDRESS.......................312
GENERAL INFORMATION................................................. 312
23_RUP_OM_EN_USC_t.book Page 6
Page 53 of 328
GETTING TO KNOW YOUR VEHICLE51
TILT SIDE MIRRORS IN REVERSE —
I
F EQUIPPED
Tilt Side Mirrors In Reverse provides automatic outside
mirror positioning which will aid the driver’s view of the
ground rearward of the front doors. The driver's outside
mirror will move slightly downward from the present
position when the vehicle is shifted into REVERSE. The
driver's outside mirror will then return to the original
position when the vehicle is shifted out of the REVERSE
position. Each stored memory setting will have an
associated Tilt Side Mirrors In Reverse position.
NOTE:The Tilt Side Mirrors In Reverse feature can be enabled or
disabled through the Uconnect system Úpage 157.
UNIVERSAL GARAGE DOOR OPENER
(HOMELINK®) — IF EQUIPPED
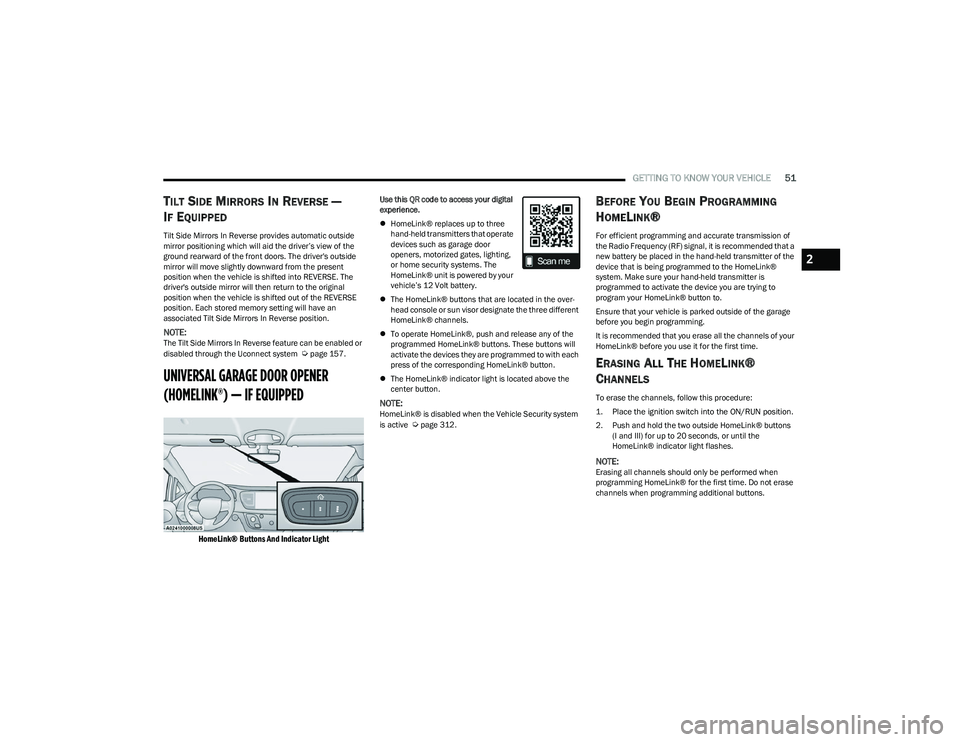
HomeLink® Buttons And Indicator Light
Use this QR code to access your digital
experience.
HomeLink® replaces up to three
hand-held transmitters that operate
devices such as garage door
openers, motorized gates, lighting,
or home security systems. The
HomeLink® unit is powered by your
vehicle’s 12 Volt battery.
The HomeLink® buttons that are located in the over -
head console or sun visor designate the three different
HomeLink® channels.
To operate HomeLink®, push and release any of the
programmed HomeLink® buttons. These buttons will
activate the devices they are programmed to with each
press of the corresponding HomeLink® button.
The HomeLink® indicator light is located above the
center button.
NOTE:HomeLink® is disabled when the Vehicle Security system
is active Úpage 312.
BEFORE YOU BEGIN PROGRAMMING
H
OMELINK®
For efficient programming and accurate transmission of
the Radio Frequency (RF) signal, it is recommended that a
new battery be placed in the hand-held transmitter of the
device that is being programmed to the HomeLink®
system. Make sure your hand-held transmitter is
programmed to activate the device you are trying to
program your HomeLink® button to.
Ensure that your vehicle is parked outside of the garage
before you begin programming.
It is recommended that you erase all the channels of your
HomeLink® before you use it for the first time.
ERASING ALL THE HOMELINK®
C
HANNELS
To erase the channels, follow this procedure:
1. Place the ignition switch into the ON/RUN position.
2. Push and hold the two outside HomeLink® buttons
(I and III) for up to 20 seconds, or until the
HomeLink® indicator light flashes.
NOTE:Erasing all channels should only be performed when
programming HomeLink® for the first time. Do not erase
channels when programming additional buttons.
2
23_RUP_OM_EN_USC_t.book Page 51
Page 87 of 328
GETTING TO KNOW YOUR VEHICLE85
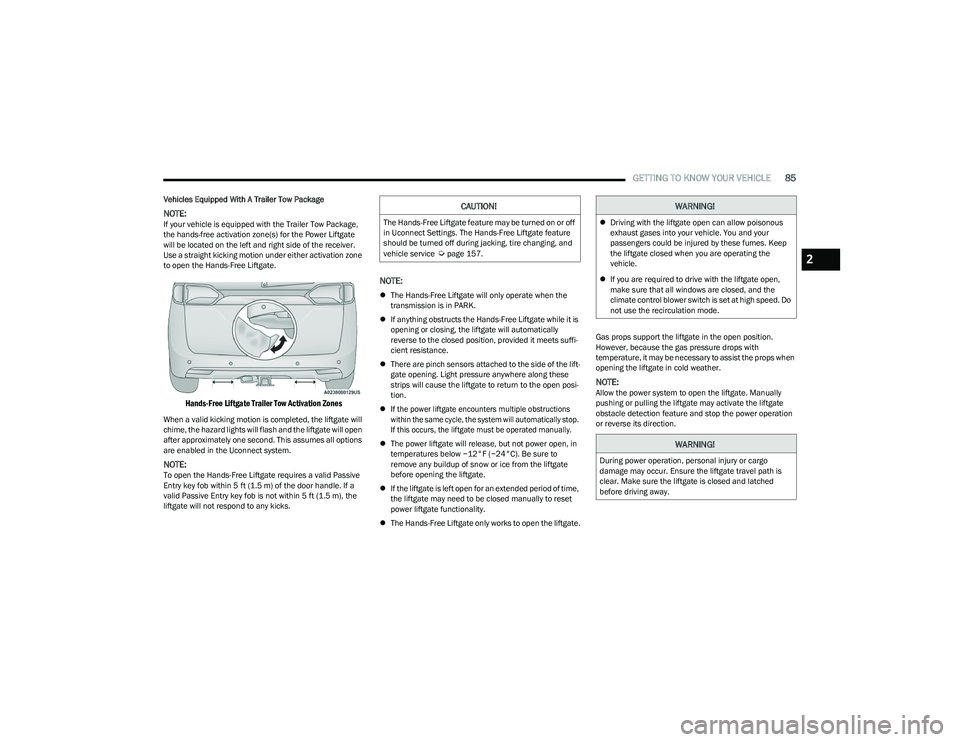
Vehicles Equipped With A Trailer Tow Package
NOTE:If your vehicle is equipped with the Trailer Tow Package,
the hands-free activation zone(s) for the Power Liftgate
will be located on the left and right side of the receiver.
Use a straight kicking motion under either activation zone
to open the Hands-Free Liftgate.
Hands-Free Liftgate Trailer Tow Activation Zones
When a valid kicking motion is completed, the liftgate will
chime, the hazard lights will flash and the liftgate will open
after approximately one second. This assumes all options
are enabled in the Uconnect system.
NOTE:To open the Hands-Free Liftgate requires a valid Passive
Entry key fob within 5 ft (1.5 m) of the door handle. If a
valid Passive Entry key fob is not within 5 ft (1.5 m), the
liftgate will not respond to any kicks.
NOTE:
The Hands-Free Liftgate will only operate when the
transmission is in PARK.
If anything obstructs the Hands-Free Liftgate while it is
opening or closing, the liftgate will automatically
reverse to the closed position, provided it meets suffi -
cient resistance.
There are pinch sensors attached to the side of the lift -
gate opening. Light pressure anywhere along these
strips will cause the liftgate to return to the open posi -
tion.
If the power liftgate encounters multiple obstructions
within the same cycle, the system will automatically stop.
If this occurs, the liftgate must be operated manually.
The power liftgate will release, but not power open, in
temperatures below −12°F (−24°C). Be sure to
remove any buildup of snow or ice from the liftgate
before opening the liftgate.
If the liftgate is left open for an extended period of time,
the liftgate may need to be closed manually to reset
power liftgate functionality.
The Hands-Free Liftgate only works to open the liftgate. Gas props support the liftgate in the open position.
However, because the gas pressure drops with
temperature, it may be necessary to assist the props when
opening the liftgate in cold weather.
NOTE:Allow the power system to open the liftgate. Manually
pushing or pulling the liftgate may activate the liftgate
obstacle detection feature and stop the power operation
or reverse its direction.
CAUTION!
The Hands-Free Liftgate feature may be turned on or off
in Uconnect Settings. The Hands-Free Liftgate feature
should be turned off during jacking, tire changing, and
vehicle service
Úpage 157.
WARNING!
Driving with the liftgate open can allow poisonous
exhaust gases into your vehicle. You and your
passengers could be injured by these fumes. Keep
the liftgate closed when you are operating the
vehicle.
If you are required to drive with the liftgate open,
make sure that all windows are closed, and the
climate control blower switch is set at high speed. Do
not use the recirculation mode.
WARNING!
During power operation, personal injury or cargo
damage may occur. Ensure the liftgate travel path is
clear. Make sure the liftgate is closed and latched
before driving away.
2
23_RUP_OM_EN_USC_t.book Page 85
Page 108 of 328
106GETTING TO KNOW YOUR INSTRUMENT PANEL
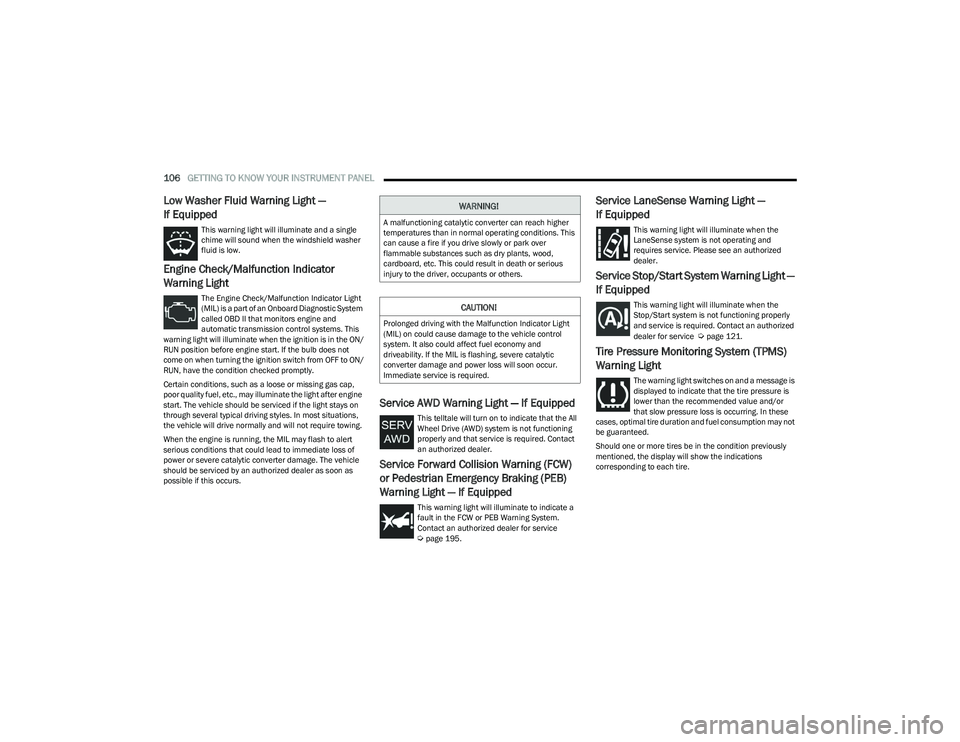
Low Washer Fluid Warning Light —
If Equipped
This warning light will illuminate and a single
chime will sound when the windshield washer
fluid is low.
Engine Check/Malfunction Indicator
Warning Light
The Engine Check/Malfunction Indicator Light
(MIL) is a part of an Onboard Diagnostic System
called OBD II that monitors engine and
automatic transmission control systems. This
warning light will illuminate when the ignition is in the ON/
RUN position before engine start. If the bulb does not
come on when turning the ignition switch from OFF to ON/
RUN, have the condition checked promptly.
Certain conditions, such as a loose or missing gas cap,
poor quality fuel, etc., may illuminate the light after engine
start. The vehicle should be serviced if the light stays on
through several typical driving styles. In most situations,
the vehicle will drive normally and will not require towing.
When the engine is running, the MIL may flash to alert
serious conditions that could lead to immediate loss of
power or severe catalytic converter damage. The vehicle
should be serviced by an authorized dealer as soon as
possible if this occurs.
Service AWD Warning Light — If Equipped
This telltale will turn on to indicate that the All
Wheel Drive (AWD) system is not functioning
properly and that service is required. Contact
an authorized dealer.
Service Forward Collision Warning (FCW)
or Pedestrian Emergency Braking (PEB)
Warning Light — If Equipped
This warning light will illuminate to indicate a
fault in the FCW or PEB Warning System.
Contact an authorized dealer for service
Úpage 195.
Service LaneSense Warning Light —
If Equipped
This warning light will illuminate when the
LaneSense system is not operating and
requires service. Please see an authorized
dealer.
Service Stop/Start System Warning Light —
If Equipped
This warning light will illuminate when the
Stop/Start system is not functioning properly
and service is required. Contact an authorized
dealer for service
Úpage 121.
Tire Pressure Monitoring System (TPMS)
Warning Light
The warning light switches on and a message is
displayed to indicate that the tire pressure is
lower than the recommended value and/or
that slow pressure loss is occurring. In these
cases, optimal tire duration and fuel consumption may not
be guaranteed.
Should one or more tires be in the condition previously
mentioned, the display will show the indications
corresponding to each tire.
WARNING!
A malfunctioning catalytic converter can reach higher
temperatures than in normal operating conditions. This
can cause a fire if you drive slowly or park over
flammable substances such as dry plants, wood,
cardboard, etc. This could result in death or serious
injury to the driver, occupants or others.
CAUTION!
Prolonged driving with the Malfunction Indicator Light
(MIL) on could cause damage to the vehicle control
system. It also could affect fuel economy and
driveability. If the MIL is flashing, severe catalytic
converter damage and power loss will soon occur.
Immediate service is required.
23_RUP_OM_EN_USC_t.book Page 106
Page 111 of 328
GETTING TO KNOW YOUR INSTRUMENT PANEL109
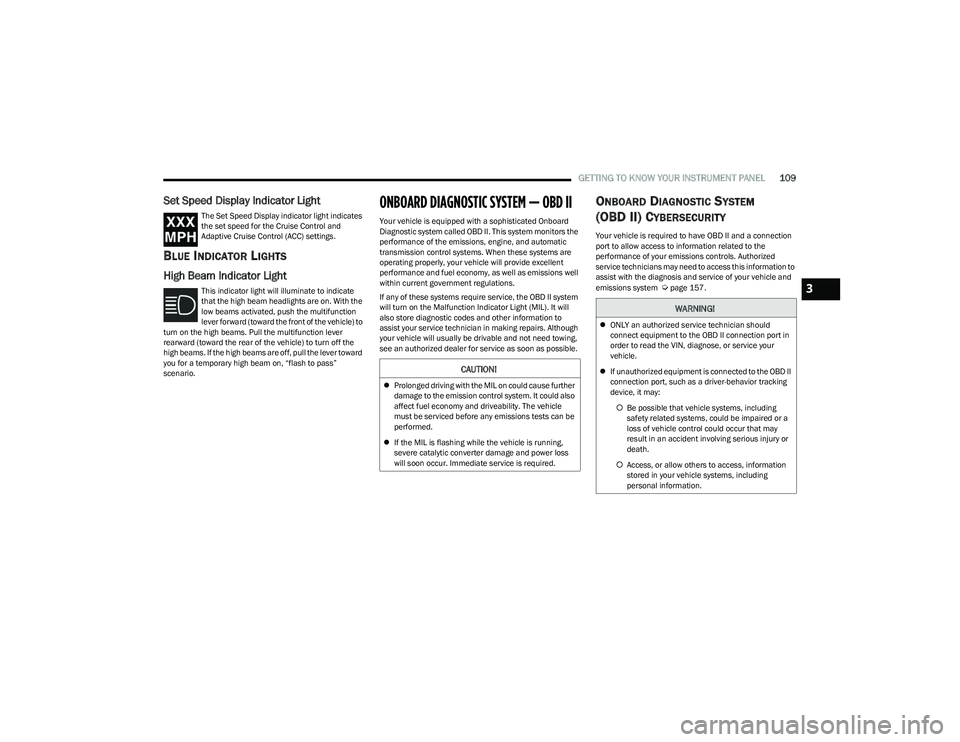
Set Speed Display Indicator Light
The Set Speed Display indicator light indicates
the set speed for the Cruise Control and
Adaptive Cruise Control (ACC) settings.
BLUE INDICATOR LIGHTS
High Beam Indicator Light
This indicator light will illuminate to indicate
that the high beam headlights are on. With the
low beams activated, push the multifunction
lever forward (toward the front of the vehicle) to
turn on the high beams. Pull the multifunction lever
rearward (toward the rear of the vehicle) to turn off the
high beams. If the high beams are off, pull the lever toward
you for a temporary high beam on, “flash to pass”
scenario.
ONBOARD DIAGNOSTIC SYSTEM — OBD II
Your vehicle is equipped with a sophisticated Onboard
Diagnostic system called OBD II. This system monitors the
performance of the emissions, engine, and automatic
transmission control systems. When these systems are
operating properly, your vehicle will provide excellent
performance and fuel economy, as well as emissions well
within current government regulations.
If any of these systems require service, the OBD II system
will turn on the Malfunction Indicator Light (MIL). It will
also store diagnostic codes and other information to
assist your service technician in making repairs. Although
your vehicle will usually be drivable and not need towing,
see an authorized dealer for service as soon as possible.
ONBOARD DIAGNOSTIC SYSTEM
(OBD II) C
YBERSECURITY
Your vehicle is required to have OBD II and a connection
port to allow access to information related to the
performance of your emissions controls. Authorized
service technicians may need to access this information to
assist with the diagnosis and service of your vehicle and
emissions system
Úpage 157.
CAUTION!
Prolonged driving with the MIL on could cause further
damage to the emission control system. It could also
affect fuel economy and driveability. The vehicle
must be serviced before any emissions tests can be
performed.
If the MIL is flashing while the vehicle is running,
severe catalytic converter damage and power loss
will soon occur. Immediate service is required.
WARNING!
ONLY an authorized service technician should
connect equipment to the OBD II connection port in
order to read the VIN, diagnose, or service your
vehicle.
If unauthorized equipment is connected to the OBD II
connection port, such as a driver-behavior tracking
device, it may:
Be possible that vehicle systems, including
safety related systems, could be impaired or a
loss of vehicle control could occur that may
result in an accident involving serious injury or
death.
Access, or allow others to access, information
stored in your vehicle systems, including
personal information.
3
23_RUP_OM_EN_USC_t.book Page 109
Page 113 of 328
111
STARTING AND OPERATING
STARTING THE ENGINE
Before starting your vehicle, adjust your seat, adjust both
inside and outside mirrors, and fasten your seat belts.Start the engine with the gear selector in the NEUTRAL (N)
or PARK (P) position. Apply the brake before shifting to any
driving range.
NORMAL STARTING
To Turn On The Engine Using the ENGINE START/STOP
Button
1. The transmission must be in PARK or NEUTRAL.
2. Press and hold the brake pedal while pushing the
ENGINE START/STOP button once.
3. The system starts the vehicle. If the vehicle fails to start, the starter will disengage automatically after 10
seconds.
4. If you wish to stop the cranking of the engine prior to the engine starting, push the button again.
ENGINE START/STOP Button Functions — With Driver’s
Foot Off The Brake Pedal (In PARK Or NEUTRAL Position)
The ENGINE START/STOP button operates similar to an
ignition switch. It has three positions; OFF, ACC, and ON/
RUN. To change the ignition positions without starting the
vehicle and to use the accessories, follow these steps:
Start with the ignition in the OFF position.
Push the ENGINE START/STOP button once to place
the ignition to the ACC position (instrument cluster will
display “ACC”).
Push the ENGINE START/STOP button a second time to
place the ignition to the ON/RUN position (instrument
cluster will display “ON/RUN”).
Push the ENGINE START/STOP button a third time to
return the ignition to the OFF position (instrument
cluster will display “OFF”).
NOTE:Only press one pedal at a time while driving the vehicle.
Torque performance of the vehicle could be reduced if
both pedals are pressed at the same time. If pressure is
detected on both pedals simultaneously, a warning
message will display in the instrument cluster
Úpage 97.
AUTOPARK
AutoPark is a supplemental feature to assist with placing
the vehicle in PARK under certain situations. It is a
back-up system and should not be relied upon as the
primary method by which the driver shifts the vehicle into
PARK.
The conditions under which AutoPark will engage are
outlined on the following pages.
WARNING!
When exiting the vehicle, always remove the key fob
from the vehicle and lock your vehicle.
Never leave children alone in a vehicle, or with
access to an unlocked vehicle.
Allowing children to be in a vehicle unattended is
dangerous for a number of reasons. A child or others
could be seriously or fatally injured. Children should
be warned not to touch the parking brake, brake
pedal or the transmission gear selector.
Do not leave the key fob in or near the vehicle, or in
a location accessible to children, and do not leave
the ignition of a vehicle equipped with Keyless
Enter ‘n Go™ in the ACC or ON/RUN position. A child
could operate power windows, other controls, or
move the vehicle.
Do not leave children or animals inside parked vehi -
cles in hot weather. Interior heat buildup may cause
serious injury or death.
4
23_RUP_OM_EN_USC_t.book Page 111
Page 114 of 328
112STARTING AND OPERATING
(Continued)
ALWAYS DO A VISUAL CHECK
that your vehicle is in PARK
by looking for the “P” in the instrument cluster display and
on the gear selector. As an added precaution, always apply
the parking brake.
If the vehicle is not in PARK and the driver attempts to turn
off the engine, if certain conditions are met, the vehicle
will AutoPark, automatically shifting the vehicle’s
transmission to the PARK position. The gear selector will
automatically reset itself to the PARK position. The
vehicle’s ignition will then move to the OFF position
(engine off). When AutoPark is activated the instrument
cluster will display the message “AutoPark Engaged”. AutoPark will engage when all of these conditions are met:
Vehicle is equipped with a gear selector
Vehicle is not in PARK
Vehicle speed is 1.2 mph (1.9 km/h) or less
Driver has pushed the ENGINE START/STOP button
If the vehicle is not in PARK and the driver exits the vehicle
with the engine running, if certain conditions are met, the
vehicle will AutoPark, automatically shifting the vehicle’s
transmission to the PARK position. The Electric Park Brake
SAFE HOLD feature will also activate in some conditions
Úpage 116.
AutoPark will engage when all of these conditions are met:
Vehicle is equipped with a gear selector
Vehicle is not in PARK
Vehicle speed is 1.2 mph (1.9 km/h) or less
Driver’s door is ajar
Driver’s seat belt is unbuckled
Brake pedal is not pressed
The message “ AutoPark Engaged ” will display in the
instrument cluster. AutoPark In Stop/Start Autostop Mode
AutoPark will engage when all of these conditions are met:
Vehicle is equipped with a gear selector
Vehicle is not in PARK
Vehicle speed is 1.2 mph (1.9 km/h) or less
Driver’s door is ajar
Driver’s seat belt is unbuckled or brake pedal is not
pressed
The message “ AutoPark Engaged ” will display in the
instrument cluster.
WARNING!
Driver inattention could lead to failure to place the
vehicle in PARK. ALWAYS DO A VISUAL CHECK that
your vehicle is in PARK by verifying that a solid (not
blinking) “P” is indicated in the instrument cluster
display and near the gear selector. If the “P” indicator
is blinking, your vehicle is not in PARK. As an added
precaution, always apply the parking brake when
exiting the vehicle.
AutoPark is a supplemental feature. It is not
designed to replace the need to shift your vehicle
into PARK. It is a back up system and should not be
relied upon as the primary method by which the
driver shifts the vehicle into PARK.
CAUTION!
Engine will remain running.
WARNING!
Never use the PARK position as a substitute for the
parking brake. Always apply the parking brake fully
when exiting the vehicle to guard against vehicle
movement and possible injury or damage.
Your vehicle could move and injure you and others if
it is not in PARK. Check by trying to move the trans -
mission gear selector out of PARK with the brake
pedal released. Make sure the transmission is in
PARK before exiting the vehicle.
The transmission may not engage PARK if the vehicle
is moving. Always bring the vehicle to a complete
stop before shifting to PARK, and verify that the
transmission gear position indicator solidly indicates
PARK (P) without blinking. Ensure that the vehicle is
completely stopped, and the PARK position is prop -
erly indicated, before exiting the vehicle.
23_RUP_OM_EN_USC_t.book Page 112
Page 115 of 328
STARTING AND OPERATING113
(Continued)To Turn On The Engine Using ENGINE START/STOP Button
1. The transmission must be in PARK or NEUTRAL.
2. Press and hold the brake pedal while pushing the
ENGINE START/STOP button once.
To release the parking brake manually, the ignition switch
must be in the ON/RUN position. Press on the brake
pedal, then push the parking brake switch momentarily. If the driver shifts into PARK while moving, the vehicle may
Park.
PARK will engage
ONLY when vehicle speed is 1.2 mph
(1.9 km/h) or less.
The message “ Vehicle Speed Is Too High To Shift To P ” will
display in the instrument cluster display if vehicle speed is
above 1.2 mph (1.9 km/h). The gear position indicator will
blink continuously until the gear selector is returned to the
proper position, or the requested shift can be completed.
COLD WEATHER OPERATION
(B
ELOW –22°F OR −30°C)
To ensure reliable starting at these temperatures, use of
an externally powered electric engine block heater
(available from an authorized dealer) is recommended.
AFTER STARTING — WARMING UP THE
E
NGINE
The idle speed is controlled automatically and it will
decrease as the engine warms up.
It is dangerous to shift out of PARK or NEUTRAL if
the engine speed is higher than idle speed. If your
foot is not firmly pressing the brake pedal, the
vehicle could accelerate quickly forward or in
reverse. You could lose control of the vehicle and hit
someone or something. Only shift into gear when
the engine is idling normally and your foot is firmly
pressing the brake pedal.
Unintended movement of a vehicle could injure
those in or near the vehicle. As with all vehicles, you
should never exit a vehicle while the engine is
running. Before exiting a vehicle, always come to a
complete stop, then apply the parking brake, shift
the transmission into PARK, and turn the ignition
OFF. When the ignition is in the OFF position, the
transmission is locked in PARK, securing the vehicle
against unwanted movement.
When exiting the vehicle, always make sure the igni -
tion is in the OFF position, remove the key fob from
the vehicle, and lock the vehicle.
Never leave children alone in a vehicle, or with
access to an unlocked vehicle. Allowing children to
be in a vehicle unattended is dangerous for a
number of reasons. A child or others could be seri -
ously or fatally injured. Children should be warned
not to touch the parking brake, brake pedal or the
transmission gear selector.
WARNING!
Do not leave the key fob in or near the vehicle (or in
a location accessible to children), and do not leave
the ignition in the ACC or ON/RUN position. A child
could operate power windows, other controls, or
move the vehicle.
CAUTION!
Damage to the transmission may occur if the following
precautions are not observed:
Shift into or out of PARK or REVERSE only after the
vehicle has come to a complete stop.
Do not shift between PARK, REVERSE, NEUTRAL, or
DRIVE when the engine is above idle speed.
Before shifting into any gear, make sure your foot is
firmly pressing the brake pedal.
WARNING!
WARNING!
If vehicle speed is not below 1.2 mph (1.9 km/h) when
the driver shifts into PARK, the transmission will default
to NEUTRAL until the vehicle speed drops below
1.2 mph (1.9 km/h) and the conditions are met,
enabling AutoPark. A vehicle left in the NEUTRAL
position can roll. As an added precaution, always apply
the parking brake when exiting the vehicle.4
23_RUP_OM_EN_USC_t.book Page 113
Page 116 of 328
114STARTING AND OPERATING
IF ENGINE FAILS TO START
T
O TURN OFF THE ENGINE USING THE
ENGINE START/STOP B
UTTON
1. Place the gear selector in PARK, then push and
release the ENGINE START/STOP button.
2. The ignition switch will return to the OFF position.
3. If the gear selector is not in PARK, the ENGINE START/STOP button must be held for two seconds or
three short pushes in a row with the vehicle speed
above 5 mph (8 km/h) before the engine will shut off.
The ignition switch position will remain in the ACC
position until the gear selector is in PARK and the button is pushed twice to the OFF position. If the gear
selector is not in PARK and the ENGINE START/STOP
button is pushed once, the instrument cluster will
display a “Vehicle Not In Park” message and the
engine will remain running. Never leave a vehicle out
of the PARK position, or it could roll.
NOTE:If the ignition switch is left in the ACC or ON/RUN (engine
not running) position and the transmission is in PARK, the
system will automatically time out after 30 minutes of
inactivity and the ignition will switch to the OFF position.
ENGINE BLOCK HEATER — IF EQUIPPED
The engine block heater warms the engine and permits
quicker starts in cold weather.
Connect the cord to a 110-115 Volt AC electrical outlet
with a grounded, three-wire extension cord.
For ambient temperatures below 0°F (-18°C), the engine
block heater is recommended. For ambient temperatures
below -20°F (-29°C), the engine block heater is required.
The engine block heater cord is routed under the hood,
behind to the passenger’s side headlamp. Follow these
steps to properly use the engine block heater:
1. Locate the engine block heater cord (behind the
passenger’s side headlamp).
2. Undo the hook-and-loop strap that secures the heater cord in place.
3. Pull the cord to the front of the vehicle and plug it into a grounded, three-wire extension cord. 4. After the vehicle is running, reattach the cord to the
hook-and-loop strap and properly stow it away behind
the passenger’s side headlamp.
NOTE:
The engine block heater cord is a factory installed
option. If your vehicle is not equipped, heater cords are
available from an authorized dealer.
The engine block heater will require 110 Volt AC and
6.5 Amps to activate the heater element.
The engine block heater must be plugged in at least
one hour to have an adequate warming effect on the
engine.
ENGINE BREAK-IN RECOMMENDATIONS
A long break-in period is not required for the engine and
drivetrain (transmission and axle) in your vehicle.
Drive moderately during the first 300 miles (500 km).
After the initial 60 miles (100 km), speeds up to 50 or
55 mph (80 or 90 km/h) are desirable.
While cruising, brief full-throttle acceleration within the
limits of local traffic laws contributes to a good break-in.
Wide-open throttle acceleration in low gear can be
detrimental and should be avoided.
WARNING!
Never pour fuel or other flammable liquid into the
throttle body air inlet opening in an attempt to start
the vehicle. This could result in flash fire causing
serious personal injury.
Do not attempt to push or tow your vehicle to get it
started. Vehicles equipped with an automatic trans -
mission cannot be started this way. Unburned fuel
could enter the catalytic converter and once the
engine has started, ignite and damage the converter
and vehicle.
If the vehicle has a discharged battery, booster
cables may be used to obtain a start from a booster
battery or the battery in another vehicle. This type of
start can be dangerous if done improperly
Úpage 251.
WARNING!
Remember to disconnect the engine block heater cord
before driving. Damage to the 110-115 Volt electrical
cord could cause electrocution.
23_RUP_OM_EN_USC_t.book Page 114