tow CHRYSLER SEBRING CONVERTIBLE 2010 3.G User Guide
[x] Cancel search | Manufacturer: CHRYSLER, Model Year: 2010, Model line: SEBRING CONVERTIBLE, Model: CHRYSLER SEBRING CONVERTIBLE 2010 3.GPages: 457, PDF Size: 8.76 MB
Page 92 of 457
CAUTION! (Continued)
•Do not allow the top to remain in the suspended
position. After approximately 10 minutes in the
suspended position, the hydraulic pressure will
release, which will allow the top and the trunk lid
to lower. Pressing the power top switch will cancel
this operation.
•Always use a normal ice scraper to remove snow or
ice from the rear window. Use of a sharp object or
other tools could scratch the fabric or panels when
removing snow or ice.
•Always close the top when leaving your vehicle so
as not to leave the interior exposed to potentially
damaging outdoor conditions.(Continued)
CAUTION! (Continued)
•Do not leave the top lowered for several weeks at
a time. Close it occasionally to prevent discolora-
tion in the folds of the fabric and to allow the
creases to smooth out. This is especially important
if the top was stowed when not completely dry.
WARNING!
Failure to follow these warnings can result in injuries
that are serious or fatal to you, your passengers, and
others around you:
•Before operating the power top, make sure that no
moving parts of the convertible top can injure a
person or animal.(Continued)
3
UNDERSTANDING THE FEATURES OF YOUR VEHICLE 91
Page 93 of 457
WARNING! (Continued)
•Never place any extremities (hands, feet, etc.) near
the convertible top components, the upper wind-
shield area, the shelf area behind the rear seats, or
the convertible top stowage area while raising or
lowering the convertible top.
•When using the power top button on RKE trans-
mitter, if potential danger exists while lowering
the top, release the button immediately to inter-
rupt the operation.
•When using the power top switch on the instru-
ment panel, if potential danger exists while low-
ering the top, release the switch immediately to
interrupt the operation.(Continued)
WARNING! (Continued)
•When using the power top switch on the instru-
ment panel, if potential danger exists while raising
the top, release the switch immediately to inter-
rupt the operation.
•Only drive the vehicle with the convertible top
completely closed and latched or fully lowered
into its stowage compartment.
•Do not operate the power top when the vehicle is
in motion.
Cargo Shield
The cargo shield is located in the trunk. Before lowering
the convertible top, you must unfold the cargo shield and
seat the tabs at each end of the cargo shield in the V slots
in the trunk liner. Doing so closes a switch that allows top
operation. If the switch is not closed, a warning message
displays in the instrument cluster to notify the driver.
92 UNDERSTANDING THE FEATURES OF YOUR VEHICLE
Page 94 of 457
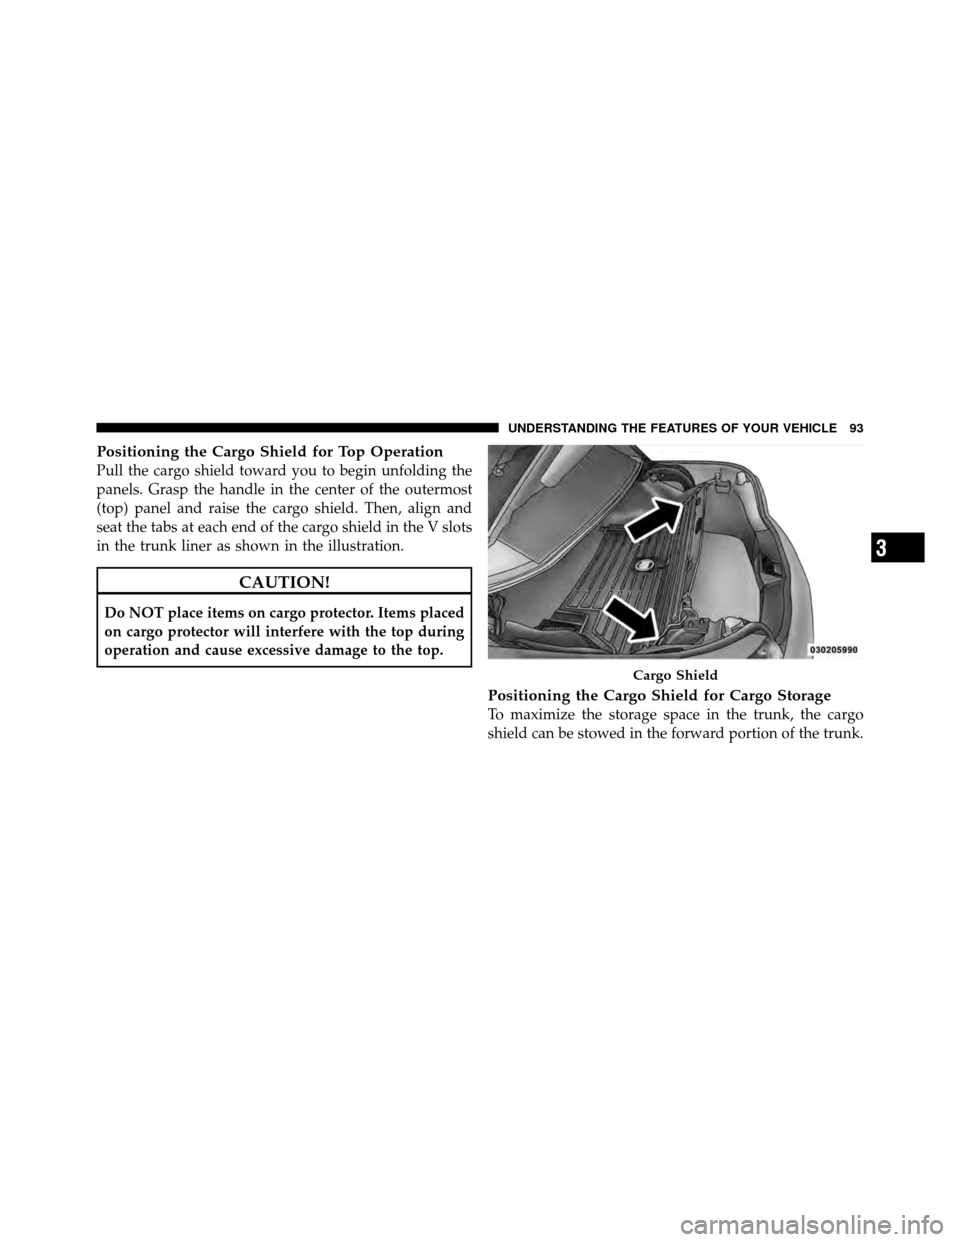
Positioning the Cargo Shield for Top Operation
Pull the cargo shield toward you to begin unfolding the
panels. Grasp the handle in the center of the outermost
(top) panel and raise the cargo shield. Then, align and
seat the tabs at each end of the cargo shield in the V slots
in the trunk liner as shown in the illustration.
CAUTION!
Do NOT place items on cargo protector. Items placed
on cargo protector will interfere with the top during
operation and cause excessive damage to the top.
Positioning the Cargo Shield for Cargo Storage
To maximize the storage space in the trunk, the cargo
shield can be stowed in the forward portion of the trunk.
Cargo Shield
3
UNDERSTANDING THE FEATURES OF YOUR VEHICLE 93
Page 95 of 457
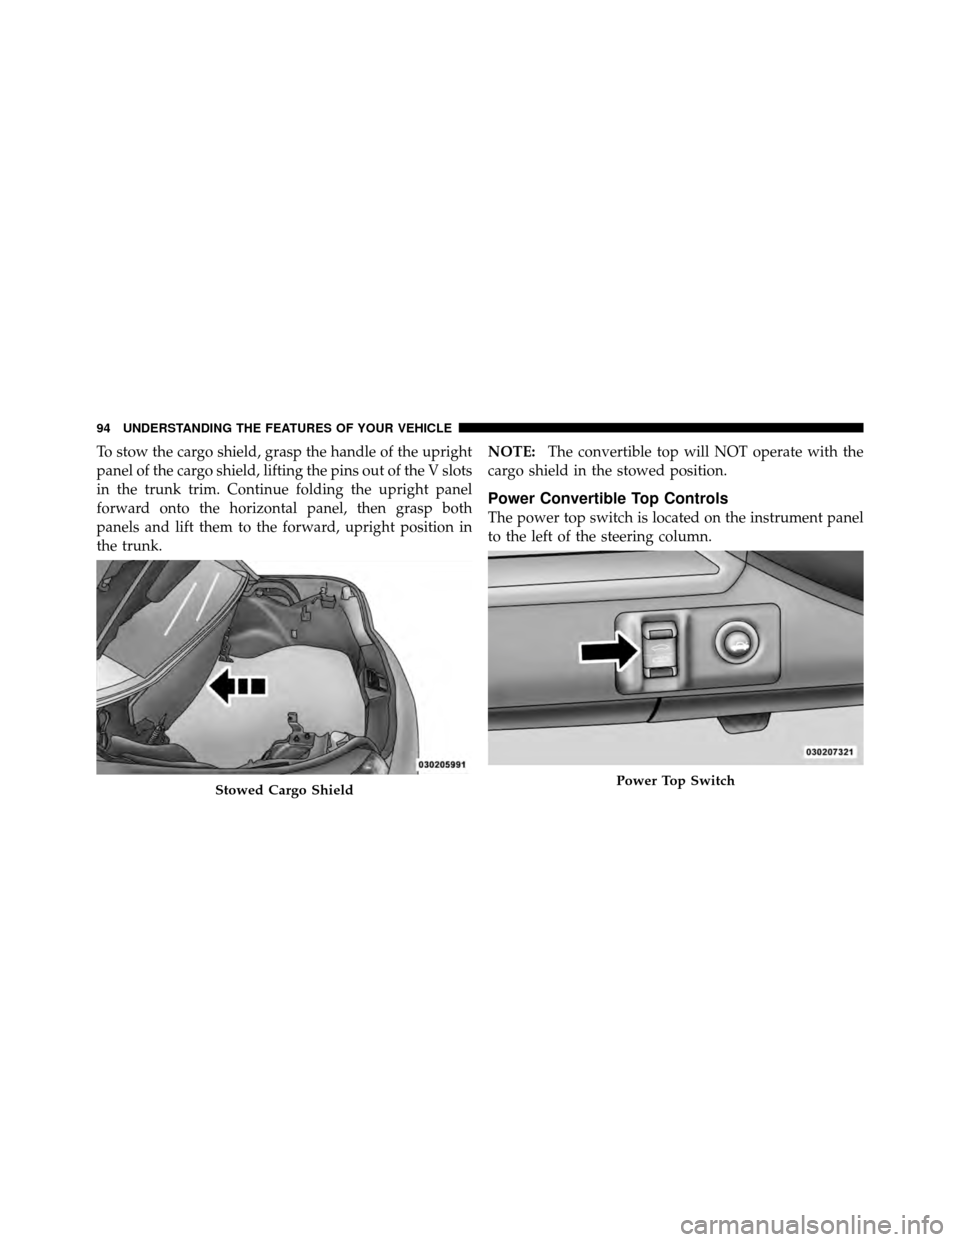
To stow the cargo shield, grasp the handle of the upright
panel of the cargo shield, lifting the pins out of the V slots
in the trunk trim. Continue folding the upright panel
forward onto the horizontal panel, then grasp both
panels and lift them to the forward, upright position in
the trunk.NOTE:
The convertible top will NOT operate with the
cargo shield in the stowed position.
Power Convertible Top Controls
The power top switch is located on the instrument panel
to the left of the steering column.
Stowed Cargo ShieldPower Top Switch
94 UNDERSTANDING THE FEATURES OF YOUR VEHICLE
Page 123 of 457
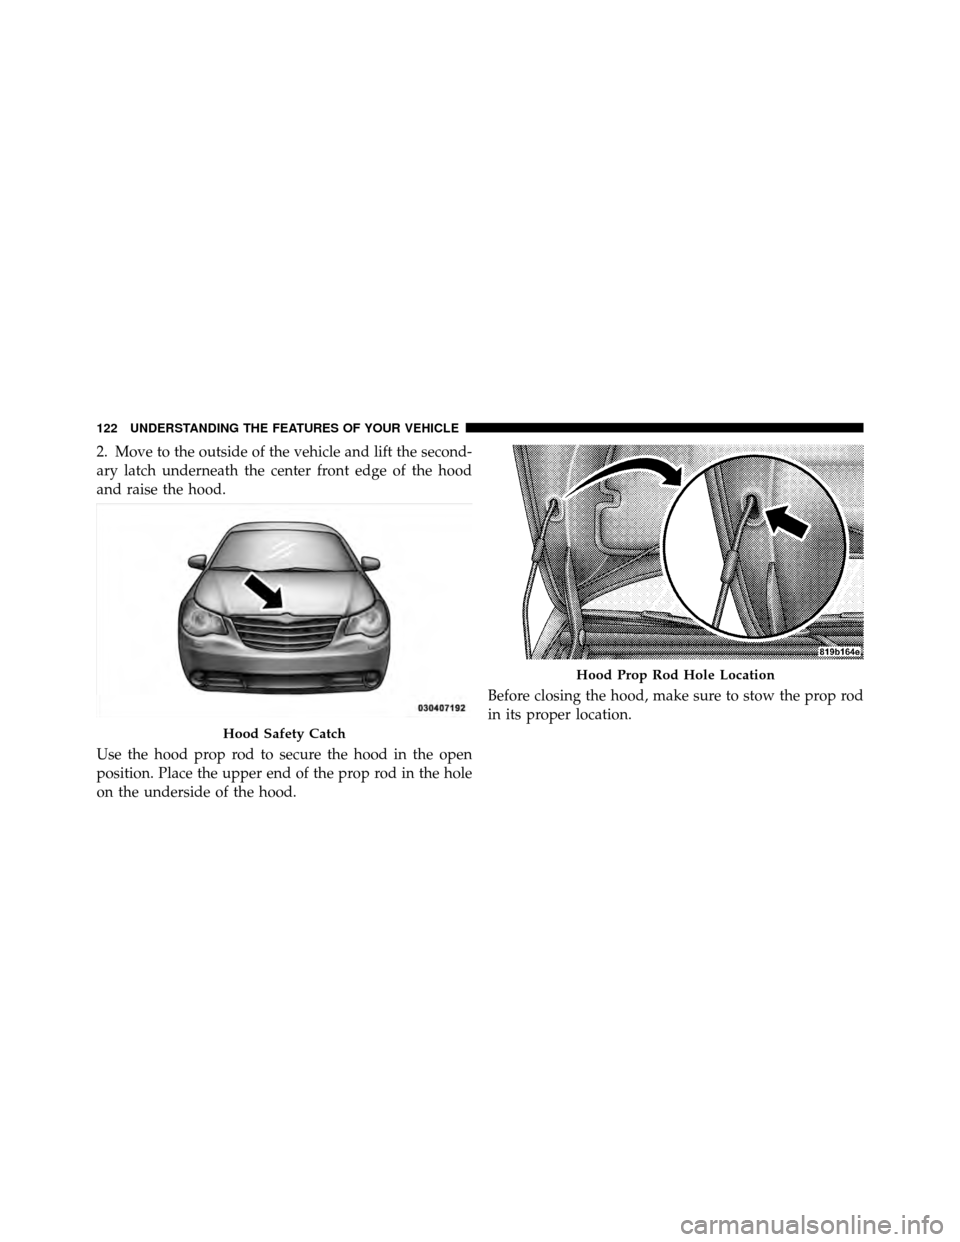
2. Move to the outside of the vehicle and lift the second-
ary latch underneath the center front edge of the hood
and raise the hood.
Use the hood prop rod to secure the hood in the open
position. Place the upper end of the prop rod in the hole
on the underside of the hood.Before closing the hood, make sure to stow the prop rod
in its proper location.
Hood Safety Catch
Hood Prop Rod Hole Location
122 UNDERSTANDING THE FEATURES OF YOUR VEHICLE
Page 129 of 457
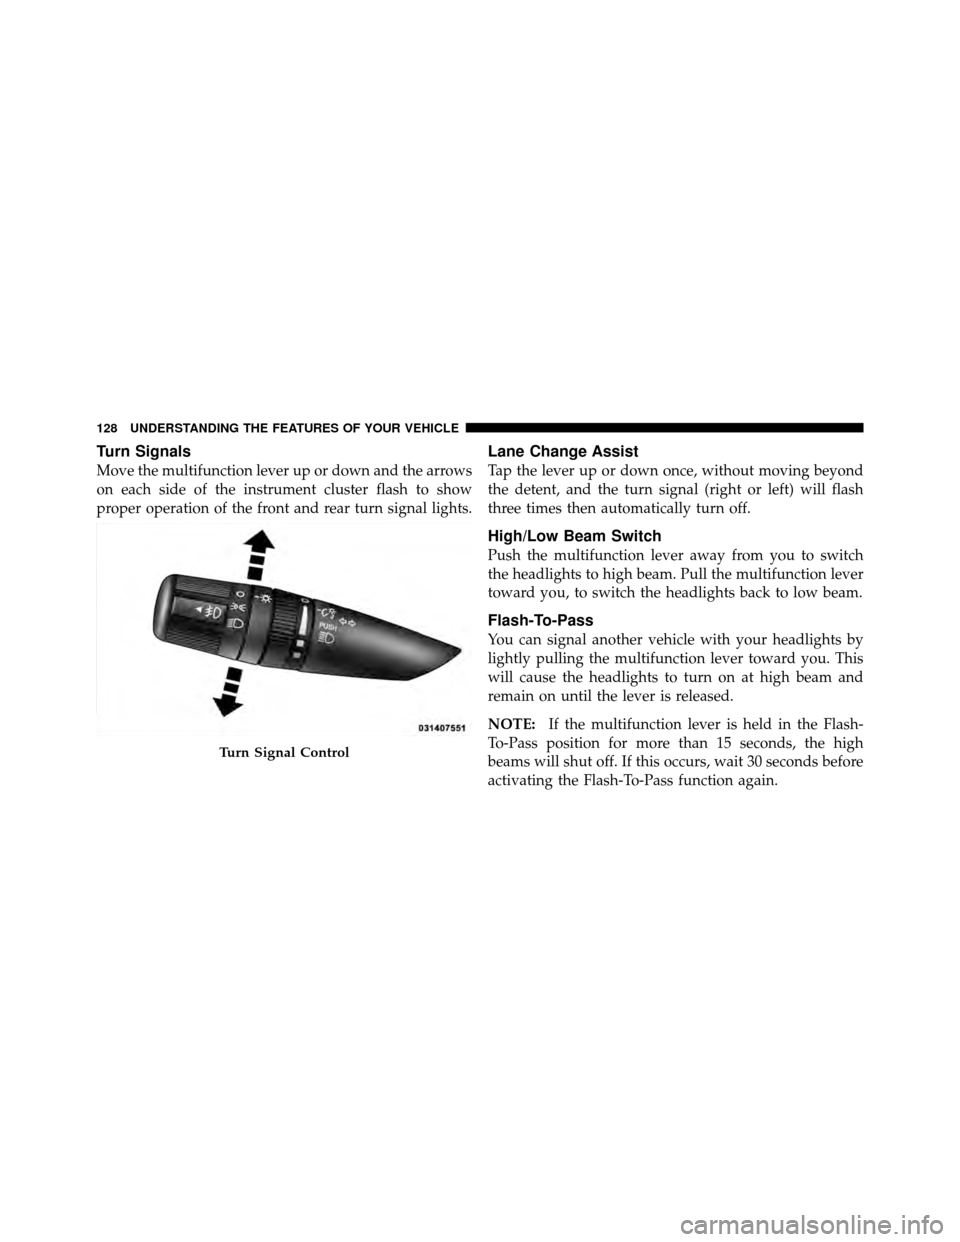
Turn Signals
Move the multifunction lever up or down and the arrows
on each side of the instrument cluster flash to show
proper operation of the front and rear turn signal lights.
Lane Change Assist
Tap the lever up or down once, without moving beyond
the detent, and the turn signal (right or left) will flash
three times then automatically turn off.
High/Low Beam Switch
Push the multifunction lever away from you to switch
the headlights to high beam. Pull the multifunction lever
toward you, to switch the headlights back to low beam.
Flash-To-Pass
You can signal another vehicle with your headlights by
lightly pulling the multifunction lever toward you. This
will cause the headlights to turn on at high beam and
remain on until the lever is released.
NOTE:If the multifunction lever is held in the Flash-
To-Pass position for more than 15 seconds, the high
beams will shut off. If this occurs, wait 30 seconds before
activating the Flash-To-Pass function again.
Turn Signal Control
128 UNDERSTANDING THE FEATURES OF YOUR VEHICLE
Page 134 of 457
Headlights with Wipers (Available with Auto
Headlights Only)
When this feature is active, the headlights will turn on
approximately 10 seconds after the wipers are turned on
if the multifunction lever (on the left side of the steering
column) is placed in the AUTO position. In addition, the
headlights will turn off when the wipers are turned off if
they were turned on by this feature.
The Headlights with Wipers feature can be turned on or
off through the Electronic Vehicle Information Center
(EVIC) — if equipped. Refer to “Electronic Vehicle Infor-
mation Center (EVIC)/Personal Settings (Customer-
Programmable Features)” in “Understanding Your In-
strument Panel” for further information.
Windshield Washers
To use the washer, pull the windshield wiper/washer
control lever toward you and hold it for as long as
washer spray is desired.
If you activate the washer while the wiper control is in
the delay range, the wipers will operate in low-speed for
two wipe cycles after releasing the lever and then resume
the intermittent interval previously selected.
If you activate the washer while the wiper control is in
the off position, the wipers will operate for two wipe
cycles and then turn off.
3
UNDERSTANDING THE FEATURES OF YOUR VEHICLE 133
Page 137 of 457
WARNING!
Leaving the Electronic Speed Control on when not in
use is dangerous. You could accidentally set the
system or cause it to go faster than you want. You
could lose control and have an accident. Always
leave the system off when you are not using it.
To Set a Desired Speed
Turn the Electronic Speed Control ON. When the vehicle
reaches the speed desired, press down on the lever and
release SET DECEL. Release the accelerator and the
vehicle will operate at the selected speed.
NOTE:
•The vehicle must be traveling at least 25 mph
(40 km/h) for the Electronic Speed Control to set.
•The vehicle should be traveling at a steady speed and
on level ground before pressing the lever SET DECEL.
To Deactivate
A soft tap on the brake pedal, or pulling the Electronic
Speed Control lever toward you (CANCEL), or normal
brake pressure while slowing the vehicle will deactivate
the Electronic Speed Control without erasing the set
speed from memory. Pressing the ON/OFF button or
turning off the ignition erases the set speed from
memory.
To Resume Speed
If you deactivated the Electronic Speed Control without
erasing the set speed from memory and your vehicle
speed is above 20 mph (32 km/h) you can resume the
previous set speed. To do so, push the lever up and
release RESUME ACCEL, and then remove your foot
from the accelerator pedal.
To Vary the Speed Setting
When the Electronic Speed Control is set, you can in-
crease speed by pushing up and holding the RESUME
136 UNDERSTANDING THE FEATURES OF YOUR VEHICLE
Page 159 of 457
INSTRUMENT CLUSTER DESCRIPTIONS
1. Temperature Gauge
The temperature gauge shows engine coolant tempera-
ture. Any reading below the red area of the gauge shows
that the engine cooling system is operating properly. The
gauge pointer may show a higher than normal tempera-
ture when driving in hot weather, up mountain grades, in
heavy stop and go traffic, or when towing a trailer.
If the pointer rises to theH(red) mark, the instrument
cluster will sound a chime. Pull over and stop the vehicle.
Idle the vehicle with the air conditioner turned off until
the pointer drops back into the normal range. If the
pointer remains on the H(red) mark, turn the engine off
immediately and call for service.
There are steps that you can take to slow down an
impending overheat condition. If your air conditioning is
on, turn it off. The air conditioning system adds heat to
the engine cooling system and turning off the A/C removes this heat. You can also turn the Temperature
control to maximum heat, the Mode control to Floor and
the Fan control to High. This allows the heater core to act
as a supplement to the radiator and aids in removing heat
from the engine cooling system.
2. Fuel Door Reminder
This is a reminder that the Fuel Filler Door is
located on the left side of the vehicle.
3. Fuel Gauge
When the ignition switch is in the ON position, the
pointer will show the level of fuel remaining in the fuel
tank.
4. Speedometer
Indicates the vehicle speed in miles per hour (MPH) and
kilometers per hour (km/h).
158 UNDERSTANDING YOUR INSTRUMENT PANEL
Page 166 of 457
15. Cruise Indicator — If EquippedThis indicator shows that the Electronic Speed
Control System is ON.
16. Odometer/Trip Odometer Reset Button
Single Trip Odometer
Press and release this button to change the display from
odometer to trip odometer. The word “Trip” displays to
show that the odometer is in Trip Mode. Press and release
the button again to change the display back to the
odometer.
To reset the trip odometer, first set the display to Trip
Mode. Then push and hold the button (approximately
2 seconds) until the display resets to 0 miles (kilometers).
The odometer must be in Trip Mode to reset the trip
odometer. Dual Trip Odometer — If Equipped
Press and release this button to change the display from
odometer to “Trip A.” Press and release it a second time
to change the display to “Trip B.” Press and release it a
third time to change the display back to the odometer.
To reset the trip odometer, first display the trip mileage
that you want to reset, “Trip A” or “Trip B.” Then push
and hold the button (approximately 2 seconds) until the
display resets to 0 miles (kilometers). The odometer must
be in Trip Mode to reset the trip odometer.
17. Electronic Throttle Control (ETC) Indicator Light
This light informs you of a problem with the
Electronic Throttle Control (ETC) system. If a
problem is detected, the light will come on
while the engine is running. If the light remains
lit with the engine running, your vehicle will usually be
drivable and not need towing, however see your autho-
rized dealer for service as soon as possible.
4
UNDERSTANDING YOUR INSTRUMENT PANEL 165