lights CHRYSLER SEBRING CONVERTIBLE 2010 3.G Owners Manual
[x] Cancel search | Manufacturer: CHRYSLER, Model Year: 2010, Model line: SEBRING CONVERTIBLE, Model: CHRYSLER SEBRING CONVERTIBLE 2010 3.GPages: 457, PDF Size: 8.76 MB
Page 19 of 457

VEHICLE SECURITY ALARM — IF EQUIPPED
The Vehicle Security Alarm monitors the doors and trunk
for unauthorized entry and ignition switch for unautho-
rized operation.
If something triggers the alarm, the Vehicle Security
Alarm will signal for about 18 minutes. For the first three
minutes, the horn will sound intermittently and the
headlights, park lamps and/or turn signals will flash and
the Vehicle Security Light in the cluster will flash. Then
the exterior lights will flash for another 15 minutes.
Rearming The System
If something triggers the alarm, and no action is taken to
disarm it, the Vehicle Security Alarm will turn off the
horn after three minutes, turn off all of the visual signals
after 15 minutes, and then the Vehicle Security Alarm will
rearm itself.
To Arm The System
1. Remove the keys from the ignition switch and get out
of the vehicle.
2. Lock the door using either the power door lock switch
(one door must be open) or the LOCK button on the
Remote Keyless Entry (RKE) transmitter (doors can be
open or closed), and close all doors.
NOTE:The Vehicle Security Alarm will not arm if you
lock the doors with the manual door lock plungers.
3. The Vehicle Security Light in the instrument cluster
will flash for 16 seconds. This shows that the Vehicle
Security Alarm is arming. During this period, if a door is
opened, the ignition switch is turned ON, or the power
door locks are unlocked in any manner, the Vehicle
Security Alarm will automatically disarm.
18 THINGS TO KNOW BEFORE STARTING YOUR VEHICLE
Page 21 of 457
If the Vehicle Security Alarm is armed and the battery
becomes disconnected the Vehicle Security Alarm will
remain armed when the battery is reconnected. The
exterior lights will flash, and the horn will sound. If this
occurs, disarm the Vehicle Security Alarm.
Tamper Alert
If the alarm was triggered, but the warning signals have
timed out, the park and taillights flash three times
(instead of the normal twice), and the horn will chirp
three times, when unlocking the vehicle with a valid RKE
transmitter to alert the driver.
ILLUMINATED ENTRY — IF EQUIPPED
The courtesy/reading lights will turn on when you use
the Remote Keyless Entry (RKE) transmitter or open
either door.This feature also turns on the approach lighting (if
equipped). Refer to “Electronic Vehicle Information Cen-
ter (EVIC)/Personal Settings (Customer-Programmable
Features)” in “Understanding Your Instrument Panel” for
further information.
The interior lights will fade to off after approximately
30 seconds or they will immediately fade to off once the
ignition switch is turned ON.
NOTE:
The illuminated entry system will not operate
the interior lights if the dimmer control is in the “defeat”
position (extreme downward position).
20 THINGS TO KNOW BEFORE STARTING YOUR VEHICLE
Page 22 of 457
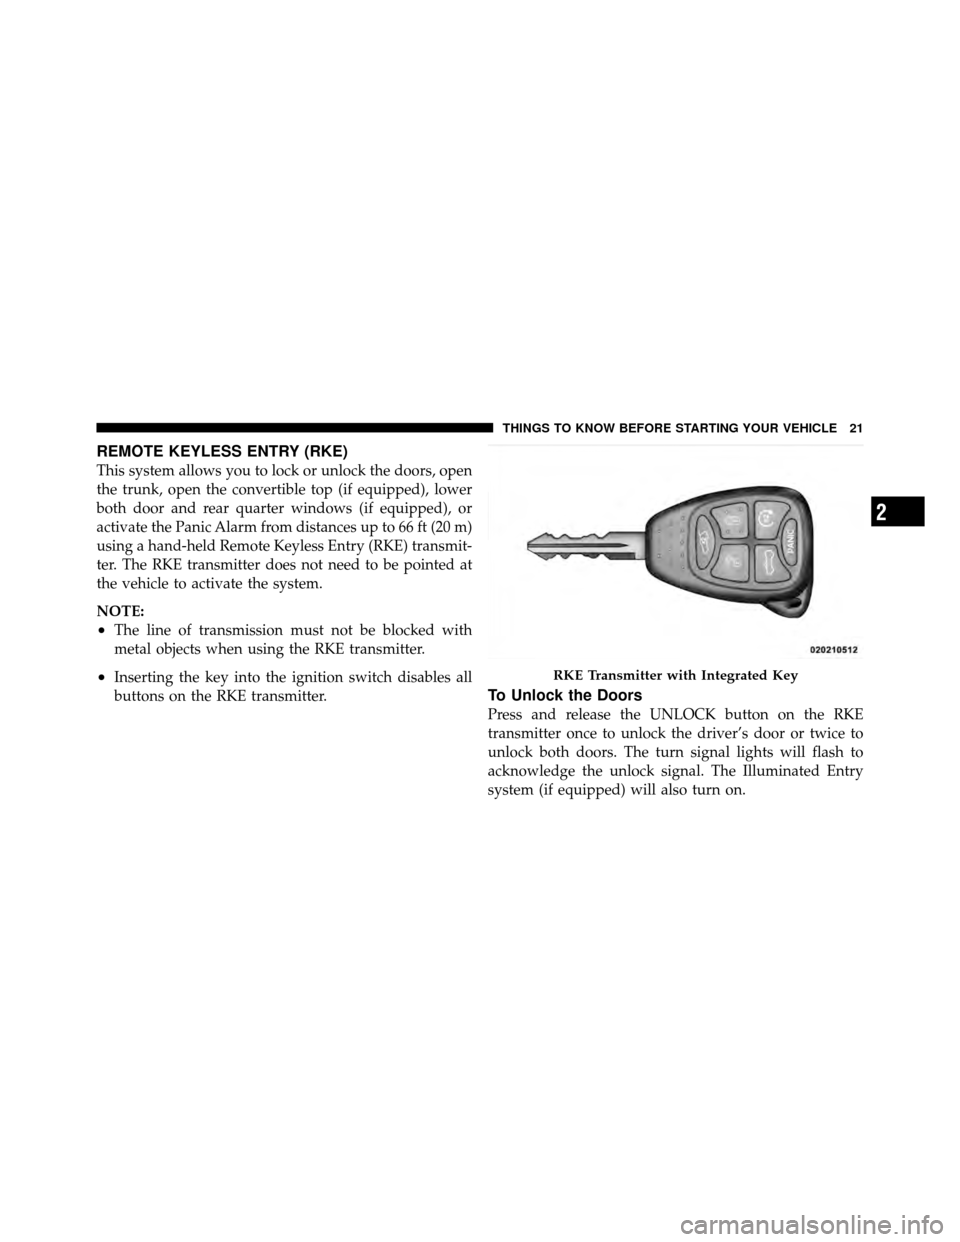
REMOTE KEYLESS ENTRY (RKE)
This system allows you to lock or unlock the doors, open
the trunk, open the convertible top (if equipped), lower
both door and rear quarter windows (if equipped), or
activate the Panic Alarm from distances up to 66 ft (20 m)
using a hand-held Remote Keyless Entry (RKE) transmit-
ter. The RKE transmitter does not need to be pointed at
the vehicle to activate the system.
NOTE:
•The line of transmission must not be blocked with
metal objects when using the RKE transmitter.
•Inserting the key into the ignition switch disables all
buttons on the RKE transmitter.
To Unlock the Doors
Press and release the UNLOCK button on the RKE
transmitter once to unlock the driver’s door or twice to
unlock both doors. The turn signal lights will flash to
acknowledge the unlock signal. The Illuminated Entry
system (if equipped) will also turn on.
RKE Transmitter with Integrated Key
2
THINGS TO KNOW BEFORE STARTING YOUR VEHICLE 21
Page 24 of 457
Flash Lights with Lock
The feature will cause the turn signal lights to flash when
the doors are locked or unlocked with the RKE transmit-
ter. This feature can be turned on or turned off. To change
the current setting, proceed as follows:
•For vehicles equipped with the Electronic Vehicle
Information Center (EVIC), refer to “Electronic Vehicle
Information Center (EVIC)/Personal Settings
(Customer-Programmable Features)” in “Understand-
ing Your Instrument Panel” for further information.
•For vehicles not equipped with the EVIC, perform the
following procedure:
1. Press and hold the UNLOCK button on a programmed
RKE transmitter for at least four seconds, but not longer
than 10 seconds. Then, press and hold the LOCK button
while still holding the UNLOCK button.
2. Release both buttons at the same time. 3. Test the feature while outside of the vehicle, by
pressing the LOCK/UNLOCK buttons on the RKE trans-
mitter with the ignition in the LOCK position, and the
key removed.
4. Repeat these steps if you want to return this feature to
its previous setting.
NOTE:
Pressing the LOCK button on the RKE transmit-
ter while you are in the vehicle will activate the Vehicle
Security Alarm. Opening a door with the Vehicle Security
Alarm activated will cause the alarm to sound. Press the
UNLOCK button to deactivate the Vehicle Security
Alarm System.
Illuminated Approach — If Equipped
This feature activates the headlights for up to 90 seconds
when the doors are unlocked with the RKE transmitter.
The time for this feature is programmable on vehicles
equipped with the Electronic Vehicle Information Center
(EVIC). Refer to “Electronic Vehicle Information Center
2
THINGS TO KNOW BEFORE STARTING YOUR VEHICLE 23
Page 25 of 457
(EVIC)/Personal Settings (Customer-Programmable Fea-
tures)” in “Understanding Your Instrument Panel” for
further information.
To Lock the Doors
Press and release the LOCK button on the RKE transmit-
ter to lock both doors. The turn signal lights will flash
and the horn will chirp once to acknowledge the lock
signal.
Sound Horn with Lock
This feature will cause the horn to chirp when the doors
are locked with the RKE transmitter. This feature can be
turned on or off. To change the current setting, proceed as
follows:
•For vehicles equipped with the Electronic Vehicle
Information Center (EVIC), refer to “Electronic Vehicle
Information Center (EVIC)/Personal Settings
(Customer-Programmable Features)” in “Understand-
ing Your Instrument Panel” for further information.
•For vehicles not equipped with the EVIC, perform the
following steps:
1. Press the LOCK button on a programmed RKE trans-
mitter for at least four seconds, but not longer than
10 seconds. Then, press the PANIC button while still
holding the LOCK button.
2. Release both buttons at the same time.
3. Test the feature while outside of the vehicle, by
pressing the LOCK button on the RKE transmitter with
the ignition in the LOCK position, and the key removed.
4. Repeat these steps if you want to return this feature to
its previous setting.
NOTE: Pressing the LOCK button on the RKE transmit-
ter while you are in the vehicle will activate the Vehicle
Security Alarm. Opening a door with the Vehicle Security
Alarm activated will cause the alarm to sound. Press the
UNLOCK button to deactivate the Vehicle Security
Alarm System.
24 THINGS TO KNOW BEFORE STARTING YOUR VEHICLE
Page 26 of 457
Convertible Top Operation Button — If Equipped
Refer to “Convertible Top Operation” under “Under-
standing The Features Of Your Vehicle” for further
information.
To Unlatch the Trunk
Press the TRUNK button on the RKE transmitter two
times to unlatch the trunk.
Remote Open Window Feature — If Equipped
This feature allows you to remotely lower both door and
rear quarter windows at the same time. Lowering the
windows using the RKE is a two step operation:
1. Press the RKE transmitter UNLOCK button once.
2. Press the UNLOCK button a second time and hold the
button until the windows lower completely or the win-
dows drop to the desired level, then release the button.
Using the Panic Alarm
To turn the Panic Alarm feature on or off, press and hold
the PANIC button on the RKE transmitter for at least one
second and release. When the Panic Alarm is on, the
headlights and park lights will flash, the horn will pulse
on and off, and the Illuminated Entry system (if
equipped) will turn on.
The Panic Alarm will stay on for three minutes unless
you turn it off by pressing the PANIC button a second
time or if the vehicle speed is 5 mph (8 km/h) or greater.
NOTE:You may need to be close to the vehicle when
using the RKE transmitter to turn off the Panic Alarm due
to the Radio Frequency (RF) noises emitted by the
system.
2
THINGS TO KNOW BEFORE STARTING YOUR VEHICLE 25
Page 29 of 457
•Hood closed
•Trunk closed
•Hazard switch off
•Brake switch inactive (brake pedal not pressed)
•Ignition key removed from ignition switch
•Battery at an acceptable charge level, and
•RKE PANIC button not pressed
WARNING!
•Do not start or run an engine in a closed garage or
confined area. Exhaust gas contains Carbon Mon-
oxide (CO) which is odorless and colorless. Car-
bon Monoxide is poisonous and can cause serious
injury or death when inhaled.(Continued)
WARNING! (Continued)
•Keep Remote Keyless Entry (RKE) transmitters
away from children. Operation of the Remote Start
System, windows, door locks or other controls
could cause serious injury or death.
To Enter Remote Start Mode
Press and release the REMOTE START button
on the RKE transmitter twice, within five sec-
onds. The parking lights will flash and the horn
will chirp twice (if programmed). Then, the
engine will start and the vehicle will remain in the
Remote Start mode for a 15-minute cycle.
NOTE:
•For security, power window operation is disabled
when the vehicle is in the Remote Start mode.
•The engine can be started two consecutive times (two
15 minute cycles) with the RKE transmitter. However,
28 THINGS TO KNOW BEFORE STARTING YOUR VEHICLE
Page 56 of 457
WARNING! (Continued)
•Do not mount any accessories to the knee bolster
such as alarm lights, stereos, citizen band radios,
etc.
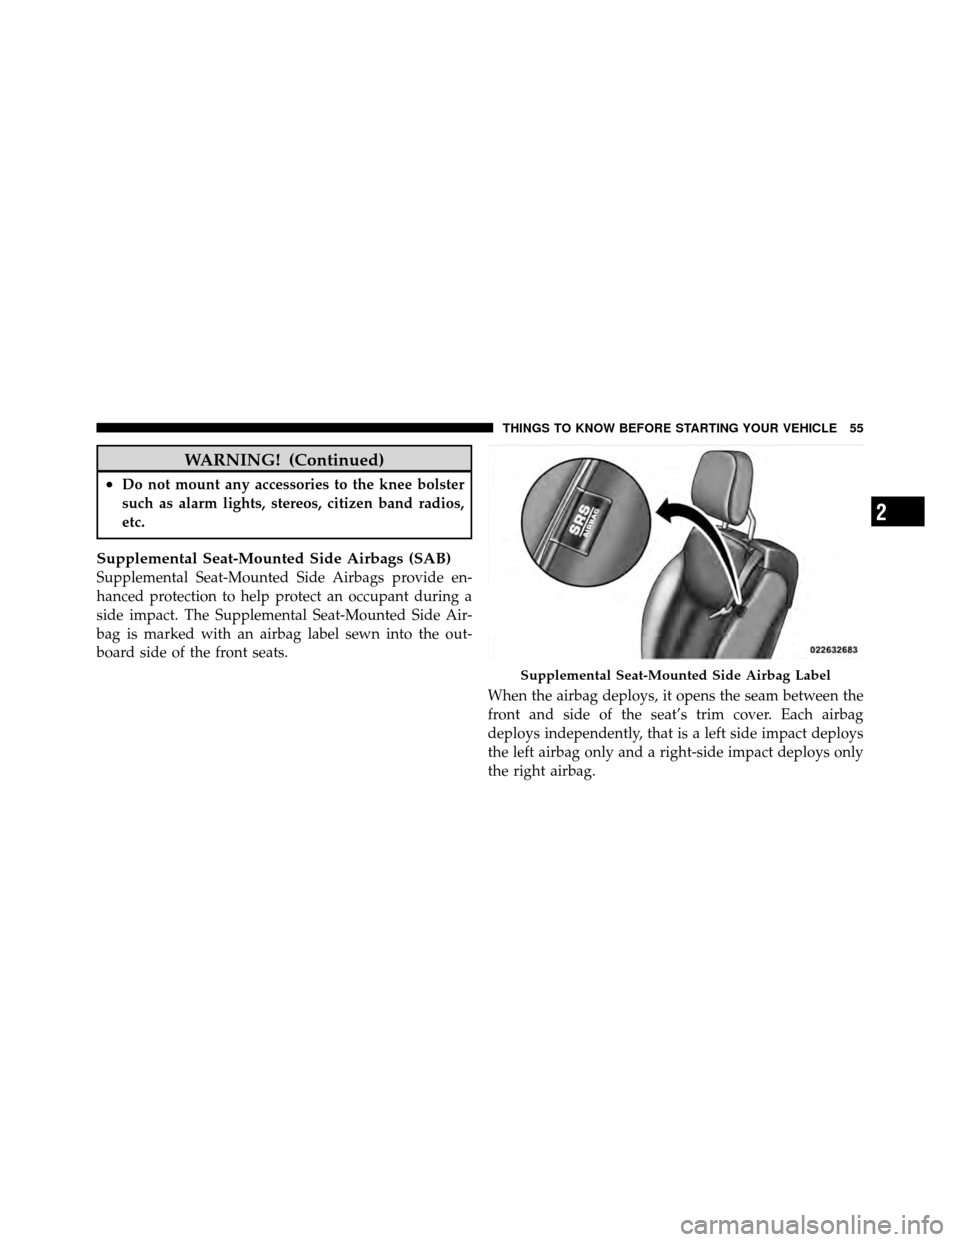
Supplemental Seat-Mounted Side Airbags (SAB)
Supplemental Seat-Mounted Side Airbags provide en-
hanced protection to help protect an occupant during a
side impact. The Supplemental Seat-Mounted Side Air-
bag is marked with an airbag label sewn into the out-
board side of the front seats.When the airbag deploys, it opens the seam between the
front and side of the seat’s trim cover. Each airbag
deploys independently, that is a left side impact deploys
the left airbag only and a right-side impact deploys only
the right airbag.
Supplemental Seat-Mounted Side Airbag Label
2
THINGS TO KNOW BEFORE STARTING YOUR VEHICLE 55
Page 62 of 457
Based on the severity and type of collision, the side
airbag inflator on the crash side of the vehicle may be
triggered, releasing a quantity of non-toxic gas. The
inflating side airbag exits through the seat seam into the
space between the occupant and the door. The side
airbags fully inflate in about 10 milliseconds. The side
airbag moves at a very high speed and with such a high
force, that it could injure you if you are not seated
properly, or if items are positioned in the area where the
side airbag inflates. This especially applies to children.
Front and Side Impact Sensors
In front and side impacts, impact sensors can aid the
ORC in determining appropriate response to impact
events. Additional sensors in the ORC determine the
level of airbag deployment and provide verification.
Enhanced Accident Response System
In the event of an impact causing airbag deployment, if
the communication network remains intact, and thepower remains intact, depending on the nature of the
event the ORC will determine whether to have the
Enhanced Accident Response System perform the follow-
ing functions:
•Cut off fuel to the engine.
•Flash hazard lights as long as the battery has power or
until the ignition key is turned off.
•Turn on the interior lights, which remain on as long as
the battery has power or until the ignition key is
removed.
•Unlock the doors automatically.
If a Deployment Occurs
The front airbags are designed to deflate immediately
after deployment.
2
THINGS TO KNOW BEFORE STARTING YOUR VEHICLE 61
Page 82 of 457
WARNING! (Continued)
•Check mounting of mats on a regular basis. Al-
ways properly reinstall and secure floor mats that
have been removed for cleaning.
•Always make sure that objects cannot fall into the
driver foot well while the vehicle is moving.
Objects can become trapped under the brake pedal
and accelerator pedal causing a loss of vehicle
control.
•If required, mounting posts must be properly
installed, if not equipped from the factory.
Failure to properly follow floor mat installation or
mounting can cause interference with the brake
pedal and accelerator pedal operation causing loss
of control of the vehicle.
Periodic Safety Checks You Should Make Outside
the Vehicle
Tires
Examine tires for excessive tread wear and uneven wear
patterns. Check for stones, nails, glass, or other objects
lodged in the tread. Inspect the tread and sidewall for
cuts and cracks. Check the wheel nuts for tightness.
Check the tires (including spare) for proper pressure.
Lights
Have someone observe the operation of exterior lights
while you work the controls. Check turn signal and high
beam indicator lights on the instrument panel.
2
THINGS TO KNOW BEFORE STARTING YOUR VEHICLE 81