lock CHRYSLER SEBRING CONVERTIBLE 2010 3.G User Guide
[x] Cancel search | Manufacturer: CHRYSLER, Model Year: 2010, Model line: SEBRING CONVERTIBLE, Model: CHRYSLER SEBRING CONVERTIBLE 2010 3.GPages: 76, PDF Size: 9.67 MB
Page 3 of 76
INTRODUCTION/WELCOME
WELCOME FROM CHRYSLER GROUP
LLC..................... 2
CONTROLS AT A GLANCE
DRIVER COCKPIT.............4
INSTRUMENT CLUSTER .........6
GETTING STARTED
KEYFOB ..................8
THEFT ALARM..............9
SEATBELT ................9
CHILD RESTRAINTS ...........9
FRONTSEATS...............12
HEATEDSEATS..............14
TILT / TELESCOPING STEERING
COLUMN ..................15
PROGRAMMABLE FEATURES ......15
OPERATING YOUR VEHICLE
TURN SIGNAL/LIGHTS LEVER .....17
WIPER/WASHER LEVER .........18
SPEED CONTROL LEVER ........19
MANUAL CLIMATE CONTROLS .... 20
AUTOMATIC TEMPERATURE
CONTROLS(ATC)............ 20
POWER CONVERTIBLE TOP
OPERATION ................21
WIND BUFFETING .............23
ELECTRONICS
NON-TOUCH-SCREEN RADIOS .....24
TOUCH-SCREEN RADIOS .........27
REMOTE AUDIO CONTROLS .......32
ELECTRONIC VEHICLE INFORMATION
CENTER (EVIC) ..............32
UNIVERSAL GARAGE DOOR OPENER
(HOMELINK
®)...............33
POWER OUTLET ............ 34
Uconnect™ Phone ........... 34
VOICE COMMAND ............ 36
UTILITY
TRAILER TOWING WEIGHTS (MAXIMUM
TRAILER WEIGHT RATINGS) ...... 38RECREATIONAL TOWING (BEHIND
MOTORHOME, ETC.)
.......... 39
BRAKE/TRANSAXLE INTERLOCK
MANUAL OVERRIDE .......... 39
WHAT TO DO IN EMERGENCIES
24-HOUR TOWING ASSISTANCE
- U.S. ONLY............... 40
INSTRUMENT CLUSTER WARNING
LIGHTS .................. 40
IF YOUR ENGINE OVERHEATS .... 44
JACKING AND TIRE CHANGING .... 45
JUMP-STARTING ............ 50
TOWING A DISABLED VEHICLE .... 53
FREEING A STUCK VEHICLE ...... 54
EVENT DATA RECORDER (EDR) . . . 55
MAINTAINING YOUR VEHICLE
OPENING THE HOOD .......... 56
ENGINE COMPARTMENT ....... 57
FLUIDS AND CAPACITIES ....... 60
MAINTENANCE CHART ........ 62
FUSES .................. 64
TIREPRESSURES............ 66
WHEEL AND WHEEL TRIM CARE . . . 66
EXTERIOR BULBS .............67
CONSUMER ASSISTANCE
CHRYSLER GROUP LLC CUSTOMER
CENTER ................. 68
CHRYSLER CANADA INC. CUSTOMER
CENTER ................. 68
ASSISTANCE FOR THE HEARING
IMPAIRED ................ 68
PUBLICATIONS ORDERING ...... 68
REPORTING SAFETY DEFECTS IN
THE 50 UNITED STATES AND
WASHINGTON, D.C. ........... 69
TIREWARRANTY ............ 69
MOPAR ACCESSORIES
MOPAR®ACCESSORIES .........72
TABLE OF CONTENTS
Page 8 of 76
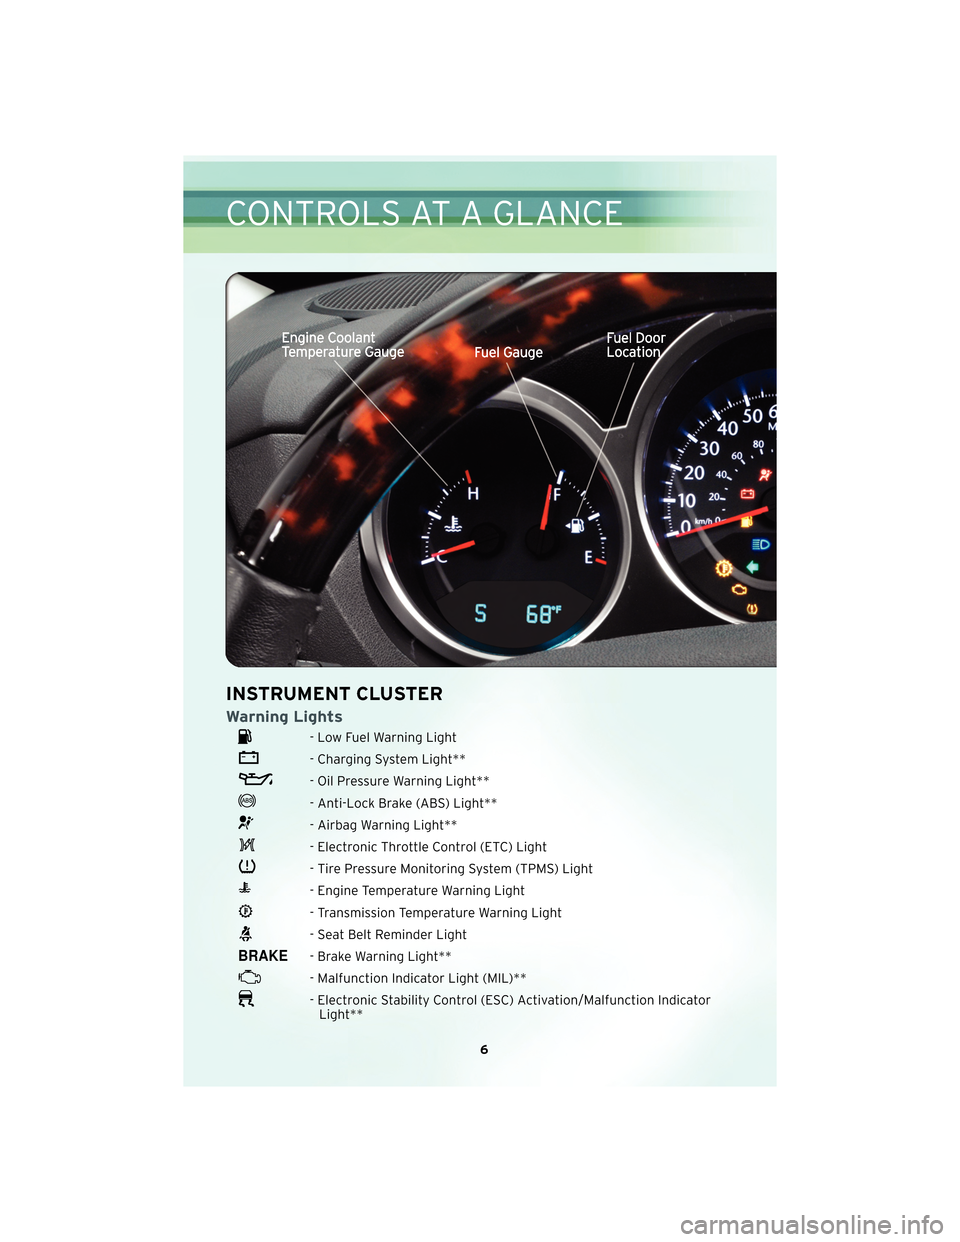
INSTRUMENT CLUSTER
Warning Lights
- Low Fuel Warning Light
- Charging System Light**
- Oil Pressure Warning Light**
- Anti-Lock Brake (ABS) Light**
- Airbag Warning Light**
- Electronic Throttle Control (ETC) Light
- Tire Pressure Monitoring System (TPMS) Light
- Engine Temperature Warning Light
- Transmission Temperature Warning Light
- Seat Belt Reminder Light
- Brake Warning Light**
- Malfunction Indicator Light (MIL)**
- Electronic Stability Control (ESC) Activation/Malfunction IndicatorLight**
6
CONTROLS AT A GLANCE
Page 10 of 76
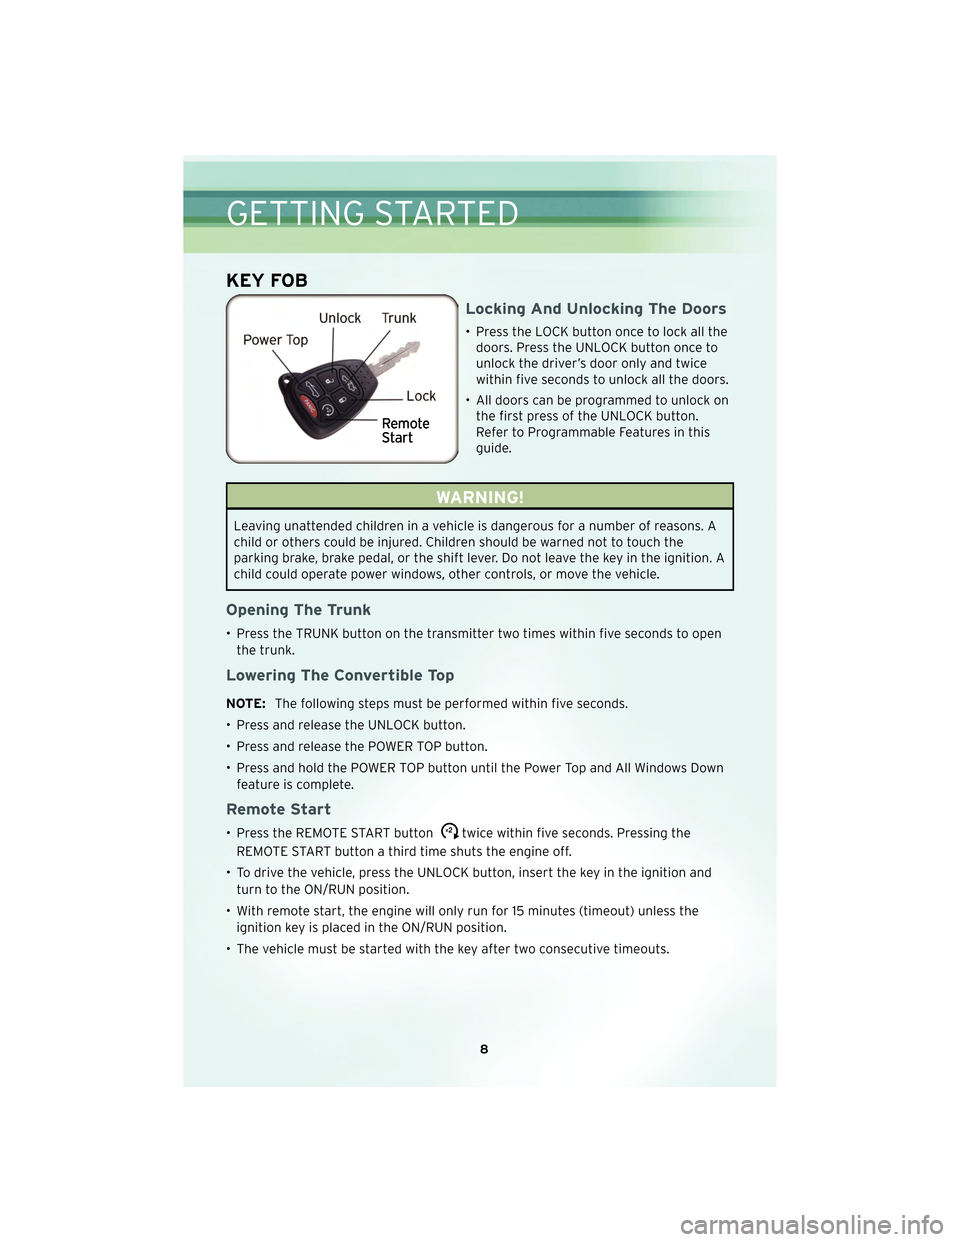
KEY FOB
Locking And Unlocking The Doors
• Press the LOCK button once to lock all thedoors. Press the UNLOCK button once to
unlock the driver’s door only and twice
within five seconds to unlock all the doors.
• All doors can be programmed to unlock on the first press of the UNLOCK button.
Refer to Programmable Features in this
guide.
WARNING!
Leaving unattended children in a vehicle is dangerous for a number of reasons. A
child or others could be injured. Children should be warned not to touch the
parking brake, brake pedal, or the shift lever. Do not leave the key in the ignition. A
child could operate power windows, other controls, or move the vehicle.
Opening The Trunk
• Press the TRUNK button on the transmitter two times within five seconds to open
the trunk.
Lowering The Convertible Top
NOTE: The following steps must be performed within five seconds.
• Press and release the UNLOCK button.
• Press and release the POWER TOP button.
• Press and hold the POWER TOP button until the Power Top and All Windows Down feature is complete.
Remote Start
• Press the REMOTE START buttonx2twice within five seconds. Pressing the
REMOTE START button a third time shuts the engine off.
• To drive the vehicle, press the UNLOCK button, insert the key in the ignition and turn to the ON/RUN position.
• With remote start, the engine will only run for 15 minutes (timeout) unless the ignition key is placed in the ON/RUN position.
• The vehicle must be started with the key after two consecutive timeouts.
GETTING STARTED
8
Page 11 of 76
WARNING!
• Do not start or run an engine in a closed garage or confined area. Exhaust gascontains Carbon Monoxide (CO) which is odorless and colorless. Carbon
Monoxide is poisonous and can cause serious injury or death when inhaled.
• Keep Key Fob transmitters away from children. Operation of the Remote Start System, windows, door locks or other controls could cause serious injury or
death.
Panic Alarm
• Press the PANIC button once to turn the panic alarm on.
• Wait approximately three seconds and press the button a second time to turn the
panic alarm off.
THEFT ALARM
To Arm
• Press the Key Fob LOCK button or the power door lock switch while the door isopen.
To Disarm
• Press the Key Fob UNLOCK button and turn the ignition to the ON/RUN position.
SEAT BELT
• Be sure everyone in your vehicle is in a seat and using a seat belt properly.
WARNING!
In a collision, you and your passengers can suffer much greater injuries if you are
not properly buckled up. You can strike the interior of your vehicle or other
passengers, or you can be thrown out of the vehicle. Always be sure you and
others in your vehicle are buckled up properly.
CHILD RESTRAINTS
• Children 12 years and under should ride properly buckled up in a rear seat, ifavailable. According to crash statistics, children are safer when properly restrained
in the rear seats rather than in the front.
• Every state in the United States and all Canadian provinces require that small children ride in proper restraint systems. This is the law, and you can be prosecuted
for ignoring it.
9
GETTING STARTED
Page 17 of 76
CAUTION!
Repeated overheating of the seat could damage the heating element and/or
degrade the material of the seat.
TILT / TELESCOPING STEERING COLUMN
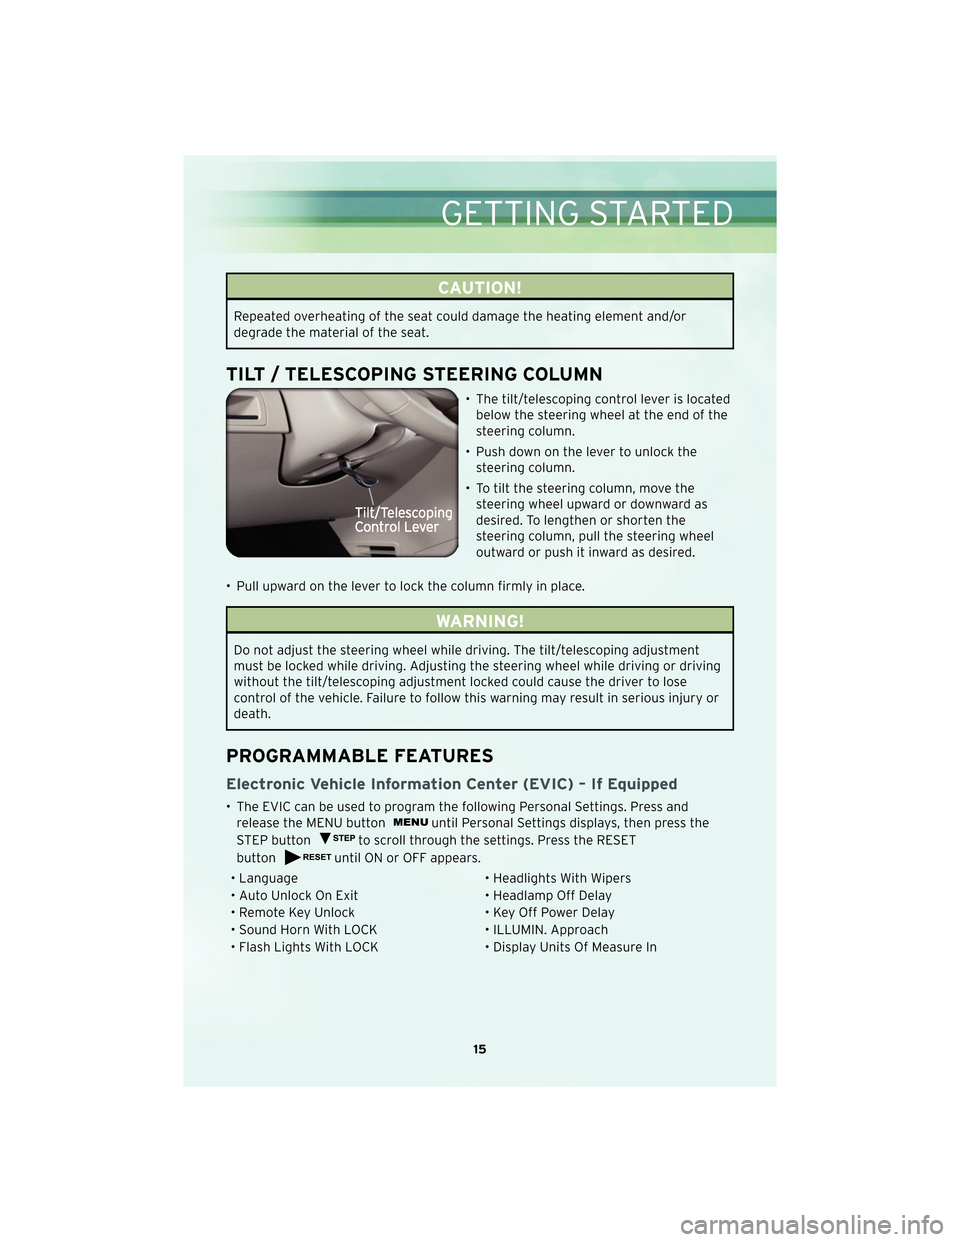
• The tilt/telescoping control lever is locatedbelow the steering wheel at the end of the
steering column.
• Push down on the lever to unlock the steering column.
• To tilt the steering column, move the steering wheel upward or downward as
desired. To lengthen or shorten the
steering column, pull the steering wheel
outward or push it inward as desired.
• Pull upward on the lever to lock the column firmly in place.
WARNING!
Do not adjust the steering wheel while driving. The tilt/telescoping adjustment
must be locked while driving. Adjusting the steering wheel while driving or driving
without the tilt/telescoping adjustment locked could cause the driver to lose
control of the vehicle. Failure to follow this warning may result in serious injury or
death.
PROGRAMMABLE FEATURES
Electronic Vehicle Information Center (EVIC) – If Equipped
• The EVIC can be used to program the following Personal Settings. Press and release the MENU button
until Personal Settings displays, then press the
STEP button
to scroll through the settings. Press the RESET
button
until ON or OFF appears.
• Language • Headlights With Wipers
• Auto Unlock On Exit • Headlamp Off Delay
• Remote Key Unlock • Key Off Power Delay
• Sound Horn With LOCK • ILLUMIN. Approach
• Flash Lights With LOCK • Display Units Of Measure In
15
GETTING STARTED
Page 18 of 76
Key Fob Programmable Features
• The following features may also be programmed by using the Key Fob transmitteror the ignition switch and driver’s door lock switch.
NOTE: Pressing the LOCK button while you are inside the vehicle will activate the
Vehicle Security Alarm. Opening a door with the Vehicle Security Alarm activated will
cause the alarm to sound. Press the UNLOCK button to deactivate the Vehicle
Security Alarm.
Unlock On First Press
• To unlock either the driver’s side, or all doors, on the first press of the UNLOCK button:
• Press and hold the LOCK button for at least 4 seconds, but no longer than 10 seconds. Then, press and hold the UNLOCK button while still holding the
LOCK button.
• Release both buttons at the same time.
Auto Unlock Doors On Exit
• To have all of the vehicle doors unlock when any door is opened: • Close all doors and place the key in the ignition.
• Within 15 seconds, cycle the ignition switch between LOCK and ON and then backto LOCK four times, ending up in the LOCK position (do not start the engine).
• Within 30 seconds, press the power door UNLOCK switch to unlock the doors.
Auto Door Lock
• To have the doors lock automatically when the vehicle’s speed exceeds 15 mph (24 km/h):
• The auto door lock feature can be enabled or disabled by your authorized dealer. See your authorized dealer for programming.
Sound Horn With Lock
• To turn the horn chirp on or off when the doors are locked:
• Press the LOCK button for at least 4 seconds, but no longer than 10 seconds.Then, press the PANIC button while still holding the LOCK button.
• Release both buttons at the same time.
Flashing Lights With Lock
• The turn signal lights flashing, when the doors are locked or unlocked, feature can be turned on or off. To turn this feature on or off:
• Press and hold the UNLOCK button for at least 4 seconds, but no longer than 10 seconds. Then, press and hold the LOCK button while still holding the
UNLOCK button.
• Release both buttons at the same time.
GETTING STARTED
16
Page 28 of 76
Clock Setting
• Press and hold the TIME button until the hours blink; turn the TUNE/SCROLLcontrol knob to set the hours.
• Press the TUNE/SCROLL control knob until the minutes begin to blink; turn the TUNE/SCROLL control knob to set the minutes.
• Press the TUNE/SCROLL control knob to save the time change.
• To exit, press any button/knob or wait five seconds.
Station Presets
• Press the SET/RND button once and SET 1 will show in the display. Then select the button (1–6).
• A second station may be added to each push button. Press the SET/RND button twice and SET 2 will show in the display, then select button (1–6).
How To Load Multiple CDs/DVDs
REQ Radio Only
• Press the LOAD button and then press the button with the corresponding number(1–6) where the CD is being loaded. The radio will display PLEASE WAIT and prompt
when to INSERT DISC.
• After the radio displays INSERT DISC, insert the CD into the player. The radio display will show LOADING DISC when the disc is loading and “READING DISC”
when the radio is reading the disc.
• Press the eject button and then the corresponding number (1–6) to eject the desired disc.
ELECTRONICS
26
Page 31 of 76
Auxiliary Mode
• The auxiliary (AUX) jack allows a portable device, such as an MP3 player or acassette player, to be plugged into the radio and utilize the vehicle’s audio system
to amplify the source and play through the vehicle speakers.
• The display will switch automatically to the AUX mode when a 3.5 mm stereo mini-jack cable has been connected.
• To change radio modes while the cable is connected to the unit, press the RADIO/MEDIA (RER and REN) or MEDIA (RBZ) hard-key until the AUX tab is
displayed on the top of the screen. Touch the AUX tab to return to the AUX mode.
• The control of the external device cannot be provided by the radio; use the device controls instead.
Clock Setting
• Turn the radio on, then touch the screen where the time is displayed.
• Touch the USER CLOCK soft-key (Navigation radio only).
• To adjust the hours, touch either the HOUR FORWARD or HOUR BACKWARDsoft-key.
• To adjust the minutes, touch either the MINUTE FORWARD or MINUTE BACKWARD soft-key.
• To save the new time setting, touch the screen where the word “Save” is displayed.
Store Radio Presets
• For REN and RER: Press the RADIO/MEDIA hard-key repeatedly until AM FM SAT is displayed in the upper left corner of the screen.
• For RBZ: Press the RADIO hard-key to display AM FM SAT in the upper left corner of the screen.
• Select the radio band by touching either the AM, FM, or SAT soft-key.
• Find the station to store by either pressing the SEEK UP/DOWN hard-key (REN and RER), touching the right and left arrow soft-keys (RBZ), touching the SCAN
soft-key, or by using the DIRECT TUNE soft-key.
• Once the station is found, touch and hold one of the PRESET soft-keys in the list to the right, until you hear a confirmation beep.
Hard Disc Drive Operation
Copy Complete Audio Disc To Hard-Drive
• Press the OPEN/CLOSE hard-key (REN and RER) or LOAD hard-key (RBZ) andinsert a disc, then press the MENU hard-key.
• Touch the MY FILES soft-key, then select MY MUSIC.
• Touch the IMPORT MUSIC soft-key, then touch the FROM DISC soft-key in the next screen to start the process.
29
ELECTRONICS
Page 36 of 76
Programming A Rolling Code System
• At the garage door opener motor (in the garage), locate the “learn” or “training”button. This can usually be found where the hanging antenna wire is attached to
the garage door opener motor (it is NOT the button normally used to open and
close the door).
• Firmly press and release the “learn” or “training” button. The name and color of the button may vary by manufacturer. Within 30 seconds, return to the vehicle and
press the programmed HomeLink
®button twice (holding the button for two
seconds each time). If the device is plugged in and activates, programming is
complete.
• If the device does not activate, press the button a third time (for two seconds) to complete the training.
Using HomeLink®
• To operate, simply press and release the programmed HomeLink®button and the
trained device will operate.
• Refer to your Owner’s Manual on the DVD for further details. If you have any problems programming HomeLink
®, or require assistance, please call toll-free
1–800–355–3515 or, on the Internet, at www.HomeLink.com.
POWER OUTLET
• There are two 12 Volt electrical outlets on this vehicle.
• The outlet on the front console has power available only when the ignition is in the ON/RUN position. If desired, this outlet can be converted by your authorized dealer
to provide power with the ignition switch in the LOCK position.
• The second outlet in the center console is powered directly from the battery (power available at all times). Items plugged into this outlet may discharge the
battery and/or prevent engine starting.
NOTE: Do not exceed the maximum power of 160 Watts (13 Amps) at 12 Volts. If the
160 Watt (13 Amp) power rating is exceeded the fuse protecting the system will need
to be replaced.
Uconnect™ Phone
• The Uconnect™ Phone is a voice-activated, hands-free, in-vehicle communications system.
• The Uconnect™ Phone allows you to dial a phone number with your cellular phone using simple voice commands.
• For vehicles equipped with Video Entertainment System (VES)™, refer to the Uconnect™ Phone section of the Uconnect™ User’s Manual on the DVD for further
details.
• For vehicles not equipped with VES™, refer to your vehicle Owner’s Manual on the DVD for further details.
ELECTRONICS
34
Page 41 of 76
RECREATIONAL TOWING
(BEHIND MOTORHOME,
ETC.)
Towing This Vehicle Behind
Another Vehicle (Flat Towing
With All Four Wheels On The
Ground)
CAUTION!
DO NOT flat tow this vehicle.
Damage to the drivetrain will result.
NOTE: If the vehicle requires towing,
make sure all four wheels are off the
ground.
BRAKE/TRANSAXLE
INTERLOCK MANUAL
OVERRIDE
• The manual override may be used in the event that the shift lever should
fail to move from PARK with the Key
Fob in the ON position and the brake
pedal pr essed.
• To operate the shift lock manual override, perform the following
steps: • Firmly apply the parking brake,
insert the ignition Key Fob and
rotate it to the ON position (do not
start engine).
• Remove the cup-holder liner.
• Insert a key, screwdriver, or finger into the front hole, then push and
hold the manual override release
lever forward.
• While holding the release lever forward, move the shift lever from
PARK to NEUTRAL. Release the
override.
• Release the parking brake.
• Have your vehicle inspected by your local authorized dealer if the shift
lock manual override has been used.
NOTE: If a malfunction occurs, the
system will trap the Key Fob in the
ignition cylinder to warn you that this
safety feature is inoperable. The
engine can be started and stopped, but
the Key Fob cannot be removed until
you obtain service.
39
UTILITY