engine CHRYSLER SEBRING COUPE 2004 2.G User Guide
[x] Cancel search | Manufacturer: CHRYSLER, Model Year: 2004, Model line: SEBRING COUPE, Model: CHRYSLER SEBRING COUPE 2004 2.GPages: 382, PDF Size: 2.23 MB
Page 24 of 382
NOTE
1. In the following cases, the vehicle may not be able to
receive the registered ID code from the key. This
means the engine will not start even when the regis-
tered key is turned to the9START9position:
·When the key comes into contact with a metallic or
magnetic object.
·When the key comes into contact with another
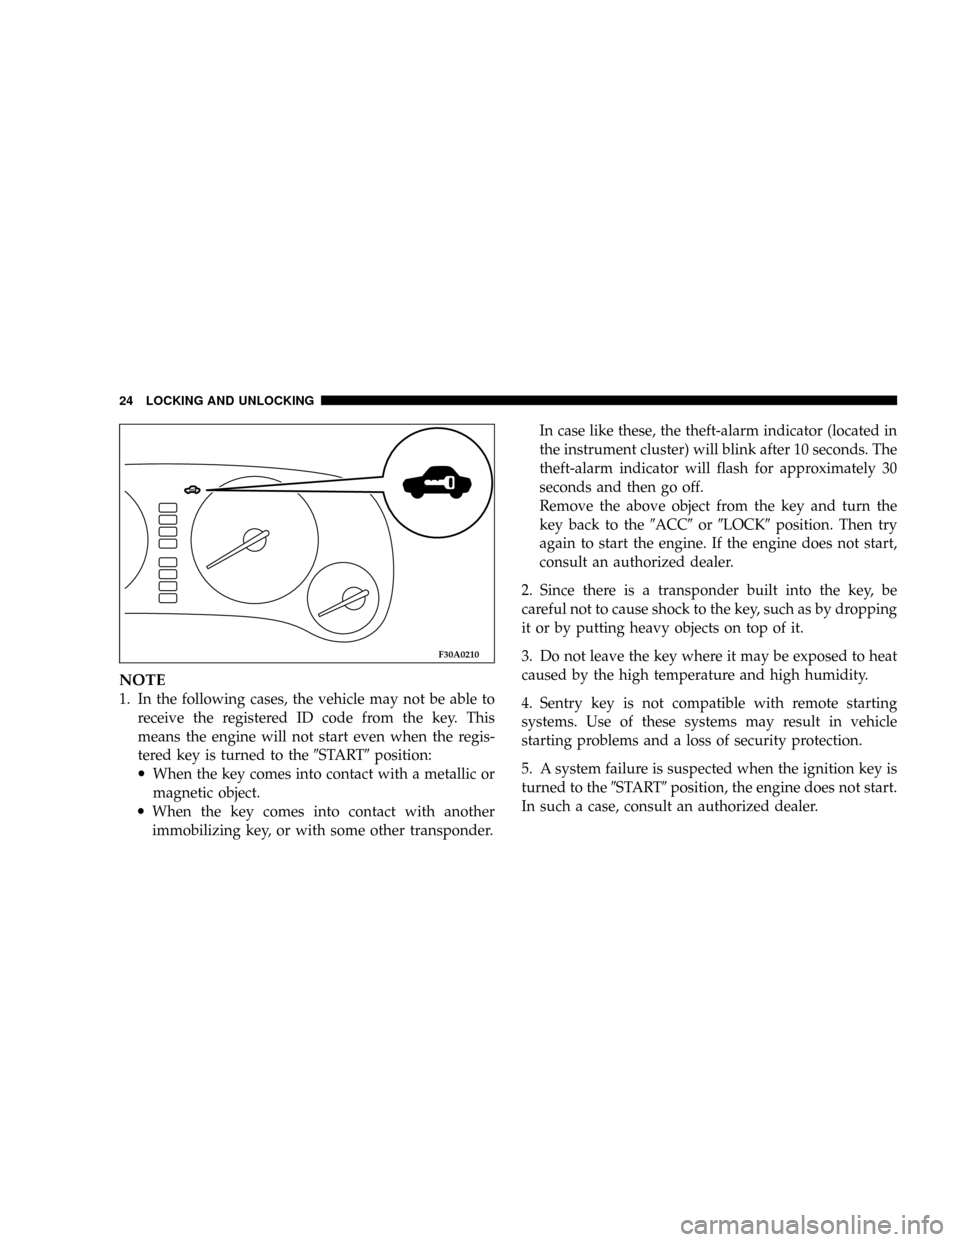
immobilizing key, or with some other transponder.In case like these, the theft-alarm indicator (located in
the instrument cluster) will blink after 10 seconds. The
theft-alarm indicator will flash for approximately 30
seconds and then go off.
Remove the above object from the key and turn the
key back to the9ACC9or9LOCK9position. Then try
again to start the engine. If the engine does not start,
consult an authorized dealer.
2. Since there is a transponder built into the key, be
careful not to cause shock to the key, such as by dropping
it or by putting heavy objects on top of it.
3. Do not leave the key where it may be exposed to heat
caused by the high temperature and high humidity.
4. Sentry key is not compatible with remote starting
systems. Use of these systems may result in vehicle
starting problems and a loss of security protection.
5. A system failure is suspected when the ignition key is
turned to the9START9position, the engine does not start.
In such a case, consult an authorized dealer.
F30A0210
24 LOCKING AND UNLOCKING
Page 39 of 382
FUEL FILLER
WARNING!
Turn off the engine while refueling.
Do not smoke and do not operate other ignition
sources while refueling.
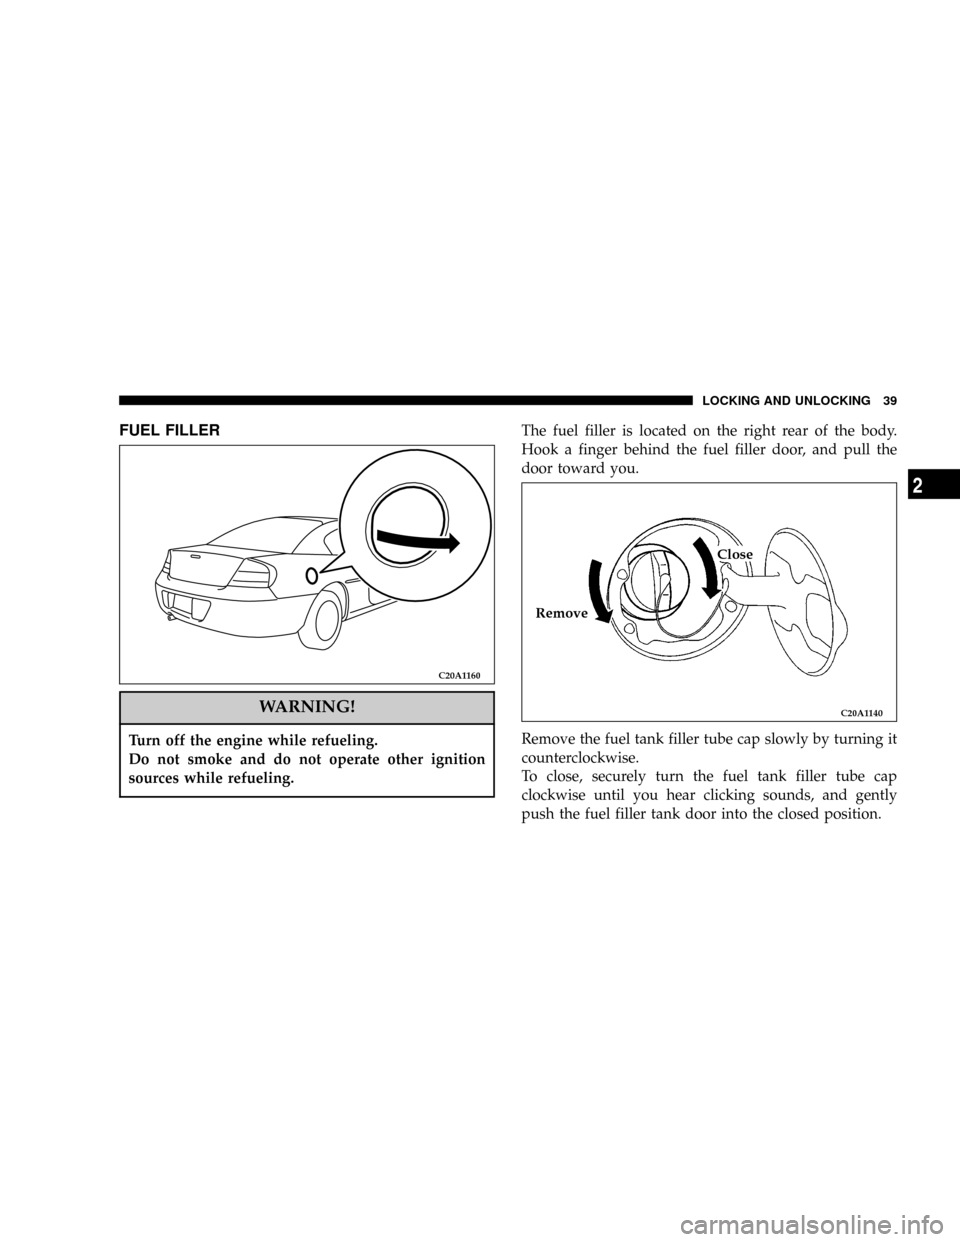
The fuel filler is located on the right rear of the body.
Hook a finger behind the fuel filler door, and pull the
door toward you.
Remove the fuel tank filler tube cap slowly by turning it
counterclockwise.
To close, securely turn the fuel tank filler tube cap
clockwise until you hear clicking sounds, and gently
push the fuel filler tank door into the closed position.
C20A1160
C20A1140
RemoveClose
LOCKING AND UNLOCKING 39
2
Page 41 of 382
ENGINE HOOD RELEASE
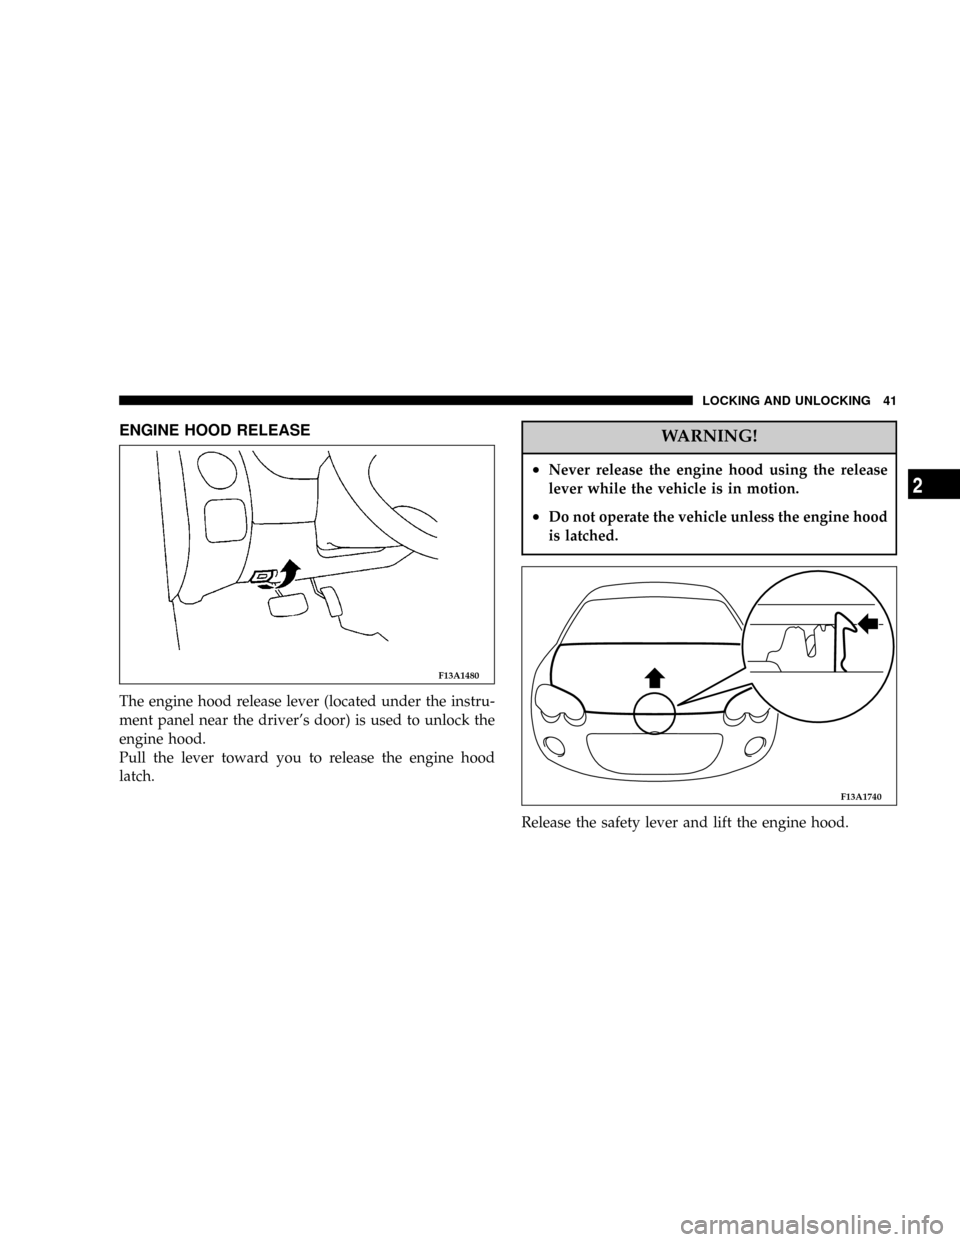
The engine hood release lever (located under the instru-
ment panel near the driver's door) is used to unlock the
engine hood.
Pull the lever toward you to release the engine hood
latch.
WARNING!
²Never release the engine hood using the release
lever while the vehicle is in motion.
²Do not operate the vehicle unless the engine hood
is latched.
Release the safety lever and lift the engine hood.
F13A1480
F13A1740
LOCKING AND UNLOCKING 41
2
Page 42 of 382
NOTE: Only open the engine hood when the wipers are
at their parked position to prevent damage to the engine
hood and wipers.
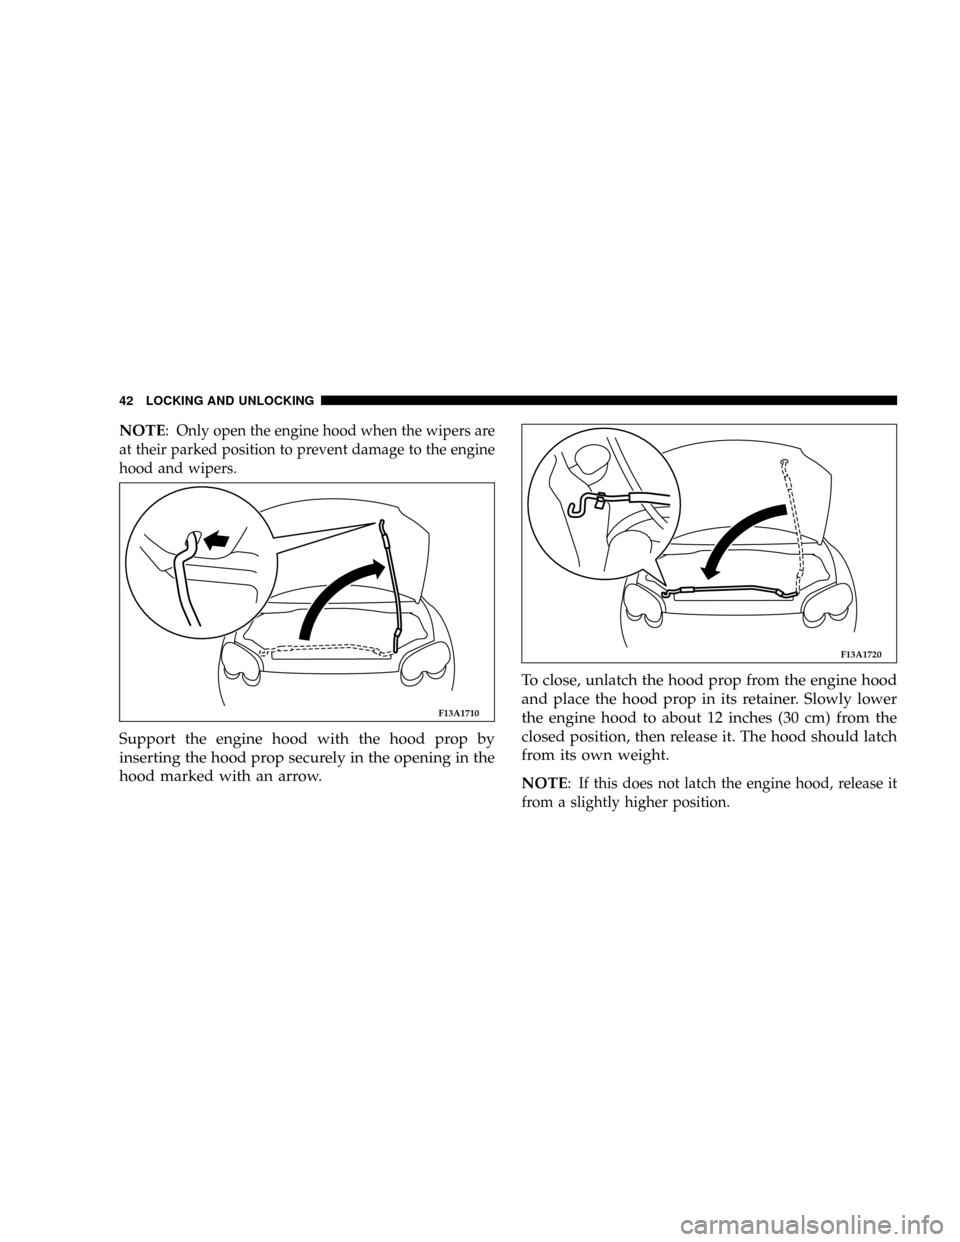
Support the engine hood with the hood prop by
inserting the hood prop securely in the opening in the
hood marked with an arrow.To close, unlatch the hood prop from the engine hood
and place the hood prop in its retainer. Slowly lower
the engine hood to about 12 inches (30 cm) from the
closed position, then release it. The hood should latch
from its own weight.
NOTE
: If this does not latch the engine hood, release it
from a slightly higher position.
F13A1710
F13A1720
42 LOCKING AND UNLOCKING
Page 43 of 382

CAUTION!
Be careful that hands or fingers are not trapped
when closing the engine hood.
POWER WINDOWS
NOTE
1. The windows can be operated when the ignition key is
in the ªON ºposition. The door windows can be openedor closed for a 30-second period even after the ignition
switch is turned off. However, once the driver's door or
the front passenger's door is opened, the windows can-
not be operated until the ignition switch is turned on
again.
2. Never try to operate the driver switch and passenger
switch in opposing directions at the same time. Doing so
will cause the window to freeze in position.
3. Repeated operation with the engine stopped (key
ªONº) will run down the battery. Operate the window
switches while the engine is running.
WARNING!
²Before operating the power windows, make sure
that nothing can be trapped (head, hand, finger,
etc.) in the window.
²Never leave the vehicle without removing the key.
²Never leave a child in the vehicle alone.
F17A0250
Open
Close
LOCKING AND UNLOCKING 43
2
Page 48 of 382

3. Do not try to operate the sunroof if it is frozen closed
(after snowfall or during extreme cold).
4. Do not sit on or place heavy luggage on the sunroof or
roof opening edge.
5. Do not apply any force that may cause damage to the
sunroof.
6. When waxing your vehicle, be careful not to put any
wax on the weatherstrip (black rubber) around the sun-
roof opening. If stained with wax, the weatherstrip
cannot maintain a weatherproof seal with the sunroof.
7. Release the switch when the sunroof has reached a
completely open or completely closed position.
THEFT-ALARM SYSTEM
The theft-alarm system is designed to provide protection
from unauthorized entry into the vehicle. This system is
operated in three stages: the first is the ªarmedº stage, the
second is the ªalarmº stage, and third is the ªdisarmedº
stage. If triggered, the system provides both audible and
visual alarm signals.
Armed stage
Park the vehicle and stop the engine. Arm the system as
described below.
1. Remove the key from the ignition switch.
2. Make sure the trunk lid is locked.
F30A0010
Arm the system and leave.
48 LOCKING AND UNLOCKING
Page 56 of 382

WARNING!
²Do not attempt to adjust the seat while driving.
This can be dangerous.
²After adjusting the seat, make sure that the seat is
securely locked into position.
²Be sure to have the seat adjusted by an adult. If it
is adjusted by a child, the seat may not be prop-
erly locked into position.
WARNING!
²In order to reduce risk of serious or fatal injury in
a collision, including from a deploying front pas-
senger air bag, all front seat passengers should
move the front passenger seat as far back as
possible, all children 12 years old and under
should ride restrained in the rear seat, and all
children in rear-facing child restraints must ride
in the rear seat.
²In order to reduce risk of serious or fatal injury in
an accident, including from a deploying driver 's
side air bag, the driver should move the driver's
seat as far back as possible, while still maintain-
ing good visibility and good control of the steer-
ing wheel, accelerator and brake pedals.
NOTE: On vehicles with a power seat, to prevent the
battery from running down, operate the power seat with
the engine in operation.
56 SEATS, SEAT BELTS, CHILD RESTRAINTS AND AIR BAGS
Page 72 of 382

WARNING!
To reduce risk of serious injury in a collision, adjust
the anchor at a position so that the belt passes over
your shoulder, but does not touch your neck.
Always adjust the anchor when vehicle is not in
motion.
Make sure the anchor is securely latched after ad-
justment.
Enhanced Driver Seat Belt Use Reminder System
(BeltAlertŸ)
If the driver 's seat belt has not been buckled within 60
seconds of starting the vehicle and if the vehicle speed is
greater than 5 mph (8 km/h), the Enhanced Warning
System (BeltAlertŸ) will alert the driver to buckle their
seat belt. The driver should also instruct all other occu-
pants to buckle their seat belts. Once the warning is
triggered, the Enhanced Warning System (BeltAlertŸ)
will continue to chime and flash the Seat Belt Warning
Light for 96 seconds or until the driver 's seat belt is
buckled.The Enhanced Warning System (BeltAlertŸ) will be
reactivated if the driver 's seat belt is unbuckled for more
than 10 seconds and the vehicle speed is greater than 5
mph (8 km/h).
The Enhanced Warning System (BeltAlertŸ) can be en-
abled or disabled by your authorized dealer or by
following these steps:
NOTE:
The following steps must occur within the first 60
seconds of the ignition switch being turned to the ON
or START position. The manufacturer does not recom-
mend deactivating the Enhanced Warning System
(BeltAlertŸ).
·Turn the ignition switch to the OFF position, and
buckle the driver 's seat belt.
·Turn the ignition key to the ACCESSORY/RUN
position (engine does not need to be running), and
wait for the Seat Belt Warning Light to turn off.
·Within 60 seconds of starting the vehicle, unbuckle
and then re-buckle the driver 's seat belt at least three
times within 10 seconds, ending with the seat belt
buckled.
72 SEATS, SEAT BELTS, CHILD RESTRAINTS AND AIR BAGS
Page 101 of 382

INSTRUMENTS AND CONTROLS
CONTENTS
mInstrument cluster......................104
NMeter cluster.........................104
NIndicator and warning light package........105
NSpeedometer.........................106
NTachometer..........................106
NFuel gauge..........................107
NOdometer/Trip odometer................108
NEngine coolant temperature gauge..........109
NTurn signal indicators/hazard warning lights . . 110
NHigh beam indicator...................110
NTheft-alarm indicator...................110
NDoor-ajar warning light and chime.........110NAnti-lock braking system warning light
(if so equipped).......................111
NCruise/speed control indicator............111
NLow-fuel warning light and chime..........111
NFront fog light indicator.................112
NCharging system warning light............112
NOil pressure warning light...............112
NMalfunction indicator light
(SERVICE ENGINE SOON)...............113
NSupplemental Restraint System (SRS)-air bag
warning light.........................114
NBrake warning light....................115
NSeat belt reminder/warning light...........116
4
Page 104 of 382
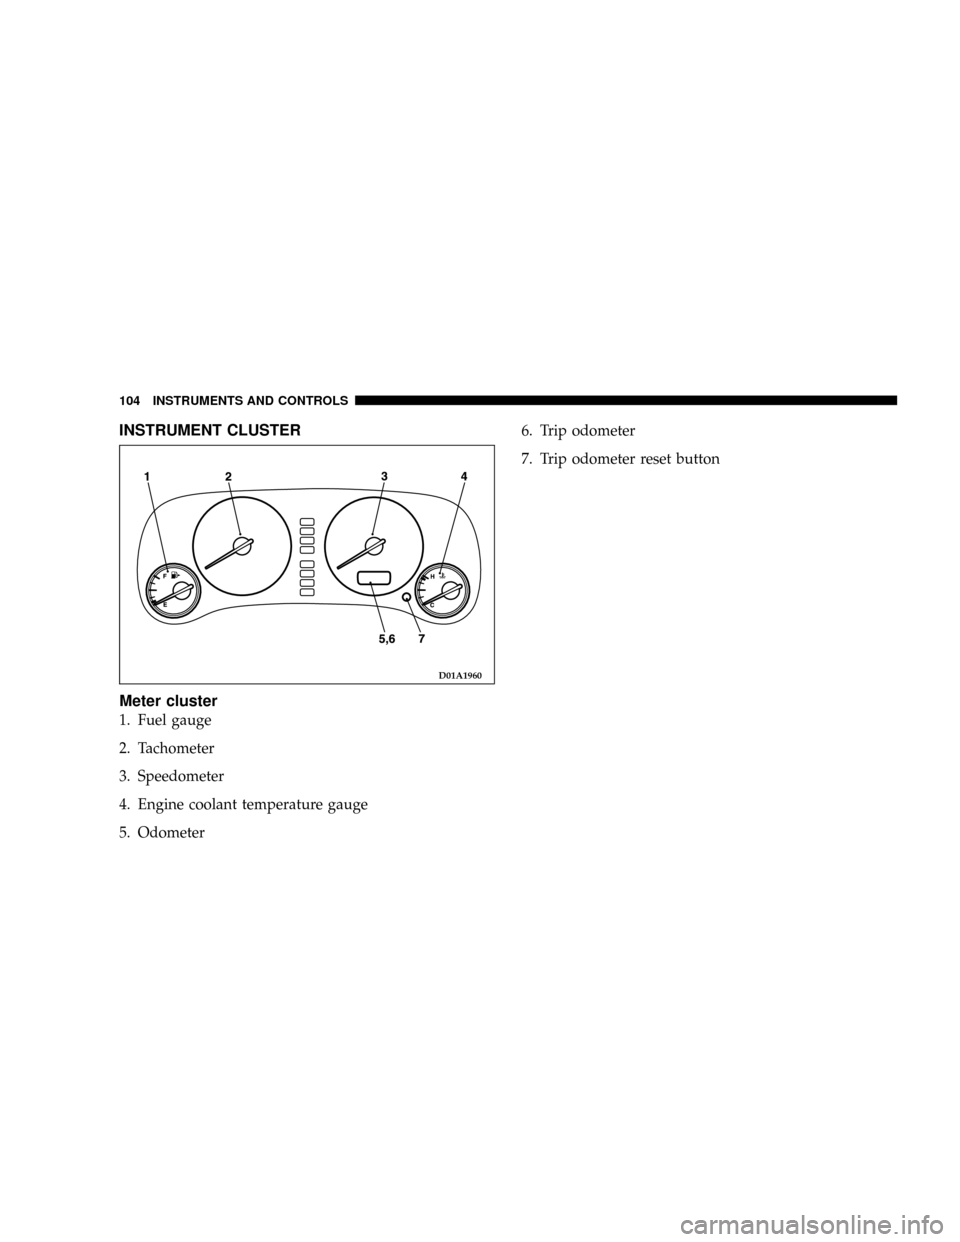
INSTRUMENT CLUSTER
Meter cluster
1. Fuel gauge
2. Tachometer
3. Speedometer
4. Engine coolant temperature gauge
5. Odometer6. Trip odometer
7. Trip odometer reset button
D01A1960
104 INSTRUMENTS AND CONTROLS