CHRYSLER SEBRING COUPE 2004 2.G Owners Manual
Manufacturer: CHRYSLER, Model Year: 2004, Model line: SEBRING COUPE, Model: CHRYSLER SEBRING COUPE 2004 2.GPages: 382, PDF Size: 2.23 MB
Page 201 of 382
WARNING!
Never open the radiator cap when the radiator is hot.
You could be seriously burned.
TRAILER TOWING
Warranty Requirements
The Manufacturer's Passenger Vehicle Warranty will
apply to vehicles used to tow trailers for non-commercial
use. However the following conditions must be met:
²The maximum trailer load for vehicles with manual
transaxles is 1,000 lbs (454 kg).
²The maximum trailer load for vehicles with automatic
transaxles is 1,000 lbs (454 kg).
²The maximum frontal area of the trailer cannot exceed
20 square feet (1.86 square meters).
²If using a manual transaxle vehicle for trailer towing,
all starts must be in FIRST gear to avoid excessive
clutch slippage.The trailer tongue load must be considered as part of the
tow vehicle load capacity when loading the vehicle.
NOTE:Check the automatic transmission fluid level
before towing. Fluid discoloration, or a burnt odor,
shows the need for transmission fluid replacement.
WARNING!
Connecting trailer brakes to your vehicle's hydraulic
brake lines can overload your brake system and
cause it to fail. You might not have brakes when you
need them and could have an accident.
Whenever you pull a trailer, regardless of the trailer size,
stop lights and turn signals on the trailer are recom-
mended for motoring safety.
STARTING AND DRIVING 201
5
Page 202 of 382

Weight limits
Never exceed the maximum trailer weight (A), maximum
tongue weight (B), Gross Vehicle Weight Rating (GVWR)
and Gross Axle Weight Rating (GAWR).
I26A1290
202 STARTING AND DRIVING
Page 203 of 382

FOR PLEASANT DRIVING
CONTENTS
mSun visors............................207
NTo adjust the sun visor position...........207
NVanity mirror........................208
mAccessory socket.......................209
mCup holder...........................210
mAccessory boxes.......................211
NGlove compartment....................212
NCenter console with lid..................213
NTrunk net (if so equipped)...............213
mElectronic digital clock...................214
NClock setting procedure.................214
mGeneral information about your radio.......214
NSignal transmission....................215NWeak reception (fading).................215
NReflections...........................215
NCross modulation......................216
NFM stereo reception....................216
NCauses of disturbances..................216
mWhip antenna.........................217
mAM Stereo & FM Stereo Radio With Graphic
Equalizer, Cassette Tape Player And CD Player
(if so equipped)
.......................217
NOperating Instructions - Radio Mode.......217
NPower Switch, Volume Control............218
NSeek Button (Radio Mode)...............218
NTuning.............................218
NBalance............................218
6
Page 204 of 382

NFade..............................218
NGraphic Equalizer.....................218
NAM/FM Selection.....................218
NScan Button.........................218
NTo Set The Radio Pushbutton Memory......219
NGeneral Information...................219
NTo Change From Clock To Radio Mode......219
NTape Player Operation..................219
NSeek Button.........................220
NFast Forward (FF).....................220
NRewind (RW)........................220
NTape Eject...........................220
NScan Button.........................220
NChanging Tape Direction................220
NMetal Tape Selection...................220
NPinch Roller Release...................220NNoise Reduction......................221
NOperation InstructionsÐCD Player.........221
NInserting The Compact Disc..............221
NSeek Button.........................221
NEJT CD (Eject) Button..................221
NFF/Tune/RW Button...................221
NProgram Button 4 (Random Play)..........222
NTape /CD Button.....................222
NTime Button.........................222
NScan Button.........................222
mCassette Tape And Player Maintenance......222
mAM/FM Stereo Radio With 4 Disc CD Changer
(if so equipped)
.......................223
NOperating Instructions - Radio Mode.......223
NPower Switch, Volume Control............223
NSeek Button (Radio Mode)...............224
204 FOR PLEASANT DRIVING
Page 205 of 382

NTuning.............................224
NBalance............................224
NFade..............................224
NTone Control........................224
NMODE Selection......................224
NPTY (Program Type) Selection.............224
NScan Button.........................224
NTo Set The Pushbutton Memory...........225
NTo Change From Clock To Radio Mode......225
NGeneral Information...................225
NOperating Instructions Ð CD Changer......225
NInserting the Compact Disc..............225
NSeek Button.........................226
NFF /Tune/ RW Button..................226
NRandom Play........................226
NRadio/CD Button.....................226NTime Button.........................226
NScan Button.........................226
NLoading The CD Changer...............226
NPlaying Discs........................227
NRemoving Discs From The CD Changer.....227
mSteering wheel remote control switches (if so
equipped)
...........................227
NHow to adjust the volume...............228
NTo listen to the audio system..............228
NTo listen to the radio...................228
NAutomatic tuning the radio...............228
NTo select the preset memory..............228
NTo listen to a tape.....................229
NTo listen to a CD......................229
NHandling of compact discs...............230
mRadio operation and cellular phones........232
FOR PLEASANT DRIVING 205
6
Page 206 of 382

mVents................................233
NAir flow rate and direction adjustments......233
mAir conditioning.......................234
NControl panel........................234
NChanging the blower speed...............235
NChanging the temperature...............235
NChanging mode selection................236
NChanging air selection..................240
NAir conditioning switch.................241NHow to use the controls.................242
NDefrosting or defogging of the windshield
and door windows.....................242
NImportant operation tips for air conditioning . . 245
NAir conditioning system refrigerant and
lubricant recommendations...............245
NDuring a long period of disuse............246
mInstallation of accessories.................246
206 FOR PLEASANT DRIVING
Page 207 of 382
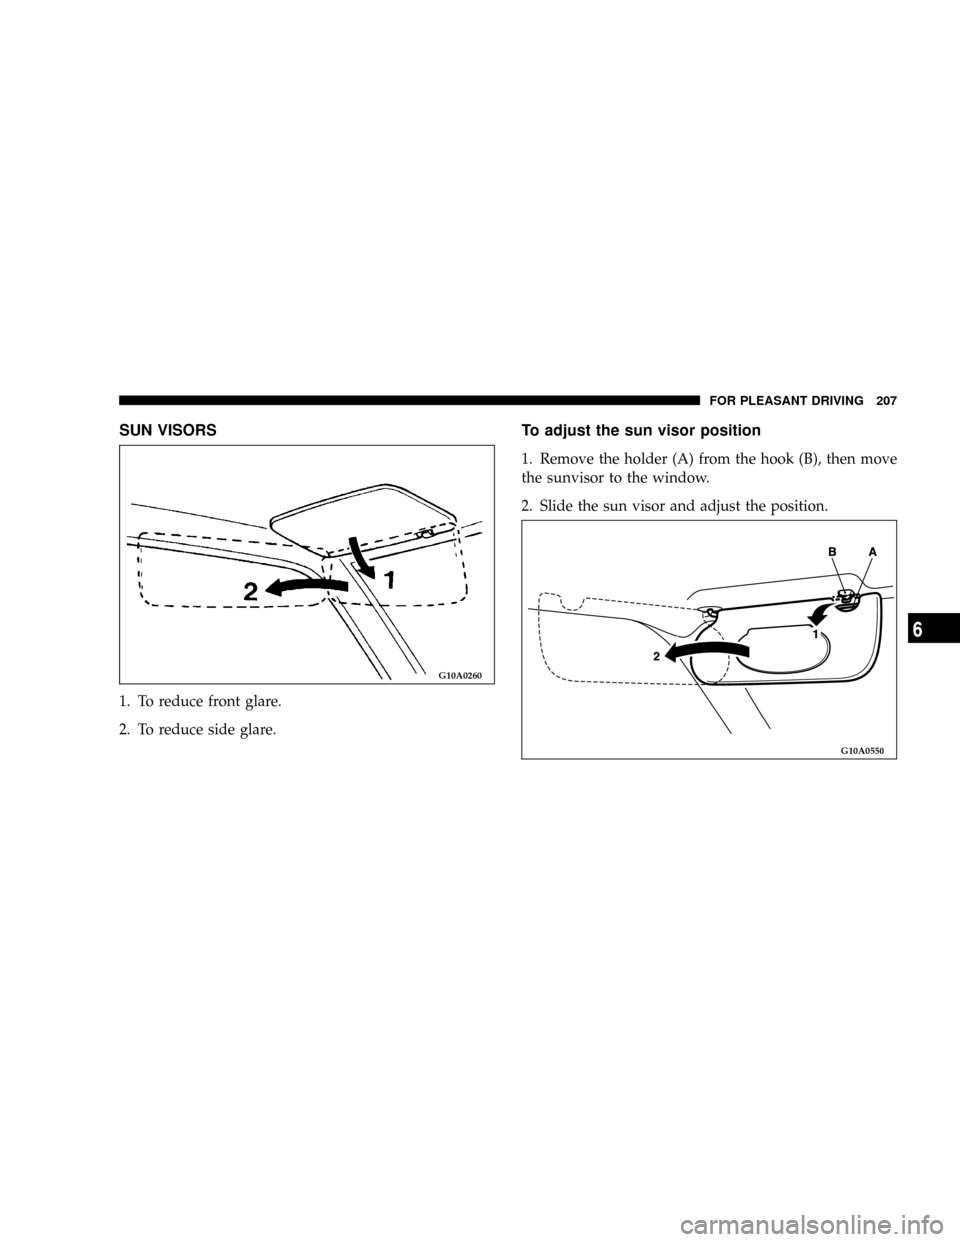
SUN VISORS
1. To reduce front glare.
2. To reduce side glare.
To adjust the sun visor position
1. Remove the holder (A) from the hook (B), then move
the sunvisor to the window.
2. Slide the sun visor and adjust the position.
G10A0260
G10A0550
FOR PLEASANT DRIVING 207
6
Page 208 of 382
WARNING!
²Do not attempt to adjust the sun visor while
driving. This can be dangerous.
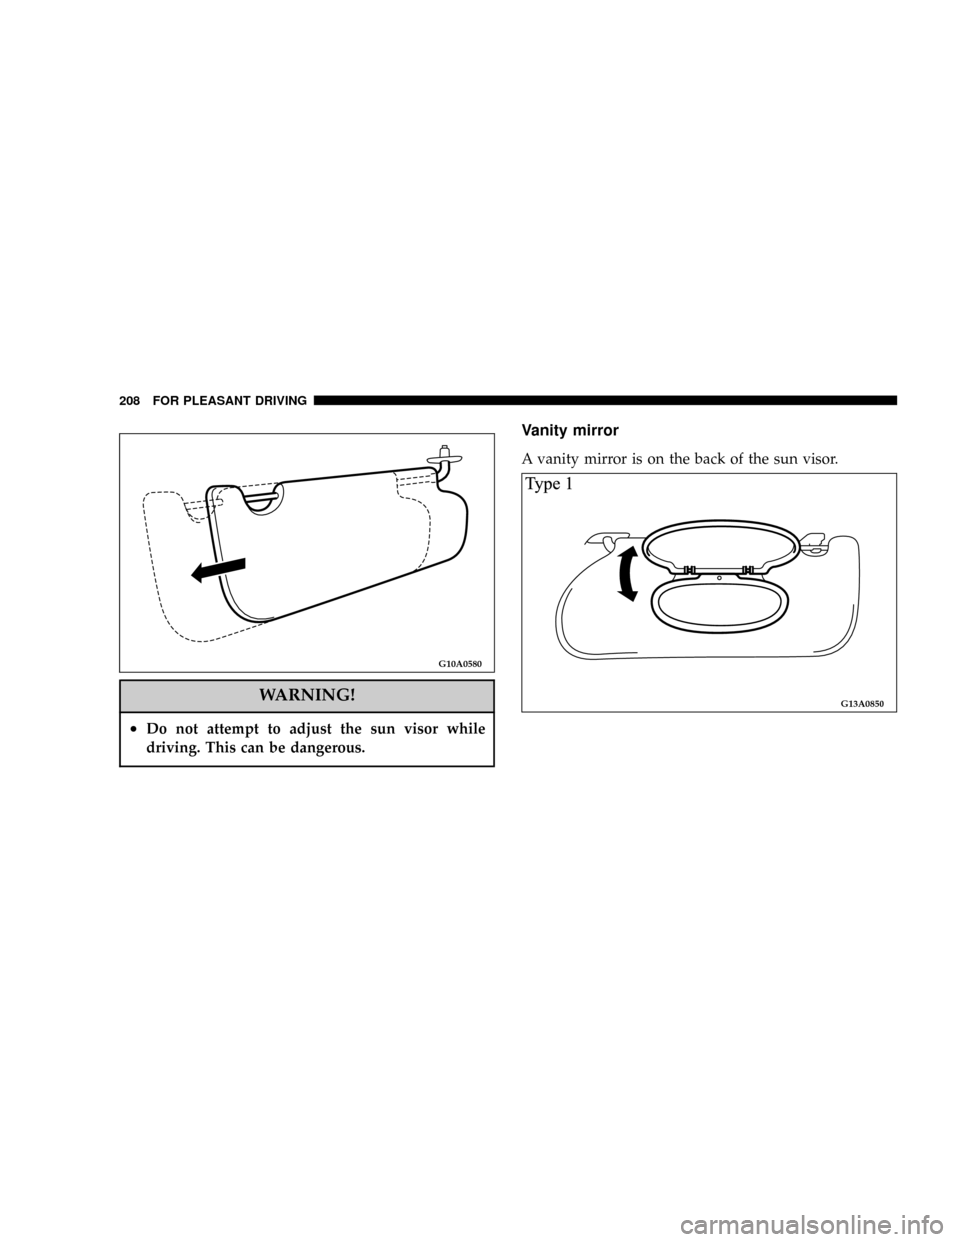
Vanity mirror
A vanity mirror is on the back of the sun visor.
G10A0580
G13A0850
208 FOR PLEASANT DRIVING
Page 209 of 382
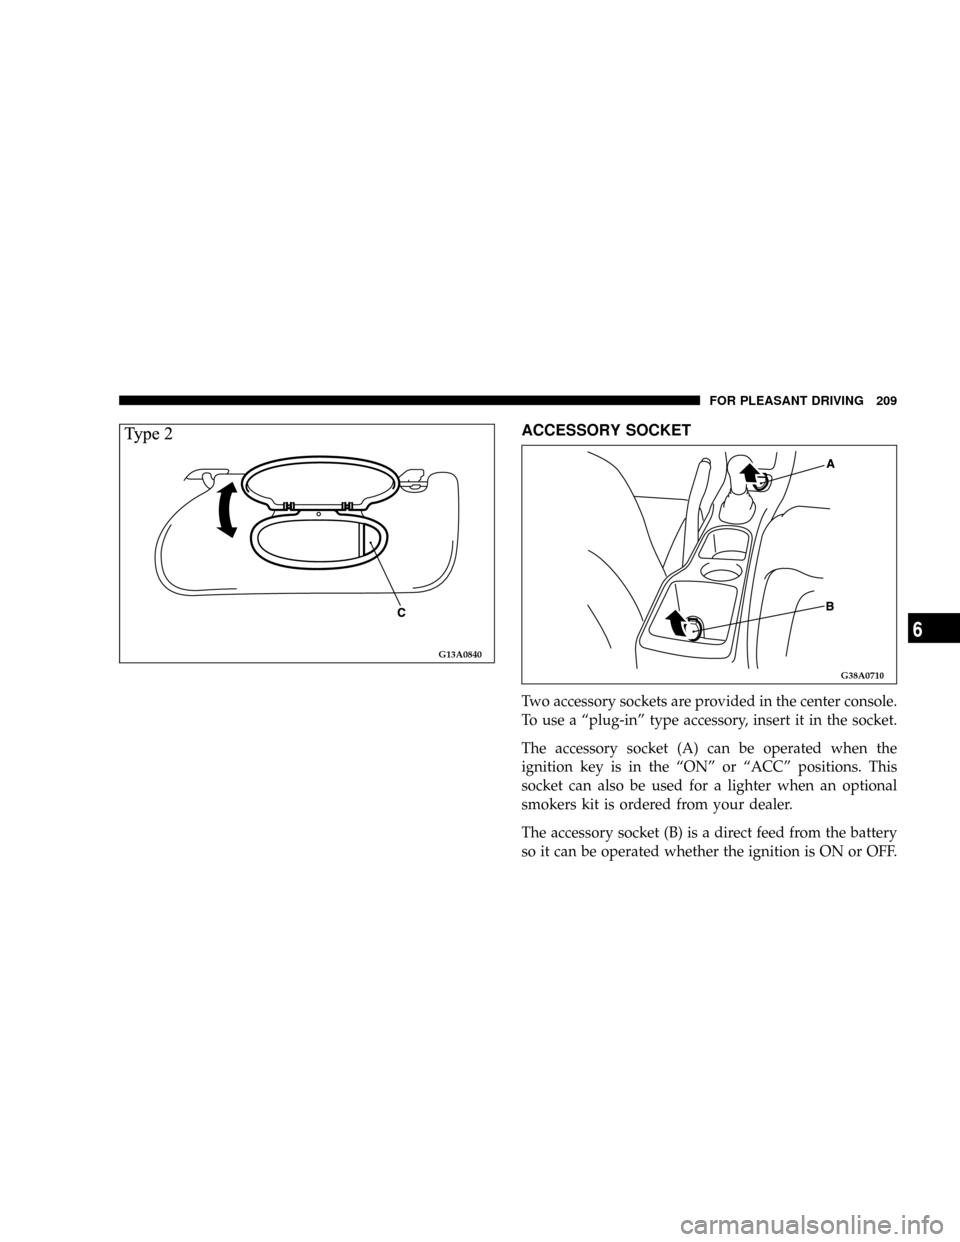
ACCESSORY SOCKET
Two accessory sockets are provided in the center console.
To use a ªplug-inº type accessory, insert it in the socket.
The accessory socket (A) can be operated when the
ignition key is in the ªONº or ªACCº positions. This
socket can also be used for a lighter when an optional
smokers kit is ordered from your dealer.
The accessory socket (B) is a direct feed from the battery
so it can be operated whether the ignition is ON or OFF.
G13A0840
G38A0710
FOR PLEASANT DRIVING 209
6
Page 210 of 382
CAUTION!
²Be sure to use a ªplug-inº type accessory operat-
ing on 12V and at 120W or less.
Extended use of electronic equipment with the
engine off may run down the battery.
²When the accessory socket is not in use, be sure to
close the socket cap. This will prevent the socket
from becoming clogged and short circuiting.
²Many accessories that can be plugged in draw
power from the vehicle's battery, even when not
in use (i.e., cellular phones, etc.). Eventually, if
plugged in long enough, the vehicle's battery will
discharge sufficiently to degrade battery life
and/or prevent engine starting.
²Accessories that draw higher power (i.e., coolers,
vacuum cleaners, lights, etc.) will degrade the
battery even more quickly. Only use these inter-
mittently and with greater caution.
²After the use of high power draw accessories, or
long periods of the vehicle not being started (with
accessories still plugged in), the vehicle must be
driven a sufficient length of time to allow the
generator to recharge the vehicle's battery.
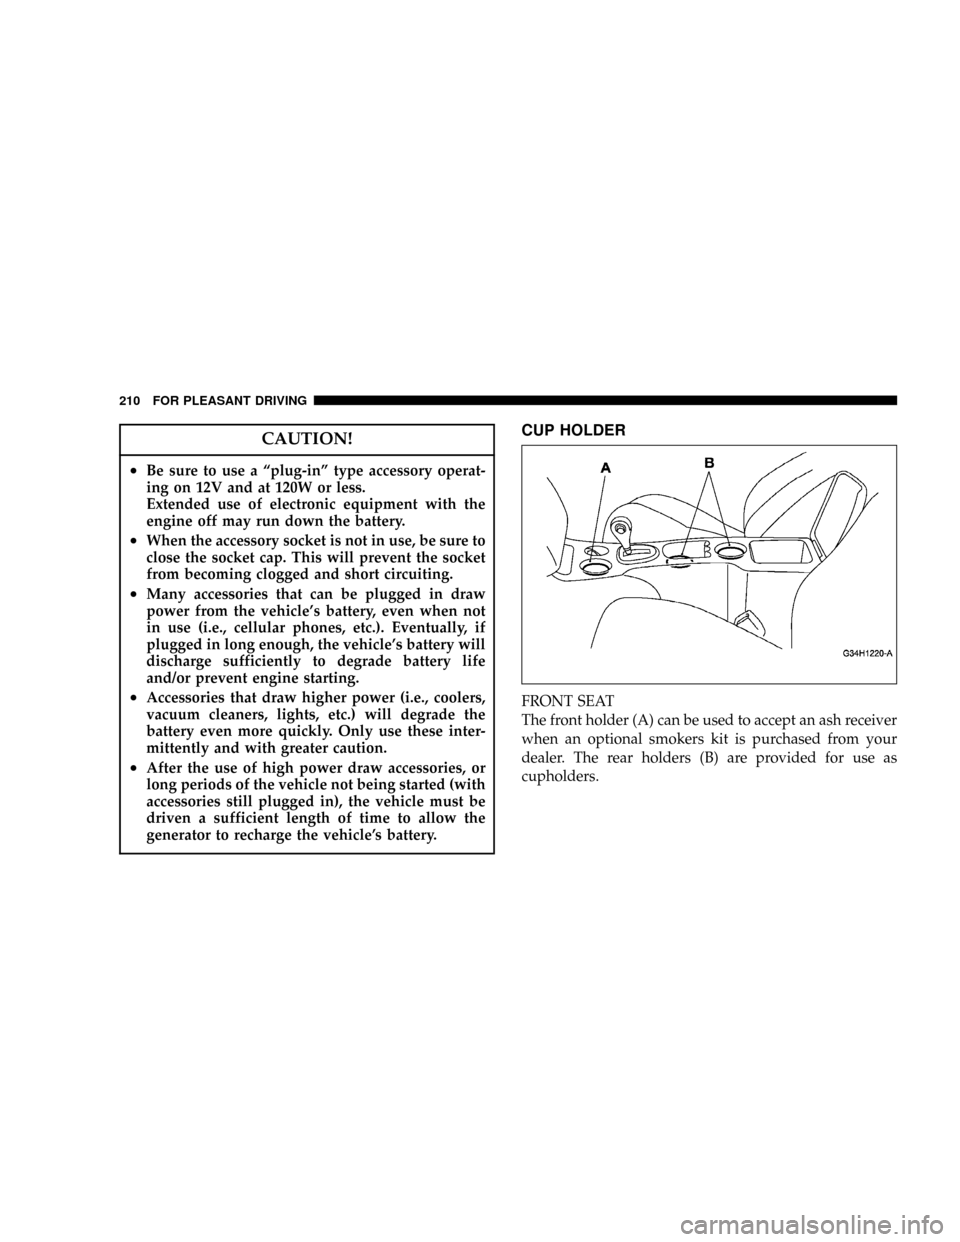
CUP HOLDER
FRONT SEAT
The front holder (A) can be used to accept an ash receiver
when an optional smokers kit is purchased from your
dealer. The rear holders (B) are provided for use as
cupholders.
210 FOR PLEASANT DRIVING