CHRYSLER TOWN AND COUNTRY 2009 5.G Owners Manual
Manufacturer: CHRYSLER, Model Year: 2009, Model line: TOWN AND COUNTRY, Model: CHRYSLER TOWN AND COUNTRY 2009 5.GPages: 543, PDF Size: 6.66 MB
Page 231 of 543
3. Remove the console.
To Reinstall The Basic Floor Console
1. Position the console at a slight angle (front slightly
higher than the rear).
2. Slide the console rearward into the floor bracket/
hook.
3. Align the console until the front anchor cup plug hole
is centered on the winch hole.
4. Reinstall the clip first and then while pushing down-
ward on the console with slight pressure, reinstall the
cover plug.
5. Pull up on the console to be sure it is firmly latched.
WARNING!
In an accident, serious injury could result if the
removable floor console is not properly installed.
Always be sure the removable floor console is fully
latched.
Premium Console — If Equipped
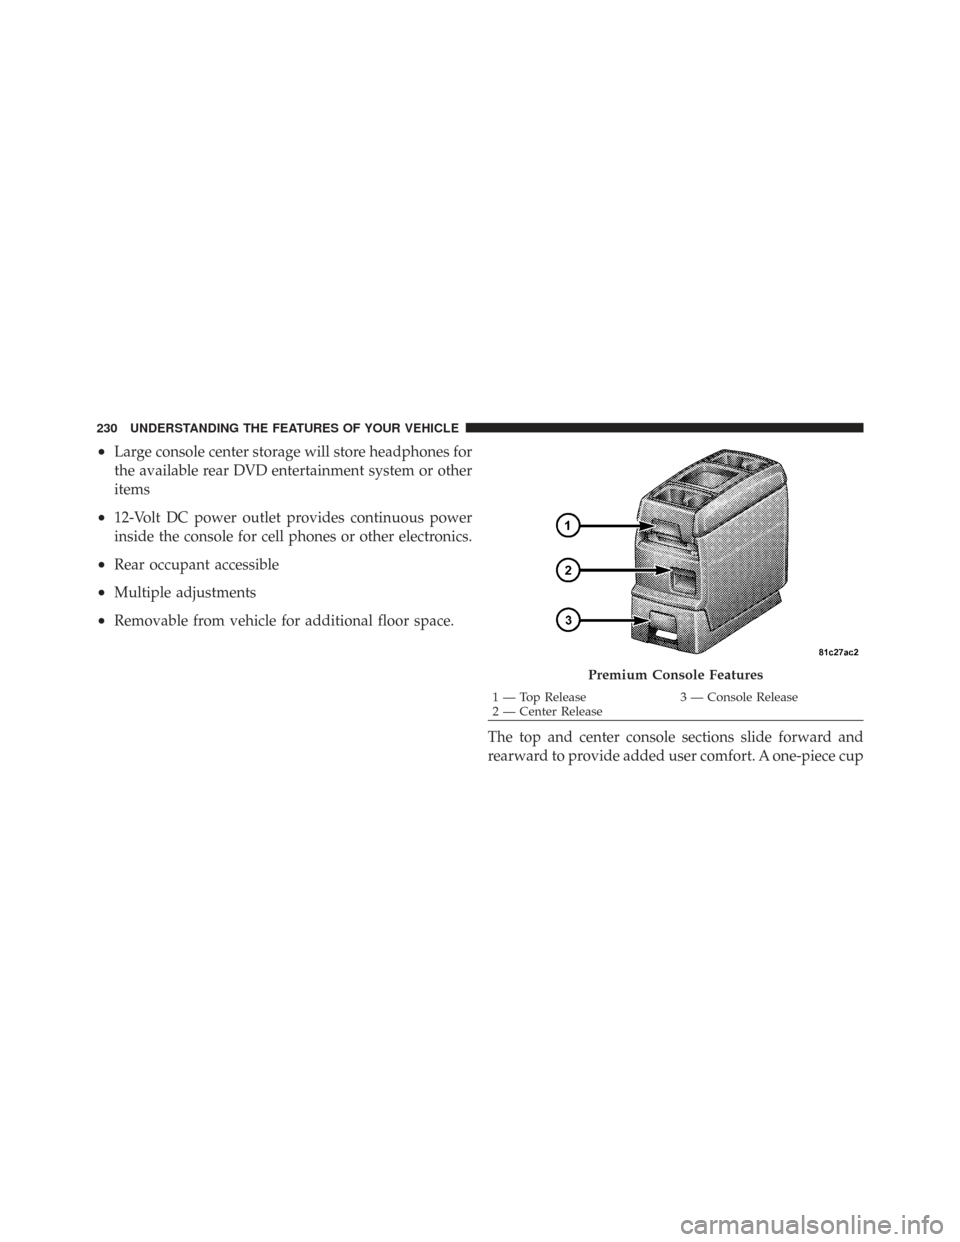
The three-compartment console with sliding storage bin,
sliding upper tray with storage and large console storage
bin offers multiple configurations.
•Four cupholders with dishwasher safe liners for clean-
ing. The cupholders can accept plastic bottles, large
cups or mugs with handles.
•Top tray storage
•Upper storage bin can hold nine regular or 18 thin CDs
or other items
3
UNDERSTANDING THE FEATURES OF YOUR VEHICLE 229
Page 232 of 543
•Large console center storage will store headphones for
the available rear DVD entertainment system or other
items
•12-Volt DC power outlet provides continuous power
inside the console for cell phones or other electronics.
•Rear occupant accessible
•Multiple adjustments
•Removable from vehicle for additional floor space.The top and center console sections slide forward and
rearward to provide added user comfort. A one-piece cup
Premium Console Features
1 — Top Release3 — Console Release
2 — Center Release
230 UNDERSTANDING THE FEATURES OF YOUR VEHICLE
Page 233 of 543
holder insert for both cavities can easily be removed for
cleaning. The cupholders will also accommodate large
size cups and 20 oz (.6 L) bottles.
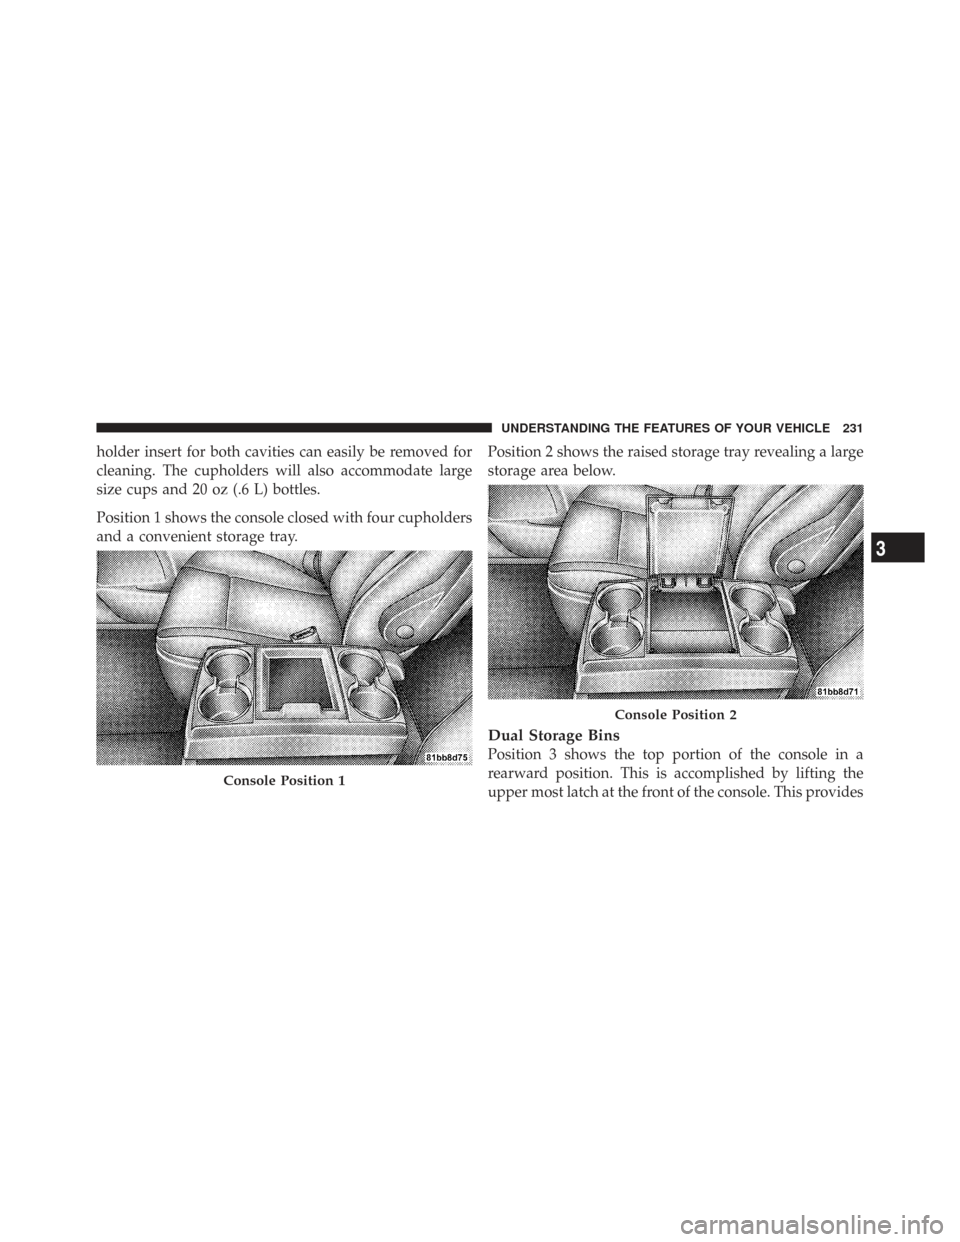
Position 1 shows the console closed with four cupholders
and a convenient storage tray.Position 2 shows the raised storage tray revealing a large
storage area below.
Dual Storage Bins
Position 3 shows the top portion of the console in a
rearward position. This is accomplished by lifting the
upper most latch at the front of the console. This provides
Console Position 1
Console Position 2
3
UNDERSTANDING THE FEATURES OF YOUR VEHICLE 231
Page 234 of 543
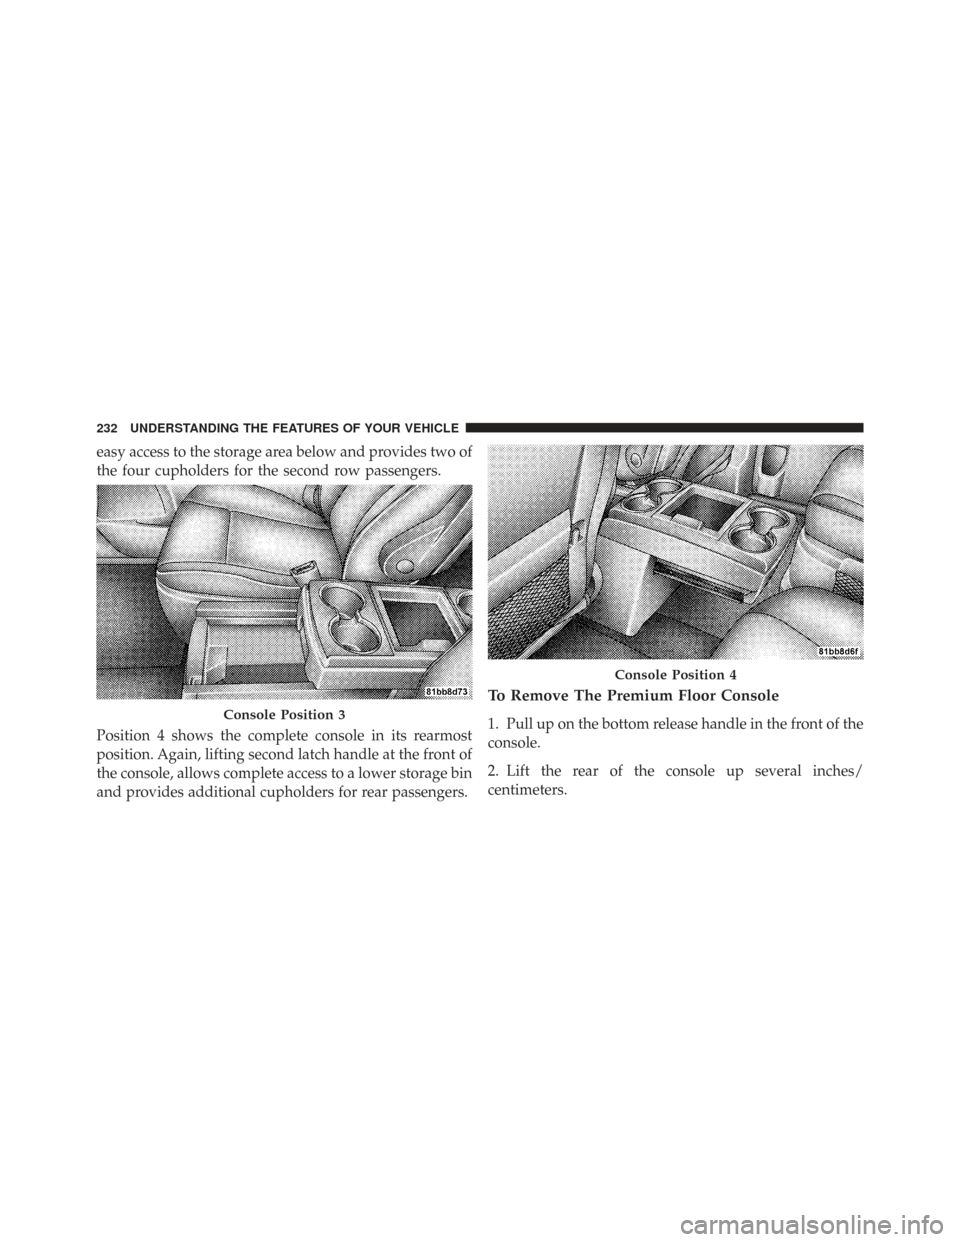
easy access to the storage area below and provides two of
the four cupholders for the second row passengers.
Position 4 shows the complete console in its rearmost
position. Again, lifting second latch handle at the front of
the console, allows complete access to a lower storage bin
and provides additional cupholders for rear passengers.
To Remove The Premium Floor Console
1. Pull up on the bottom release handle in the front of the
console.
2. Lift the rear of the console up several inches/
centimeters.Console Position 3
Console Position 4
232 UNDERSTANDING THE FEATURES OF YOUR VEHICLE
Page 235 of 543
3. Pull rearward to disengage from floor and remove
console.
To reinstall the console:
1. Position the console at a slight angle (rear slightly
higher than the front).
2. Slide the console forward into the floor bracket.
3. Rotate the rear of the console down until it is resting
on the floor bracket.
4. Push down on the rear of the console until it is seated
in the rear floor bracket.
5. Pull up on the console to be sure it is firmly latched.WARNING!
In an accident, serious injury could result if the
removable floor console is not properly installed.
Always be sure the removable floor console is fully
latched.
REAR WINDOW FEATURES
Rear Window Defroster
The rear window defroster button is located on the
climate control (Mode) knob. Press this button to
turn on the rear window defroster and the heated outside
mirrors (if equipped). An indicator in the button will
illuminate when the rear window defroster is on. The
rear window defroster automatically turns off after ap-
proximately 10 minutes. For an additional five minutes of
operation, press the button a second time.
3
UNDERSTANDING THE FEATURES OF YOUR VEHICLE 233
Page 236 of 543
NOTE:
•You can turn off the heated mirror feature at anytime
by pressing the rear window defroster switch a second
time.
•To prevent excessive battery drain, use the rear win-
dow defroster only when the engine is operating.
CAUTION!
Failure to follow these cautions can cause damage to
the heating elements:
•Use care when washing the inside of the rear
window. Do not use abrasive window cleaners on
the interior surface of the window. Use a soft cloth
and a mild washing solution, wiping parallel to
the heating elements. Labels can be peeled off
after soaking with warm water.(Continued)
CAUTION! (Continued)
•Do not use scrapers, sharp instruments, or abra-
sive window cleaners on the interior surface of the
window.
•Keep all objects a safe distance from the window.
LOAD-LEVELING SYSTEM
The automatic load-leveling system will provide a level
riding vehicle under most passenger and cargo loading
conditions.
A hydraulic pump contained within the shock absorbers
raises the rear of the vehicle to the correct height. It takes
approximately 1 mile (1.6 km) of driving for the leveling
to complete depending on road surface conditions.
If the leveled vehicle is not moved for approximately
15 hours, the leveling system will bleed itself down. The
vehicle must be driven to reset the system.
234 UNDERSTANDING THE FEATURES OF YOUR VEHICLE
Page 237 of 543
ROOF LUGGAGE RACK — IF EQUIPPED
The crossbars and side rails are designed to carry the
weight on vehicles equipped with a luggage rack. The
load must not exceed 150 lbs (68 kg), and should be
uniformly distributed over the luggage rack crossbars.
Distribute cargo weight evenly on the roof rack crossbars.
The roof rack does not increase the total load carrying
capacity of the vehicle. Be sure the total load of cargo
inside the vehicle plus that on the external rack does not
exceed the maximum vehicle load capacity.
To move the crossbars, loosen the thumb screws located
at the upper edge of each crossbar approximately six
turns, then move the crossbar to the desired position,
keeping the crossbars parallel to the rack frame. Once the
crossbar is in place, retighten the thumb screws to lock
the crossbar into position.
Attempt to move the crossbar again to ensure that it has
properly locked into position.NOTE:
To help control wind noise when installing the
crossbars make sure the arrows marked on the underside
of the crossbars are facing the front of the vehicle. When
the crossbars are not in use, the front crossbar should be
fastened just forward of the middle support and the rear
crossbar should be fastened at the rearmost position of
the side rails. This will help reduce the amount of wind
noise when the crossbars are not in use.
The tie down holes on the crossbar ends should always
be used to tie down the load. Check the straps frequently
to be sure that the load remains securely attached.
CAUTION!
•Crossbars should remain equally spaced or paral-
lel at any luggage rack position for proper func-
tion. Noncompliance could result in damage to the
luggage rack, cargo and/or vehicle.
(Continued)
3
UNDERSTANDING THE FEATURES OF YOUR VEHICLE 235
Page 238 of 543
CAUTION! (Continued)
•To avoid damage to the roof rack and vehicle, do
not exceed the maximum roof rack load capacity of
150 lbs (68 kg). Always distribute heavy loads as
evenly as possible and secure the load appropri-
ately.
•Long loads which extend over the windshield,
such as wood panels or surfboards, or loads with
large frontal area should be secured to both the
front and rear of the vehicle.
•Travel at reduced speeds and turn corners care-
fully when carrying large or heavy loads on the
roof rack. Wind forces, due to natural causes or
nearby truck traffic, can add sudden upward lift to
a load. This is especially true on large flat loads
and may result in damage to the cargo or your
vehicle.
WARNING!
Cargo must be securely tied before driving your
vehicle. Improperly secured loads can fly off the
vehicle, particularly at high speeds, resulting in per-
sonal injury or property damage. Follow the Roof
Rack Cautions when carrying cargo on your roof
rack.
SUN SCREENS — IF EQUIPPED
Sun screens are available for second and third row
seating windows. The screens store in the sill trim panels,
and the tops of the windows are equipped with hooks
that the sun screens attach to when pulled out.
236 UNDERSTANDING THE FEATURES OF YOUR VEHICLE
Page 239 of 543
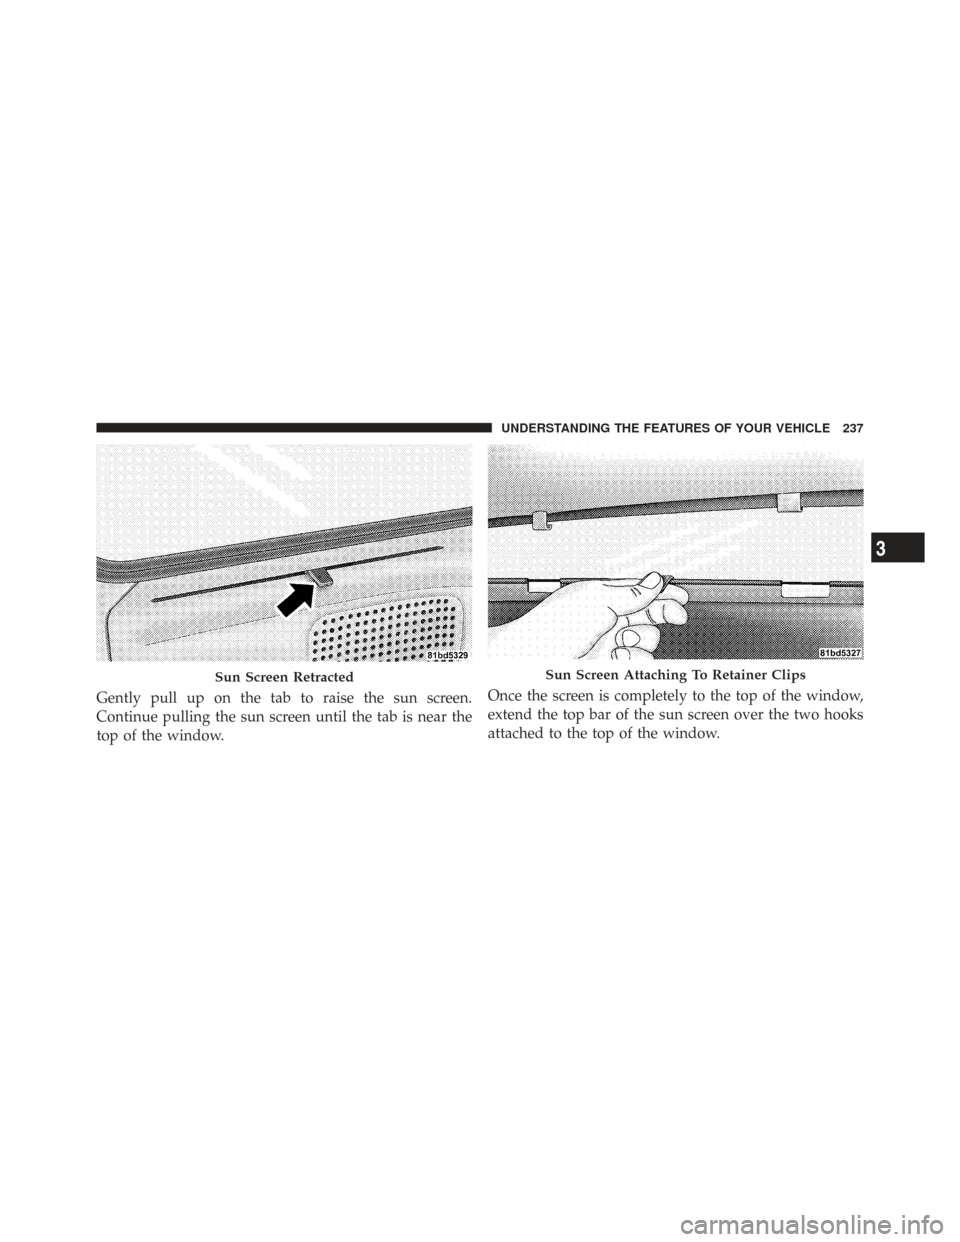
Gently pull up on the tab to raise the sun screen.
Continue pulling the sun screen until the tab is near the
top of the window.Once the screen is completely to the top of the window,
extend the top bar of the sun screen over the two hooks
attached to the top of the window.
Sun Screen RetractedSun Screen Attaching To Retainer Clips
3
UNDERSTANDING THE FEATURES OF YOUR VEHICLE 237
Page 240 of 543
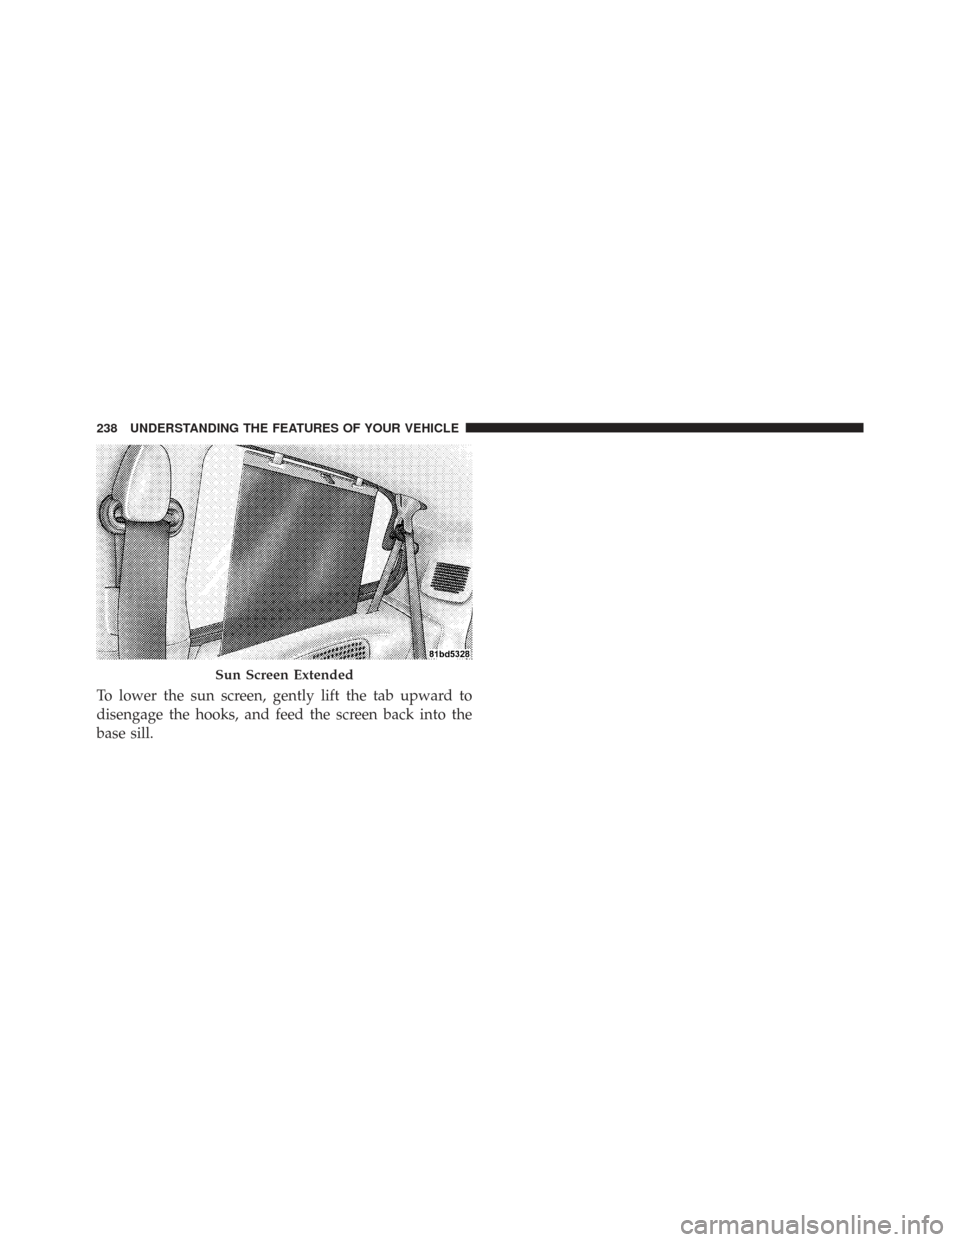
To lower the sun screen, gently lift the tab upward to
disengage the hooks, and feed the screen back into the
base sill.
Sun Screen Extended
238 UNDERSTANDING THE FEATURES OF YOUR VEHICLE