ABS CHRYSLER TOWN AND COUNTRY 2012 5.G User Guide
[x] Cancel search | Manufacturer: CHRYSLER, Model Year: 2012, Model line: TOWN AND COUNTRY, Model: CHRYSLER TOWN AND COUNTRY 2012 5.GPages: 132, PDF Size: 3.41 MB
Page 8 of 132

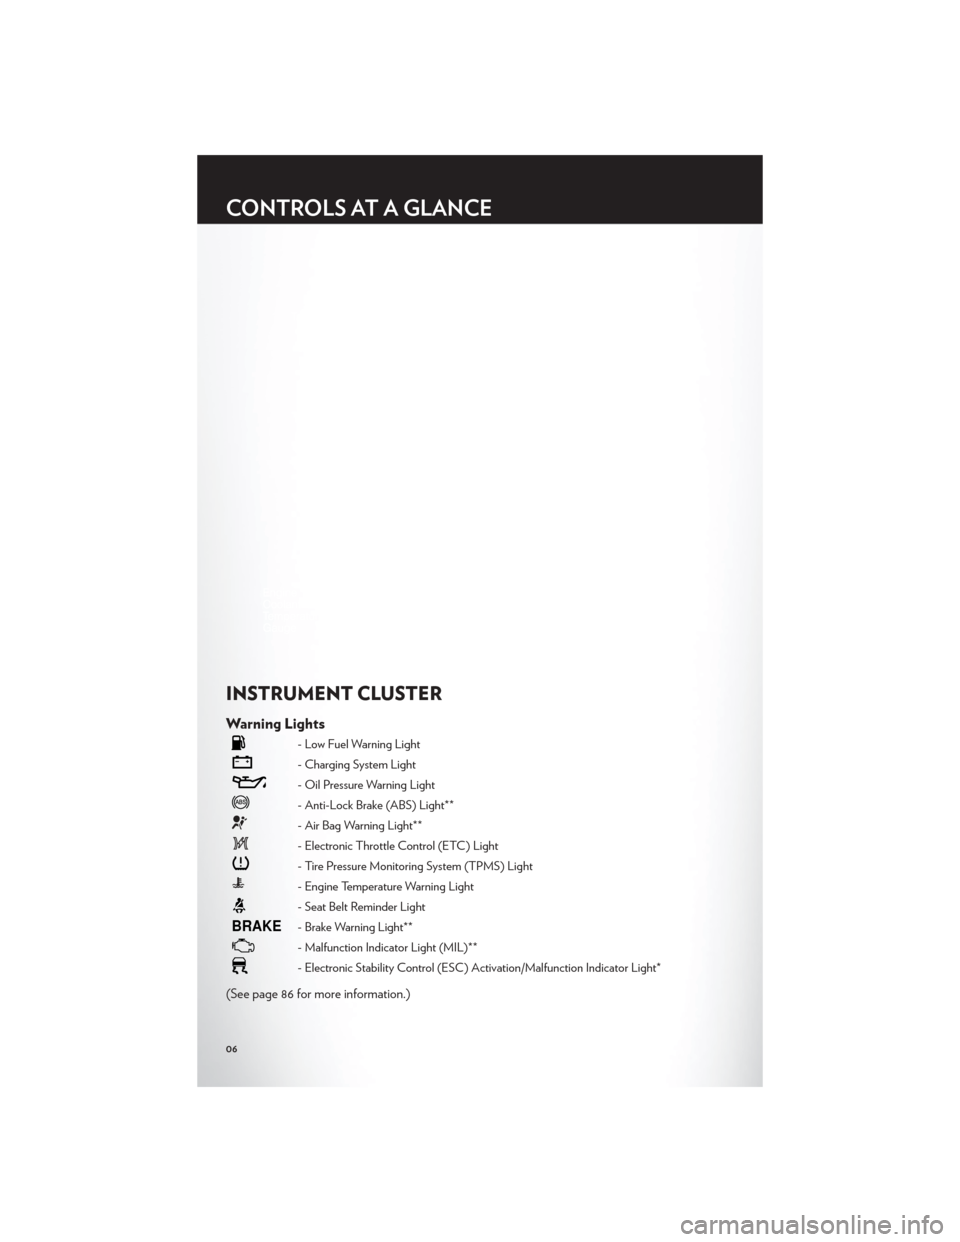
INSTRUMENT CLUSTER
Warning Lights
- Low Fuel Warning Light
- Charging System Light
- Oil Pressure Warning Light
- Anti-Lock Brake (ABS) Light**
- Air Bag Warning Light**
- Electronic Throttle Control (ETC) Light
- Tire Pressure Monitoring System (TPMS) Light
- Engine Temperature Warning Light
- Seat Belt Reminder Light
BRAKE- Brake Warning Light**
- Malfunction Indicator Light (MIL)**
- Electronic Stability Control (ESC) Activation/Malfunction Indicator Light*
(See page 86 for more information.)
CONTROLS AT A GLANCE
06
Page 51 of 132

CD/DVD Disc Operation
• Press the “MEDIA” hard key to display the media source tabs at the top of the screen.Select the source by touching the “HDD,” “DISC,” or “AUX” media source soft-key tab.
NOTE:Your Touch-Screen Radio will usually automatically switch to the appropriate mode
when something is first connected or inserted into the system.
Insert a CD/DVD Disc
• To insert a disc, press the “LOAD” hard-key.
• With the printed side upwards, insert the disc into the disc slot of the radio. The radio pulls the disc in automatically and closes the flip screen. The radio selects the appropriate
mode after the disc is recognized, and starts playing the first track. The display shows
“Reading...” during this process.
Seek Up/Seek Down
• Press the “Seek Up” or “Seek Down” soft-keys to seek through tracks in Disc Mode. Holdeither Seek to bypass tracks without stopping.
Audio Jack Operation
• The Audio Jack allows a portable device, such as an MP3 player or a cassette player, tobe plugged into the radio and utilize the vehicle’s audio system, using a 3.5 mm audio
cable, to amplify the source and play through the vehicle speakers.
• Pressing the “MEDIA” hard-key and then the “AUX” soft-key to change the mode to auxiliary device if the Audio Jack is connected, allowing the music from your portable
device to play through the vehicle's speakers.
ELECTRONICS
49
Page 54 of 132

Playing Music From The HDD
• Press the “MEDIA” hard key to display themedia source tabs at the top of the screen.
Touch the “HDD” soft-key tab. Touch the
desired track soft-key to play or touch the
“SEARCH/BROWSE” soft-key to search
by artist, by album, by song, by genre,
from a folder, or from Favorites.
Cleaning Your Touch-Screen Radio
• Do not spray any liquid or caustic chemicals directly on the screen. Use a clean and drymicro fiber lens cleaning cloth in order to clean the touch-screen.
• If necessary, use a lint-free cloth dampened with a cleaning solution such as isopropyl alcohol or an isopropyl alcohol and water solution ratio of 50:50. Be sure to follow the
solvent manufacturer's precautions and directions.
Garmin® Navigation
• Media Center 430N integrates Garmin’s consumer-friendly navigation into your vehicle.Garmin Navigation includes a database with over 6 million points of interest.
• Touch the “NAV” soft-key in the upper right corner of the screen to access the Navigation system.
NOTE:For your own safety and the safety of others, it is not possible to use certain features
while the vehicle is in motion.
ELECTRONICS
52
Page 60 of 132

CD/DVD Disc Operation
• Press the “RADIO/MEDIA” hard key until the media source tabs are displayed at the topof the screen. Select the source by touching the “HDD,” “DISC,” or “AUX” media source
soft-key tab.
NOTE:Your Touch-Screen Radio will usually automatically switch to the appropriate mode
when something is first connected or inserted into the system.
Insert a CD/DVD Disc
• To insert a disc, press the “OPEN/CLOSE” hard-key.
• With the printed side upwards, insert the disc into the disc slot of the radio. The radio pulls the disc in automatically and closes the flip screen. The radio selects the appropriate
mode after the disc is recognized, and starts playing the first track. The display shows
“Reading...” during this process.
Seek Up/Seek Down
• Press the “Seek Up” or “Seek Down” hard-keys to seek through tracks in Disc Mode. Holdeither Seek to bypass tracks without stopping.
Audio Jack Operation
• The Audio Jack allows a portable device, such as an MP3 player or a cassette player, tobe plugged into the radio and utilize the vehicle’s audio system, using a 3.5 mm audio
cable, to amplify the source and play through the vehicle speakers.
• Pressing the “RADIO/MEDIA” hard-key and then the “AUX” soft-key to change the mode to auxiliary device if the Audio Jack is connected, allowing the music from your
portable device to play through the vehicle's speakers.
ELECTRONICS
58
Page 65 of 132

NOTE:
• A check mark in the My Pictures screen indicates the currently used picture.
• You can also delete pictures by touching the “Delete” soft-key.
Playing Music From The HDD
• Press the “RADIO/MEDIA” hard key untilthe media source tabs are displayed at the
top of the screen. Touch the “HDD”
soft-key tab. Touch the desired track
soft-key to play or touch the
“SEARCH/BROWSE” soft-key to search
by artist, by album, by song, by genre,
from a folder, or from Favorites.
Cleaning Your Touch-Screen Radio
• Do not spray any liquid or caustic chemicals directly on the screen. Use a clean and drymicro fiber lens cleaning cloth in order to clean the touch-screen.
• If necessary, use a lint-free cloth dampened with a cleaning solution such as isopropyl alcohol or an isopropyl alcohol and water solution ratio of 50:50. Be sure to follow the
solvent manufacturer's precautions and directions.
NAVIGATION
• Your navigation system receives GPS signals from up to 16 satellites to display theposition of your vehicle. Map and database information is supplied through a hard disk
drive.
• Touch the “NAV” hard-key on the radio face plate to access the Navigation system and the NAV – Main Menu.
NOTE:For your own safety and the safety of others, it is not possible to use certain features
while the vehicle is in motion.
ELECTRONICS
61
Page 93 of 132

- Anti-Lock Brake (ABS) Light
• This light monitors the Anti-Lock Brake System (ABS).
• If the light is not on during starting, stays on, or turns on while driving, we recommendyou drive to the nearest service center and have the vehicle serviced immediately.
- Electronic Throttle Control (ETC) Light
• This light informs you of a problem with the Electronic Throttle Control (ETC) system.
• If a problem is detected, the light will come on while the engine is running. Cycle theignition when the vehicle has completely stopped and the shift lever is placed in the
PARK position; the light should turn off.
• If the light remains lit with the engine running, your vehicle will usually be drivable; however, see an authorized service center immediately. If the light is flashing when the
engine is running, immediate service is required and you may experience reduced
performance, an elevated/rough idle or engine stall and your vehicle may require towing.
- Air Bag Warning Light
• If the light is not on during starting, stays on, or turns on while driving, have the vehicleserviced by an authorized service center immediately.
Fuel Cap/Loose Gas Cap Message
• If a “gas cap” message (shown as gASCAP) appears, tighten the gas cap until a “clicking”sound is heard.
• Press the odometer reset button to turn the message off.
• If the message continues to appear for more than three days after tightening the gas cap, see your authorized service center.
Oil Change Indicator
Message
• If an “oil change” message (shown as CHAnGE OIL) appears and a single chime sounds,it is time for your next required oil change.
Resetting The Light After Servicing
Vehicles Equipped With Keyless Enter-N-Go™
• Without pressing the brake pedal, push the ENGINE START/STOP button and cycle theignition to the ON/RUN position (Do not start the engine.)
• Fully depress the accelerator pedal, slowly, three times within 10 seconds.
• Without pressing the brake pedal, push the ENGINE START/STOP button once to return the ignition to the OFF/LOCK position.
Vehicles Not Equipped With Keyless Enter-N-Go™
• Turn the ignition switch to the ON/RUN position (Do not start the engine.)
• Fully depress the accelerator pedal, slowly, three times within 10 seconds.
• Turn the ignition switch to the OFF/LOCK position.
WHAT TO DO IN EMERGENCIES
89
Page 98 of 132

Spare Tire Removal Instructions
• The spare tire is located under the vehicle beneath the center console area.1. Assemble the spare tire tools into aT-handle and place the square end over
the spare tire winch drive nut.
2. Rotate the nut to the left until the winch mechanism stops turning freely. This will
allow enough slack in the cable to allow
you to pull the spare tire out from
underneath the vehicle.
3. Assemble the winch handle extensions to form the spare tire hook, and pull the
spare tire from under the vehicle.
NOTE:If either front tire is flat it may be
necessary to jack up the vehicle to remove
the compact spare tire/cover assembly from
under the vehicle.
4. Stand the tire/cover assembly upright and remove the wheel spacer by
squeezing the winch retaining tabs
together. Push the retainer through the
spare tire to release it from the wheel.
WHAT TO DO IN EMERGENCIES
94
Page 100 of 132

Jacking Instructions
1. Loosen (but do not remove) the wheellug nuts by turning them to the left one
turn while the wheel is still on the ground.
2. There are two jack engagement locations on each side of the vehicle body. These
locations are on the sill flange of the
vehicle body.
Rear jack locations are between a pair of
down-facing tabs on the sill flange of the
vehicle side body.
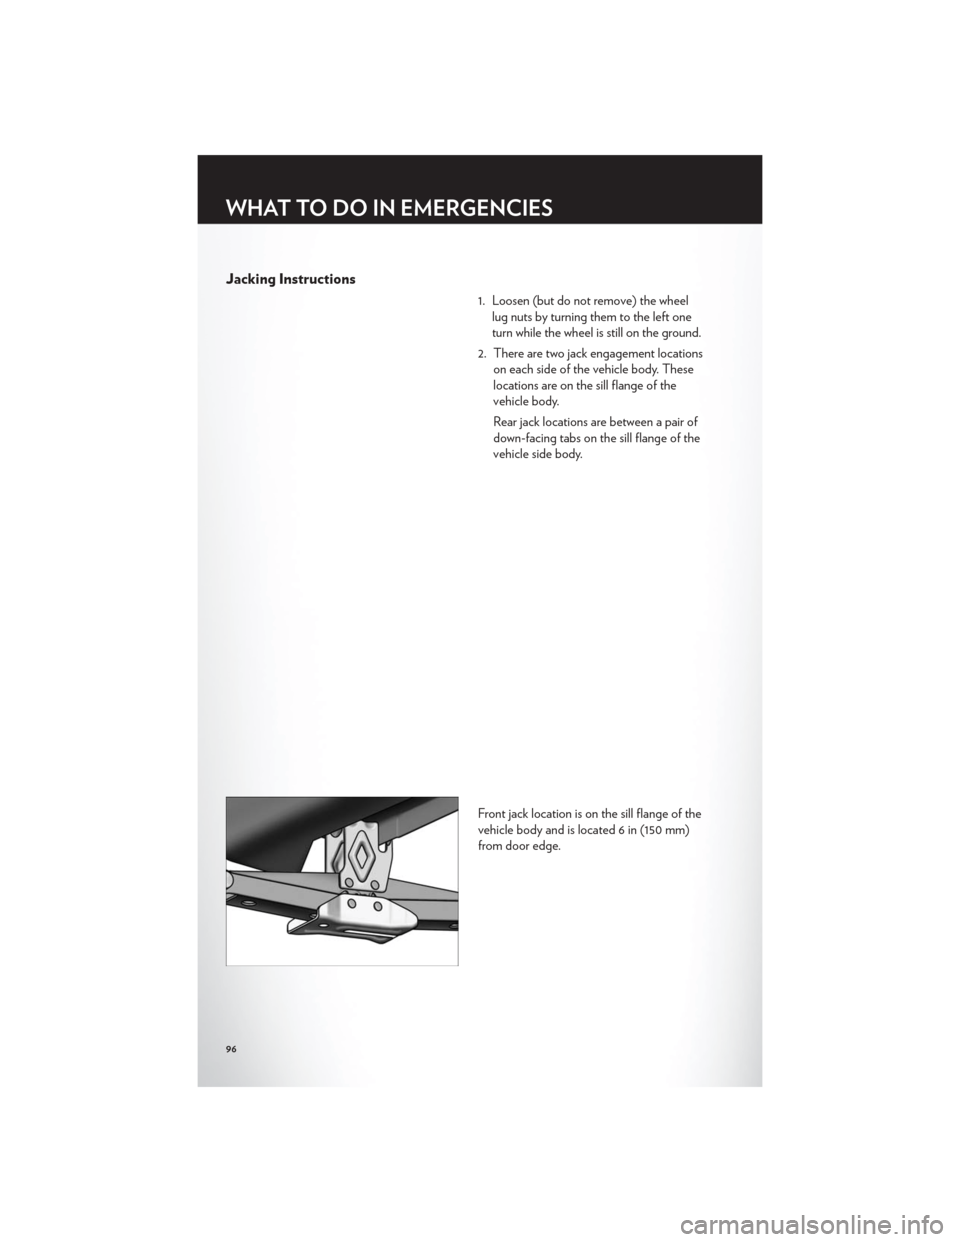
Front jack location is on the sill flange of the
vehicle body and is located 6 in (150 mm)
from door edge.
WHAT TO DO IN EMERGENCIES
96
Page 102 of 132

NOTE:Refer to the “Spare Tire Tools” section for instructions on assembling the T-handle.
12. Stow the jack, jack handle and winch handle tools back in the stowage compartment.
13. Check the compact spare tire pressure as soon as possible. Correct the tire pressure, as required.
Securing The Spare Tire
1. Assemble the winch handle extensions to form a T-handle and fit the winch T-handleover the drive nut. Rotate the nut to the left until the winch mechanism stops turning
freely. This will allow enough slack in the cable to allow you to pull the wheel spacer out
from under the vehicle.
2. Assemble the winch handle extensions to form the spare tire hook, and pull the wheel spacer from under the vehicle.
3. Turn the compact spare tire so that the valve stem is down, and place the tire into the spare tire/cover assembly. Slide the wheel spacer through the center of the wheel and
spare tire/cover assembly, so that the two retainer tabs snap out and engage the spare
tire cover on the opposite side.
4. Using the winch T-handle, rotate the drive nut to the right until the compact spare tire/cover assembly is drawn into place against the underside of the vehicle.
5. Continue to rotate the nut to the right until you hear the winch mechanism click three times. It cannot be overtightened. Check under the vehicle to ensure the compact spare
tire/cover assembly is positioned correctly against the underside of the vehicle.
Road Tire Installation
Vehicles Equipped With Wheel Covers
1. Mount the road tire on the axle.
2. To ease the installation process for steel wheels with wheel covers, install two lug nuts onthe mounting studs which are on each side of the valve stem. Install the lug nuts with the
cone shaped end of the nut toward the wheel. Lightly tighten the lug nuts.
3. Align the valve notch in the wheel coverwith the valve stem on the wheel. Install
the cover by hand, snapping the cover
over the two lug nuts. Do not use a
hammer or excessive force to install the
cover.
4. Install the remaining lug nuts with the cone shaped end of the nut toward the
wheel. Lightly tighten the lug nuts.
5. Lower the vehicle to the ground by turning the jack handle counterclockwise.
1 — Valve Stem 4 — Wheel Cover
2 — Valve Notch 5 — Mounting Stud
3 — Wheel Lug Nut
WHAT TO DO IN EMERGENCIES
98
Page 104 of 132

WARNING!
• Do not attempt to change a tire on the side of the vehicle close to moving traffic. Pull farenough off the road to avoid the danger of being hit when operating the jack or
changing the wheel.
• Being under a jacked-up vehicle is dangerous. The vehicle could slip off the jack and fall on you. You could be crushed. Never put any part of your body under a vehicle that is on
a jack. If you need to get under a raised vehicle, take it to a service center where it can be
raised on a lift.
• Never start or run the engine while the vehicle is on a jack.
• The jack is designed to be used as a tool for changing tires only. The jack should not be used to lift the vehicle for service purposes. The vehicle should be jacked on a firm level
surface only. Avoid ice or slippery areas.
• Carefully follow these tire changing warnings to help prevent personal injury or damage to your vehicle:
• Always park on a firm, level surface as far from the edge of the roadway as possible before raising the vehicle.
• Turn on the Hazard Warning flasher.
• Block the wheel diagonally opposite the wheel to be raised.
• Set the parking brake firmly and set an automatic transmission in PARK; a manual transmission in REVERSE.
• Never start or run the engine with the vehicle on a jack.
• Do not let anyone sit in the vehicle when it is on a jack.
• Do not get under the vehicle when it is on a jack.
• Only use the jack in the positions indicated and for lifting this vehicle during a tire change.
• If working on or near a roadway, be extremely careful of motor traffic.
• To assure that spare tires, flat or inflated, are securely stowed, spares must be stowed with the valve stem facing the ground.
• Raising the vehicle higher than necessary can make the vehicle less stable. It could slip off the jack and hurt someone near it. Raise the vehicle only enough to remove the tire.
• To avoid the risk of forcing the vehicle off the jack, do not tighten the wheel nuts fully until the vehicle has been lowered. Failure to follow this warning may result in personal
injury.
• A loose tire or jack thrown forward in a collision or hard stop could endanger the occupants of the vehicle. Always stow the jack parts and the spare tire in the places
provided. Have the deflated (flat) tire repaired or replaced immediately.
• Verify that both retainer tabs of the wheel spacer have been properly extended through the center of the wheel and spare tire/cover assembly. Failure to properly engage both
retainer tabs could result in loss of the spare tire and cover assembly, which will cause
vehicle damage and may cause loss of vehicle control.
WHAT TO DO IN EMERGENCIES
100