radio controls CHRYSLER TOWN AND COUNTRY 2015 5.G Owners Manual
[x] Cancel search | Manufacturer: CHRYSLER, Model Year: 2015, Model line: TOWN AND COUNTRY, Model: CHRYSLER TOWN AND COUNTRY 2015 5.GPages: 726, PDF Size: 20.14 MB
Page 159 of 726
Uconnect® Phone Button
The radio or steering wheel controls (if
equipped) will contain the two control buttons
(Uconnect® Phonebutton and Voice Com-
mandbutton) that will enable you to
access the system. When you push the button you will
hear the word Uconnect® followed by a BEEP. The
beep is your signal to give a command.
Voice Command Button
Actual button location may vary with the ra-
dio. The individual buttons are described in the
“Operation” section.
The Uconnect® Phone can be used with any Hands-Free
Profile certified Bluetooth® mobile phone. See the
Uconnect® website for supported phones. Refer to your
mobile service provider or the phone manufacturer for
details.
The Uconnect® Phone is fully integrated with the vehi-
cle’s audio system. The volume of the Uconnect® Phone
can be adjusted either from the radio volume control
knob or from the steering wheel radio control (right
switch), if so equipped.
The radio display will be used for visual prompts from
the Uconnect® Phone such as “CELL” or caller ID on
certain radios.
Operation
Voice commands can be used to operate the Uconnect®
Phone and to navigate through the Uconnect® Phone
menu structure. Voice commands are required after most
Uconnect® Phone prompts. You will be prompted for a
specific command and then guided through the available
options.
3
UNDERSTANDING THE FEATURES OF YOUR VEHICLE 157
Page 321 of 726
!STEERING WHEEL AUDIO CONTROLS — IF
EQUIPPED...........................447
▫Radio Operation......................447
▫CD Player...........................448
!CD/DVD/Blu-ray™ Disc MAINTENANCE . . . .448
!RADIO OPERATION AND MOBILE PHONES . .449
▫General Information...................449
!CLIMATE CONTROLS...................449
▫Manual Heating And Air Conditioning
System — If Equipped.................450
▫Rear Manual Climate Control — If Equipped . .455
▫Automatic Temperature Control (ATC) — If
Equipped...........................457
▫Operating Tips.......................4694
UNDERSTANDING YOUR INSTRUMENT PANEL 319
Page 322 of 726
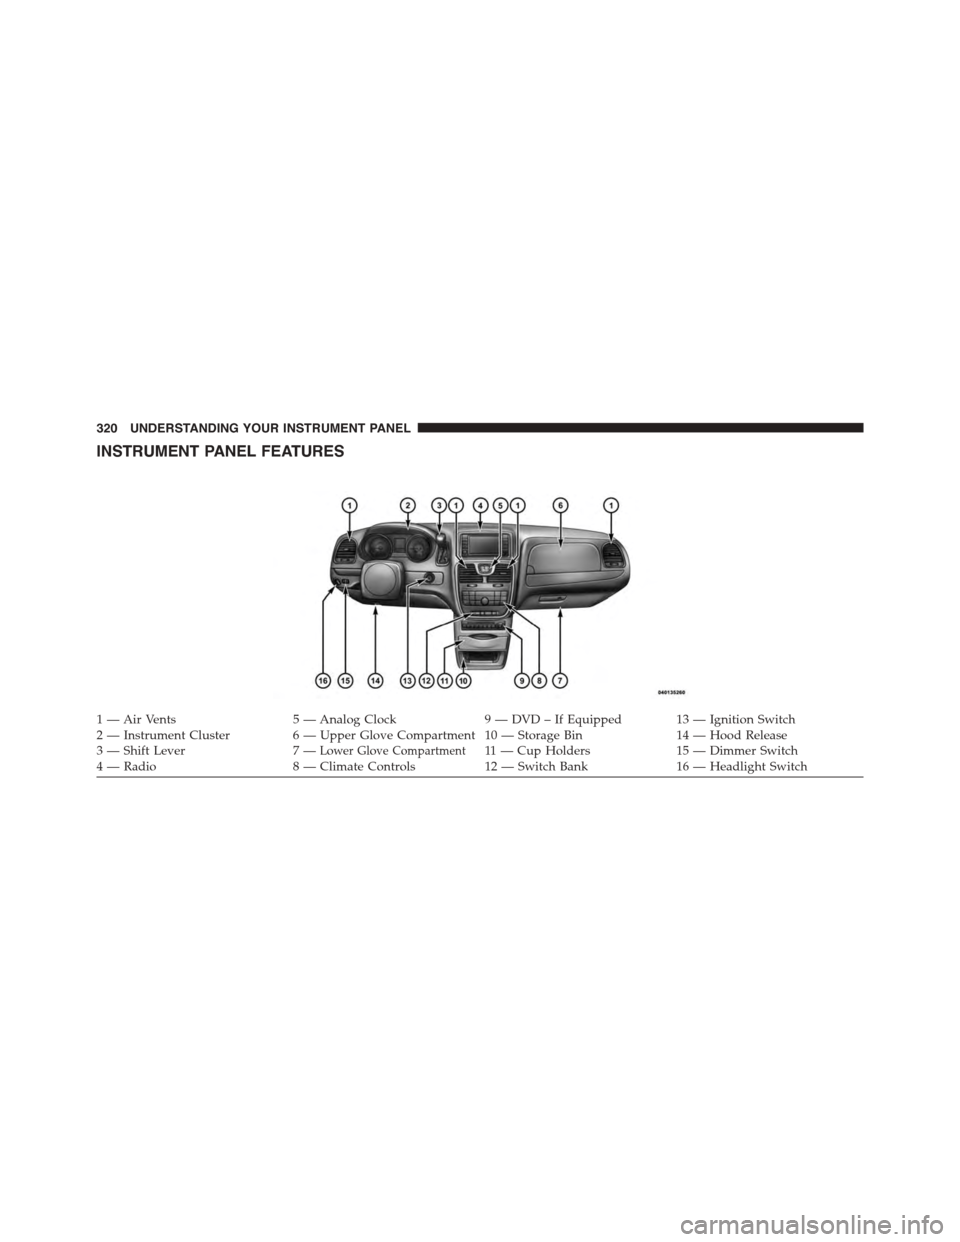
INSTRUMENT PANEL FEATURES
1 — Air Vents5 — Analog Clock9 — DVD – If Equipped 13 — Ignition Switch2 — Instrument Cluster6 — Upper Glove Compartment 10 — Storage Bin14 — Hood Release3 — Shift Lever7—Lower Glove Compartment11 — Cup Holders15 — Dimmer Switch4 — Radio8 — Climate Controls12 — Switch Bank16 — Headlight Switch
320 UNDERSTANDING YOUR INSTRUMENT PANEL
Page 404 of 726
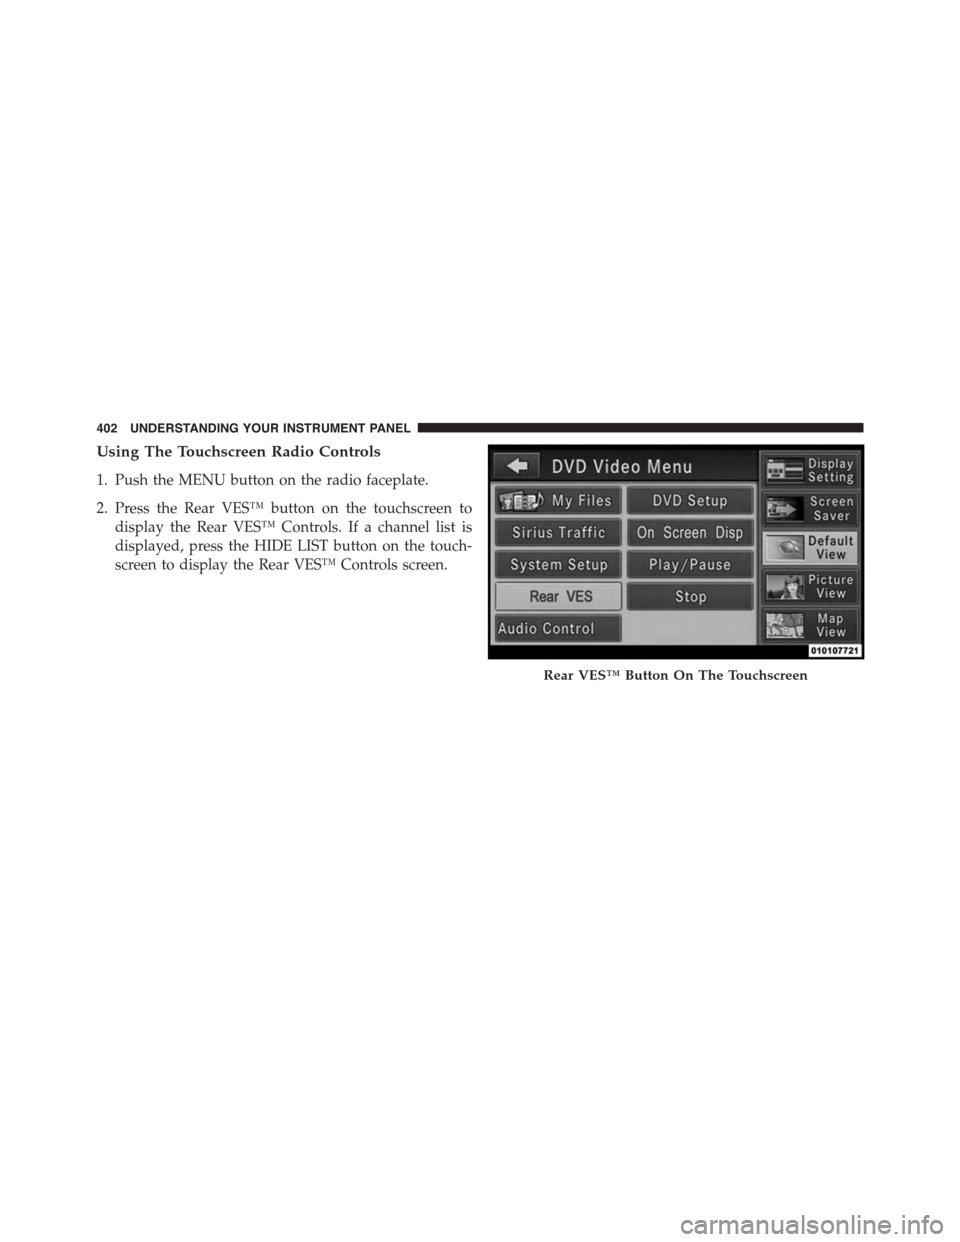
Using The Touchscreen Radio Controls
1. Push the MENU button on the radio faceplate.
2. Press the Rear VES™ button on the touchscreen to
display the Rear VES™ Controls. If a channel list is
displayed, press the HIDE LIST button on the touch-
screen to display the Rear VES™ Controls screen.
Rear VES™ Button On The Touchscreen
402 UNDERSTANDING YOUR INSTRUMENT PANEL
Page 406 of 726
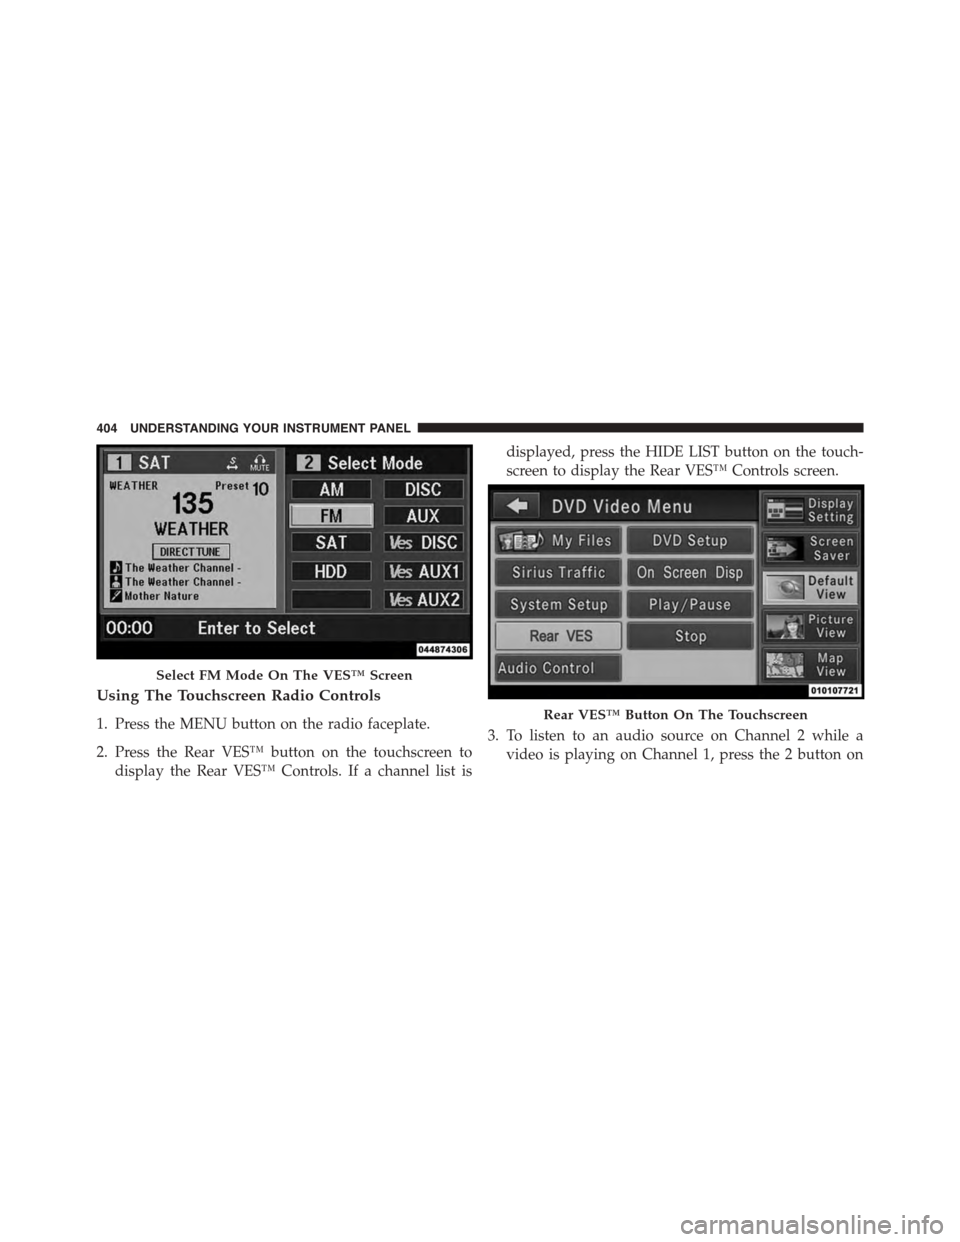
Using The Touchscreen Radio Controls
1. Press the MENU button on the radio faceplate.
2. Press the Rear VES™ button on the touchscreen to
display the Rear VES™ Controls. If a channel list is
displayed, press the HIDE LIST button on the touch-
screen to display the Rear VES™ Controls screen.
3. To listen to an audio source on Channel 2 while a
video is playing on Channel 1, press the 2 button on
Select FM Mode On The VES™ Screen
Rear VES™ Button On The Touchscreen
404 UNDERSTANDING YOUR INSTRUMENT PANEL
Page 409 of 726
NOTE:
•Channel/Screen 1 select mode information is shown
on the left side of the screen.
•Channel/Screen 2 select mode information is shown
on the right side of the screen.
•The VES™ will retain the last setting when turned off.
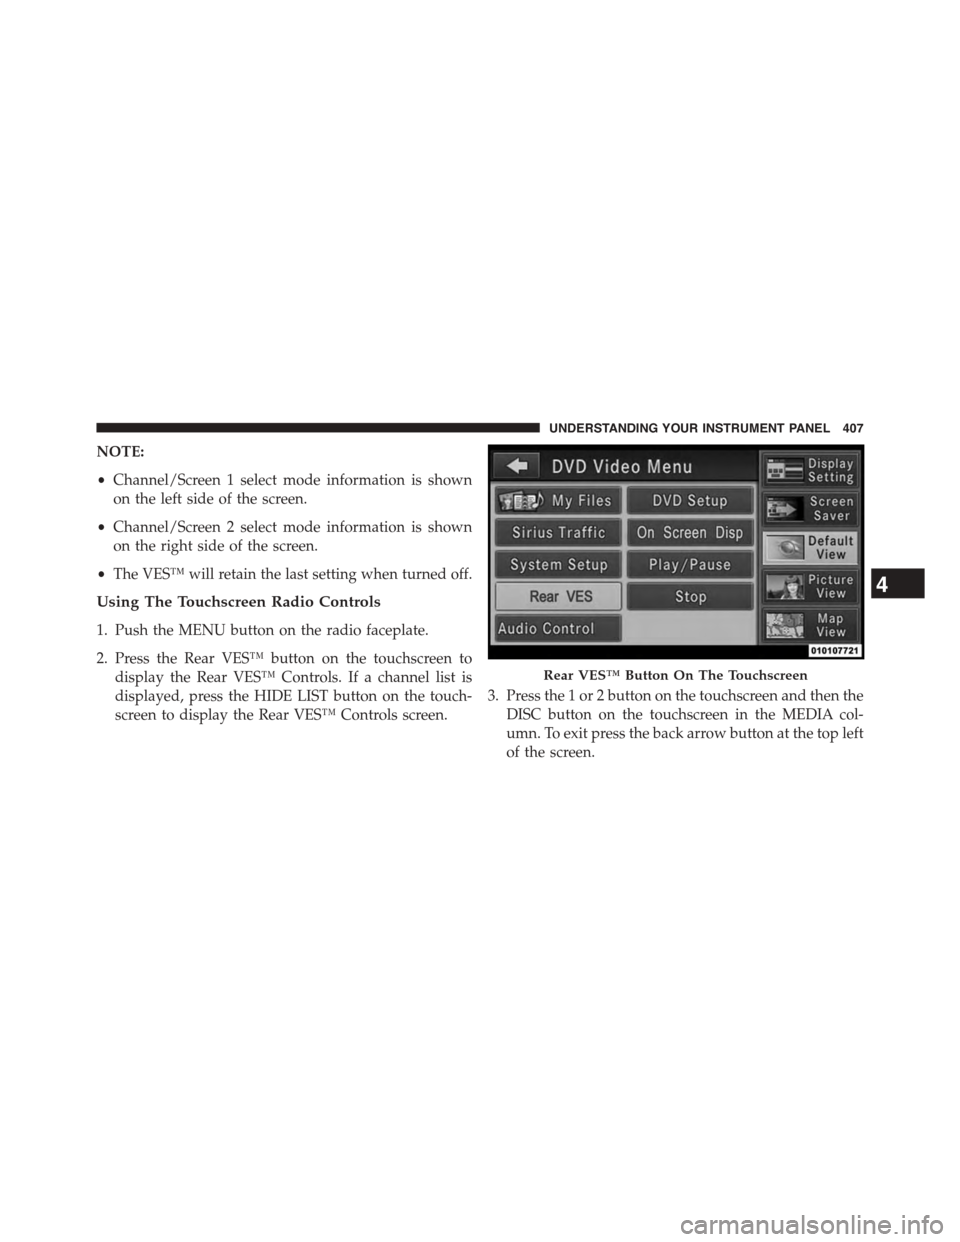
Using The Touchscreen Radio Controls
1. Push the MENU button on the radio faceplate.
2. Press the Rear VES™ button on the touchscreen to
display the Rear VES™ Controls. If a channel list is
displayed, press the HIDE LIST button on the touch-
screen to display the Rear VES™ Controls screen.
3. Press the 1 or 2 button on the touchscreen and then the
DISC button on the touchscreen in the MEDIA col-
umn. To exit press the back arrow button at the top left
of the screen.
Rear VES™ Button On The Touchscreen
4
UNDERSTANDING YOUR INSTRUMENT PANEL 407
Page 412 of 726
NOTE:
•Channel/Screen 1 select mode information is shown
on the left side of the screen.
•Channel/Screen 2 select mode information is shown
on the right side of the screen.
•The VES™ will retain the last setting when turned off.
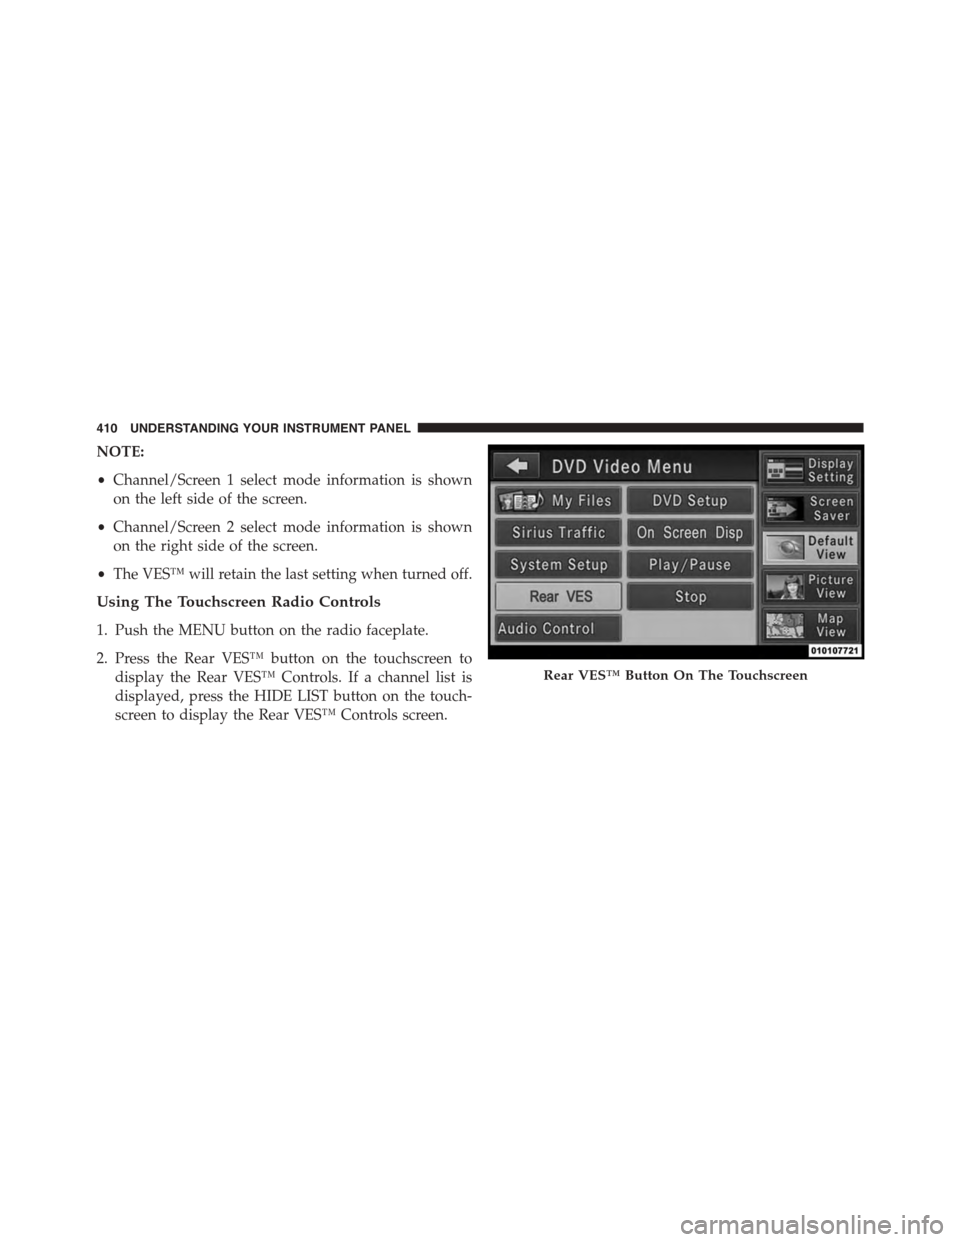
Using The Touchscreen Radio Controls
1. Push the MENU button on the radio faceplate.
2. Press the Rear VES™ button on the touchscreen to
display the Rear VES™ Controls. If a channel list is
displayed, press the HIDE LIST button on the touch-
screen to display the Rear VES™ Controls screen.
Rear VES™ Button On The Touchscreen
410 UNDERSTANDING YOUR INSTRUMENT PANEL
Page 415 of 726
Using The Touchscreen Radio Controls
1. Push the MENU button on the radio faceplate.
2. Press the Rear VES™ button on the touchscreen to
display the Rear VES™ Controls. If a channel list is
displayed, press the HIDE LIST button on the touch-
screen to display the Rear VES™ Controls screen.
3. Press the 1 or 2 button on the touchscreen and then the
VES™ Disc button on the touchscreen in the VES™
column. To exit press the back arrow button at the top
left of the screen.
NOTE:
•To view a Blu-ray™ Disc on the radio, push the
RADIO/MEDIA button on the radio faceplate, then
press the VES™ Disc tab button on the touchscreen
and then the VIEW VIDEO button on the touchscreen.
•Viewing a Blu-ray™ Disc on the Touchscreen radio
screen is not available in all states/provinces. If avail-
able, the vehicle must be stopped and the shift lever
must be in the PARK position for vehicles with an
automatic transmission. In vehicles with a manual
transmission the parking brake must be engaged.
4
UNDERSTANDING YOUR INSTRUMENT PANEL 413
Page 417 of 726
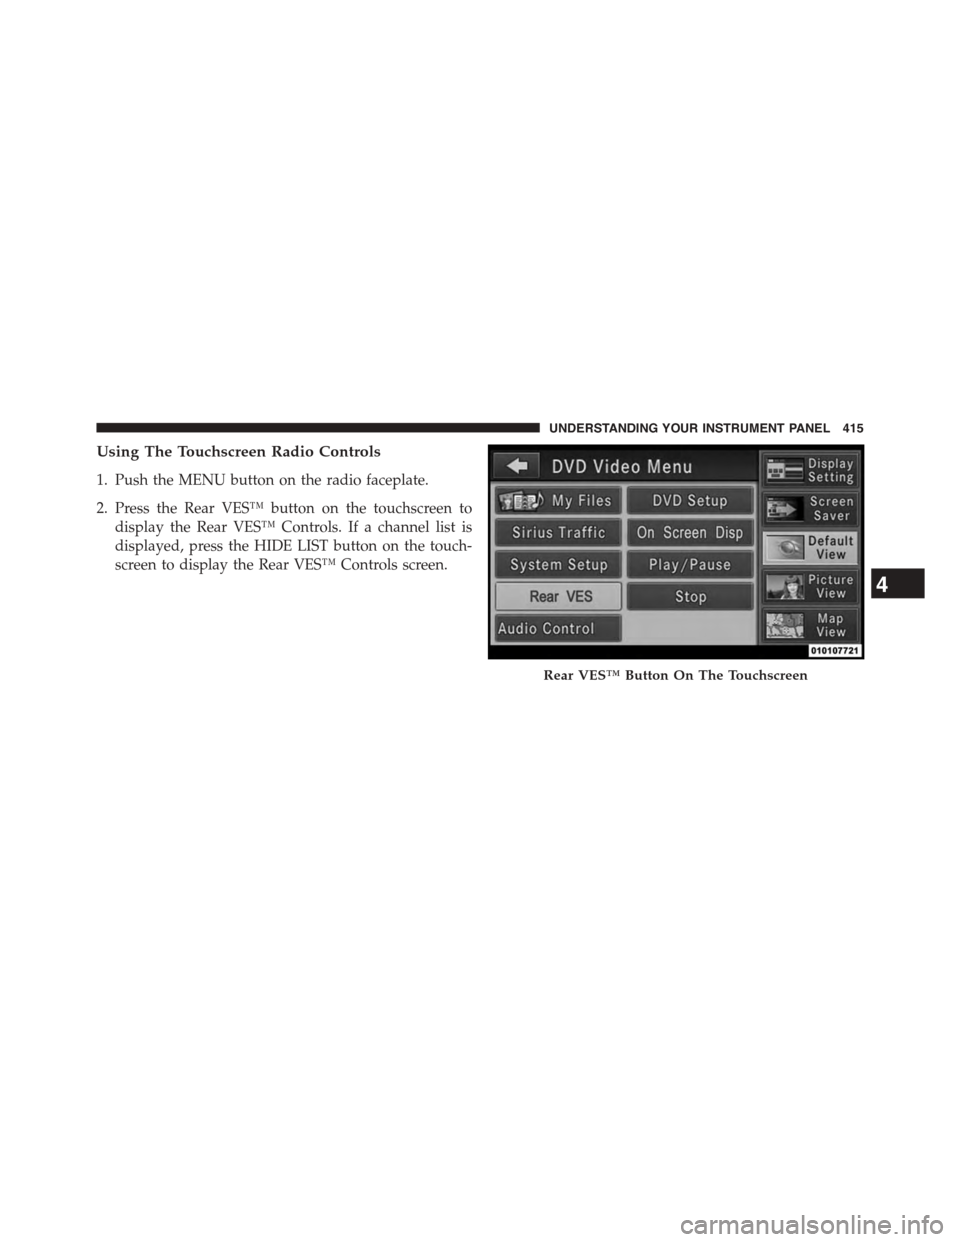
Using The Touchscreen Radio Controls
1. Push the MENU button on the radio faceplate.
2. Press the Rear VES™ button on the touchscreen to
display the Rear VES™ Controls. If a channel list is
displayed, press the HIDE LIST button on the touch-
screen to display the Rear VES™ Controls screen.
Rear VES™ Button On The Touchscreen
4
UNDERSTANDING YOUR INSTRUMENT PANEL 415
Page 419 of 726
•Selecting a video source on Channel 2, the video
source will display on the third row screen or Screen 2
and can be heard on Channel 2.
•The 2nd row screen and 3rd row screen of the Video
Entertainment System can play two separate discs by
utilizing the touchscreen radio DVD player and Blu-
ray™ Disc Player.
•Audio can be heard through the headphones even
when the screen(s) are closed.
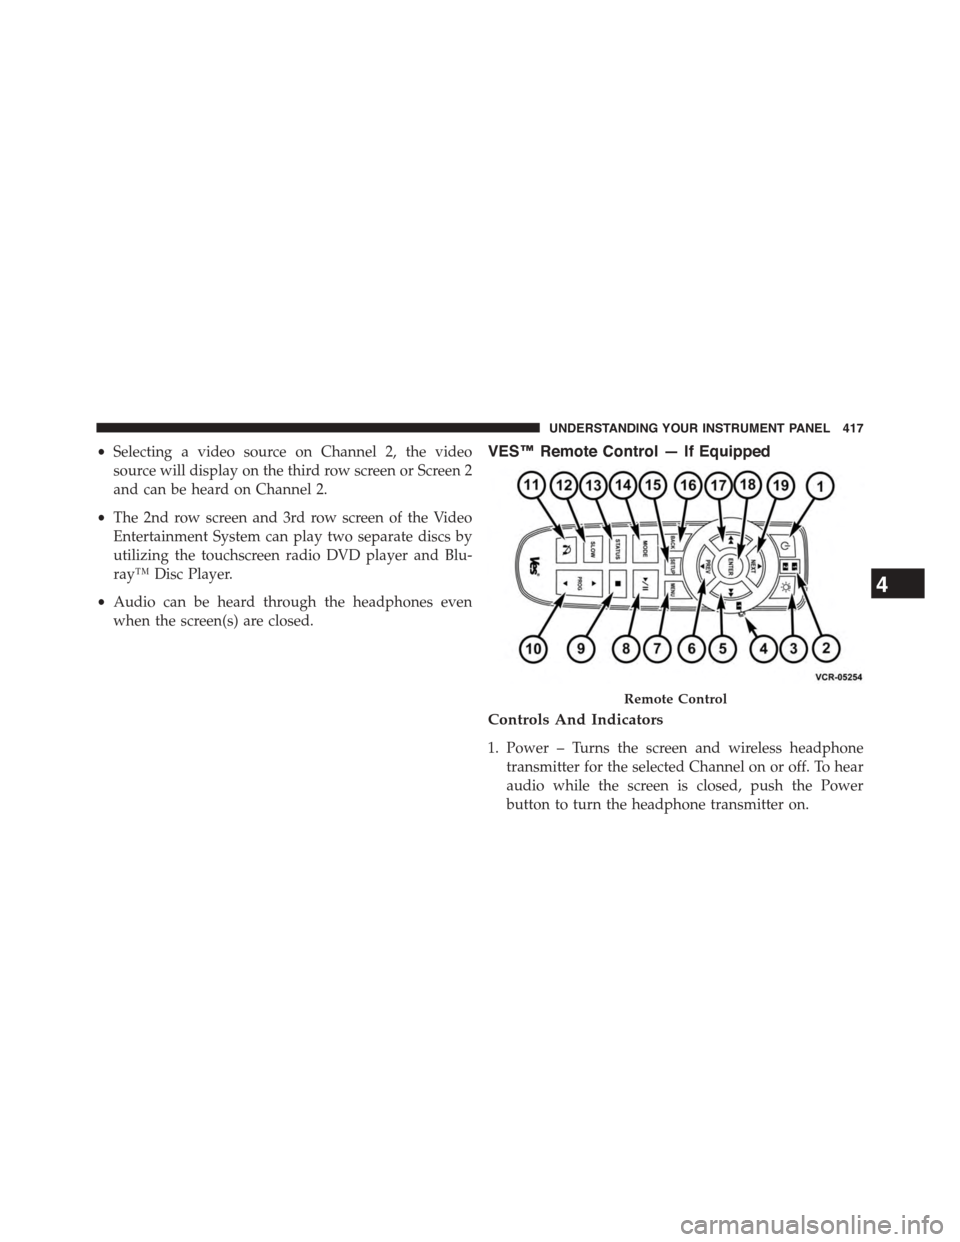
VES™ Remote Control — If Equipped
Controls And Indicators
1. Power – Turns the screen and wireless headphone
transmitter for the selected Channel on or off. To hear
audio while the screen is closed, push the Power
button to turn the headphone transmitter on.
Remote Control
4
UNDERSTANDING YOUR INSTRUMENT PANEL 417