washer fluid CHRYSLER TOWN AND COUNTRY 2015 5.G Owners Manual
[x] Cancel search | Manufacturer: CHRYSLER, Model Year: 2015, Model line: TOWN AND COUNTRY, Model: CHRYSLER TOWN AND COUNTRY 2015 5.GPages: 726, PDF Size: 20.14 MB
Page 243 of 726
Intermittent Wiper System
Use the intermittent wiper when weather conditions
make a single wiping cycle with a variable pause be-
tween cycles desirable. Rotate the end of the multifunc-
tion lever to the first detent position, and then turn the
end of the lever to select the desired delay interval. There
are five delay settings, which allow you to regulate the
wipe interval from a minimum of one cycle every second
to a maximum of approximately 36 seconds between
cycles. The delay intervals will double in duration when
the vehicle speed is 10 mph (16 km/h) or less.
Windshield Wiper Operation
Rotate the end of the lever upward, to the first detent past
the intermittent settings for low-speed wiper operation.
Rotate the end of the lever upward to the second detent
past the intermittent settings for high-speed wiper opera-
tion.
Windshield Washers
To use the Washer, push on the end of the lever to the
second detent and hold while spray is desired. If the lever
is pushed while on the intermittent setting, the wipers
will turn on and operate for several wipe cycles after the
lever is released, and then resume the intermittent inter-
val previously selected. If the lever is pushed while the
wipers are in the off position, the wipers will operate
several wipe cycles, then turn off.
Mist Feature
Press the end of the multifunction lever inward (toward
the steering column) to the first detent and release for a
single wiping cycle.
NOTE:The mist feature does not activate the washer
pump; therefore, no washer fluid will be sprayed on the
windshield. The wash function must be used in order to
spray the windshield with washer fluid.
3
UNDERSTANDING THE FEATURES OF YOUR VEHICLE 241
Page 343 of 726
•Remote start disabled — Start Vehicle to Reset
•Remote start active — Push Start Button
•Remote start active — Key to Run
•Wrong Key
•Damaged Key
•Key not programmed
•Vehicle Not in Park
•Key Left Vehicle
•Key Not Detected
•Press Brake Pedal and Push Button to Start
•Liftgate Ajar (chime will sound when vehicle starts
moving)
•Low Tire Pressure
•Service TPM System (refer to “Tire Pressure Monitor-
ing System” in “Starting And Operating”)
•Tire Pressure Screen With Low Tire(s) “Inflate Tire to
XX”
•Turn Signal On
•RKE Battery Low
•Service Keyless System
•Low Washer Fluid
•Oil Change Required
•Check Gascap
•Left Front Turn Signal Light Out
•Left Rear Turn Signal Light Out
•Right Front Turn Signal Light Out
•Right Rear Turn Signal Light Out
4
UNDERSTANDING YOUR INSTRUMENT PANEL 341
Page 345 of 726
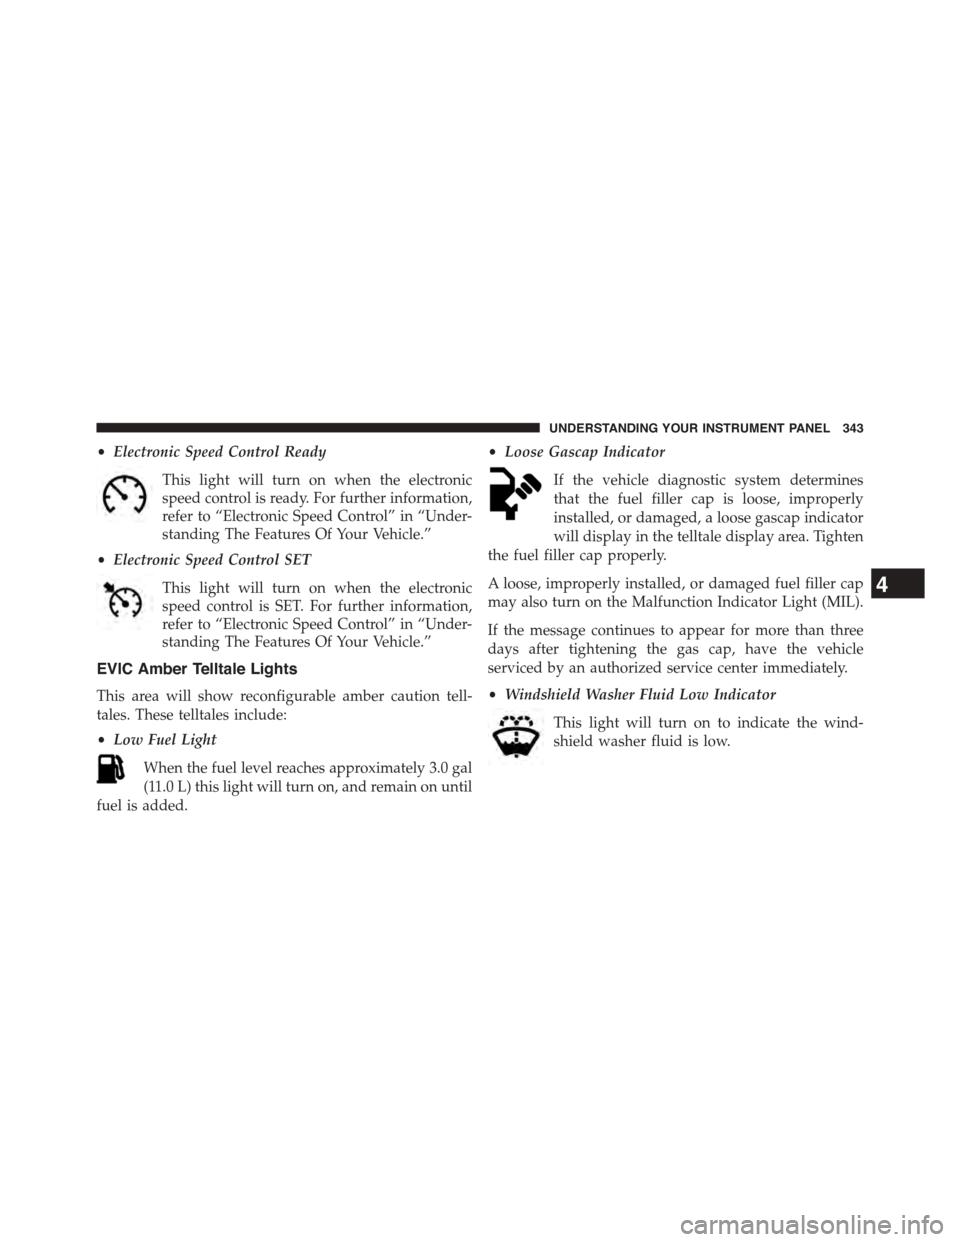
•Electronic Speed Control Ready
This light will turn on when the electronic
speed control is ready. For further information,
refer to “Electronic Speed Control” in “Under-
standing The Features Of Your Vehicle.”
•Electronic Speed Control SET
This light will turn on when the electronic
speed control is SET. For further information,
refer to “Electronic Speed Control” in “Under-
standing The Features Of Your Vehicle.”
EVIC Amber Telltale Lights
This area will show reconfigurable amber caution tell-
tales. These telltales include:
•Low Fuel Light
When the fuel level reaches approximately 3.0 gal
(11.0 L) this light will turn on, and remain on until
fuel is added.
•Loose Gascap Indicator
If the vehicle diagnostic system determines
that the fuel filler cap is loose, improperly
installed, or damaged, a loose gascap indicator
will display in the telltale display area. Tighten
the fuel filler cap properly.
A loose, improperly installed, or damaged fuel filler cap
may also turn on the Malfunction Indicator Light (MIL).
If the message continues to appear for more than three
days after tightening the gas cap, have the vehicle
serviced by an authorized service center immediately.
•Windshield Washer Fluid Low Indicator
This light will turn on to indicate the wind-
shield washer fluid is low.
4
UNDERSTANDING YOUR INSTRUMENT PANEL 343
Page 629 of 726
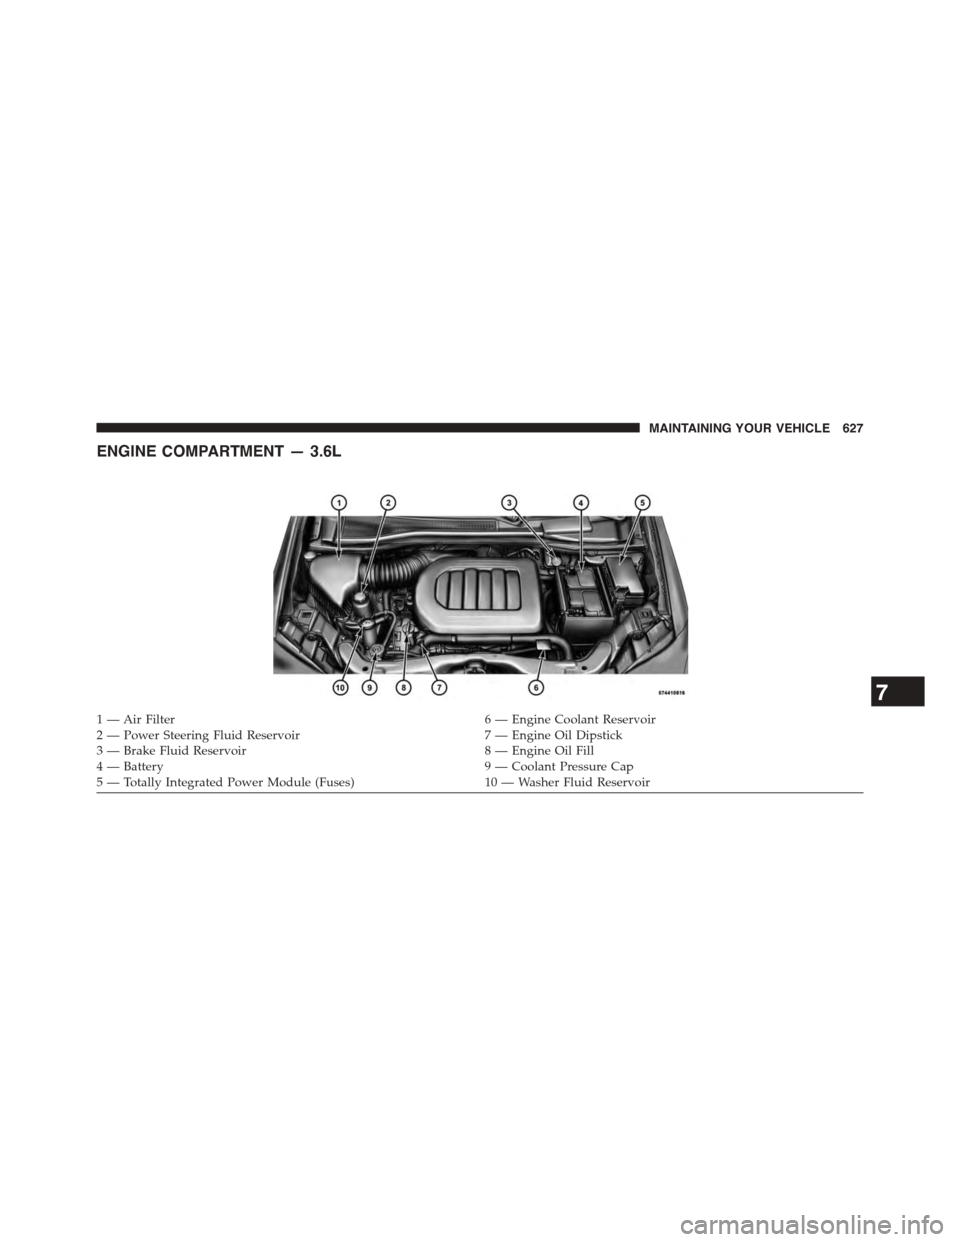
ENGINE COMPARTMENT — 3.6L
1—AirFilter6—EngineCoolantReservoir2 — Power Steering Fluid Reservoir7 — Engine Oil Dipstick3 — Brake Fluid Reservoir8 — Engine Oil Fill4 — Battery9 — Coolant Pressure Cap5 — Totally Integrated Power Module (Fuses)10 — Washer Fluid Reservoir
7
MAINTAINING YOUR VEHICLE 627
Page 645 of 726
operation and to protect against rust and wear. Prior to
the application of any lubricant, the parts concerned
should be wiped clean to remove dust and grit; after
lubricating excess oil and grease should be removed.
Particular attention should also be given to hood latching
components to ensure proper function. When performing
other underhood services, the hood latch, release mecha-
nism and safety catch should be cleaned and lubricated.
The external lock cylinders should be lubricated twice a
year, preferably in the Fall and Spring. Apply a small
amount of a high quality lubricant, such as MOPAR®
Lock Cylinder Lubricant directly into the lock cylinder.
Windshield Wiper Blades
Clean the rubber edges of the wiper blades and the
windshield periodically with a sponge or soft cloth and a
mild nonabrasive cleaner. This will remove accumula-
tions of salt or road film.
Operation of the wipers on dry glass for long periods
may cause deterioration of the wiper blades. Always use
washer fluid when using the wipers to remove salt or dirt
from a dry windshield.
Avoid using the wiper blades to remove frost or ice from
the windshield. Keep the blade rubber out of contact with
petroleum products such as engine oil, gasoline, etc.
NOTE:Life expectancy of wiper blades varies depend-
ing on geographical area and frequency of use. Poor
performance of blades may be present with chattering,
marks, water lines or wet spots. If any of these conditions
are present, clean the wiper blades or replace as neces-
sary.
Adding Washer Fluid
The fluid reservoir for the windshield washers and the
rear window washer is shared. It is located in the engine
compartment and should be checked at regular intervals.
7
MAINTAINING YOUR VEHICLE 643
Page 646 of 726
Fill the reservoir with windshield washer solvent (not
radiator antifreeze) and operate the system for a few
seconds to flush out any residual water.
The washer fluid reservoir will hold a full gallon of fluid
when the Low Washer Fluid Light illuminates.
WARNING!
Commercially available windshield washer solvents
are flammable. They could ignite and burn you. Care
must be exercised when filling or working around
the washer solution.
After the engine has warmed, operate the defroster for a few
minutes to reduce the possibility of smearing or freezing the
fluid on the cold windshield. MOPAR® All Weather Wind-
shield Washer Solution or equivalent, used with water as
directed on the container, aids cleaning action, reduces the
freezing point to avoid line clogging, and is not harmful to
paint or trim.
Cooling System
WARNING!
•When working near the radiator cooling fan,
disconnect the fan motor lead or turn the ignition
switch to the OFF position. The fan is temperature
controlled and can start at anytime the ignition
switch is in the ON position.
•You or others can be badly burned by hot engine
coolant (antifreeze) or steam from your radiator. If
you see or hear steam coming from under the hood,
do not open the hood until the radiator has had
time to cool. Never try to open a cooling system
pressure cap when the radiator is hot.
644 MAINTAINING YOUR VEHICLE
Page 661 of 726
liquid. Please do not use polishes, oils, cleaning fluids,
solvents, detergents, or ammonia-based cleaners to clean
your leather upholstery. Application of a leather condi-
tioner is not required to maintain the original condition.
CAUTION!
•Do not use volatile solvents for cleaning purposes.
Many are potentially flammable, and if used in
closed areas they may cause respiratory harm.
•Do not use power washers to clean the inside of the
vehicle, plastic parts can be permanently damaged
and the amount of water can cause problems with
the electrical components of your vehicle.
Cleaning Headlights
Your vehicle is equipped with plastic headlights and fog
lights that are lighter and less susceptible to stone break-
age than glass headlights.
Plastic is not as scratch resistant as glass and therefore
different lens cleaning procedures must be followed.
To minimize the possibility of scratching the lenses and
reducing light output, avoid wiping with a dry cloth. To
remove road dirt, wash with a mild soap solution fol-
lowed by rinsing.
Do not use abrasive cleaning components, solvents, steel
wool or other aggressive material to clean the lenses.
Glass Surfaces
All glass surfaces should be cleaned on a regular basis
with MOPAR® Glass Cleaner, or any commercial
household-type glass cleaner. Never use an abrasive type
cleaner. Use caution when cleaning the inside rear win-
dow equipped with electric defrosters or the right rear
quarter window equipped with the radio antenna. Do
not use scrapers or other sharp instrument that may
scratch the elements.
7
MAINTAINING YOUR VEHICLE 659
Page 686 of 726
MAINTENANCE SCHEDULE
Your vehicle is equipped with an automatic oil change
indicator system. The oil change indicator system will
remind you that it is time to take your vehicle in for
scheduled maintenance.
Based on engine operation conditions, the oil change
indicator message will illuminate. This means that ser-
vice is required for your vehicle. Operating conditions
such as frequent short-trips, trailer tow, extremely hot or
cold ambient temperatures, and E85 fuel usage will
influence when the “Oil Change Required” message is
displayed. Severe Operating Conditions can cause the
change oil message to illuminate as early as 3,500 miles
(5,600 km) since last reset. Have your vehicle serviced as
soon as possible, within the next 500 miles (805 km).
Your authorized dealer will reset the oil change indicator
message after completing the scheduled oil change. If a
scheduled oil change is performed by someone other
than your authorized dealer, the message can be reset by
referring to the steps described under “Electronic Vehicle
Information Center (EVIC)” in “Understanding Your
Instrument Panel” for further information.
NOTE:Under no circumstances should oil change inter-
vals exceed 10,000 miles (16,000 km) or twelve months,
whichever comes first.
Severe Duty All Models
Change Engine Oil at 4000 miles (6,500 km) if the vehicle
is operated in a dusty and off road environment. This
type of vehicle use is considered Severe Duty.
Once A Month Or Before A Long Trip:
•Check engine oil level.
•Check windshield washer fluid level.
8
MAINTENANCE
SCHEDULES
684 MAINTENANCE SCHEDULES
Page 704 of 726
About Your Brakes........................503
Adding Engine Coolant (Antifreeze)............647
Adding Fuel.............................560
Adding Washer Fluid......................643
Additives, Fuel...........................554
Adjustable Pedals.........................246
Air bag . . . . . . . . . . . . . . . . . . . . . . . . . . . . . . . . .86
Air Bag
Advance Front Air Bag....................87
Air Bag Components.....................86
Air bag Operation.......................89
Air Bag Warning Light....................98
Enhanced Accident Response................97
Event Data Recorder (EDR)................100
Front Air Bag . . . . . . . . . . . . . . . . . . . . . . . . . . .86
If A Deployment Occurs...................96
Knee Impact Bolsters.....................90
Maintaining Your Air Bag System............100
Side Air Bags...........................91
Air bag Deployment........................86
Air bag Light.............................98
Air bag Maintenance.......................100
Air Cleaner, Engine (Engine Air Cleaner Filter) . . . .635
Air Conditioner Maintenance.................640
Air Conditioning..........................450
Air Conditioning Controls...................450
Air Conditioning Filter.....................470
Air Conditioning, Operating Tips..............469
Air Conditioning, Rear Zone.................455
Air Conditioning Refrigerant.................640
Air Conditioning System....................450
Air Conditioning System, Zone Control..........450
Air Pressure, Tires.........................529
Alarm
Arm The System........................18
Disarm The System.......................19
Tamper Alert...........................20
Alarm Light.............................331
702 INDEX
Page 723 of 726
Uconnect® 130 With Satellite Radio
Multimedia Satellite Radio.................384
Operating Instructions Radio Mode..........372
Playing MP3 Files.......................380
Uconnect® (Hands-Free Phone)...............155
Umbrella Holder..........................293
Uniform Tire Quality Grades.................699
Universal Consumer Interface (UCI) Connector . . . .390
Universal Transmitter......................268
Unleaded Gasoline........................551
Untwisting Procedure, Seat Belt................76
Upholstery Care..........................658
Vanity Mirrors...........................146
Variance, Compass........................353
Vehicle Certification Label...................562
Vehicle Identification Number (VIN).............6
Vehicle Loading..........................524
Vehicle Modifications/Alterations...............7
Vehicle Security Alarm Arming................18
Vehicle Storage...........................470
Viscosity, Engine Oil.......................634
Voice Command
Commands............................188
System Operation.......................186
Voice Training.........................192
Voice Recognition System (VR)................186
Warning Flasher, Hazard....................581
Warning Lights (Instrument Cluster Description) . . .323
Warnings and Cautions.......................6
Warranty Information......................696
Washer
Adding Fluid..........................643
Washing Vehicle..........................655
Water
Driving Through........................497
Wind Buffeting............................5010
INDEX 721