clock CHRYSLER TOWN AND COUNTRY 2015 5.G Owner's Manual
[x] Cancel search | Manufacturer: CHRYSLER, Model Year: 2015, Model line: TOWN AND COUNTRY, Model: CHRYSLER TOWN AND COUNTRY 2015 5.GPages: 164, PDF Size: 22.47 MB
Page 121 of 164

4. Using the winch T-handle, rotate the drive nut to the right until the compact spare tire/cover
assembly is drawn into place against the underside of the vehicle.
5. Continue to rotate the nut to the right until you hear the winch mechanism click three times.
It cannot be overtightened. Check under the vehicle to ensure the compact spare tire/cover
assembly is positioned correctly against the underside of the vehicle.
Road Tire Installation
Ve h i c l e s E q u i p p e d W i t h W h e e l C o v e r s
1. Mount the road tire on the axle.
2. To ease the installation process for steel wheels with wheel covers, install two lug nuts on the
mounting studs which are on each side of the valve stem. Install the lug nuts with the cone
shaped end of the nut toward the wheel. Lightly tighten the lug nuts.
3. Align the valve notch in the wheel cover with
the valve stem on the wheel. Install the cover
by hand, snapping the cover over the two
lug nuts. Do not use a hammer or excessive
force to install the cover.
4. Install the remaining lug nuts with the cone
shaped end of the nut toward the wheel.
Lightly tighten the lug nuts.
5. Lower the vehicle to the ground by turning
the jack handle counterclockwise.
6. Finish tightening the lug nuts. Push down on
the wrench while at the end of the handle for
increased leverage. Tighten the lug nuts in a
star pattern until each nut has been tight-
ened twice. The correct tightness of each
lug nut is 100 ft/lbs (135 N·m). If in doubt
about the correct tightness, have them
checked with a torque wrench by your au-
thorized dealer or service station.
7. After 25 miles (40 km) check the lug nut torque with a torque wrench to ensure that all lug nuts
are properly seated against the wheel.
Wheel Cover Installation
1—ValveStem2—ValveNotch3—WheelLugNut4—WheelCover5—MountingStud
WHAT TO DO IN EMERGENCIES
119
Page 122 of 164

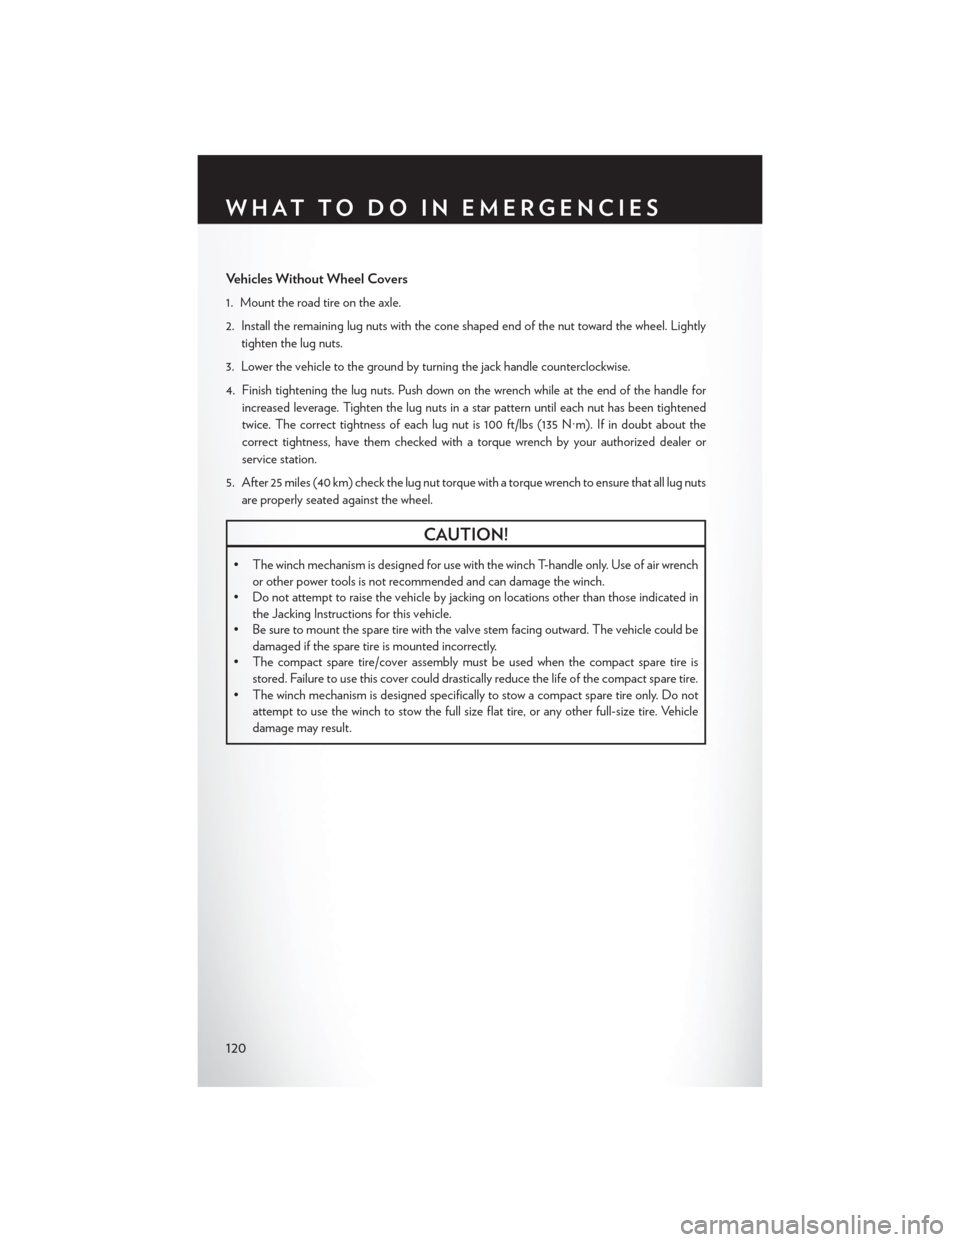
Ve h i c l e s W i t h o u t W h e e l C o v e r s
1. Mount the road tire on the axle.
2. Install the remaining lug nuts with the cone shaped end of the nut toward the wheel. Lightly
tighten the lug nuts.
3. Lower the vehicle to the ground by turning the jack handle counterclockwise.
4. Finish tightening the lug nuts. Push down on the wrench while at the end of the handle for
increased leverage. Tighten the lug nuts in a star pattern until each nut has been tightened
twice. The correct tightness of each lug nut is 100 ft/lbs (135 N·m). If in doubt about the
correct tightness, have them checked with a torque wrench by your authorized dealer or
service station.
5. After 25 miles (40 km) check the lug nut torque with a torque wrench to ensure that all lug nuts
are properly seated against the wheel.
CAUTION!
• The winch mechanism is designed for use with the winch T-handle only. Use of air wrench
or other power tools is not recommended and can damage the winch.
•Donotattempttoraisethevehiclebyjackingonlocationsotherthanthoseindicatedin
the Jacking Instructions for this vehicle.
•Besuretomountthesparetirewiththevalvestemfacingoutward.Thevehiclecouldbe
damaged if the spare tire is mounted incorrectly.
•Thecompactsparetire/coverassemblymustbeusedwhenthecompactsparetireis
stored. Failure to use this cover could drastically reduce the life of the compact spare tire.
•Thewinchmechanismisdesignedspecificallytostowacompactsparetireonly.Donot
attempt to use the winch to stow the full size flat tire, or any other full-size tire. Vehicle
damage may result.
WHAT TO DO IN EMERGENCIES
120
Page 141 of 164

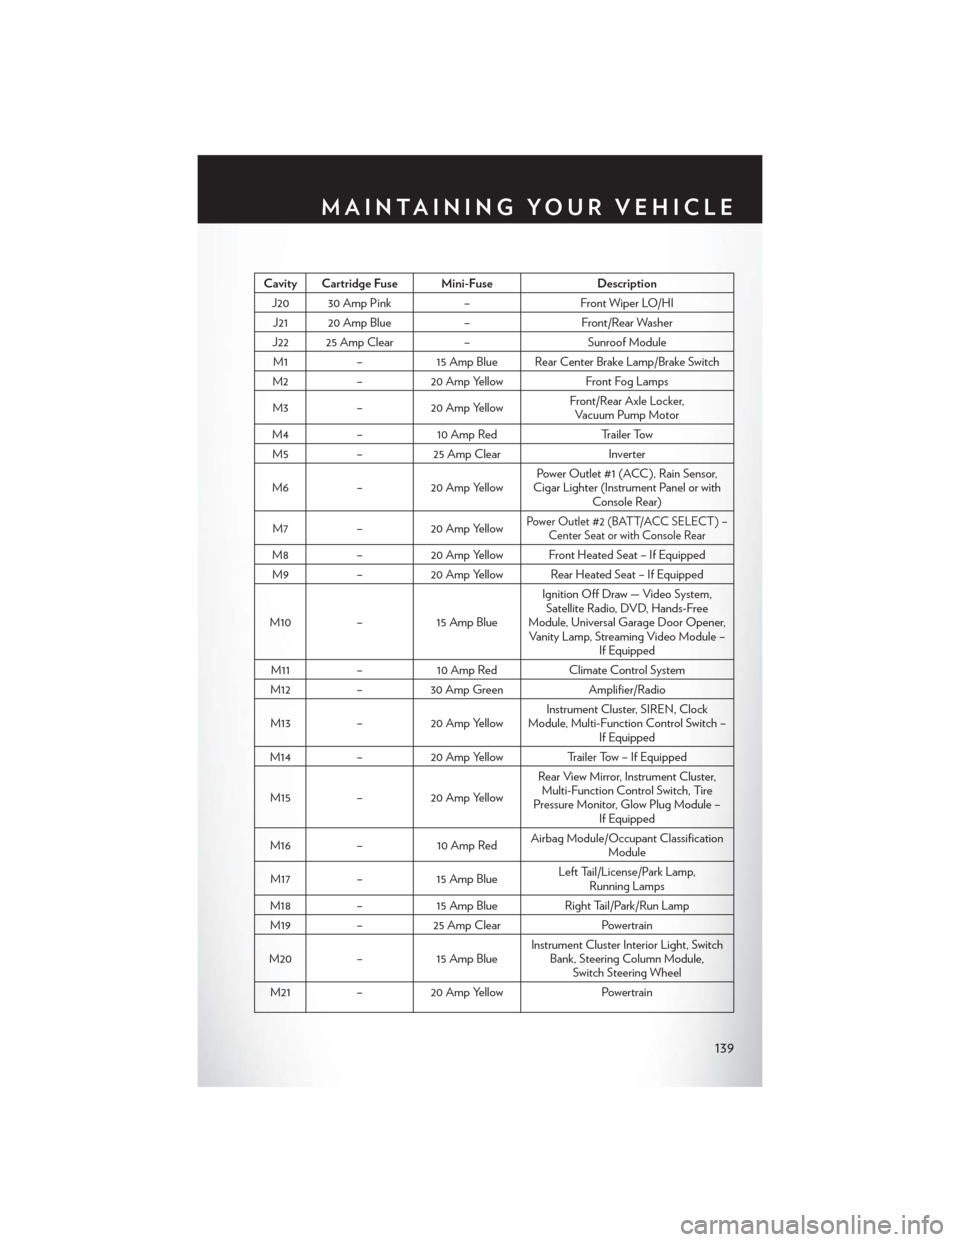
Cavity Cartridge Fuse Mini-FuseDescription
J20 30 Amp Pink–Front Wiper LO/HI
J21 20 Amp Blue–Front/Rear Washer
J22 25 Amp Clear–Sunroof Module
M1–15 Amp Blue Rear Center Brake Lamp/Brake Switch
M2–20 Amp YellowFront Fog Lamps
M3–20 Amp YellowFront/Rear Axle Locker,Vacuum Pump Motor
M4–10 Amp RedTr a i l e r To w
M5–25 Amp ClearInverter
M6–20 Amp YellowPower Outlet #1 (ACC ), Rain Sensor,Cigar Lighter (Instrument Panel or withConsole Rear)
M7–20 Amp YellowPower Outlet #2 (BATT/ACC SELECT ) –Center Seat or with Console Rear
M8–20 Amp Yellow Front Heated Seat – If Equipped
M9–20 Amp Yellow Rear Heated Seat – If Equipped
M10–15 Amp Blue
Ignition Off Draw — Video System,Satellite Radio, DVD, Hands-FreeModule, Universal Garage Door Opener,Vanity Lamp, Streaming Video Module –If Equipped
M11–10 Amp RedClimate Control System
M12–30 Amp GreenAmplifier/Radio
M13–20 Amp YellowInstrument Cluster, SIREN, ClockModule, Multi-Function Control Switch –If Equipped
M14–20 Amp YellowTrailer Tow – If Equipped
M15–20 Amp Yellow
Rear View Mirror, Instrument Cluster,Multi-Function Control Switch, TirePressure Monitor, Glow Plug Module –If Equipped
M16–10 Amp RedAirbag Module/Occupant ClassificationModule
M17–15 Amp BlueLeft Tail/License/Park Lamp,Running Lamps
M18–15 Amp BlueRight Tail/Park/Run Lamp
M19–25 Amp ClearPowertrain
M20–15 Amp BlueInstrument Cluster Interior Light, SwitchBank, Steering Column Module,Switch Steering Wheel
M21–20 Amp YellowPowertrain
MAINTAINING YOUR VEHICLE
139
Page 151 of 164

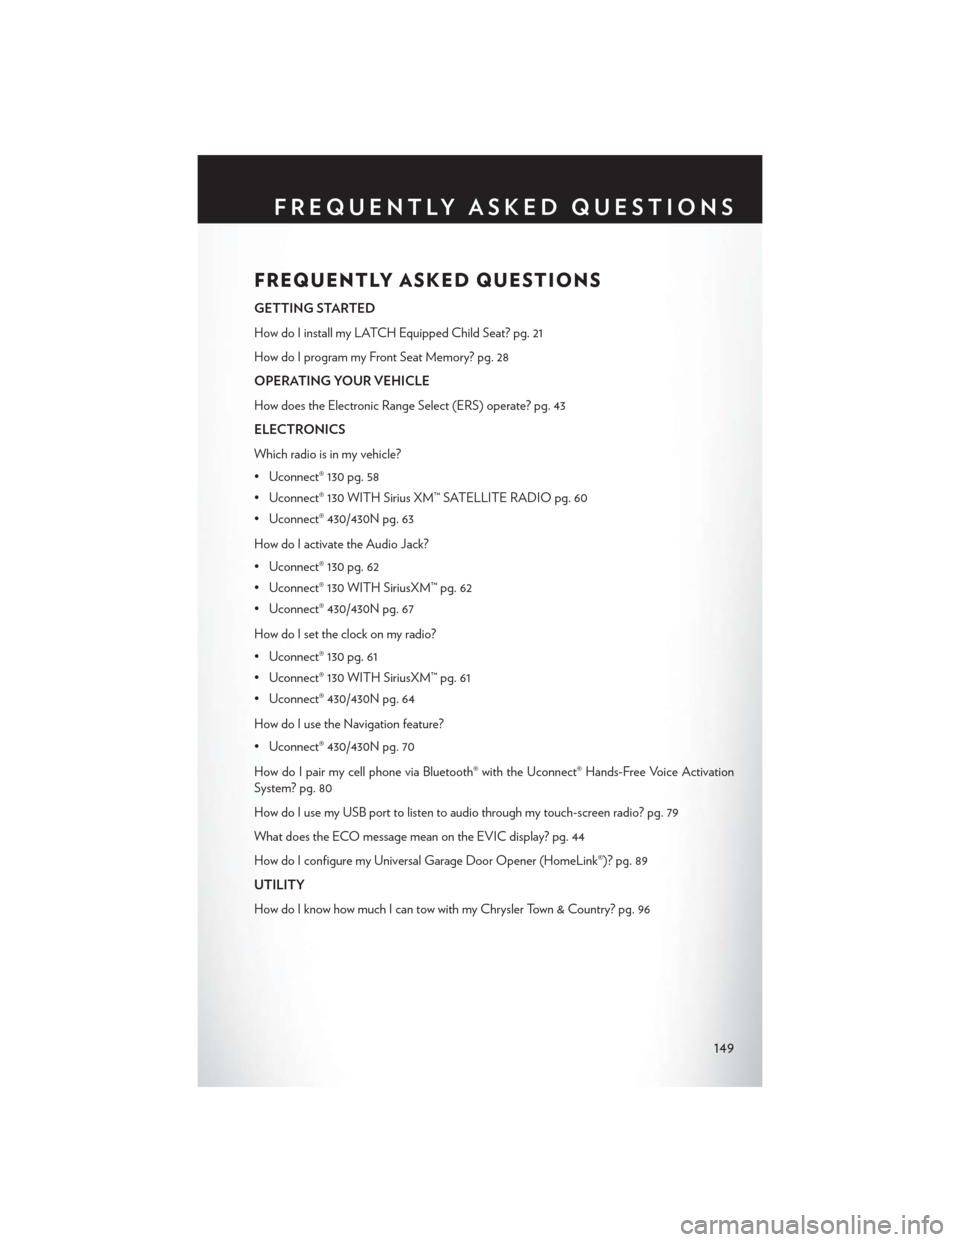
FREQUENTLY ASKED QUESTIONS
GETTING STARTED
How do I install my LATCH Equipped Child Seat? pg. 21
How do I program my Front Seat Memory? pg. 28
OPERATING YOUR VEHICLE
How does the Electronic Range Select (ERS) operate? pg. 43
ELECTRONICS
Which radio is in my vehicle?
• Uconnect® 130 pg. 58
• Uconnect® 130 WITH Sirius XM™ SATELLITE RADIO pg. 60
• Uconnect® 430/430N pg. 63
How do I activate the Audio Jack?
• Uconnect® 130 pg. 62
• Uconnect® 130 WITH SiriusXM™ pg. 62
• Uconnect® 430/430N pg. 67
How do I set the clock on my radio?
• Uconnect® 130 pg. 61
• Uconnect® 130 WITH SiriusXM™ pg. 61
• Uconnect® 430/430N pg. 64
How do I use the Navigation feature?
• Uconnect® 430/430N pg. 70
How do I pair my cell phone via Bluetooth® with the Uconnect® Hands-Free Voice Activation
System? pg. 80
How do I use my USB port to listen to audio through my touch-screen radio? pg. 79
What does the ECO message mean on the EVIC display? pg. 44
How do I configure my Universal Garage Door Opener (HomeLink®)? pg. 89
UTILITY
How do I know how much I can tow with my Chrysler Town & Country? pg. 96
FREQUENTLY ASKED QUESTIONS
149
Page 153 of 164

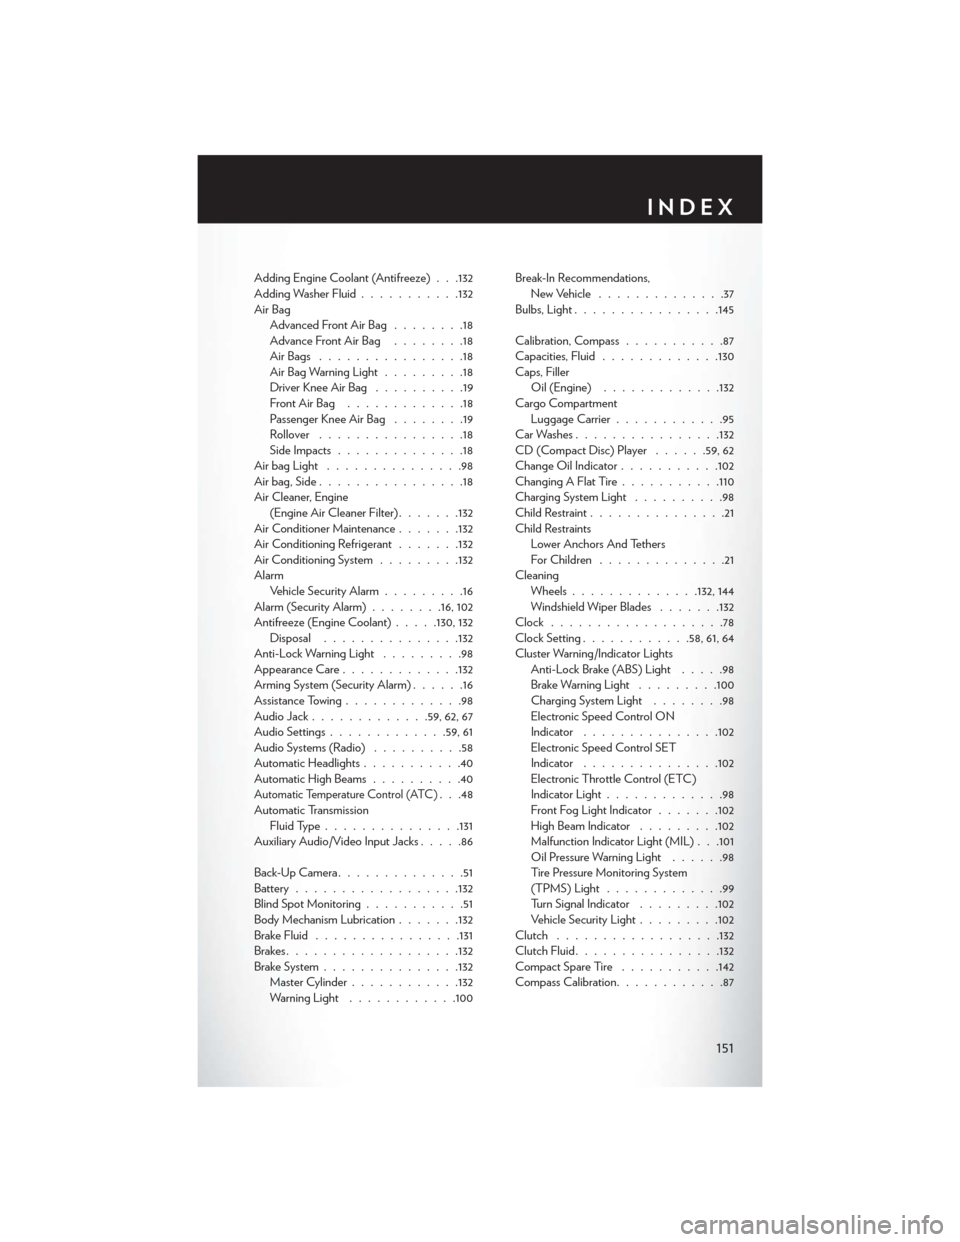
Adding Engine Coolant (Antifreeze) . . .132Adding Washer Fluid...........132Air BagAdvanced Front Air Bag........18Advance Front Air Bag........18Air Bags . . . . . . . . . . . . . . . .18Air Bag Warning Light.........18Driver Knee Air Bag . . . . . . . . . .19Front Air Bag . . . . . . . . . . . . .18Passenger Knee Air Bag........19Rollover . . . . . . . . . . . . . . . .18Side Impacts..............18Air bag Light . . . . . . . . . . . . . . .98Air bag, Side . . . . . . . . . . . . . . . .18Air Cleaner, Engine(Engine Air Cleaner Filter).......132Air Conditioner Maintenance.......132Air Conditioning Refrigerant.......132Air Conditioning System.........132AlarmVehicle Security Alarm.........16Alarm (Security Alarm)........16, 102Antifreeze (Engine Coolant).....130, 132Disposal...............132Anti-Lock Warning Light.........98Appearance Care.............132Arming System (Security Alarm)......16Assistance Towing.............98Audio Jack . . . . . . . . . . . ..59, 62, 67Audio Settings.............59, 61Audio Systems (Radio)..........58Automatic Headlights...........40Automatic High Beams..........40Automatic Temperature Control (ATC). . .48Automatic TransmissionFluid Type...............131Auxiliary Audio/Video Input Jacks.....86
Back-Up Camera . . . . . . . . . . . . . .51Battery..................132Blind Spot Monitoring...........51Body Mechanism Lubrication.......132Brake Fluid................131Brakes . . . . . . . . . . . . . . . . . ..132Brake System...............132Master Cylinder............132Warning Light............100
Break-In Recommendations,New Vehicle..............37Bulbs, Light................145
Calibration, Compass...........87Capacities, Fluid.............130Caps, FillerOil (Engine).............132Cargo CompartmentLuggage Carrier............95Car Washes................132CD (Compact Disc) Player......59, 62Change Oil Indicator...........102Changing A Flat Tire...........110Charging System Light..........98Child Restraint...............21Child RestraintsLower Anchors And TethersFor Children..............21CleaningWheels..............132, 144Windshield Wiper Blades.......132Clock . . . . . . . . . . . . . . . . . . .78Clock Setting............58, 61, 64Cluster Warning/Indicator LightsAnti-Lock Brake (ABS) Light.....98Brake Warning Light.........100Charging System Light........98Electronic Speed Control ONIndicator...............102Electronic Speed Control SETIndicator...............102Electronic Throttle Control (ETC)Indicator Light.............98Front Fog Light Indicator.......102High Beam Indicator.........102Malfunction Indicator Light (MIL) . . .101Oil Pressure Warning Light......98Ti re Pre s s u re M o n i t o r i n g S y s t e m(TPMS) Light.............99Turn Signal Indicator.........102Vehicle Security Light.........102Clutch . . . . . . . . . . . . . . . . ..132Clutch Fluid................132Compact Spare Tire . . . . . . . . . . .142Compass Calibration............87
INDEX
151
Page 156 of 164

Lift Gate . . . . . . . . . . . . . . . .10Outlet (Auxiliary Electrical Outlet). . .93Seats..................27Power Steering Fluid...........131Preparation for Jacking..........115PretensionersSeat Belts...............17Programmable Electronic Features.....88
Radio Operation............59, 61Rain Sensitive Wiper System........38Rear Camera . . . . . . . . . . . . . . . .51Rear Cross Path . . . . . . . . . . . . . .51Rear Heated Seats.............34Rear ParkSense System...........51Recreational Towing............97Refrigerant................132Remote Keyless Entry (RKE)Lock The Doors . . . . . . . . . . . .10Remote Keyless Entry (RKE)......10Unlock The Doors...........10Remote Starting System..........12Replacement Bulbs............145Reporting Safety Defects.........147Restraint, Head..............25Rocking Vehicle When Stuck.......125Roof Rack (Luggage Rack)........95
Satellite Radio (Uconnect® studios). . .60, 62Schedule, Maintenance..........132Seat Belt Maintenance..........132Seat Belts.................17Adjustable Shoulder Belt........17Pretensioners.............17Reminder...............100Seat Belt Warning...........17Seats....................27Adjustment..............27Fold in Floor (Stow `n Go)......29Lumbar Support . . . . . . . . . . . .27Manual.................27Memory . . . . . . . . . . . . . . . .28Power . . . . . . . . . . . . . . . . .27Stow `n Go (Fold in Floor) . . . . . .29Security Alarm..............102Security Alarm.............16Selection of Coolant (Antifreeze).....130
Setting the Clock.............78Shift Lever Override...........124Signals, Turn..............38, 102Sirius Satellite Radio............73SIRIUS Travel Link.............73Spare Tire . . . . . . . . . . ..110, 142, 143Spark Plugs................130Speed ControlAccel/Decel..............41Cancel . . . . . . . . . . . . . . . . .42Resume................42Set . . . . . . . . . . . . . . . . . . .41StartingRemote . . . . . . . . . . . . . . . .12SteeringTilt Column..............35Wheel, Heated............35Steering Wheel Audio Controls......78Stow `n Go (Fold in Floor) Seats.....29Stuck, Freeing...............125Sun Roof . . . . . . . . . . . . . . . . . .53Supplemental Restraint System -Airbag . . . . . . . . . . . . . . . . .18
Tether Anchor, Child Restraint.......22Tilt Steering Column............35Ti re sAir Pressure..............141Changing...............110Compact Spare . . . . . . . . . . . .142Jacking..............110, 116Spare Tire . . . . . . . . . . . . . ..110Tire Service Kit............104, 105To u c h s c r e e n R a d i oCleaning Your Touchscreen Radio . . .70To w i n g . . . . . . . . . . . . . . . . . . . 9 6Disabled Vehicle...........124Recreational..............97Trailer TowingTrailer and Tongue Weight.......96Trailer Weight...............96TransmissionFluid...............131, 132Maintenance.............132Turn Signals..............38, 102
Uconnect® Voice Command........82
INDEX
154