ECO mode CHRYSLER TOWN AND COUNTRY 2015 5.G Owner's Manual
[x] Cancel search | Manufacturer: CHRYSLER, Model Year: 2015, Model line: TOWN AND COUNTRY, Model: CHRYSLER TOWN AND COUNTRY 2015 5.GPages: 164, PDF Size: 22.47 MB
Page 86 of 164
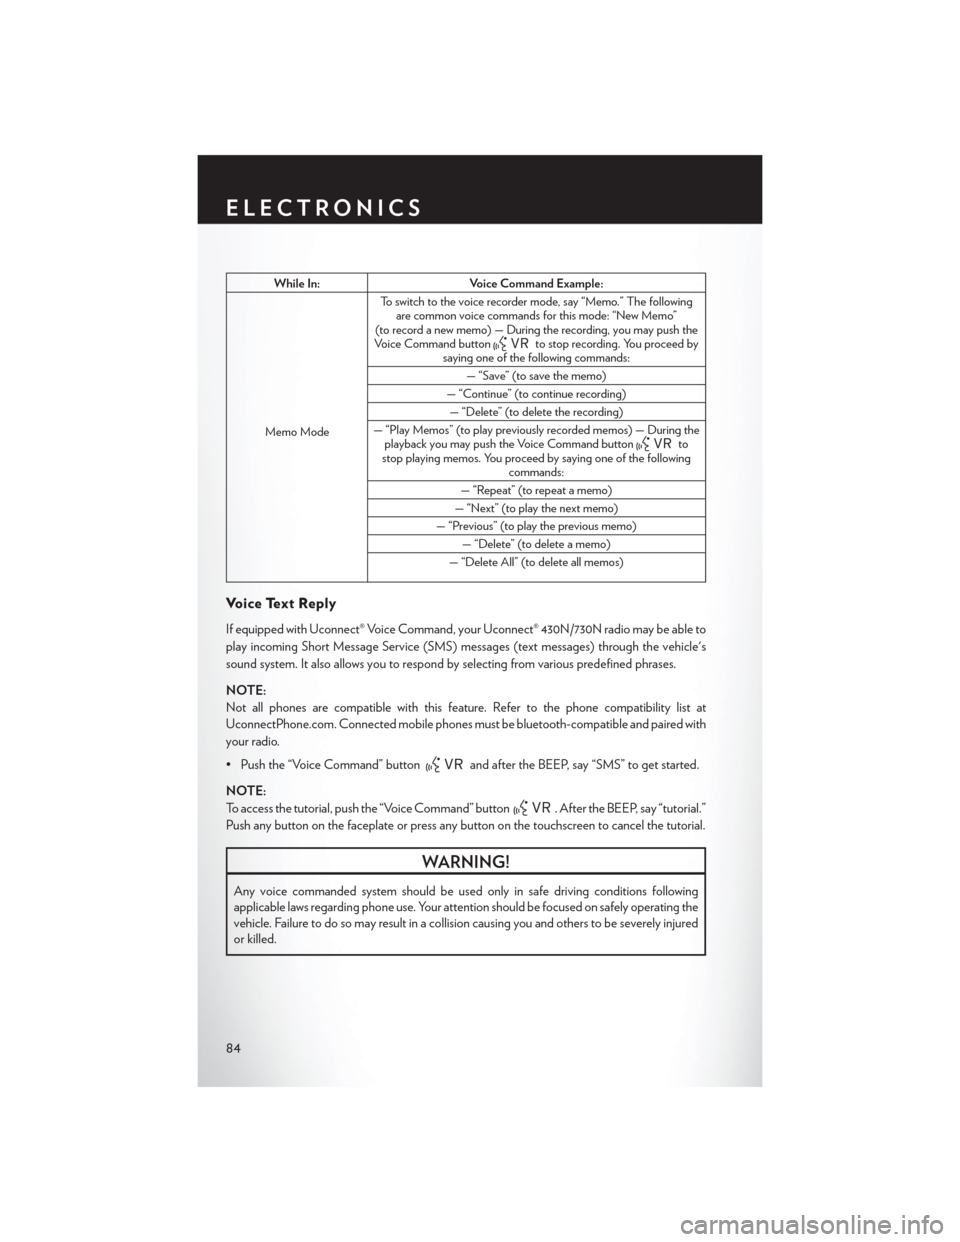
While In:Voice Command Example:
Memo Mode
To s w i t c h t o t h e v o i c e r e c o r d e r m o d e , s a y “ M e m o . ” T h e f o l l o w i n gare common voice commands for this mode: “New Memo”(to record a new memo) — During the recording, you may push theVoice Command buttonto stop recording. You proceed bysaying one of the following commands:
—“Save”(tosavethememo)
— “Continue” (to continue recording)
— “Delete” (to delete the recording)
— “Play Memos” (to play previously recorded memos) — During theplayback you may push the Voice Command buttontostop playing memos. You proceed by saying one of the followingcommands:
— “Repeat” (to repeat a memo)
— “Next” (to play the next memo)
— “Previous” (to play the previous memo)
— “Delete” (to delete a memo)
— “Delete All” (to delete all memos)
Vo i c e Te x t R e p l y
If equipped with Uconnect® Voice Command, your Uconnect® 430N/730N radio may be able to
play incoming Short Message Service (SMS) messages (text messages) through the vehicle's
sound system. It also allows you to respond by selecting from various predefined phrases.
NOTE:
Not all phones are compatible with this feature. Refer to the phone compatibility list at
UconnectPhone.com. Connected mobile phones must be bluetooth-compatible and paired with
your radio.
• Push the “Voice Command” buttonand after the BEEP, say “SMS” to get started.
NOTE:
To access the tutorial, push the “Voice Command” button. After the BEEP, say “tutorial.”
Push any button on the faceplate or press any button on the touchscreen to cancel the tutorial.
WARNING!
Any voice commanded system should be used only in safe driving conditions following
applicable laws regarding phone use. Your attention should be focused on safely operating the
vehicle. Failure to do so may result in a collision causing you and others to be severely injured
or killed.
ELECTRONICS
84
Page 87 of 164
Bluetooth® STREAMING AUDIO
If equipped with Uconnect® Voice Command, your Bluetooth®-equipped iPod® devices,
cell phones or other media players, may also be able to stream music to your vehicles speakers.
Yo u r c o n n e c t e d d e v i c e m u s t b e B l u e t o o t h ® - c o m p a t i b l e , a n d p a i r e d w i t h y o u r r a d i o ( s e e
UconnectPhone.com for pairing instructions).
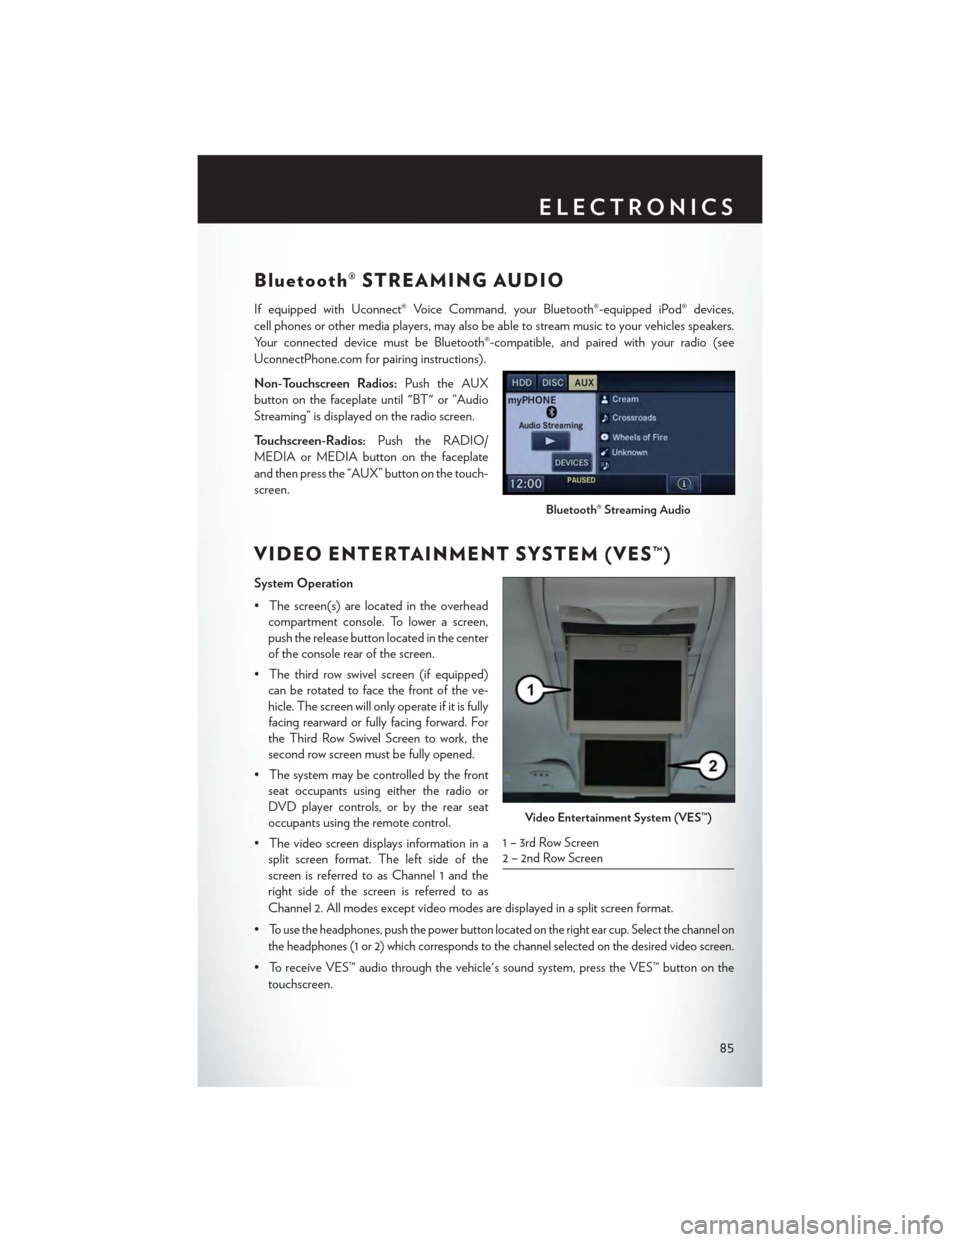
Non-Touchscreen Radios:Push the AUX
button on the faceplate until "BT" or “Audio
Streaming” is displayed on the radio screen.
To u c h s c r e e n - R a d i o s :Push the RADIO/
MEDIA or MEDIA button on the faceplate
and then press the “AUX” button on the touch-
screen.
VIDEO ENTERTAINMENT SYSTEM (VES™)
System Operation
•Thescreen(s)arelocatedintheoverhead
compartment console. To lower a screen,
push the release button located in the center
of the console rear of the screen.
•Thethirdrowswivelscreen(ifequipped)
can be rotated to face the front of the ve-
hicle. The screen will only operate if it is fully
facing rearward or fully facing forward. For
the Third Row Swivel Screen to work, the
second row screen must be fully opened.
•Thesystemmaybecontrolledbythefront
seat occupants using either the radio or
DVD player controls, or by the rear seat
occupants using the remote control.
•Thevideoscreendisplaysinformationina
split screen format. The left side of the
screen is referred to as Channel 1 and the
right side of the screen is referred to as
Channel 2. All modes except video modes are displayed in a split screen format.
•To use the headphones, push the power button located on the right ear cup. Select the channel on
the headphones (1 or 2) which corresponds to the channel selected on the desired video screen.
•ToreceiveVES™audiothroughthevehicle'ssoundsystem,presstheVES™buttononthe
touchscreen.
Bluetooth® Streaming Audio
Video Entertainment System (VES™)
1 – 3rd Row Screen2 – 2nd Row Screen
ELECTRONICS
85
Page 88 of 164
Operation Of The Touchscreen Radio/DVD Player/Blu-Ray Player
• To view a DVD push the OPEN/CLOSE button on the faceplate and insert the disc or insert
the disc into the optional DVD player. Playback will begin automatically after the DVD is
recognized by the disc drive. If playback does not begin automatically when the disc is inserted
into the DVD player push the PLAY button. If playback does not begin automatically after the
disc is inserted into the touchscreen radio follow these steps:
• Push the MENU button on the faceplate, then press the Rear VES™ button on the
touchscreen. If a chapter list appears on the right side of the screen, press the “HIDE LIST”
button on the touchscreen to display the Rear VES™ control screen.
• Touch the “1” button on the touchscreen to select an audio channel, then press the DISC
button on the touchscreen in the MEDIA column.
Operation Of The Remote Control
The remote control operates similarly to any DVD remote you may have used before and allows
the rear seat passengers to change stations, tracks, discs and audio/video modes.
The remote control is designed to control either channel by using the selector switch located on
the right side of the remote.
Connect the video game or other external media devices to the AUX jacks following the color
coding for the VES™ jacks.
•PushingthepowerbuttonwillturntheVES™systemON/OFF.
• Pushing the mode button causes the MODE SELECTION menu to appear on the VES™
screen. Use the remote control arrow buttons to scroll through the available modes, and then
push ENTER to select the desired mode.
Auxiliary Audio/Video Input Jacks
The AUX jacks are located on the drivers side rear trim panel behind the sliding door.
Connect the video game or other external media devices to the AUX jacks following the color
coding for the VES™ jacks.
Using either the touchscreen radio or remote control, select AUX from the REAR VES™
CONTROL or the MODE SELECTION screen.
Refer to the Uconnect® Multimedia – Video Entertainment System (VES™) section in the vehicle
Owner's Manual on the DVD for further details.
ELECTRONICS
86
Page 106 of 164

IF YOUR ENGINE OVERHEATS
In any of the following situations, you can reduce the potential for overheating by taking the
appropriate action:
•Onthehighways—slowdown.
• In city traffic — while stopped, shift the transmission to NEUTRAL, but do not increase engine
idle speed.
NOTE:
There are steps that you can take to slow down an impending overheat condition:
•Ifyourairconditioner(A/C)ison,turnitoff.TheA/Csystemaddsheattotheenginecooling
system and turning the A/C off can help remove this heat.
• You can also turn the temperature control to maximum heat, the mode control to floor and the
blower control to high. This allows the heater core to act as a supplement to the radiator and
aids in removing heat from the engine cooling system.
CAUTION!
Driving with a hot cooling system could damage your vehicle. If the temperature gauge reads
HOT (H), pull over and stop the vehicle. Idle the vehicle with the air conditioner turned off
until the pointer drops back into the normal range. If the pointer remains on HOT (H), and
you hear continuous chimes, turn the engine off immediately, and call for service.
WARNING!
Yo u o r o t h e r s c a n b e b a d l y b u r n e d b y h o t e n g i n e c o o l a n t ( a n t i f r e e z e ) o r s t e a m f r o m y o u r
radiator. If you see or hear steam coming from under the hood, do not open the hood until the
radiator has had time to cool. Never try to open a cooling system pressure cap when the
radiator or coolant bottle is hot.
TIRE SERVICE KIT
Yo u r v e h i c l e m a y b e e q u i p p e d w i t h a T i r e S e r v i c e K i t .
Small punctures up to 1/4” (6 mm) in the tire tread can be sealed with the Tire Service Kit. Foreign
objects (e.g., screws or nails) should not be removed from the tire. The Tire Service Kit can be
used in outside temperatures down to approximately -4°F (-20°C).
This kit will provide a temporary tire seal, allowing you to drive your vehicle up to 100 miles
(160 km) with a maximum speed of 55 mph (90 km/h).
WHAT TO DO IN EMERGENCIES
104
Page 107 of 164
Ti re S e r v i c e K i t S t o ra g e
•TheTireServiceKitisstowedbehindtherearleftsidetrimpanelintherearcargoarea.
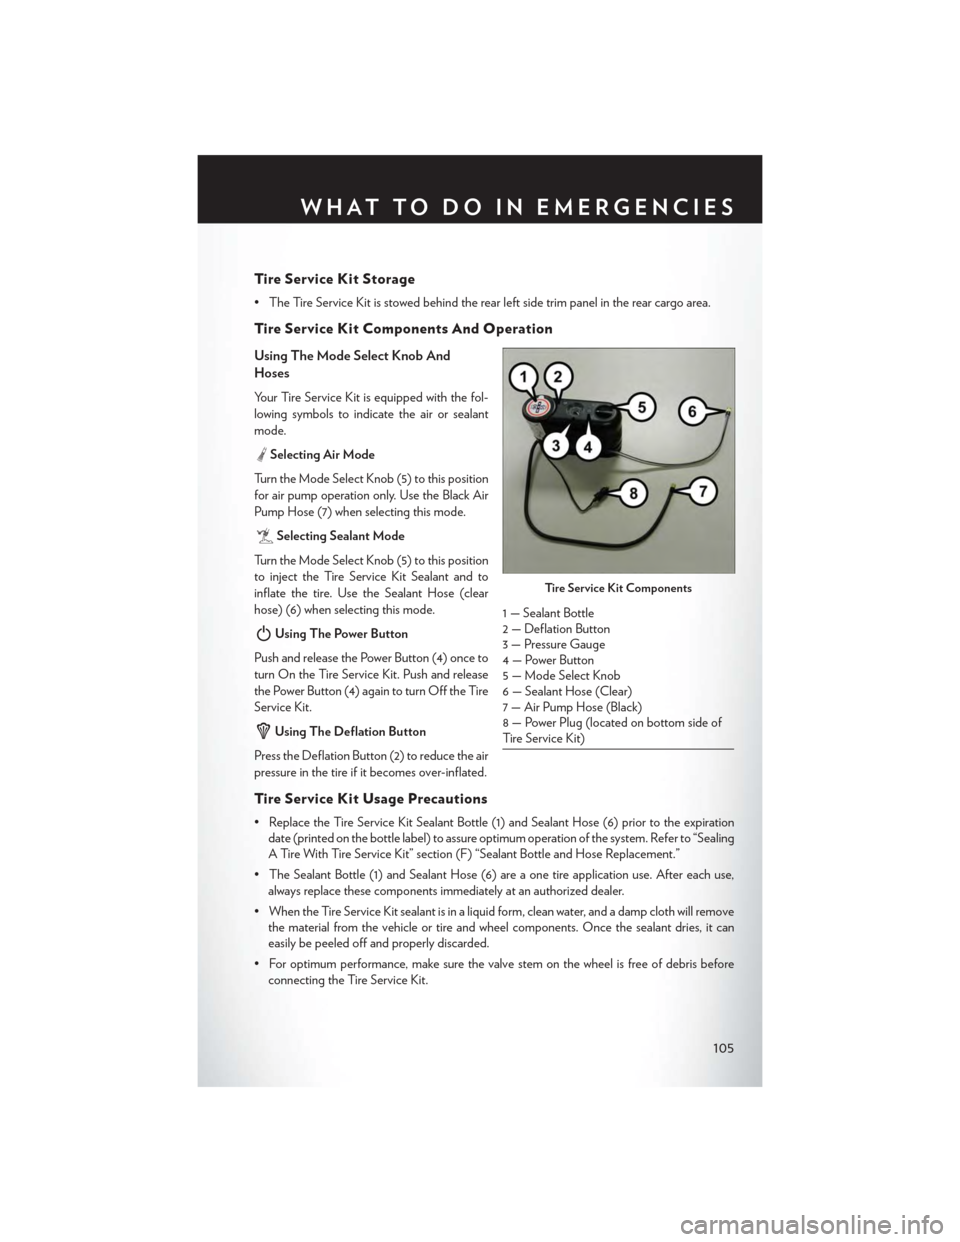
Ti re S e r v i c e K i t Co m p o n e n t s A n d O p e ra t i o n
Using The Mode Select Knob And
Hoses
Your Tire Service Kit is equipped with the fol-
lowing symbols to indicate the air or sealant
mode.
Selecting Air Mode
Tu r n t h e M o d e S e l e c t K n o b ( 5 ) t o t h i s p o s i t i o n
for air pump operation only. Use the Black Air
Pump Hose (7) when selecting this mode.
Selecting Sealant Mode
Tu r n t h e M o d e S e l e c t K n o b ( 5 ) t o t h i s p o s i t i o n
to inject the Tire Service Kit Sealant and to
inflate the tire. Use the Sealant Hose (clear
hose) (6) when selecting this mode.
Using The Power Button
Push and release the Power Button (4) once to
turn On the Tire Service Kit. Push and release
the Power Button (4) again to turn Off the Tire
Service Kit.
Using The Deflation Button
Press the Deflation Button (2) to reduce the air
pressure in the tire if it becomes over-inflated.
Ti re S e r v i c e K i t Us a g e Pre c a u t i o n s
• Replace the Tire Service Kit Sealant Bottle (1) and Sealant Hose (6) prior to the expiration
date (printed on the bottle label) to assure optimum operation of the system. Refer to “Sealing
A Tire With Tire Service Kit” section (F) “Sealant Bottle and Hose Replacement.”
• The Sealant Bottle (1) and Sealant Hose (6) are a one tire application use. After each use,
always replace these components immediately at an authorized dealer.
•WhentheTireServiceKitsealantisinaliquidform,cleanwater,andadampclothwillremove
the material from the vehicle or tire and wheel components. Once the sealant dries, it can
easily be peeled off and properly discarded.
•Foroptimumperformance,makesurethevalvestemonthewheelisfreeofdebrisbefore
connecting the Tire Service Kit.
Ti re S e r v i c e K i t Co m p o n e n t s
1 — Sealant Bottle2 — Deflation Button3 — Pressure Gauge4 — Power Button5—ModeSelectKnob6 — Sealant Hose (Clear)7 — Air Pump Hose (Black)8 — Power Plug (located on bottom side ofTire Service Kit)
WHAT TO DO IN EMERGENCIES
105
Page 109 of 164
If the sealant (white fluid) does not flow within0–10seconds through the Sealant Hose (6):
1. Press the Power Button (4) to turn Off the Tire Service Kit. Disconnect the Sealant Hose (6)
from the valve stem. Make sure the valve stem is free of debris. Reconnect the Sealant
Hose (6) to the valve stem. Check that the Mode Select Knob (5) is in the Sealant Mode
position and not Air Mode. Press the Power Button (4) to turn On the Tire Service Kit.
2. Connect the Power Plug (8) to a different 12 Volt power outlet in your vehicle or another
vehicle, if available. Make sure the engine is running before turning ON the Tire Service Kit.
3. The Sealant Bottle (1) may be empty due to previous use. Call for assistance.
NOTE:
If the Mode Select Knob (5) is on Air Mode and the pump is operating, air will dispense from the
Air Pump Hose (7) only, not the Sealant Hose (6).
If the sealant (white fluid) does flow through the Sealant Hose (6):
1. Continue to operate the pump until sealant is no longer flowing through the hose (typically
takes 30 - 70 seconds). As the sealant flows through the Sealant Hose (6), the Pressure Gauge
(3) can read as high as 70 psi (4.8 Bar). The Pressure Gauge (3) will decrease quickly from
approximately 70 psi (4.8 Bar) to the actual tire pressure when the Sealant Bottle (1) is empty.
2. The pump will start to inject air into the tire immediately after the Sealant Bottle (1) is empty.
Continue to operate the pump and inflate the tire to the pressure indicated on the tire pressure
label on the driver-side latch pillar (recommended pressure). Check the tire pressure by
looking at the Pressure Gauge (3).
If the tire does not inflate to at least 26 psi (1.8 Bar) pressure within 15 minutes:
The tire is too badly damaged. Do not attempt to drive the vehicle further. Call for assistance.
NOTE:
If the tire becomes over-inflated, press the Deflation Button to reduce the tire pressure to the
recommended inflation pressure before continuing.
If the tire inflates to the recommended pressure or is at least 26 psi (1.8 Bar) pressure within
15 minutes:
1. Press the Power Button (4) to turn off the Tire Service Kit.
2. Remove the Speed Limit sticker from the top of the Sealant Bottle (1) and place the sticker on
the instrument panel.
3. Immediately disconnect the Sealant Hose (6) from the valve stem, reinstall the cap on the
fitting at the end of the hose, and place the Tire Service Kit in the vehicle storage location.
Quickly proceed to (D) “Drive Vehicle.”
(D) Drive Vehicle:
Immediately after injecting sealant and inflating the tire, drive the vehicle 5 miles (8 km) or
10 minutes to ensure distribution of the Tire Service Kit Sealant within the tire. Do not exceed
55 mph (88 km/h).
WHAT TO DO IN EMERGENCIES
107
Page 110 of 164
(E) After Driving:
Pull over to a safe location. Refer to “Whenever You Stop to Use Tire Service Kit” before continuing.
1. Turn the Mode Select Knob (5) to the Air Mode position.
2. Uncoil the Air Pump Hose (7) (black in color) and screw the fitting at the end of hose (7) onto
the valve stem.
3. Uncoil the power plug and insert the plug into the vehicles 12 Volt power outlet.
4. Check the pressure in the tire by reading the Pressure Gauge (3).
If tire pressure is less than 19 psi (1.3 Bar), the tire is too badly damaged. Do not attempt to
drive the vehicle further. Call for assistance.
If the tire pressure is 19 psi (1.3 Bar) or higher:
1. Press the Power Button (4) to turn on Tire Service Kit and inflate the tire to the pressure
indicated on the tire and loading information label on the driver-side door opening.
2. Disconnect the Tire Service Kit from the valve stem, reinstall the cap on the valve stem and
unplug from 12 Volt outlet.
3. Place the Tire Service Kit in its proper storage area in the vehicle.
4. Have the tire inspected and repaired or replaced at the earliest opportunity at an authorized
dealer or tire service center.
5. Remove the Speed Limit sticker from the instrument panel after the tire has been repaired.
6. Replace the Sealant Bottle (1) and Sealant Hose (6) assembly at your authorized dealer as
soon as possible. Refer to “(F) Sealant Bottle and Hose Replacement.”
NOTE:
•Ifthetirebecomesover-inflated,presstheDeflationButtontoreducethetirepressuretothe
recommended inflation pressure before continuing.
• When having the tire serviced, advise the authorized dealer or service center that the tire has
been sealed using the Tire Service Kit.
(F) Sealant Bottle And Hose Replacement:
1. Uncoil the Sealant Hose (6) (clear in color).
2. Locate the round Sealant Bottle release button in the recessed area under the sealant bottle.
3. Press the Sealant Bottle release button. The Sealant Bottle (1) will pop up. Remove the bottle
and dispose of it accordingly.
4. Clean any remaining sealant from the Tire Service Kit housing.
5. Position the new Sealant Bottle (1) in the housing so that the Sealant Hose (6) aligns with the
hose slot in the front of the housing. Press the bottle into the housing. An audible click will be
heard indicating the bottle is locked into place.
WHAT TO DO IN EMERGENCIES
108
Page 127 of 164

FREEING A STUCK VEHICLE
If your vehicle becomes stuck in mud, sand or snow, it can often be moved using a rocking motion.
Tu r n y o u r s t e e r i n g w h e e l r i g h t a n d l e f t t o c l e a r t h e a r e a a r o u n d t h e f r o n t w h e e l s . T h e n s h i f t b a c k
and forth between DRIVE and REVERSE while gently pressing the accelerator. Use the least
amount of accelerator pedal pressure that will maintain the rocking motion, without spinning the
wheels or racing the engine.
NOTE:
Press the "ESC Off" switch, to place the Electronic Stability Control (ESC ) system in "Partial
Off" mode before rocking the vehicle. Once the vehicle has been freed, press the "ESC Off"
switch again to restore "ESC On" mode.
CAUTION!
•When“rocking”astuckvehiclebyshiftingbetweenREVERSEandDRIVE,donotspin
the wheels faster than 15 mph (24 km/h), or drivetrain damage may result.
•Revvingtheengineorspinningthewheelstoofastmayleadtotransmissionoverheating
and failure. It can also damage the tires. Do not spin the wheels above 30 mph (48 km/h)
while in gear (no transmission shifting occurring).
WARNING!
Fast spinning tires can be dangerous. Forces generated by excessive wheel speeds may cause
tire damage or failure. A tire could explode and injure someone. Do not spin your vehicle's
wheels faster than 30 mph (48 km/h) when you are stuck. Do not let anyone near a spinning
wheel, no matter what the speed.
WHAT TO DO IN EMERGENCIES
125
Page 135 of 164
Severe Duty All Models
Change Engine Oil at 4000 miles (6,500 km) if the vehicle is operated in a dusty and off road
environment. This type of vehicle use is considered Severe Duty.
Once A Month Or Before A Long Trip:
•Checkengineoillevel.
•Checkwindshieldwasherfluidlevel.
• Check tire pressure and look for unusual wear or damage. Rotate tires at the first sign of
irregular wear, even if it occurs before the oil indicator system turns on.
•Checkthefluidlevelsofthecoolantreservoir,brakemastercylinder,andpowersteeringand
fill as needed.
• Check function of all interior and exterior lights .
Required Maintenance Intervals.
Refer to the maintenance schedules on the following page for the required maintenance
intervals.
At Every Oil Change Interval As Indicated By Oil Change Indicator System:
• Change oil and filter.
• Rotate the tires.Rotate at the first sign of irregular wear, even if it occurs before the oilindicator system turns on.
•Inspectbatteryandcleanandtightenterminalsasrequired.
•Inspectbrakepads,shoes,rotors,drums,hosesandparkbrake.
•Inspectenginecoolingsystemprotectionandhoses.
•Inspectexhaustsystem.
•Inspectengineaircleanerifusingindustyoroff-roadconditions.
MAINTAINING YOUR VEHICLE
133
Page 149 of 164

NOTE:
• A street address is required when ordering manuals (no P.O. Boxes).
•TheOwner'sManualandUserGuideelectronicfilesarealsoavailableontheChrysler,Jeep,
Ram Truck, Dodge and SRT websites.
•Clickonthe“ForOwners”tab,select“Owner/ServiceManuals”,thenselectyourdesired
model year and vehicle from the drop down lists.
REPORTING SAFETY DEFECTS IN THE
UNITED STATES
If you believe that your vehicle has a defect that could cause a collision or cause injury or death,
you should immediately inform the National Highway Traffic Safety Administration (NHTSA) in
addition to notifying the manufacturer.
If NHTSA receives similar complaints, it may open an investigation, and if it finds that a safety
defect exists in a group of vehicles, it may order a recall and remedy campaign. However, NHTSA
cannot become involved in individual problems between you, your authorized dealer and the
manufacturer.
To contact NHTSA, you may either call the Auto Safety Hotline toll free at 1–888–327–4236
(TTY: 1–800–424–9153), or go to http://www.safercar.gov; or write to: Administrator, NHTSA,
1200 New Jersey Avenue, SE., West Building, Washington, D.C. 20590. You can also obtain
other information about motor vehicle safety from http://www.safercar.gov.
In Canada
If you believe that your vehicle has a safety defect, you should contact the Customer Service
Department immediately. Canadian customers who wish to report a safety defect to the
Canadian government should contact Transport Canada, Motor Vehicle Defect Investigations
and Recalls at 1-800-333-0510 or go to http://www.tc.gc.ca/roadsafety/.
French Canadian customers who wish to report a safety defect to the Canadian government
should contact Transport Canada, Motor Vehicle Defect Investigations and Recalls at
1-800-333-0510 or go to http://www.tc.gc.ca/securiteroutiere/ .
CONSUMER ASSISTANCE
147