charging CHRYSLER TOWN AND COUNTRY 2016 5.G Owners Manual
[x] Cancel search | Manufacturer: CHRYSLER, Model Year: 2016, Model line: TOWN AND COUNTRY, Model: CHRYSLER TOWN AND COUNTRY 2016 5.GPages: 727, PDF Size: 5.32 MB
Page 336 of 727
Charging System Warning Light
Red TelltaleLight What It Means
Charging System Warning Light
This light shows the status of the electrical charging system. The light should come on when
the ignition switch is first turned to ON/RUN and remain on briefly as a bulb check. If the
light stays on or comes on while driving, turn off some of the vehicle’s nonessential electri-
cal devices or increase engine speed (if at idle). If the charging system light remains on, it
means that the vehicle is experiencing a problem with the charging system. Obtain SERVICE
IMMEDIATELY. See an authorized dealer.
If jump starting is required, refer to “Jump Starting Procedures” in “What To Do In Emer-
gencies.”
334 UNDERSTANDING YOUR INSTRUMENT PANEL
Page 405 of 727
Connecting The iPod Or External USB Device
Use the connection cable to connect an iPod or external
USB device to the vehicle’s USB connector port which is
located in the glove compartment.NOTE:
The glove compartment will have a position
where the iPod or consumer electronic audio device cable
can be routed through without damaging the cable when
closing the lid. This allows routing of the cable without
damaging it while closing the lid. If a cut out is not
available in the glove compartment, route the cable away
from the lid latch and in a place that will allow the lid to
close without damaging the cable.
Once the audio device is connected and synchronized to
the vehicle’s iPod/USB/MP3 control system (iPod or
external USB device may take a few minutes to connect),
the audio device starts charging and is ready for use by
pressing radio switches, as described below.
NOTE: If the audio device battery is completely dis-
charged, it may not communicate with the iPod/USB/
MP3 control system until a minimum charge is attained.
Leaving the audio device connected to the iPod/USB/
MP3 control system may charge it to the required level.
USB Port
4
UNDERSTANDING YOUR INSTRUMENT PANEL 403
Page 626 of 727
3. If using another vehicle to jump-start the battery, parkthe vehicle within the jumper cables reach, set the
parking brake and make sure the ignition is OFF.
WARNING!
Do not allow vehicles to touch each other as this
could establish a ground connection and personal
injury could result.
Jump-Starting Procedure
WARNING!
Failure to follow this jump-starting procedure could
result in personal injury or property damage due to
battery explosion.
CAUTION!
Failure to follow these procedures could result in
damage to the charging system of the booster vehicle
or the discharged vehicle.
Connecting The Jumper Cables
1. Connect the positive (+)end of the jumper cable to the
positive (+)post of the vehicle with the discharged
battery.
2. Connect the opposite end of the positive (+)jumper
cable to the positive (+)post of the booster battery.
3. Connect the negative (-)end of the jumper cable to the
negative (-)post of the booster battery.
624 WHAT TO DO IN EMERGENCIES
Page 627 of 727
4. Connect the opposite end of the negative(-)jumper
cable to a good engine ground (exposed metal part of
the discharged vehicle’s engine) away from the battery
and the fuel injection system.
WARNING!
Do not connect the jumper cable to the negative (-)
post of the discharged battery. The resulting electri-
cal spark could cause the battery to explode and
could result in personal injury. Only use the specific
ground point, do not use any other exposed metal
parts.
5. Start the engine in the vehicle that has the booster battery, let the engine idle a few minutes, and then
start the engine in the vehicle with the discharged
battery. 6. Once the engine is started, remove the jumper cables
in the reverse sequence:
Disconnecting The Jumper Cables
1. Disconnect the negative (-)end of the jumper cable
from the engine ground of the vehicle with the dis-
charged battery.
2. Disconnect the opposite end of the negative (-)jumper
cable from the negative (-)post of the booster battery.
3. Disconnect the positive (+)end of the jumper cable
from the positive (+)post of the booster battery.
4. Disconnect the opposite end of the positive (+)jumper
cable from the positive (+)post of the vehicle with the
discharged battery.
If frequent jump-starting is required to start your vehicle
you should have the battery and charging system in-
spected at your authorized dealer.
6
WHAT TO DO IN EMERGENCIES 625
Page 707 of 727
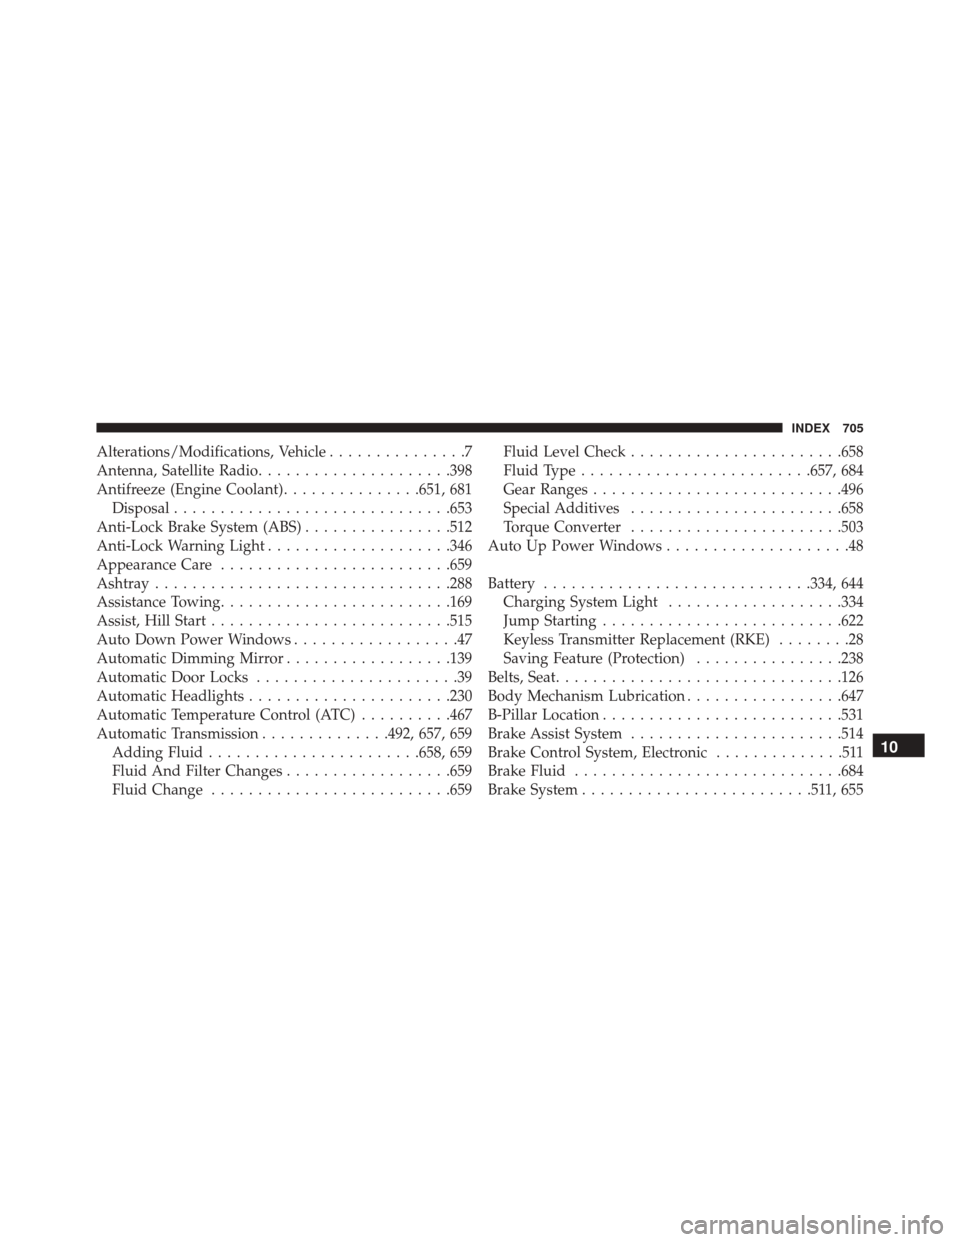
Alterations/Modifications, Vehicle...............7
Antenna, Satellite Radio .....................398
Antifreeze (Engine Coolant) ...............651, 681
Disposal ............................. .653
Anti-Lock Brake System (ABS) ................512
Anti-Lock Warning Light ....................346
Appearance Care ........................ .659
Ashtray ............................... .288
Assistance Towing ........................ .169
Assist, Hill Start ......................... .515
Auto Down Power Windows ..................47
Automatic Dimming Mirror ..................139
Automatic Door Locks ......................39
Automatic Headlights ..................... .230
Automatic Temperature Control (ATC) ..........467
Automatic Transmission ..............492, 657, 659
Adding Fluid ...................... .658, 659
Fluid And Filter Changes ..................659
Fluid Change ......................... .659Fluid Level Check
...................... .658
Fluid Type ........................ .657, 684
Gear Ranges .......................... .496
Special Additives ...................... .658
Torque Converter ...................... .503
Auto Up Power Windows ....................48
Battery ............................ .334, 644
Charging System Light ...................334
Jump Starting ......................... .622
Keyless Transmitter Replacement (RKE) ........28
Saving Feature (Protection) ................238
Belts, Seat .............................. .126
Body Mechanism Lubrication .................647
B-Pillar Location ......................... .531
Brake Assist System ...................... .514
Brake Control System, Electronic ..............511
Brake Fluid ............................ .684
Brake
System .........................511,655
10
INDEX 705