Front door CHRYSLER VOYAGER 2005 Owner's Manual
[x] Cancel search | Manufacturer: CHRYSLER, Model Year: 2005, Model line: VOYAGER, Model: CHRYSLER VOYAGER 2005Pages: 2339, PDF Size: 59.69 MB
Page 445 of 2339
The lock function works from the RKE transmitter
even in an out of synchronization condition, therefore
it could be verified by pressing the LOCK button on
the RKE key fob.
DOOR CYLINDER LOCK
SWITCH - EXPORT
DESCRIPTION
The Door Cylinder Lock Switch (If equipped) is
used to:
²Unlock/Lock all the doors via the Central Lock-
ing feature.
²Arm/Disarm the Vehicle Theft Security System.
²Trigger the Illuminated Entry feature.
The door cylinder lock switch is mounted to the
rear of the driver door lock cylinder. When installed
on the rear of the cylinder, there is a tab on the lock
cylinder that aligns with the switch to prevent it
from turning. An anti-rotating device. The door cylin-
der lock switch is a one time use switch. Once it is
removed from the rear of the door lock cylinder, it
may not be reinstalled and a new switch must be
used.
OPERATION
When the Door Cylinder Lock Switch is turned
either way using the door key cylinder, the BCM
reads a direct message signal from the switch.
If turning the key cylinder once, toward the front
of the vehicle, this will:
(1) Mechanically unlock the door lock.
(2) Disarm the Vehicle Theft Security System (if
equipped).
(3) Turn on the Illuminated Entry (if equipped) for
approximately 30 seconds.
If the key cylinder is turned to the unlock position
(toward the front of vehicle) twice within two sec-
onds, all the doors and liftgate will unlock (if
equipped with the central locking feature).
To lock the vehicle using the door cylinder lock
switch, turn the key cylinder toward the rear of the
vehicle once. This will lock the door that you are
using the key on. If equipped with the central locking
feature, this will lock all the other doors and liftgate.
Furthermore, this will arm the vehicle theft security
system and turn off the illuminated entry.
DIAGNOSIS AND TESTING
DOOR CYLINDER LOCK SWITCH - EXPORT
Any diagnosis of the power lock system
should begin with the use of the DRB IIItdiag-
nostic tool. For information on the use of theDRB IIIt, refer to the appropriate Diagnostic
Service Manual.
For complete circuit diagrams, refer to the appro-
priate wiring information.
(1) Visually inspect the switch for proper installa-
tion. Make sure it is seated on the rear of the key
cylinder, with the tab of the door key cylinder prop-
erly aligned with the slot on the door cylinder lock
switch.
(2) Disconnect the switch at the harness connector
and check the resistance in each switch position.
CAUTION: Do not disconnect the switch from the
rear of the door key cylinder. This switch is a one
time use switch. Once it is removed from the rear of
the switch, it is not reusable and must be replaced.
Test the switch at the harness connector.
DOOR CYLINDER LOCK SWITCH RESISTANCE
SWITCH POSITION RESISTANCE VALUE
COUNTERCLOCKWISE 5.4K OHMS
NEUTRAL 18.4K OHMS
CLOCKWISE 2K OHMS
REMOVAL
(1) Disconnect and isolate the battery negative
cable.
(2) Remove the door trim panel of the effected door
cylinder lock switch (Refer to 23 - BODY/DOOR -
FRONT/TRIM PANEL - REMOVAL).
(3) Close the door window.
(4) Disconnect the door cylinder lock switch wire
connector from the door harness, and wiring clip
from the impact beam.
(5) Remove the outer door handle from the door.
(6) Remove the switch from the key cylinder in the
door handle and remove from vehicle.
INSTALLATION
(1) Install the switch on the key cylinder in the
door handle.
(2) Install the door handle.
(3) Connect the door cylinder lock switch wire con-
nector to the door harness, and the wiring clip to the
impact beam.
(4) Install the door trim panel of the affected door
cylinder lock switch (Refer to 23 - BODY/DOOR -
FRONT/TRIM PANEL - INSTALLATION).
(5) Connect the battery negative cable.
(6) Verify system operation.
8N - 22 POWER LOCKSRS
POWER LOCKS (Continued)
Page 446 of 2339

DOOR LOCK MOTOR
DIAGNOSIS AND TESTING
DOOR LOCK MOTOR
Any diagnosis of the power lock system
should begin with the use of the DRB IIItdiag-
nostic tool. For information on the use of the
DRB IIIt, refer to the appropriate Diagnostic
Service Manual.
For complete circuit diagrams, refer to the appro-
priate wiring information.
Verify battery condition before testing door lock
motor(s).
To determine which motor is faulty, check each
individual door for electrical lock and unlock or dis-
connect the motor connectors one at a time, while
operating the door lock switch. In the event that
none of the motors work, the problem may be caused
by a shorted motor or a faulty switch. Disconnecting
the faulty motor will allow the others to work.
To test an individual door lock motor, disconnect
the electrical connector from the motor. To lock the
door, connect a fused 12 volt power source to the pos-
itive pin of the lock motor and a ground wire to the
other pin. To unlock the door reverse the wire con-
nections at the motor pin terminals. If these results
are not obtained, replace the door latch.
DOOR LOCK SWITCH
DIAGNOSIS AND TESTING
DOOR LOCK SWITCH
(1) Remove door trim panel. Refer to Body, Door -
Front, Trim Panel, Removal and Installation.
(2) Disconnect wire connector from back of door
lock switch.
(3) Depress switch to LOCK position.
(4) Using an ohmmeter, test switch resistance
between Pins 2 and 3. Refer to the DOOR LOCK
SWITCH CONTINUITY test and (Fig. 1).
(5) Depress switch to UNLOCK position.
(6) Test resistance between Pins 2 and 3.
(7) Test resistance between pins 2 and 3 while
switch is in its normal unactuated mode.
(8) If resistance values are not within the param-
eters shown replace the door lock switch.
DOOR LOCK SWITCH CONTINUITY
SWITCH
POSITIONCONTINUITY
BETWEENRESISTANCE
VALUE
LOCK 2 and 3 5.3K Ohm 5%
UNLOCK 2 and 3 2.0K Ohm 5%
UNACTUATED 2 and 3 18.3K Ohms
5%
REMOVAL
(1) Disconnect and isolate the battery negative
cable.
(2) Remove door trim panel. Refer to Body, Door -
Front, Trim Panel, Removal.
(3) Disconnect wire connector from back of door
lock switch.
(4) Remove two screws to door lock switch.
(5) Remove switch from vehicle.
INSTALLATION
(1) Install the switch into the vehicle.
(2) Install the two screws to door lock switch.
(3) Connect wire connector to back of door lock
switch.
(4) Install door trim panel. Refer to Body, Door -
Front, Trim Panel, Installation.
(5) Connect the battery negative cable.
Fig. 1 DOOR LOCK SWITCH
RSPOWER LOCKS8N-23
Page 455 of 2339
(Refer to 8 - ELECTRICAL/HEATED SEATS -
DESCRIPTION) for more information on the heated
seat option. (Refer to 8 - ELECTRICAL/POWER
SEATS - DESCRIPTION - MEMORY SEAT SYS-
TEM) for more information on the memory seat sys-
tem.
The power seat system includes the following com-
ponents:
²Power seat recliners
²Power seat switches
²Power seat tracks
²Circuit breaker
The power seat system with memory and heated
seat options includes the following components:
²Power seat recliner
²Power seat switch
²Power seat track.
²Memory Seat Mirror Module (MSMM)
²Memory set switch
²Heated Seat Module (HSM)
²Heated seat switch
²Electronic Vehicle Information Center (EVIC)
MEMORY SYSTEM
The memory system is able to store and recall the
driver side power seat positions (including the power
recliner position), power adjustable pedal positions
and the driver outside mirror position for two driv-
ers. On vehicles equipped with a factory radio, the
memory system is also able to store and recall radio
station presets for two drivers. The memory system
also will store and recall the last station listened to
for each driver, even if it is not one of the preset sta-
tions.
The memory system will automatically return to
its preset settings when the corresponding numbered
button of the memory switch is depressed, or when
the doors are unlocked using the corresponding
Remote Keyless Entry (RKE) transmitter. A customer
programmable feature of the memory system allows
the RKE recall of memory features to be disabled, if
desired. This programmable feature is internal in the
Electronic Vehicle Information Center (EVIC) mod-
ule, which is located in the overhead console.
A Memory Seat Mirror Module (MSMM) is used to
control and integrate the many electronic functions
and features included in the memory seat and mirror
systems.
The memory system includes the following compo-
nents:
²Memory Seat Mirror Module (MSMM)
²Memory set switch
²Position potentiometers on the driver outside
side view mirror
²Position potentiometers on the power adjustable
pedal motor²Position potentiometers on the driver side power
seat track and power seat recliner motors
²Electronic Vehicle Information Center (EVIC)
²Radio receiver (if PCI data bus capable)
Certain functions of the memory system rely upon
resources shared with other electronic modules in the
vehicle over the Programmable Communications
Interface (PCI) data bus network. Initial diagnosis of
these electronic modules or the PCI data bus network
requires the use of a DRBIIItor equivalent scan tool
and the proper Diagnostic Procedures information. If
this method does not prove conclusive, the proper
wiring schematics and the service manual diagnostic
information are required.
The other electronic modules that may affect mem-
ory system operation are:
²Body Control Module (BCM)- (Refer to 8 -
ELECTRICAL/ELECTRONIC CONTROL MOD-
ULES/BODY CONTROL/CENTRAL TIMER MODUL
- DESCRIPTION) for additional information.
²Powertrain Control Module (PCM)- (Refer
to 8 - ELECTRICAL/ELECTRONIC CONTROL
MODULES/POWERTRAIN CONTROL MODULE -
DESCRIPTION) for additional information.
²Transmission Control Module (TCM)- (Refer
to 8 - ELECTRICAL/ELECTRONIC CONTROL
MODULES/TRANSMISSION CONTROL MODULE -
DESCRIPTION) for additional information.
(Refer to 8 - ELECTRICAL/HEATED SEATS -
DESCRIPTION) for additional information on the
heated seat system. (Refer to 8 - ELECTRICAL/
POWER LOCKS - DESCRIPTION) for additional
information on the RKE system.
OPERATION
POWER SEAT SYSTEM
The power seat system receives battery current
through fuse #22 in the Integrated Power Module
(IPM) and a circuit breaker under the front seats,
regardless of the ignition switch position.
When a power seat switch control knob or knobs
are actuated, a battery feed and a ground path are
applied through the switch contacts to the appropri-
ate power seat track adjuster motor. The selected
adjuster motor operates to move the seat track
through its drive unit in the selected direction until
the switch is released, or until the travel limit of the
seat track is reached. When the switch is moved in
the opposite direction, the battery feed and ground
path to the motor are reversed through the switch
contacts. This causes the adjuster motor to run in the
opposite direction.
No power seat switch should be held applied in any
direction after the seat track has reached its travel
limit. The power seat adjuster motor each contain a
8N - 32 POWER SEAT SYSTEMRS
POWER SEAT SYSTEM (Continued)
Page 459 of 2339
REMOVAL
(1) Disconnect and isolate the battery negative
cable.
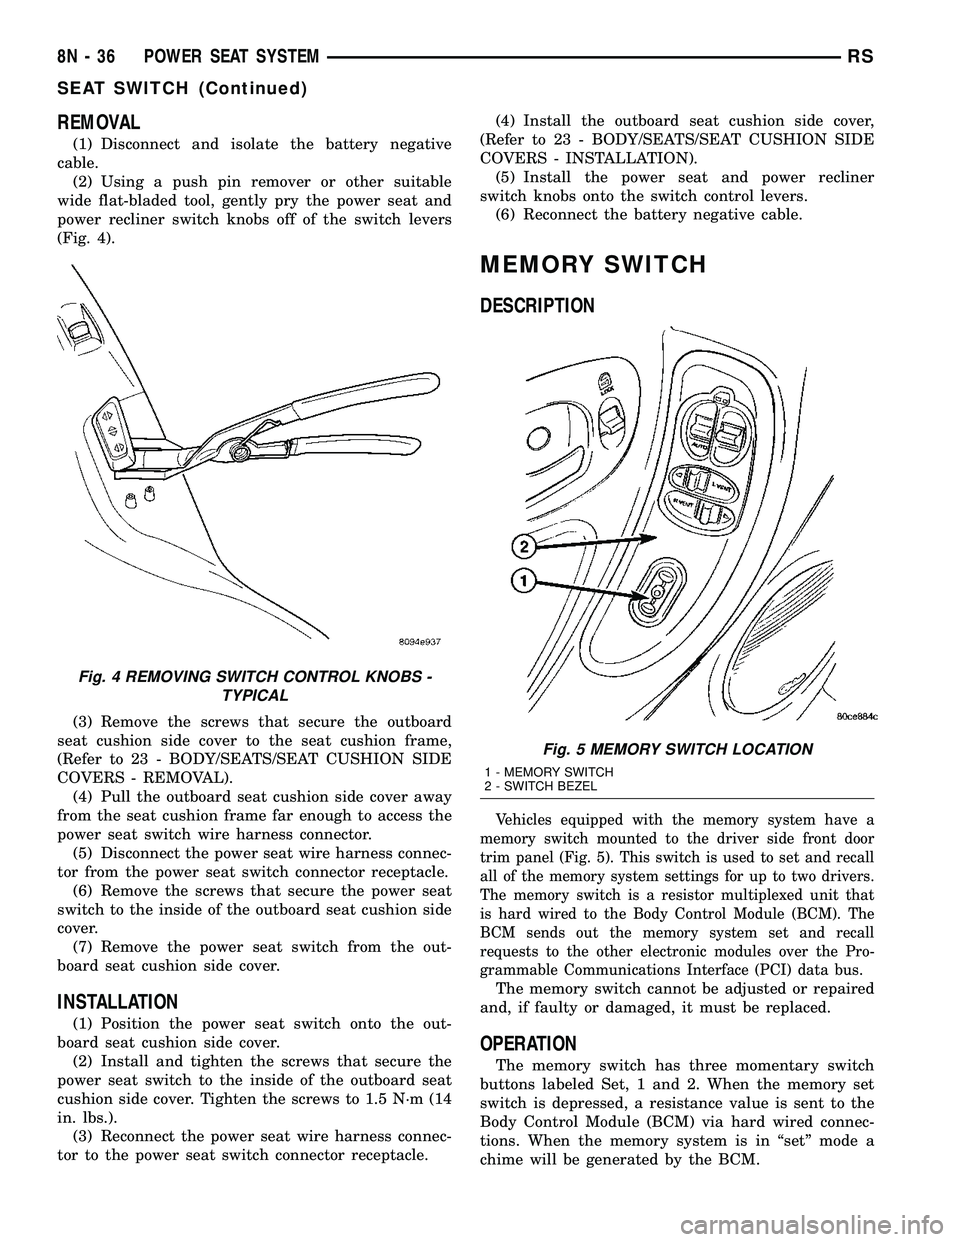
(2) Using a push pin remover or other suitable
wide flat-bladed tool, gently pry the power seat and
power recliner switch knobs off of the switch levers
(Fig. 4).
(3) Remove the screws that secure the outboard
seat cushion side cover to the seat cushion frame,
(Refer to 23 - BODY/SEATS/SEAT CUSHION SIDE
COVERS - REMOVAL).
(4) Pull the outboard seat cushion side cover away
from the seat cushion frame far enough to access the
power seat switch wire harness connector.
(5) Disconnect the power seat wire harness connec-
tor from the power seat switch connector receptacle.
(6) Remove the screws that secure the power seat
switch to the inside of the outboard seat cushion side
cover.
(7) Remove the power seat switch from the out-
board seat cushion side cover.
INSTALLATION
(1) Position the power seat switch onto the out-
board seat cushion side cover.
(2) Install and tighten the screws that secure the
power seat switch to the inside of the outboard seat
cushion side cover. Tighten the screws to 1.5 N´m (14
in. lbs.).
(3) Reconnect the power seat wire harness connec-
tor to the power seat switch connector receptacle.(4) Install the outboard seat cushion side cover,
(Refer to 23 - BODY/SEATS/SEAT CUSHION SIDE
COVERS - INSTALLATION).
(5) Install the power seat and power recliner
switch knobs onto the switch control levers.
(6) Reconnect the battery negative cable.
MEMORY SWITCH
DESCRIPTION
Vehicles equipped with the memory system have a
memory switch mounted to the driver side front door
trim panel (Fig. 5). This switch is used to set and recall
all of the memory system settings for up to two drivers.
The memory switch is a resistor multiplexed unit that
is hard wired to the Body Control Module (BCM). The
BCM sends out the memory system set and recall
requests to the other electronic modules over the Pro-
grammable Communications Interface (PCI) data bus.
The memory switch cannot be adjusted or repaired
and, if faulty or damaged, it must be replaced.
OPERATION
The memory switch has three momentary switch
buttons labeled Set, 1 and 2. When the memory set
switch is depressed, a resistance value is sent to the
Body Control Module (BCM) via hard wired connec-
tions. When the memory system is in ªsetº mode a
chime will be generated by the BCM.
Fig. 4 REMOVING SWITCH CONTROL KNOBS -
TYPICAL
Fig. 5 MEMORY SWITCH LOCATION
1 - MEMORY SWITCH
2 - SWITCH BEZEL
8N - 36 POWER SEAT SYSTEMRS
SEAT SWITCH (Continued)
Page 460 of 2339
DIAGNOSIS AND TESTING
MEMORY SWITCH
(1) Remove the memory switch from the drivers
door panel (Refer to 8 - ELECTRICAL/POWER
SEATS/MEMORY SET SWITCH - REMOVAL).
(2) Using an ohmmeter, check the continuity of the
memory select switch MUX circuit between the C2
wire harness connector for the Body Control Module
(BCM) and the wire harness connector for the mem-
ory switch. There should be continuity. If OK, go to
Step 3. If not OK, repair the open or shorted MUX
circuit as required.
(3) Using an ohmmeter, check the continuity of the
memory select switch return circuit between the C2
wire harness connector for the BCM and the wire
harness connector for the memory switch. There
should be continuity. If OK, go to Step 4. If not OK,
repair the open or shorted return circuit as required.
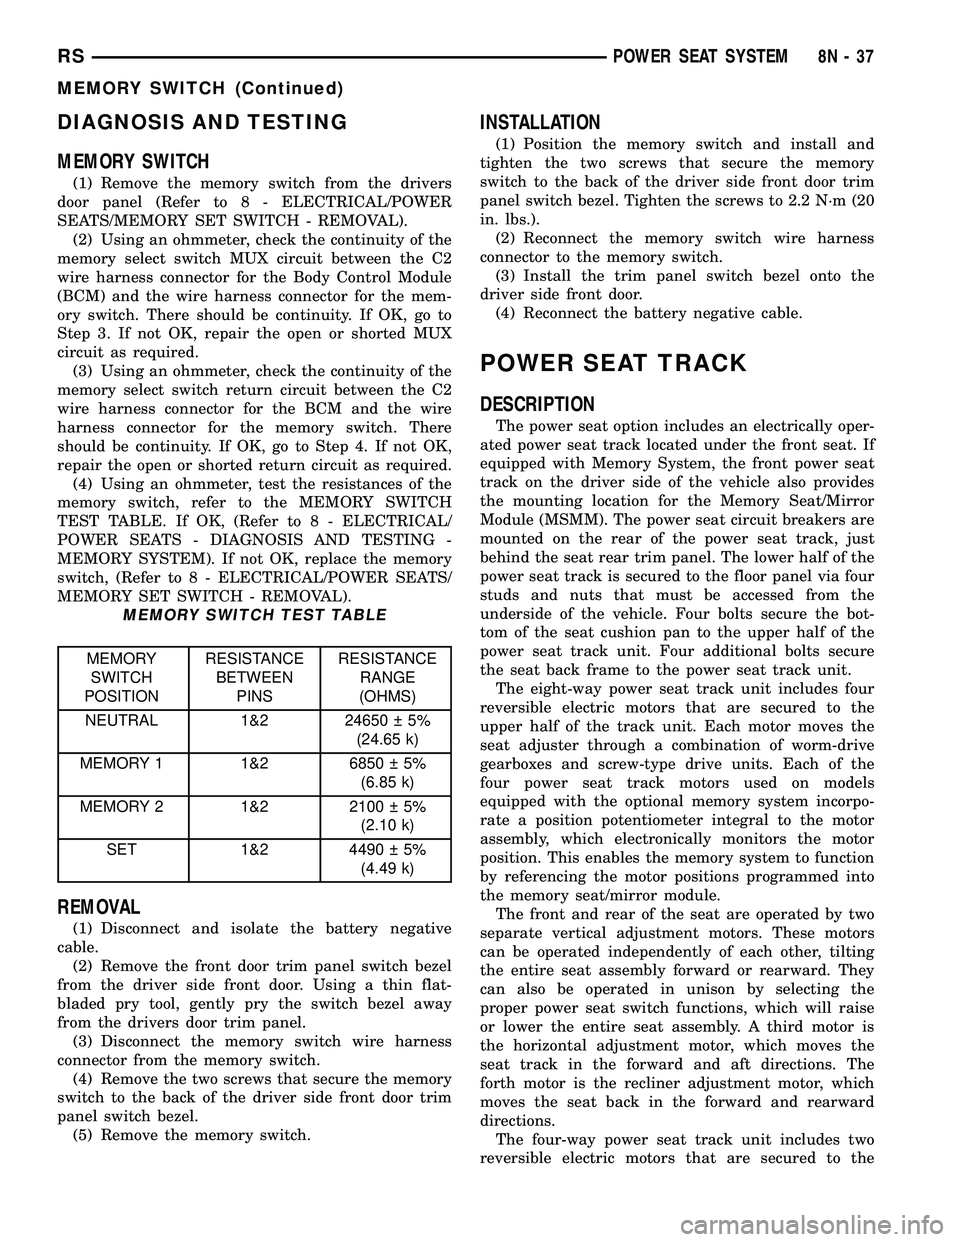
(4) Using an ohmmeter, test the resistances of the
memory switch, refer to the MEMORY SWITCH
TEST TABLE. If OK, (Refer to 8 - ELECTRICAL/
POWER SEATS - DIAGNOSIS AND TESTING -
MEMORY SYSTEM). If not OK, replace the memory
switch, (Refer to 8 - ELECTRICAL/POWER SEATS/
MEMORY SET SWITCH - REMOVAL).
MEMORY SWITCH TEST TABLE
MEMORY
SWITCH
POSITIONRESISTANCE
BETWEEN
PINSRESISTANCE
RANGE
(OHMS)
NEUTRAL 1&2 24650 5%
(24.65 k)
MEMORY 1 1&2 6850 5%
(6.85 k)
MEMORY 2 1&2 2100 5%
(2.10 k)
SET 1&2 4490 5%
(4.49 k)
REMOVAL
(1) Disconnect and isolate the battery negative
cable.
(2) Remove the front door trim panel switch bezel
from the driver side front door. Using a thin flat-
bladed pry tool, gently pry the switch bezel away
from the drivers door trim panel.
(3) Disconnect the memory switch wire harness
connector from the memory switch.
(4) Remove the two screws that secure the memory
switch to the back of the driver side front door trim
panel switch bezel.
(5) Remove the memory switch.
INSTALLATION
(1) Position the memory switch and install and
tighten the two screws that secure the memory
switch to the back of the driver side front door trim
panel switch bezel. Tighten the screws to 2.2 N´m (20
in. lbs.).
(2) Reconnect the memory switch wire harness
connector to the memory switch.
(3) Install the trim panel switch bezel onto the
driver side front door.
(4) Reconnect the battery negative cable.
POWER SEAT TRACK
DESCRIPTION
The power seat option includes an electrically oper-
ated power seat track located under the front seat. If
equipped with Memory System, the front power seat
track on the driver side of the vehicle also provides
the mounting location for the Memory Seat/Mirror
Module (MSMM). The power seat circuit breakers are
mounted on the rear of the power seat track, just
behind the seat rear trim panel. The lower half of the
power seat track is secured to the floor panel via four
studs and nuts that must be accessed from the
underside of the vehicle. Four bolts secure the bot-
tom of the seat cushion pan to the upper half of the
power seat track unit. Four additional bolts secure
the seat back frame to the power seat track unit.
The eight-way power seat track unit includes four
reversible electric motors that are secured to the
upper half of the track unit. Each motor moves the
seat adjuster through a combination of worm-drive
gearboxes and screw-type drive units. Each of the
four power seat track motors used on models
equipped with the optional memory system incorpo-
rate a position potentiometer integral to the motor
assembly, which electronically monitors the motor
position. This enables the memory system to function
by referencing the motor positions programmed into
the memory seat/mirror module.
The front and rear of the seat are operated by two
separate vertical adjustment motors. These motors
can be operated independently of each other, tilting
the entire seat assembly forward or rearward. They
can also be operated in unison by selecting the
proper power seat switch functions, which will raise
or lower the entire seat assembly. A third motor is
the horizontal adjustment motor, which moves the
seat track in the forward and aft directions. The
forth motor is the recliner adjustment motor, which
moves the seat back in the forward and rearward
directions.
The four-way power seat track unit includes two
reversible electric motors that are secured to the
RSPOWER SEAT SYSTEM8N-37
MEMORY SWITCH (Continued)
Page 463 of 2339
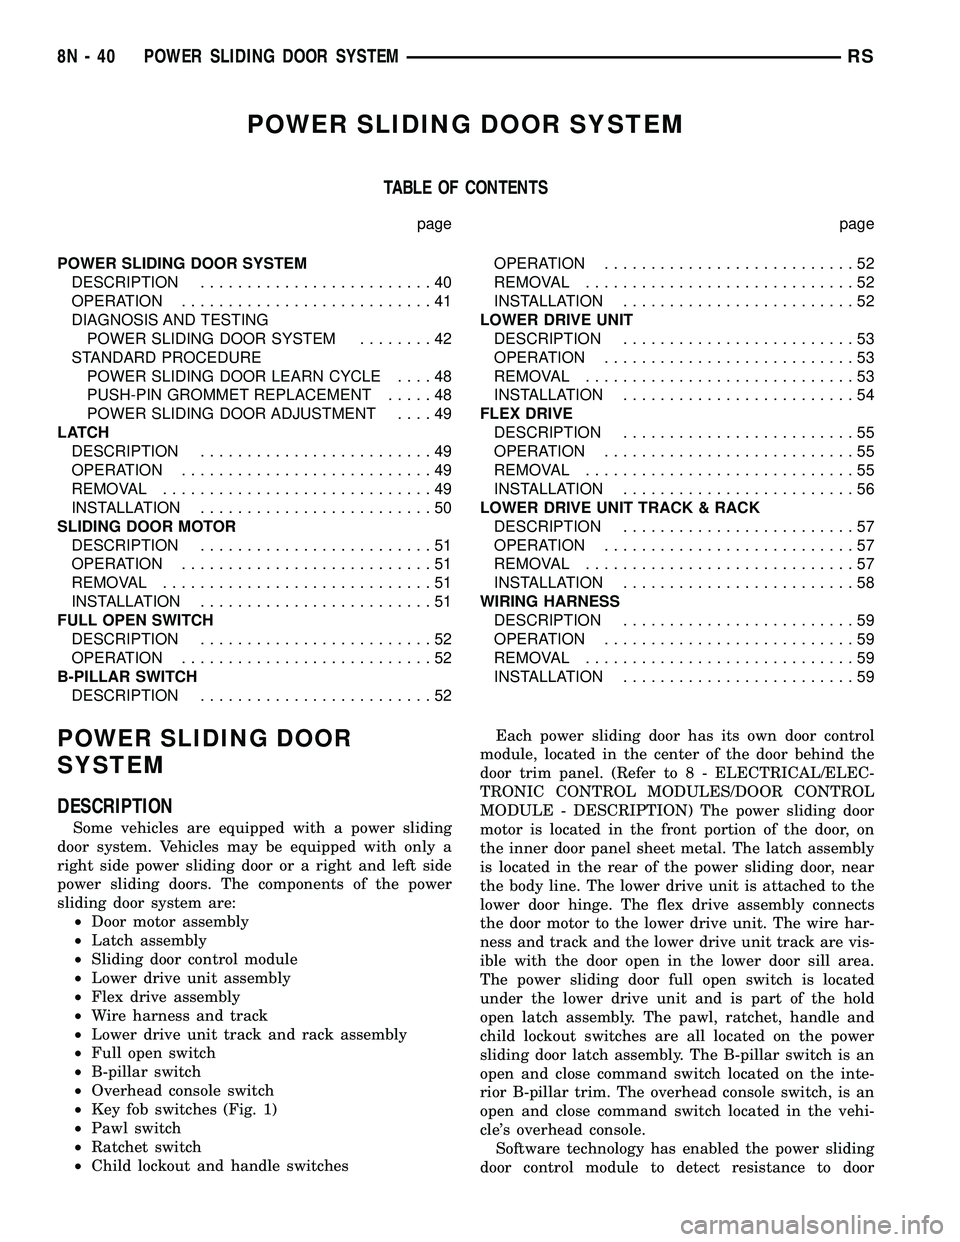
POWER SLIDING DOOR SYSTEM
TABLE OF CONTENTS
page page
POWER SLIDING DOOR SYSTEM
DESCRIPTION.........................40
OPERATION...........................41
DIAGNOSIS AND TESTING
POWER SLIDING DOOR SYSTEM........42
STANDARD PROCEDURE
POWER SLIDING DOOR LEARN CYCLE....48
PUSH-PIN GROMMET REPLACEMENT.....48
POWER SLIDING DOOR ADJUSTMENT....49
LATCH
DESCRIPTION.........................49
OPERATION...........................49
REMOVAL.............................49
INSTALLATION.........................50
SLIDING DOOR MOTOR
DESCRIPTION.........................51
OPERATION...........................51
REMOVAL.............................51
INSTALLATION.........................51
FULL OPEN SWITCH
DESCRIPTION.........................52
OPERATION...........................52
B-PILLAR SWITCH
DESCRIPTION.........................52OPERATION...........................52
REMOVAL.............................52
INSTALLATION.........................52
LOWER DRIVE UNIT
DESCRIPTION.........................53
OPERATION...........................53
REMOVAL.............................53
INSTALLATION.........................54
FLEX DRIVE
DESCRIPTION.........................55
OPERATION...........................55
REMOVAL.............................55
INSTALLATION.........................56
LOWER DRIVE UNIT TRACK & RACK
DESCRIPTION.........................57
OPERATION...........................57
REMOVAL.............................57
INSTALLATION.........................58
WIRING HARNESS
DESCRIPTION.........................59
OPERATION...........................59
REMOVAL.............................59
INSTALLATION.........................59
POWER SLIDING DOOR
SYSTEM
DESCRIPTION
Some vehicles are equipped with a power sliding
door system. Vehicles may be equipped with only a
right side power sliding door or a right and left side
power sliding doors. The components of the power
sliding door system are:
²Door motor assembly
²Latch assembly
²Sliding door control module
²Lower drive unit assembly
²Flex drive assembly
²Wire harness and track
²Lower drive unit track and rack assembly
²Full open switch
²B-pillar switch
²Overhead console switch
²Key fob switches (Fig. 1)
²Pawl switch
²Ratchet switch
²Child lockout and handle switchesEach power sliding door has its own door control
module, located in the center of the door behind the
door trim panel. (Refer to 8 - ELECTRICAL/ELEC-
TRONIC CONTROL MODULES/DOOR CONTROL
MODULE - DESCRIPTION) The power sliding door
motor is located in the front portion of the door, on
the inner door panel sheet metal. The latch assembly
is located in the rear of the power sliding door, near
the body line. The lower drive unit is attached to the
lower door hinge. The flex drive assembly connects
the door motor to the lower drive unit. The wire har-
ness and track and the lower drive unit track are vis-
ible with the door open in the lower door sill area.
The power sliding door full open switch is located
under the lower drive unit and is part of the hold
open latch assembly. The pawl, ratchet, handle and
child lockout switches are all located on the power
sliding door latch assembly. The B-pillar switch is an
open and close command switch located on the inte-
rior B-pillar trim. The overhead console switch, is an
open and close command switch located in the vehi-
cle's overhead console.
Software technology has enabled the power sliding
door control module to detect resistance to door
8N - 40 POWER SLIDING DOOR SYSTEMRS
Page 471 of 2339

CONDITION POSSIBLE CAUSES CORRECTION
Binding or sticking of components Establish location of binding and replace
necessary components
Squeaks, Noises and rattles Foreign material in door compartment Remove foreign material
Loose components Check and tighten loose components
Missing stabilizers, bumpers or
anti-rattle componentsCheck to ensure components are present.
Replace as necessary
Misadjusted stabilizers, bumpers or
anti-rattle componentsAdjust components as necessary
Poor door track lubrication Lubricate the front portions of the side door
tracks with9Door EaseT9or equivalent
STANDARD PROCEDURE
POWER SLIDING DOOR LEARN CYCLE
Any time a power sliding door component is removed,
replaced, door adjustment is performed or diagnostic
trouble codes are addressed and erased, a learn cycle
mustbe performed. This learn cycle enables the power
sliding door control module to learn or relearn its critical
information (travel limits, resistance to door travel, etc.)
which allows it to perform properly and safely. To per-
form a power sliding door learn cycle do the following:
(1)Obtain a DRB IIIt, or equivalent scan tool.
Connect the scan tool to the vehicle and check for
any power sliding door system stored diagnostic trou-
ble codes, erase any stored codes. Operate the system
and check to see if any trouble codes return. If any
diagnostic trouble codes return, diagnose, correct and
erase the codes before performing the learn cycle. If a
DRB IIIt, or equivalent scan tool is not available, the
learn cycle can be performed by opening and closing
the power sliding door using any of the normal open/
close command switches. Be certain to cycle the
power sliding door through a complete openand
close cycle or the procedure will not be complete.
(2) Using the scan tool, Go into Test Routine Menu
and select a power open command.
(3) Select a power close command.
(4) The power side door learn cycle is complete.
NOTE: If the power sliding door will not complete a
full cycle, a problem exists with the power sliding door
system. (Refer to 8 - ELECTRICAL/POWER DOORS -
DIAGNOSIS AND TESTING) for additional information.
PUSH-PIN GROMMET REPLACEMENT
Push-pin grommets are used to hold and isolate
the power sliding door motor to and from the door
inner panel. This secures the door motor assembly to
the inner panel and keeps the audible motor vibra-
tions to a minimum. If a push-pin grommet showssigns of wear, it must be replaced. Follow the proce-
dure below if replacement is necessary.
(1) Remove the door motor from the door inner
panel. (Refer to 8 - ELECTRICAL/POWER DOORS/
MOTOR - REMOVAL).
(2) Using a trim panel tool (special tool #C-4755)
or equivalent, remove the push-pin grommets from
the inner panel by pulling them straight out (Fig. 2).
(3) Install the replacement push-pin grommets in
the inner panel and install the door motor(Refer to 8
- ELECTRICAL/POWER DOORS/MOTOR - INSTAL-
LATION).
Fig. 2 SIDE DOOR MOTOR PUSH-PIN GROMMETS
1 - PUSH-PIN GROMMETS
2 - SIDE DOOR INNER PANEL
8N - 48 POWER SLIDING DOOR SYSTEMRS
POWER SLIDING DOOR SYSTEM (Continued)
Page 484 of 2339

POWER WINDOWS
TABLE OF CONTENTS
page page
POWER WINDOWS
DESCRIPTION.........................61
OPERATION...........................61
DIAGNOSIS AND TESTING
POWER WINDOWS....................61
VENT WINDOW MOTOR
DIAGNOSIS AND TESTING
VENT WINDOW MOTOR................62
REMOVAL.............................62INSTALLATION.........................62
WINDOW MOTOR
REMOVAL.............................62
WINDOW SWITCH
DIAGNOSIS AND TESTING
WINDOW SWITCH....................63
REMOVAL.............................64
INSTALLATION.........................64
POWER WINDOWS
DESCRIPTION
The Power Window System is activated through
switches mounted on the driver and passenger door
panels.
OPERATION
Front door window lift motors use permanent type
magnets. The B+ and ground applied at the motor
terminal pins will cause the motor to rotate in one
direction. Reversing current through the motor ter-
minals will cause the motor to rotate in the opposite
direction.
The power window motors ground through the
master switch in the driver door by a black wire
attached to the left cowl panel. Refer to the appropri-
ate wiring information.
The power rear vent windows, if equipped, are
operated by switches mounted in the driver door
switch bezel. A separate switch is used for each win-
dow. Permanent magnet type motors connected to a
crank system are used to open and close the rear
vent windows. A battery positive and negative con-
nection to either of the two motor terminals will
cause the motor to rotate in one direction. Reversing
current through these same two connections will
cause the motor to rotate in the opposite direction.
DIAGNOSIS AND TESTING
POWER WINDOWS
POWER WINDOW MOTOR TEST
If the power window motor is receiving proper cur-
rent and ground and does not operate, proceed withmotor test. Refer to the appropriate wiring informa-
tion.
(1) Remove front door trim panel and sound pad as
necessary to gain access to power window motor wire
connector, (Refer to 23 - BODY/DOOR - FRONT/
TRIM PANEL - REMOVAL).
(2) Disconnect power window motor wire connector
from door harness.
(3) Using two jumper wires, connect one to a bat-
tery (+) source and the other to a good ground (-).
(4) Connect the Negative (-) jumper probe to one of
the motor connector terminals.
(5) Momentarily touch the Positive (+) jumper
probe to the other motor connector terminal.
When positive probe is connected the motor should
rotate in one direction to either move window up or
down. If window is all the way up or down the motor
will grunt and the inner door panel will flex when
actuated in that one direction.
(6) Reverse jumper probes at the motor connector
terminals and window should now move in opposite
direction. If window does not move or grunt, replace
the motor.
If window moved completely up or down, reverse
the jumper probes and cycle window to the opposite
position to verify full operation.
If motor grunts and does not move, verify that reg-
ulator is not binding.
WIRING VOLTAGE TEST
The following wiring test determines whether or
not voltage is continuous through the body harness
to switch.
(1) Remove the power window switch and bezel
assembly from the driver door. (Refer to 8 - ELEC-
TRICAL/POWER WINDOWS/POWER WINDOW
SWITCH - REMOVAL).
(2) Disconnect wire connector from back of power
window switch.
RSPOWER WINDOWS8N-61
Page 485 of 2339

(3) Switch ignition ON position.
(4) Connect the clip end of a 12 volt test light to
Pin 13 in door harness connector at the window
switch. Touch the test light probe to Pin 9 and then
to Pin 11.
²If the test light illuminates, the wiring circuit
between the battery and switch is OK.
²If the lamp does not illuminate, first check the
25 amp circuit breaker attached to the electrical dis-
tribution wiring bracket. If the circuit breaker is OK,
then check the 40 amp fuse (#28) in the Integrated
Power Module (IPM). If both components are OK,
then check for a broken wire.
VENT WINDOW MOTOR
DIAGNOSIS AND TESTING
VENT WINDOW MOTOR
If the power vent window motor is receiving proper
current and ground and does not operate proceed
with motor test. Refer to the appropriate wiring
information.
(1) Remove D-pillar trim panel necessary to gain
access to power vent window motor wire connector,
(Refer to 23 - BODY/INTERIOR/LEFT D-PILLAR
TRIM PANEL - REMOVAL) or (Refer to 23 - BODY/
INTERIOR/RIGHT D-PILLAR TRIM PANEL -
REMOVAL).
(2) Disconnect power vent window motor wire con-
nector from body harness.
(3) Using two jumper wires, connect one to a bat-
tery (+) source and the other to a good ground (-).
(4) Connect the Negative (-) jumper probe to one of
the motor connector terminals.
(5) Momentarily touch the Positive (+) jumper
probe to the other motor connector terminal.
When positive probe is connected the motor should
rotate in one direction to either move window open or
closed. If window is all the way open or closed the
motor will grunt and the crank system will flex when
actuated in that one direction.
Reverse jumper probes at the motor connector ter-
minals and window should now move in opposite
direction. If window does not move or grunt, replace
the motor.
If window moved completely open or closed, reverse
the jumper probes and cycle window to the opposite
position to verify full operation.
If motor grunts and does not move, verify that
crank system is not binding.
REMOVAL
(1) Disconnect and isolate the battery negative
cable.(2) Remove D-pillar trim panel. (Refer to 23 -
BODY/INTERIOR/LEFT D-PILLAR TRIM PANEL -
REMOVAL) or (Refer to 23 - BODY/INTERIOR/
RIGHT D-PILLAR TRIM PANEL - REMOVAL).
(3) Disconnect wire connector from power vent
motor.
(4) Using a flat bladed tool, carefully lift the circu-
lar actuator link tab. Remove link from window ball
socket.
(5) Remove bolts holding power vent motor to
D-pillar (Fig. 1).
(6) Remove power vent motor.
INSTALLATION
(1) Obtain new vent window motor.
(2) Snap the actuator link socket onto the quarter
window ball socket. Using a soft rubber mallet, push
the circular link tab flush with link surface.
(3) Install bolts holding power vent motor to D-pil-
lar.
(4) Reconnect wire connector to power vent motor.
(5) Reconnect the battery negative cable.
(6) Cycle quarter window open/close to verify func-
tion.
(7) Install D-pillar trim panel.
WINDOW MOTOR
REMOVAL
The window motor is incorporated into the window
regulator assembly. If the window motor requires
replacement, the window regulator must be replaced.
(Refer to 23 - BODY/DOOR - FRONT/WINDOW
REGULATOR - REMOVAL).
Fig. 1 VENT WINDOW MOTOR
1 - VENT WINDOW MOTOR
2 - WIRE HARNESS CONNECTOR
3 - BOLT
4 - VENT WINDOW
8N - 62 POWER WINDOWSRS
POWER WINDOWS (Continued)
Page 489 of 2339
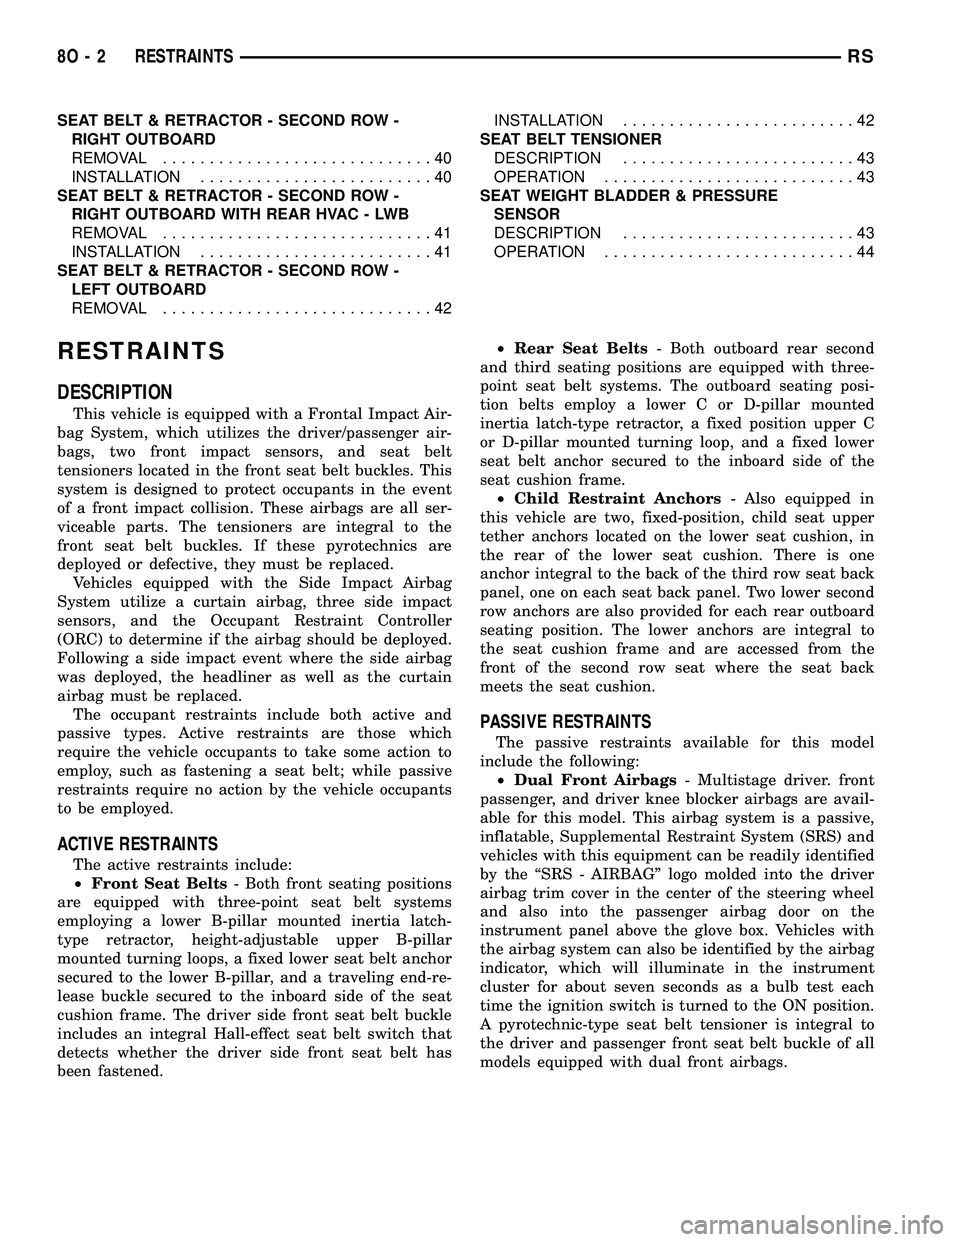
SEAT BELT & RETRACTOR - SECOND ROW -
RIGHT OUTBOARD
REMOVAL.............................40
INSTALLATION.........................40
SEAT BELT & RETRACTOR - SECOND ROW -
RIGHT OUTBOARD WITH REAR HVAC - LWB
REMOVAL.............................41
INSTALLATION.........................41
SEAT BELT & RETRACTOR - SECOND ROW -
LEFT OUTBOARD
REMOVAL.............................42INSTALLATION.........................42
SEAT BELT TENSIONER
DESCRIPTION.........................43
OPERATION...........................43
SEAT WEIGHT BLADDER & PRESSURE
SENSOR
DESCRIPTION.........................43
OPERATION...........................44
RESTRAINTS
DESCRIPTION
This vehicle is equipped with a Frontal Impact Air-
bag System, which utilizes the driver/passenger air-
bags, two front impact sensors, and seat belt
tensioners located in the front seat belt buckles. This
system is designed to protect occupants in the event
of a front impact collision. These airbags are all ser-
viceable parts. The tensioners are integral to the
front seat belt buckles. If these pyrotechnics are
deployed or defective, they must be replaced.
Vehicles equipped with the Side Impact Airbag
System utilize a curtain airbag, three side impact
sensors, and the Occupant Restraint Controller
(ORC) to determine if the airbag should be deployed.
Following a side impact event where the side airbag
was deployed, the headliner as well as the curtain
airbag must be replaced.
The occupant restraints include both active and
passive types. Active restraints are those which
require the vehicle occupants to take some action to
employ, such as fastening a seat belt; while passive
restraints require no action by the vehicle occupants
to be employed.
ACTIVE RESTRAINTS
The active restraints include:
²Front Seat Belts- Both front seating positions
are equipped with three-point seat belt systems
employing a lower B-pillar mounted inertia latch-
type retractor, height-adjustable upper B-pillar
mounted turning loops, a fixed lower seat belt anchor
secured to the lower B-pillar, and a traveling end-re-
lease buckle secured to the inboard side of the seat
cushion frame. The driver side front seat belt buckle
includes an integral Hall-effect seat belt switch that
detects whether the driver side front seat belt has
been fastened.²Rear Seat Belts- Both outboard rear second
and third seating positions are equipped with three-
point seat belt systems. The outboard seating posi-
tion belts employ a lower C or D-pillar mounted
inertia latch-type retractor, a fixed position upper C
or D-pillar mounted turning loop, and a fixed lower
seat belt anchor secured to the inboard side of the
seat cushion frame.
²Child Restraint Anchors- Also equipped in
this vehicle are two, fixed-position, child seat upper
tether anchors located on the lower seat cushion, in
the rear of the lower seat cushion. There is one
anchor integral to the back of the third row seat back
panel, one on each seat back panel. Two lower second
row anchors are also provided for each rear outboard
seating position. The lower anchors are integral to
the seat cushion frame and are accessed from the
front of the second row seat where the seat back
meets the seat cushion.
PASSIVE RESTRAINTS
The passive restraints available for this model
include the following:
²Dual Front Airbags- Multistage driver. front
passenger, and driver knee blocker airbags are avail-
able for this model. This airbag system is a passive,
inflatable, Supplemental Restraint System (SRS) and
vehicles with this equipment can be readily identified
by the ªSRS - AIRBAGº logo molded into the driver
airbag trim cover in the center of the steering wheel
and also into the passenger airbag door on the
instrument panel above the glove box. Vehicles with
the airbag system can also be identified by the airbag
indicator, which will illuminate in the instrument
cluster for about seven seconds as a bulb test each
time the ignition switch is turned to the ON position.
A pyrotechnic-type seat belt tensioner is integral to
the driver and passenger front seat belt buckle of all
models equipped with dual front airbags.
8O - 2 RESTRAINTSRS