park assist CHRYSLER VOYAGER 2021 Owners Manual
[x] Cancel search | Manufacturer: CHRYSLER, Model Year: 2021, Model line: VOYAGER, Model: CHRYSLER VOYAGER 2021Pages: 348, PDF Size: 18.73 MB
Page 6 of 348

4
STARTING AND OPERATING
STARTING THE ENGINE ...................................... 106
Normal Starting ........................................... 106AutoPark ........................................................ 107Cold Weather Operation
(Below –22°F Or −30°C) ............................ 109
After Starting — Warming Up
The Engine ..................................................... 109
If Engine Fails To Start ................................. 109To Turn Off The Engine Using
ENGINE START/STOP Button ........................ 110
ENGINE BLOCK HEATER — IF EQUIPPED ......... 110
ENGINE BREAK-IN RECOMMENDATIONS ........ 110
PARKING BRAKE ................................................. 111
Electric Park Brake (EPB) ............................. 111
AUTOMATIC TRANSMISSION.............................. 113
Ignition Park Interlock ................................... 114Brake/Transmission Shift Interlock (BTSI)
System ........................................................... 1159-Speed Automatic Transmission ............... 115
Gear Ranges .................................................. 115
ACTIVE NOISE CANCELLATION .......................... 118
POWER STEERING ............................................... 118 STOP/START SYSTEM — IF EQUIPPED ............. 119
Autostop Mode .............................................. 119
Possible Reasons The Engine Does Not
Autostop......................................................... 119
To Start The Engine While In Auto
Stop/Start ...................................................... 120
To Manually Turn Off The
Stop/Start System......................................... 120
To Manually Turn On The
Stop/Start System......................................... 120
System Malfunction ...................................... 120
CRUISE CONTROL SYSTEMS —
IF EQUIPPED ........................................................ 120
Cruise Control ................................................ 120
PARKSENSE REAR PARK ASSIST —
IF EQUIPPED ....................................................... 122
ParkSense Sensors ....................................... 123
ParkSense Warning Display ......................... 123
ParkSense Display ........................................ 123Enabling And Disabling ParkSense .............. 126Service The ParkSense Rear Park
Assist System ................................................ 126Cleaning The ParkSense System ................. 126
ParkSense System Usage Precautions........ 126
PARKVIEW REAR BACK UP CAMERA .............. 127
REFUELING THE VEHICLE ................................... 129
VEHICLE LOADING ............................................ 129
Certification Label ......................................... 129 TRAILER TOWING ............................................... 130
Common Towing Definitions......................... 130
Trailer Hitch Classification............................ 132
Trailer Towing Weights
(Maximum Trailer Weight Ratings) .............. 132
Vehicle Loading Chart ................................... 133
Trailer And Tongue Weight .......................... 134
Towing Requirements .................................. 135Towing Tips ................................................... 137
RECREATIONAL TOWING
(BEHIND MOTORHOME) ..................................... 138
Towing This Vehicle Behind Another
Vehicle ........................................................... 138
DRIVING TIPS ....................................................... 139
Driving On Slippery Surfaces ........................ 139Driving Through Water ................................. 140
MULTIMEDIA
UCONNECT SYSTEMS ......................................... 141
CYBERSECURITY ................................................. 141
UCONNECT SETTINGS ......................................... 142 Customer Programmable Features ............ 142
UCONNECT INTRODUCTION................................ 156
System Overview .......................................... 156Drag & Drop Menu Bar ................................ 158Safety And General Information .................. 158
21_RUV_OM_EN_USC_t.book Page 4
Page 7 of 348
5
UCONNECT MODES ............................................. 159 Steering Wheel Audio Controls ................... 159
Radio Mode .................................................. 160
Media Mode .................................................. 168
Phone Mode ................................................. 170
ANDROID AUTO™ & APPLE CARPLAY® —
IF EQUIPPED ........................................................ 181
Android Auto™ .............................................. 181Apple CarPlay®.............................................. 183Android Auto™ And Apple CarPlay®
Tips And Tricks............................................... 185
RADIO OPERATION AND MOBILE PHONES ..... 185
Regulatory And Safety Information .............. 185
SAFETY
SAFETY FEATURES .............................................. 186Anti-Lock Brake System (ABS) ..................... 186
Electronic Brake Control (EBC) System ...... 187
AUXILIARY DRIVING SYSTEMS .......................... 192
Blind Spot Monitoring (BSM) —
If Equipped..................................................... 192
Forward Collision Warning (FCW)
With Mitigation — If Equipped....................... 196
Tire Pressure Monitoring System
(TPMS) ........................................................... 199 OCCUPANT RESTRAINT SYSTEMS ................... 202
Occupant Restraint Systems Features ....... 202
Important Safety Precautions ...................... 202Seat Belt Systems ........................................ 203Supplemental Restraint Systems (SRS) ...... 212Child Restraints ............................................ 225
SAFETY TIPS ...................................................... 241
Transporting Passengers .............................. 241Transporting Pets ........................................ 242Safety Checks You Should Make
Inside The Vehicle ........................................ 242Periodic Safety Checks You Should
Make Outside The Vehicle ............................ 243
Exhaust Gas ................................................. 244
Carbon Monoxide Warnings ........................ 244IN CASE OF EMERGENCY
HAZARD WARNING FLASHERS......................... 245
ASSIST AND SOS MIRROR —
IF EQUIPPED ....................................................... 245
JACKING AND TIRE CHANGING —
IF EQUIPPED ...................................................... 249
Preparations For Jacking ............................. 249
Jack And Spare Tire Location ....................... 250
Equipment Removal ..................................... 250
Jacking Instructions ..................................... 251
Road Tire Installation .................................... 254
Portable Air Compressor —
If Equipped..................................................... 255Return Inflatable Spare Tire ........................ 256 TIRE SERVICE KIT — IF EQUIPPED ..................... 257
JUMP STARTING .................................................. 262
Preparations For Jump Start ........................ 262Jump Starting Procedure .............................. 263
REFUELING IN EMERGENCY –
IF EQUIPPED ........................................................ 264
IF YOUR ENGINE OVERHEATS ............................ 265
MANUAL PARK RELEASE .................................. 266
FREEING A STUCK VEHICLE .............................. 267
TOWING A DISABLED VEHICLE ......................... 268
ENHANCED ACCIDENT RESPONSE
SYSTEM (EARS) ................................................... 270
EVENT DATA RECORDER (EDR) ......................... 270
SERVICING AND MAINTENANCE
SCHEDULED SERVICING .................................... 271 Maintenance Plan ......................................... 272
ENGINE COMPARTMENT ................................... 275
3.6L Engine ................................................... 275
Checking Oil Level ......................................... 276
Adding Washer Fluid .................................... 276
Maintenance-Free Battery ........................... 276
Pressure Washing ......................................... 277
21_RUV_OM_EN_USC_t.book Page 5
Page 52 of 348
50GETTING TO KNOW YOUR VEHICLE
UNIVERSAL GARAGE DOOR OPENER
(HOMELINK®) — IF EQUIPPED
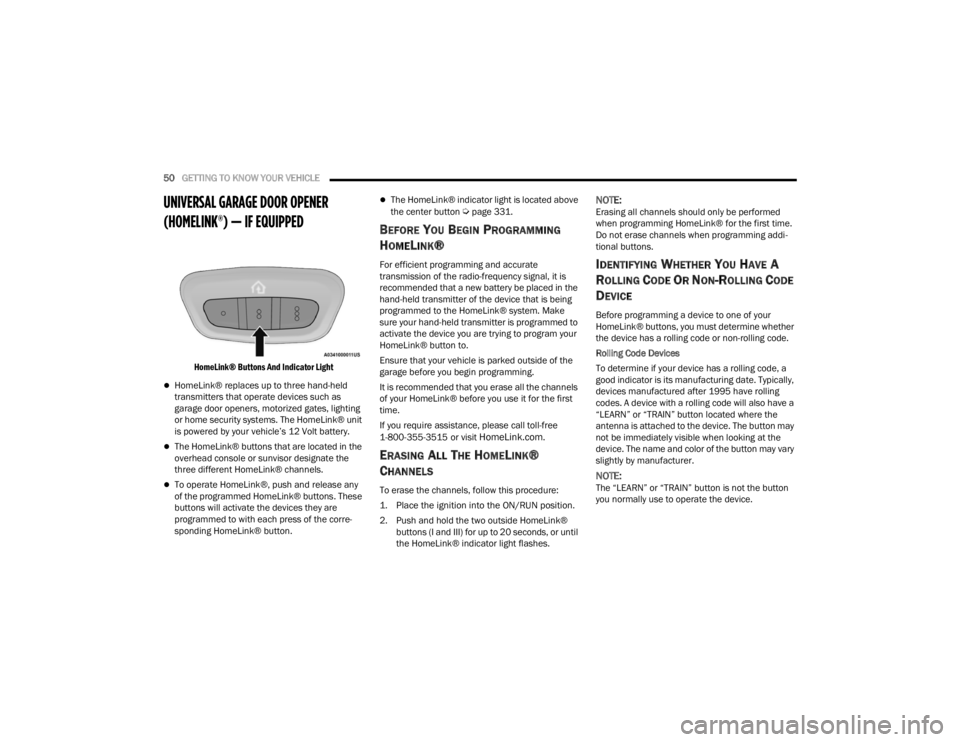
HomeLink® Buttons And Indicator Light
HomeLink® replaces up to three hand-held
transmitters that operate devices such as
garage door openers, motorized gates, lighting
or home security systems. The HomeLink® unit
is powered by your vehicle’s 12 Volt battery.
The HomeLink® buttons that are located in the
overhead console or sunvisor designate the
three different HomeLink® channels.
To operate HomeLink®, push and release any
of the programmed HomeLink® buttons. These
buttons will activate the devices they are
programmed to with each press of the corre -
sponding HomeLink® button.
The HomeLink® indicator light is located above
the center button Úpage 331.
BEFORE YOU BEGIN PROGRAMMING
H
OMELINK®
For efficient programming and accurate
transmission of the radio-frequency signal, it is
recommended that a new battery be placed in the
hand-held transmitter of the device that is being
programmed to the HomeLink® system. Make
sure your hand-held transmitter is programmed to
activate the device you are trying to program your
HomeLink® button to.
Ensure that your vehicle is parked outside of the
garage before you begin programming.
It is recommended that you erase all the channels
of your HomeLink® before you use it for the first
time.
If you require assistance, please call toll-free
1-800-355-3515 or visit
HomeLink.com.
ERASING ALL THE HOMELINK®
C
HANNELS
To erase the channels, follow this procedure:
1. Place the ignition into the ON/RUN position.
2. Push and hold the two outside HomeLink®
buttons (I and III) for up to 20 seconds, or until
the HomeLink® indicator light flashes.
NOTE:Erasing all channels should only be performed
when programming HomeLink® for the first time.
Do not erase channels when programming addi -
tional buttons.
IDENTIFYING WHETHER YOU HAVE A
R
OLLING CODE OR NON-ROLLING CODE
D
EVICE
Before programming a device to one of your
HomeLink® buttons, you must determine whether
the device has a rolling code or non-rolling code.
Rolling Code Devices
To determine if your device has a rolling code, a
good indicator is its manufacturing date. Typically,
devices manufactured after 1995 have rolling
codes. A device with a rolling code will also have a
“LEARN” or “TRAIN” button located where the
antenna is attached to the device. The button may
not be immediately visible when looking at the
device. The name and color of the button may vary
slightly by manufacturer.
NOTE:The “LEARN” or “TRAIN” button is not the button
you normally use to operate the device.
21_RUV_OM_EN_USC_t.book Page 50
Page 57 of 348
GETTING TO KNOW YOUR VEHICLE55
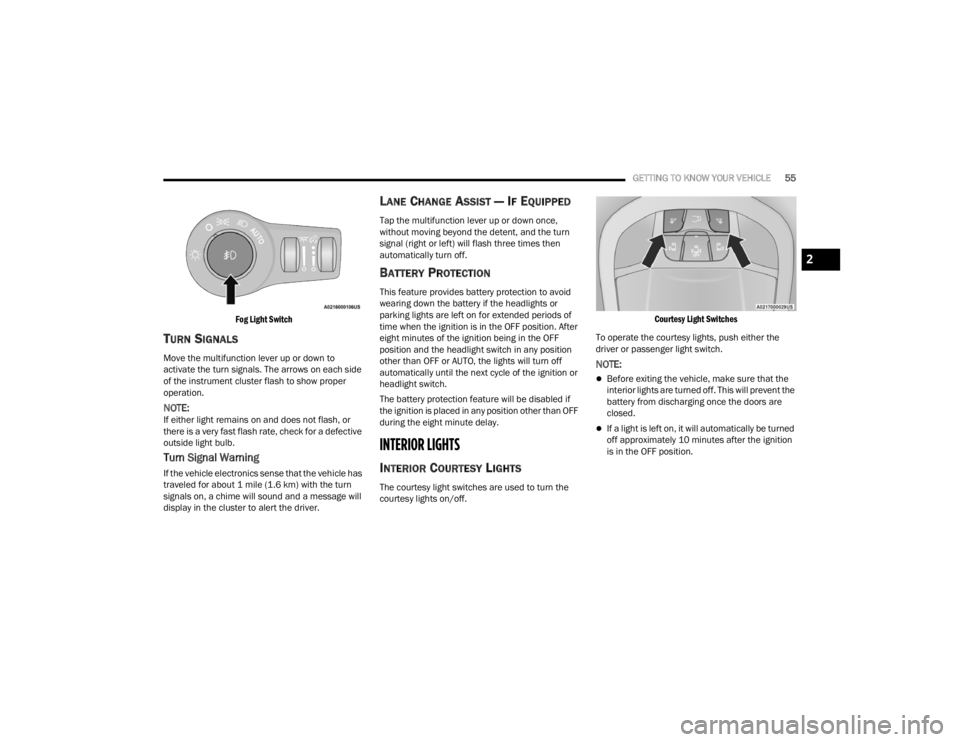
Fog Light Switch
TURN SIGNALS
Move the multifunction lever up or down to
activate the turn signals. The arrows on each side
of the instrument cluster flash to show proper
operation.
NOTE:If either light remains on and does not flash, or
there is a very fast flash rate, check for a defective
outside light bulb.
Turn Signal Warning
If the vehicle electronics sense that the vehicle has
traveled for about 1 mile (1.6 km) with the turn signals on, a chime will sound and a message will
display in the cluster to alert the driver.
LANE CHANGE ASSIST — IF EQUIPPED
Tap the multifunction lever up or down once,
without moving beyond the detent, and the turn
signal (right or left) will flash three times then
automatically turn off.
BATTERY PROTECTION
This feature provides battery protection to avoid
wearing down the battery if the headlights or
parking lights are left on for extended periods of
time when the ignition is in the OFF position. After
eight minutes of the ignition being in the OFF
position and the headlight switch in any position
other than OFF or AUTO, the lights will turn off
automatically until the next cycle of the ignition or
headlight switch.
The battery protection feature will be disabled if
the ignition is placed in any position other than OFF
during the eight minute delay.
INTERIOR LIGHTS
INTERIOR COURTESY LIGHTS
The courtesy light switches are used to turn the
courtesy lights on/off.
Courtesy Light Switches
To operate the courtesy lights, push either the
driver or passenger light switch.
NOTE:
Before exiting the vehicle, make sure that the
interior lights are turned off. This will prevent the
battery from discharging once the doors are
closed.
If a light is left on, it will automatically be turned
off approximately 10 minutes after the ignition
is in the OFF position.
2
21_RUV_OM_EN_USC_t.book Page 55
Page 100 of 348

98GETTING TO KNOW YOUR INSTRUMENT PANEL
Operation of the Brake Warning Light can be
checked by turning the ignition switch from the OFF
position to the ON/RUN position. The light should
illuminate for approximately two seconds. The light
should then turn off unless the parking brake is
applied or a brake fault is detected. If the light does
not illuminate, have the light inspected by an
authorized dealer.
The light also will turn on when the parking brake
is applied with the ignition switch in the ON/RUN
position.
NOTE:This light shows only that the parking brake is
applied. It does not show the degree of brake appli -
cation.
Battery Charge Warning Light
This warning light will illuminate when the
battery is not charging properly. If it stays
on while the engine is running, there may
be a malfunction with the charging
system. Contact an authorized dealer as soon as
possible.
This indicates a possible problem with the
electrical system or a related component.
Door Open Warning Light — If Equipped
This warning light will illuminate when a
door is ajar/open and not fully closed.
This indicator will reflect which doors are
open.
NOTE:If the vehicle is moving, there will also be a single
chime.
Electric Power Steering (EPS) Fault
Warning Light
This warning light will turn on when
there's a fault with the EPS system
Úpage 118.
Electronic Throttle Control (ETC) Warning
Light
This warning light will illuminate to
indicate a problem with the ETC system.
If a problem is detected while the vehicle
is running, the light will either stay on or
flash depending on the nature of the problem.
Cycle the ignition when the vehicle is safely and completely stopped and the transmission is placed
in the PARK (P) position. The light should turn off.
If the light remains on with the vehicle running,
your vehicle will usually be drivable; however, see
an authorized dealer for service as soon as
possible.
NOTE:This light may turn on if the accelerator and brake
pedals are pressed at the same time.
If the light continues to flash when the vehicle is
running, immediate service is required and you
may experience reduced performance, an
elevated/rough idle, or engine stall and your
vehicle may require towing. The light will come
on when the ignition is placed in the ON/RUN or
ACC/ON/RUN position and remain on briefly as a
bulb check. If the light does not come on during
starting, have the system checked by an
authorized dealer.
Engine Coolant Temperature Warning
Light
This warning light warns of an
overheated engine condition. If the
engine coolant temperature is too high,
this indicator will illuminate and a single
chime will sound. If the temperature reaches the
upper limit, a continuous chime will sound for four
minutes or until the engine is able to cool;
whichever comes first.
WARNING!
Continued operation with reduced assist could
pose a safety risk to yourself and others. Service
should be obtained as soon as possible.
21_RUV_OM_EN_USC_t.book Page 98
Page 109 of 348
STARTING AND OPERATING107
AUTOPARK
AutoPark is a supplemental feature to assist in
placing the vehicle in PARK if the situations below
occur. It is a back up system and should not be
relied upon as the primary method by which the
driver shifts the vehicle into PARK.
The conditions under which AutoPark will engage
are outlined on the following pages. ALWAYS DO A VISUAL CHECK
that your vehicle is in
PARK by looking for the “P” in the instrument
cluster display and on the gear selector. As an
added precaution, always apply the parking brake.
If the vehicle is not in PARK and the driver
attempts to turn off the engine, if certain
conditions are met, the vehicle will AutoPark,
automatically shifting the vehicle’s transmission to
the PARK position. The gear selector will
automatically reset itself to the PARK position. The
vehicle’s ignition will then move to the OFF position
(engine off). When AutoPark is activated the
instrument cluster will display the message
“AutoPark Engaged”.
AutoPark will engage when all of these conditions
are met:
Vehicle is equipped with a gear selector
Vehicle is not in PARK
Vehicle speed is 1.2 mph (1.9 km/h) or less
Driver has pushed the ENGINE START/STOP
button
If the vehicle is not in PARK and the driver exits the
vehicle with the engine running, if certain
conditions are met, the vehicle will AutoPark,
automatically shifting the vehicle’s transmission to
the PARK position. The Electric Park Brake SAFE
HOLD feature will also activate in some conditions
Úpage 113. AutoPark will engage when all of these conditions
are met:
Vehicle is equipped with a gear selector
Vehicle is not in PARK
Vehicle speed is 1.2 mph (1.9 km/h) or less
Driver’s door is ajar
Driver’s seat belt is unbuckled
Brake pedal is not pressed
The message “ AutoPark Engaged ” will display in
the instrument cluster.
AutoPark In Stop/Start Autostop Mode
AutoPark will engage when all of these condi -
tions are met:
Vehicle is equipped with a gear selector
Vehicle is not in PARK
Vehicle speed is 1.2 mph (1.9 km/h) or less
Driver’s door is ajar
Driver’s seat belt is unbuckled or brake pedal is
not pressed
The message “ AutoPark Engaged ” will display in
the instrument cluster.
WARNING!
Driver inattention could lead to failure to place
the vehicle in PARK. ALWAYS DO A VISUAL
CHECK that your vehicle is in PARK by verifying
that a solid (not blinking) “P” is indicated in
the instrument cluster display and near the
gear selector. If the "P" indicator is blinking,
your vehicle is not in PARK. As an added
precaution, always apply the parking brake
when exiting the vehicle.
AutoPark is a supplemental feature. It is not
designed to replace the need to shift your
vehicle into PARK. It is a back up system and
should not be relied upon as the primary
method by which the driver shifts the vehicle
into PARK.
CAUTION!
Engine will remain running.
4
21_RUV_OM_EN_USC_t.book Page 107
Page 120 of 348
118STARTING AND OPERATING
In the event of a momentary problem, the
transmission can be reset to regain all forward
gears by performing the following steps:
1. Stop the vehicle.
2. Shift the transmission into PARK, if possible. If not, shift the transmission to NEUTRAL.
3. Push and hold the ignition switch until the engine turns off.
4. Wait approximately 30 seconds.
5. Restart the engine.
6. Shift into the desired gear range. If the problem is no longer detected, the
transmission will return to normal operation.
NOTE:Even if the transmission can be reset, we
recommend that you visit an authorized dealer at
your earliest possible convenience. An authorized
dealer has diagnostic equipment to assess the
condition of your transmission. If the transmission
cannot be reset, authorized dealer service is
required.
Torque Converter Clutch
A feature designed to improve fuel economy has
been included in the automatic transmission on
your vehicle. A clutch within the torque converter
engages automatically at calibrated speeds. This
may result in a slightly different feeling or response during normal operation in the upper gears. When
the vehicle speed drops or during some
accelerations, the clutch automatically
disengages.
NOTE:The torque converter clutch will not engage until
the engine and/or transmission is warm (usually
after 1 to 3 miles [2 to 5 km] of driving). Because
the engine speed is higher when the torque
converter clutch is not engaged, it may seem as if
the transmission is not shifting properly when the
vehicle is cold. This is normal. The torque converter
clutch will function normally once the powertrain is
sufficiently warm.
ACTIVE NOISE CANCELLATION
Your vehicle is equipped with an Active Noise
Cancellation System. This system is designed to
address exhaust and engine noise. The system
relies on four microphones embedded in the
headliner, which monitor exhaust and engine
noise, and assists an onboard frequency
generator, which creates counteracting sound
waves in the audio system’s speakers. This helps
keep the vehicle quiet at idle and during drive.
POWER STEERING
The electric power steering system will provide
increased vehicle response and ease of
maneuverability. The power steering system
adapts to different driving conditions.
If the Steering icon is displayed and the “POWER
STEERING SYSTEM OVER TEMP” message is
displayed on the instrument cluster screen, this
indicates an over temperature condition in the
power steering system. Once driving conditions are
safe, pull over and let the vehicle idle for a few
moments until the icon and message turn off
Úpage 97.
If the “SERVICE POWER STEERING" OR
"POWER STEERING ASSIST OFF -
SERVICE SYSTEM” message and a
steering wheel icon are displayed on the
instrument cluster screen, it indicates that the
vehicle needs to be taken to the dealer for service.
It is likely the vehicle has lost power steering
assistance
Úpage 97.
WARNING!
Continued operation with reduced assist could
pose a safety risk to yourself and others. Service
should be obtained as soon as possible.
21_RUV_OM_EN_USC_t.book Page 118
Page 121 of 348
STARTING AND OPERATING119
NOTE:
Even if the power steering assistance is no
longer operational, it is still possible to steer
the vehicle. Under these conditions there will
be a substantial increase in steering effort,
especially at low speeds and during parking
maneuvers.
The power steering system is fully electric; it
requires no power steering fluid.
If the condition persists, see an authorized
dealer for service.
STOP/START SYSTEM — IF EQUIPPED
The Stop/Start function is developed to reduce
fuel consumption. The system will stop the engine
automatically during a vehicle stop if the required
conditions are met. Releasing the brake pedal,
pressing the accelerator pedal or shifting out of
DRIVE (D) will automatically re-start the engine.
This vehicle has been upgraded with a heavy duty
starter, enhanced battery, and other upgraded
engine parts to handle the additional engine starts.
AUTOSTOP MODE
The Stop/Start feature is enabled after every
normal customer engine start. At that time, the
system will go into STOP/START READY and if
all other conditions are met, can go into a
STOP/START AUTOSTOP ACTIVE. To Activate Auto STOP/START, The Following Must
Occur:
The system must be in STOP/START READY
state. A STOP/START READY message will be
displayed in the instrument cluster within the
Stop/Start section
Úpage 97.
The vehicle must be completely stopped.
The gear selector must be in a forward gear and
the brake pedal pressed.
The engine will shut down, the tachometer will
move to the zero position and the Stop/Start
telltale will illuminate indicating you are in
Autostop. Customer settings will be maintained
throughout the Auto Stop/Start process.
POSSIBLE REASONS THE ENGINE DOES
N
OT AUTOSTOP
Prior to engine shut down, the system will check
many safety and comfort conditions for Stop/Start
and ensure they are fulfilled. Detailed information
about the operation of the Stop/Start system
may be viewed in the instrument cluster display
Stop/Start screen. In the following situations the
engine will not stop:
If Stop/Start is manually disabled by the
Stop/Start OFF button.
Driver’s seat belt is not buckled.
Driver’s door is not closed.
Battery temperature is too warm or cold.
Battery charge is low. During this time a
message will display "Stop/Start Not Ready
Battery Charging".
The vehicle is on a steep grade.
Cabin heating or cooling is in process and an
acceptable cabin temperature has not been
achieved.
HVAC is set to full defrost mode at a high blower
speed.
HVAC set to MAX A/C.
Engine has not reached normal operating
temperature.
The transmission is not in a forward gear.
Hood is open.
Brake pedal is not pressed with sufficient pres -
sure.
Accelerator pedal input.
Engine temperature too high.
5 mph (8 km/h) threshold not achieved from
previous Autostop.
Steering angle beyond threshold.
It may be possible for the vehicle to be driven
several times without the Stop/Start system going
into a STOP/START READY state under more
extreme conditions of the items listed above.
4
21_RUV_OM_EN_USC_t.book Page 119
Page 124 of 348
122STARTING AND OPERATING
To Accelerate For Passing
Press the accelerator as you would normally. When
the pedal is released, the vehicle will return to the
set speed.
USING CRUISE CONTROL ON HILLS
The transmission may downshift on hills to
maintain the vehicle set speed.
The Cruise Control system maintains speed up and
down hills. A slight speed change on moderate hills
is normal. On steep hills, a greater speed loss or
gain may occur so it may be preferable to drive
without Cruise Control.
To Resume Speed
To resume a previously set speed, push the RES
button and release. Resume can be used at any
speed above 20 mph (32 km/h).
To Deactivate
A tap on the brake pedal, or pushing the CANC
button, or normal brake pressure will deactivate
the Cruise Control system without erasing the set
speed from memory.
Pushing the on/off button or placing the ignition in
the OFF position erases the set speed from
memory.
PARKSENSE REAR PARK ASSIST —
IF EQUIPPED
The ParkSense Rear Park Assist system provides
visual and audible indications of the distance
between the rear fascia and a detected obstacle
when backing up (e.g. during a parking maneuver).
If your vehicle is equipped with an Automatic
Transmission, the vehicle brakes may be
automatically applied and released when
performing a reverse parking maneuver if the
system detects a possible collision with an
obstacle.
NOTE:
The driver can override the automatic braking
function by pressing the gas pedal, turning Park-
Sense off via ParkSense switch, or changing the
gear while the automatic brakes are being
applied.
Automatic brakes will not be available if Elec -
tronic Stability Control (ESC) is not available.
Automatic brakes will not be available if there is
a faulted condition detected with the ParkSense
Park Assist system or the Braking System
Module.
The automatic braking function may not provide
enough vehicle deceleration to avoid colliding
with a detected obstacle depending on vehicle
speed, road conditions, and brake capability.
The automatic braking function may not be
applied fast enough for moving obstacles that
approach the rear of the vehicle from the left
and/or right sides.
The automatic braking function can be
enabled/disabled from the Customer-Program -
mable Features section of the Uconnect system.
ParkSense will retain its last known configura -
tion state for the automatic braking function
through ignition cycles.
The automatic braking function is intended to
assist the driver in avoiding possible collisions with
detected obstacles when backing up in REVERSE
gear.
WARNING!
Cruise Control can be dangerous where the
system cannot maintain a constant speed. Your
vehicle could go too fast for the conditions, and
you could lose control and have an accident. Do
not use Cruise Control in heavy traffic or on
roads that are winding, icy, snow-covered or
slippery.
21_RUV_OM_EN_USC_t.book Page 122
Page 125 of 348
STARTING AND OPERATING123
NOTE:
The system is provided to assist the driver and
not to substitute the driver.
The driver must stay in full control of the
vehicle's acceleration and braking and is
responsible for controlling the vehicle's move -
ments.
For limitations of this system and
recommendations/precautions, see
Úpage 126.
ParkSense will retain the last system state
(enabled or disabled) from the last ignition cycle
when the ignition is changed to the ON/RUN
position.
ParkSense can be active only when the gear
selector is in REVERSE. If ParkSense is enabled at
this gear selector position, the system will remain
active until the vehicle speed is increased to
approximately 7 mph (11 km/h) or above. When in
REVERSE and above the system's operating speed,
a warning will appear within the instrument cluster
display indicating the vehicle speed is too fast. The
system will become active again if the vehicle
speed is decreased to speeds less than
approximately 6 mph (9 km/h).
PARKSENSE SENSORS
The four ParkSense sensors, located in the rear
fascia/bumper, monitor the area behind the
vehicle that is within the sensors’ field of view. The
sensors can detect obstacles from approximately
12 inches (30 cm) up to 79 inches (200 cm) from
the rear fascia/bumper in the horizontal direction,
depending on the location, type and orientation of
the obstacle.
PARKSENSE WARNING DISPLAY
The ParkSense Warning screen will only be
displayed if Sound and Display is selected from the
Customer-Programmable Features section of the
Uconnect system
Úpage 142.
The ParkSense Warning screen is located within
the instrument cluster display
Úpage 89. It
provides visual warnings to indicate the distance
between the rear fascia/bumper and the detected
obstacle.
PARKSENSE DISPLAY
When the vehicle is in REVERSE and an obstacle
has been detected, the warning display will turn on
indicating the system status, and remain on until
the vehicle is moved out of REVERSE.
The system will indicate a detected obstacle by
showing a single arc in one or more regions based
on the obstacle’s distance and location relative to
the vehicle.
If an obstacle is detected in the center rear region,
the display will show a single solid arc in the center
rear region and will produce a one-half second
tone. As the vehicle moves closer to the obstacle,
the display will show the single arc moving closer to
the vehicle and the sound tone will change from
slow, to fast, to continuous.
If an obstacle is detected in the left and/or right
rear region, the display will show a single flashing
arc in the left and/or right rear region and will
produce a fast sound tone. As the vehicle moves
closer to the obstacle, the display will show the
single arc moving closer to the vehicle and the tone
will change from fast to continuous.
4
21_RUV_OM_EN_USC_t.book Page 123