transmission CHRYSLER VOYAGER 2021 Owners Manual
[x] Cancel search | Manufacturer: CHRYSLER, Model Year: 2021, Model line: VOYAGER, Model: CHRYSLER VOYAGER 2021Pages: 348, PDF Size: 18.73 MB
Page 6 of 348
4
STARTING AND OPERATING
STARTING THE ENGINE ...................................... 106
Normal Starting ........................................... 106AutoPark ........................................................ 107Cold Weather Operation
(Below –22°F Or −30°C) ............................ 109
After Starting — Warming Up
The Engine ..................................................... 109
If Engine Fails To Start ................................. 109To Turn Off The Engine Using
ENGINE START/STOP Button ........................ 110
ENGINE BLOCK HEATER — IF EQUIPPED ......... 110
ENGINE BREAK-IN RECOMMENDATIONS ........ 110
PARKING BRAKE ................................................. 111
Electric Park Brake (EPB) ............................. 111
AUTOMATIC TRANSMISSION.............................. 113
Ignition Park Interlock ................................... 114Brake/Transmission Shift Interlock (BTSI)
System ........................................................... 1159-Speed Automatic Transmission ............... 115
Gear Ranges .................................................. 115
ACTIVE NOISE CANCELLATION .......................... 118
POWER STEERING ............................................... 118 STOP/START SYSTEM — IF EQUIPPED ............. 119
Autostop Mode .............................................. 119
Possible Reasons The Engine Does Not
Autostop......................................................... 119
To Start The Engine While In Auto
Stop/Start ...................................................... 120
To Manually Turn Off The
Stop/Start System......................................... 120
To Manually Turn On The
Stop/Start System......................................... 120
System Malfunction ...................................... 120
CRUISE CONTROL SYSTEMS —
IF EQUIPPED ........................................................ 120
Cruise Control ................................................ 120
PARKSENSE REAR PARK ASSIST —
IF EQUIPPED ....................................................... 122
ParkSense Sensors ....................................... 123
ParkSense Warning Display ......................... 123
ParkSense Display ........................................ 123Enabling And Disabling ParkSense .............. 126Service The ParkSense Rear Park
Assist System ................................................ 126Cleaning The ParkSense System ................. 126
ParkSense System Usage Precautions........ 126
PARKVIEW REAR BACK UP CAMERA .............. 127
REFUELING THE VEHICLE ................................... 129
VEHICLE LOADING ............................................ 129
Certification Label ......................................... 129 TRAILER TOWING ............................................... 130
Common Towing Definitions......................... 130
Trailer Hitch Classification............................ 132
Trailer Towing Weights
(Maximum Trailer Weight Ratings) .............. 132
Vehicle Loading Chart ................................... 133
Trailer And Tongue Weight .......................... 134
Towing Requirements .................................. 135Towing Tips ................................................... 137
RECREATIONAL TOWING
(BEHIND MOTORHOME) ..................................... 138
Towing This Vehicle Behind Another
Vehicle ........................................................... 138
DRIVING TIPS ....................................................... 139
Driving On Slippery Surfaces ........................ 139Driving Through Water ................................. 140
MULTIMEDIA
UCONNECT SYSTEMS ......................................... 141
CYBERSECURITY ................................................. 141
UCONNECT SETTINGS ......................................... 142 Customer Programmable Features ............ 142
UCONNECT INTRODUCTION................................ 156
System Overview .......................................... 156Drag & Drop Menu Bar ................................ 158Safety And General Information .................. 158
21_RUV_OM_EN_USC_t.book Page 4
Page 8 of 348
6
VEHICLE MAINTENANCE .................................... 277 Engine Oil ...................................................... 277Engine Oil Filter ............................................ 278
Engine Air Cleaner Filter ............................. 278
Accessory Drive Belt Inspection ................... 279
Air Conditioner Maintenance ....................... 279
Body Lubrication ........................................... 282Windshield Wiper Blades ............................. 282
Exhaust System ............................................ 285
Cooling System .............................................. 286Brake System ............................................... 289
Automatic Transmission .............................. 290FUSES............................................................. 290
BULB REPLACEMENT ................................... 299
TIRES .................................................................... 301
Tire Safety Information ............................... 301
Tires — General Information ........................ 309
Tire Types ....................................................... 313
Spare Tires — If Equipped ........................... 313
Wheel And Wheel Trim Care ....................... 315
Snow Traction Devices ................................. 316Tire Rotation Recommendations ................. 317
DEPARTMENT OF TRANSPORTATION
UNIFORM TIRE QUALITY GRADES .................... 318
Treadwear ...................................................... 318Traction Grades ............................................. 318
Temperature Grades ..................................... 318
STORING THE VEHICLE ....................................... 319 BODYWORK ......................................................... 319
Protection From Atmospheric Agents ......... 319Body And Underbody Maintenance.............. 319Preserving The Bodywork ............................. 319
INTERIORS .......................................................... 320
Seats And Fabric Parts ................................. 320
Plastic And Coated Parts .............................. 321Leather Surfaces ........................................... 321Glass Surfaces ............................................. 321
TECHNICAL SPECIFICATIONS
VEHICLE IDENTIFICATION NUMBER (VIN) ........ 322
BRAKE SYSTEM ................................................... 322
WHEEL AND TIRE TORQUE
SPECIFICATIONS ................................................ 322
Torque Specifications ................................... 322
FUEL REQUIREMENTS ....................................... 323
3.6L Engine .................................................. 323
Reformulated Gasoline .............................. 324Gasoline/Oxygenate Blends ........................ 324
Do Not Use E-85 In Non-Flex Fuel
Vehicles.......................................................... 324CNG And LP Fuel System Modifications ...... 324Methylcyclopentadienyl Manganese
Tricarbonyl (MMT) In Gasoline...................... 324Materials Added To Fuel .............................. 325Fuel System Cautions ................................... 325
FLUID CAPACITIES ............................................ 326
ENGINE FLUIDS AND LUBRICANTS .................. 326
CHASSIS FLUIDS AND LUBRICANTS ............... 327
CUSTOMER ASSISTANCE
SUGGESTIONS FOR OBTAINING
SERVICE FOR YOUR VEHICLE ............................ 328
Prepare For The Appointment ...................... 328
Prepare A List ................................................ 328
Be Reasonable With Requests..................... 328
IF YOU NEED ASSISTANCE ................................ 328
FCA US LLC Customer Center....................... 328
FCA Canada Inc. Customer Center .............. 328
Mexico............................................................ 329
Puerto Rico And US Virgin Islands ............... 329
Customer Assistance For The Hearing
Or Speech Impaired
(TDD/TTY) ...................................................... 329
Service Contract ........................................... 329
WARRANTY INFORMATION ................................ 330
MOPAR® PARTS ................................................. 330
REPORTING SAFETY DEFECTS .......................... 330
In The 50 United States And
Washington, D.C............................................ 330
In Canada ...................................................... 330
PUBLICATION ORDER FORMS .......................... 331
GENERAL INFORMATION.................................... 331
21_RUV_OM_EN_USC_t.book Page 6
Page 11 of 348
9
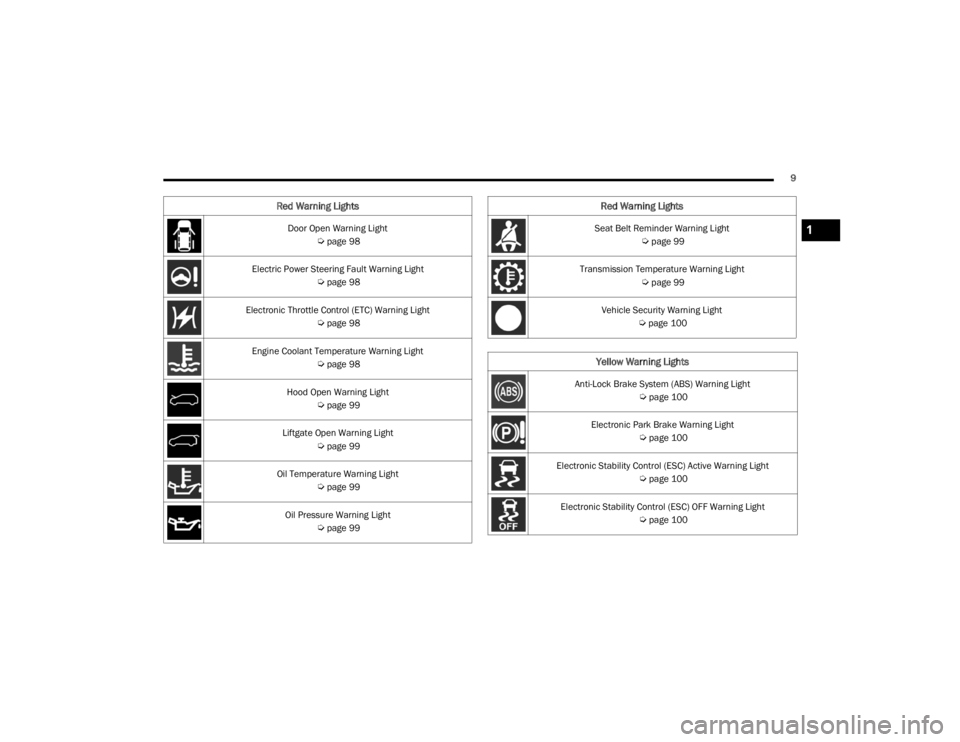
Door Open Warning Light
Úpage 98
Electric Power Steering Fault Warning Light
Úpage 98
Electronic Throttle Control (ETC) Warning Light
Úpage 98
Engine Coolant Temperature Warning Light
Úpage 98
Hood Open Warning Light
Úpage 99
Liftgate Open Warning Light
Úpage 99
Oil Temperature Warning Light
Úpage 99
Oil Pressure Warning Light
Úpage 99
Red Warning Lights
Seat Belt Reminder Warning Light
Úpage 99
Transmission Temperature Warning Light
Úpage 99
Vehicle Security Warning Light
Úpage 100
Yellow Warning Lights
Anti-Lock Brake System (ABS) Warning Light
Úpage 100
Electronic Park Brake Warning Light
Úpage 100
Electronic Stability Control (ESC) Active Warning Light
Úpage 100
Electronic Stability Control (ESC) OFF Warning Light
Úpage 100
Red Warning Lights
1
21_RUV_OM_EN_USC_t.book Page 9
Page 52 of 348
50GETTING TO KNOW YOUR VEHICLE
UNIVERSAL GARAGE DOOR OPENER
(HOMELINK®) — IF EQUIPPED
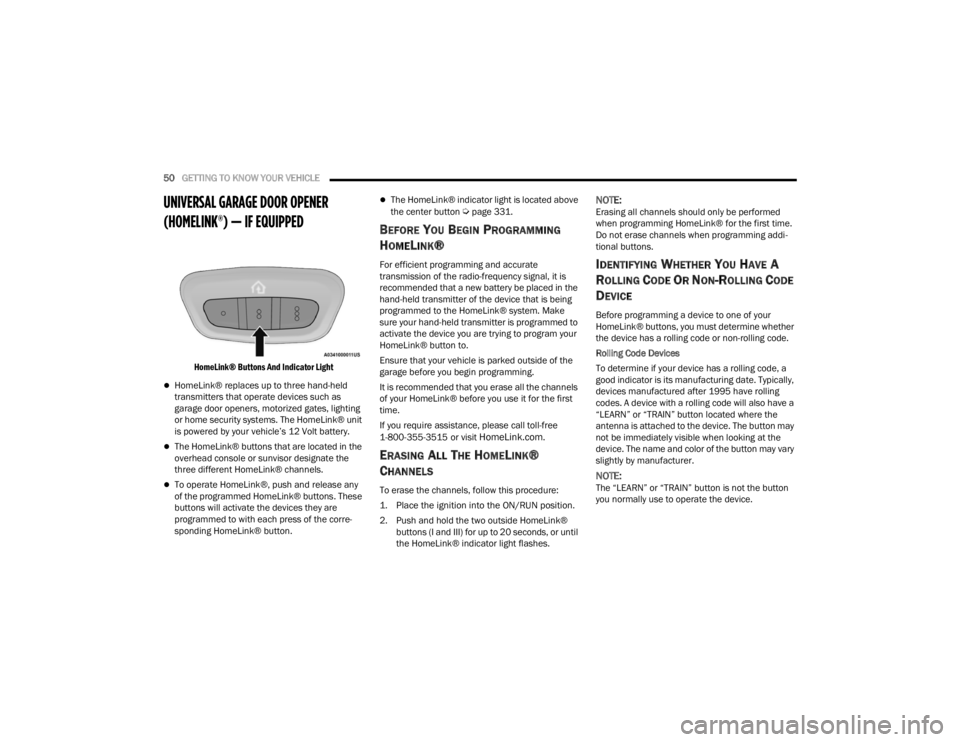
HomeLink® Buttons And Indicator Light
HomeLink® replaces up to three hand-held
transmitters that operate devices such as
garage door openers, motorized gates, lighting
or home security systems. The HomeLink® unit
is powered by your vehicle’s 12 Volt battery.
The HomeLink® buttons that are located in the
overhead console or sunvisor designate the
three different HomeLink® channels.
To operate HomeLink®, push and release any
of the programmed HomeLink® buttons. These
buttons will activate the devices they are
programmed to with each press of the corre -
sponding HomeLink® button.
The HomeLink® indicator light is located above
the center button Úpage 331.
BEFORE YOU BEGIN PROGRAMMING
H
OMELINK®
For efficient programming and accurate
transmission of the radio-frequency signal, it is
recommended that a new battery be placed in the
hand-held transmitter of the device that is being
programmed to the HomeLink® system. Make
sure your hand-held transmitter is programmed to
activate the device you are trying to program your
HomeLink® button to.
Ensure that your vehicle is parked outside of the
garage before you begin programming.
It is recommended that you erase all the channels
of your HomeLink® before you use it for the first
time.
If you require assistance, please call toll-free
1-800-355-3515 or visit
HomeLink.com.
ERASING ALL THE HOMELINK®
C
HANNELS
To erase the channels, follow this procedure:
1. Place the ignition into the ON/RUN position.
2. Push and hold the two outside HomeLink®
buttons (I and III) for up to 20 seconds, or until
the HomeLink® indicator light flashes.
NOTE:Erasing all channels should only be performed
when programming HomeLink® for the first time.
Do not erase channels when programming addi -
tional buttons.
IDENTIFYING WHETHER YOU HAVE A
R
OLLING CODE OR NON-ROLLING CODE
D
EVICE
Before programming a device to one of your
HomeLink® buttons, you must determine whether
the device has a rolling code or non-rolling code.
Rolling Code Devices
To determine if your device has a rolling code, a
good indicator is its manufacturing date. Typically,
devices manufactured after 1995 have rolling
codes. A device with a rolling code will also have a
“LEARN” or “TRAIN” button located where the
antenna is attached to the device. The button may
not be immediately visible when looking at the
device. The name and color of the button may vary
slightly by manufacturer.
NOTE:The “LEARN” or “TRAIN” button is not the button
you normally use to operate the device.
21_RUV_OM_EN_USC_t.book Page 50
Page 54 of 348
52GETTING TO KNOW YOUR VEHICLE
PROGRAMMING HOMELINK® TO A
M
ISCELLANEOUS DEVICE
Refer to “Programming HomeLink® To A Garage
Door Opener” for the procedure on how to program
HomeLink® to a miscellaneous device, as it
follows the same procedure. Be sure to determine
if the device has a rolling code, or non-rolling code
before beginning the programming process.
NOTE:Canadian radio frequency laws require transmitter
signals to time-out (or quit) after several seconds
of transmission, which may not be long enough for
HomeLink® to pick up the signal during
programming. Similar to this Canadian law, some
US gate operators are designed to time-out in the
same manner. The procedure may need to be
performed multiple times to successfully pair the
device to your HomeLink® buttons.
REPROGRAMMING A SINGLE
H
OMELINK® BUTTON
To reprogram a single HomeLink® button that has
been previously trained, without erasing all the
channels, follow the procedure below. Be sure to
determine whether the new device you want to
program the HomeLink® button to has a rolling
code, or non-rolling code.
1. Place the ignition in the ON/RUN position,
without starting the engine.
2. Push and hold the desired HomeLink® button until the HomeLink® Indicator light begins to
flash after 20 seconds. Do not release the
button.
3. Without releasing the button , proceed with
Step 2 in “Programming HomeLink® To A
Garage Door Opener” and follow all remaining
steps.
CANADIAN/GATE OPERATOR
P
ROGRAMMING
For programming transmitters in Canada/United
States that require the transmitter signals to
“time-out” after several seconds of transmission.
Canadian radio frequency laws require transmitter
signals to time-out (or quit) after several seconds
of transmission – which may not be long enough
for HomeLink® to pick up the signal during
programming. Similar to this Canadian law, some
U.S. gate operators are designed to time-out in the
same manner. It may be helpful to unplug the device during the
cycling process to prevent possible overheating of
the garage door or gate motor.
1. Place the ignition in the ON/RUN position.
2. Place the hand-held transmitter 1 to 3 inches
(3 to 8 cm) away from the HomeLink® button
you wish to program while keeping the
HomeLink® indicator light in view.
3. Continue to press and hold the HomeLink® button, while you press and release (cycle)
your hand-held transmitter every two seconds
until HomeLink® has successfully accepted
the frequency signal. The indicator light will
flash slowly and then rapidly when fully
trained.
4. Watch for the HomeLink® indicator to change flash rates. When it changes, it is
programmed. It may take up to 30 seconds or
longer in rare cases. The garage door may
open and close while you are programming.
5. Press and hold the programmed HomeLink® button and observe the indicator light.
21_RUV_OM_EN_USC_t.book Page 52
Page 82 of 348
80GETTING TO KNOW YOUR VEHICLE
WIND BUFFETING
Wind buffeting can be described as the perception
of pressure on the ears or a helicopter-type sound
in the ears. Your vehicle may exhibit wind buffeting
with the windows down, or the sunroof (if
equipped) in certain open or partially open
positions. This is a normal occurrence and can be
minimized. If the rear windows are open and
buffeting occurs, open the front and rear windows
together to minimize the buffeting. If the buffeting
occurs with the sunroof open, adjust the sunroof
opening to minimize the buffeting.
HOOD
OPENING
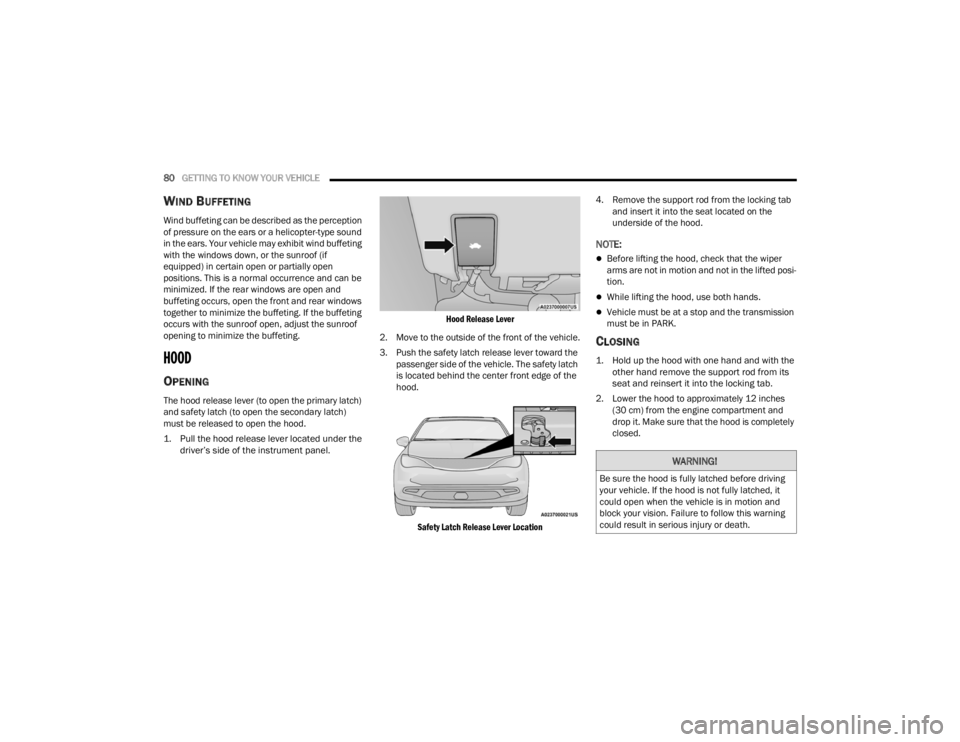
The hood release lever (to open the primary latch)
and safety latch (to open the secondary latch)
must be released to open the hood.
1. Pull the hood release lever located under the
driver’s side of the instrument panel.
Hood Release Lever
2. Move to the outside of the front of the vehicle.
3. Push the safety latch release lever toward the passenger side of the vehicle. The safety latch
is located behind the center front edge of the
hood.
Safety Latch Release Lever Location
4. Remove the support rod from the locking tab
and insert it into the seat located on the
underside of the hood.
NOTE:
Before lifting the hood, check that the wiper
arms are not in motion and not in the lifted posi -
tion.
While lifting the hood, use both hands.
Vehicle must be at a stop and the transmission
must be in PARK.
CLOSING
1. Hold up the hood with one hand and with the other hand remove the support rod from its
seat and reinsert it into the locking tab.
2. Lower the hood to approximately 12 inches (30 cm) from the engine compartment and
drop it. Make sure that the hood is completely
closed.
WARNING!
Be sure the hood is fully latched before driving
your vehicle. If the hood is not fully latched, it
could open when the vehicle is in motion and
block your vision. Failure to follow this warning
could result in serious injury or death.
21_RUV_OM_EN_USC_t.book Page 80
Page 94 of 348
92GETTING TO KNOW YOUR INSTRUMENT PANEL
Coolant Temp
Displays the actual coolant temperature.
Transmission Temp
Displays the actual transmission temperature.
Oil Temp
Displays the actual oil temperature.
Oil Pressure
Displays the actual oil pressure.
Oil Life
Displays the remaining engine oil life as a
percentage.
To reset the Oil Life, you must hold the OK button.
The “Hold OK to Reset” instruction will be
displayed at all times, but the following conditions
will need to be met in order to reset Oil Life:
The ignition must be in the ON/RUN position
If the conditions are met, holding the OK button will
reset the gauge and the numeric display will return
to 100%.
If the conditions are not met, a pop-up message
will display for five seconds, describing the
required conditions, and then the Oil Life screen
will reappear.
Battery Voltage
Displays the actual battery voltage. Engine Hours — If Equipped
Displays the number of hours of engine operation.
Fuel Economy
Push and release the
up or down arrow
button until the Fuel Economy Menu item is
highlighted in the instrument cluster display. The
Fuel Economy Menu will display the following:
Two submenu pages that can be toggled
between using the left and right arrow
buttons; one with Current Value displayed and
one without the Current Value displayed:
Average Fuel Economy
(MPG, L/100 km, or km/L)
Range To Empty (miles or km)
Current Fuel Economy
(MPG, L/100 km, or km/L)
The Max and Min values will correspond to
the particular engine requirements
Hold OK to reset average fuel economy informa -
tion.
Trip Info
Push and release the up or down arrow
button until the Trip Menu item is highlighted in the
instrument cluster display. Push the left or
right arrow button to scroll through the Trip A and Trip B submenus. The Trip information will
display the following:
Distance
Average Fuel Economy
Elapsed Time
Hold the OK button to reset feature information.
Stop / Start – If Equipped
Push and release the up or down arrow
button until the Stop/Start menu title is displayed
in the instrument cluster display.
Audio
Push and release the up or down arrow
button until the Audio Menu displays in the
instrument cluster display.
Messages
Push and release the up or down arrow
button until Messages is highlighted in the
instrument cluster display. This feature shows the
number of stored warning messages. Pushing the
right arrow button will allow you to see what the
stored messages are.
NOTE:The pop-up messages indicate the status of the
system and/or the conditions that need to be met.
Messages remain in the stored stack until
condition is cleared.
21_RUV_OM_EN_USC_t.book Page 92
Page 100 of 348

98GETTING TO KNOW YOUR INSTRUMENT PANEL
Operation of the Brake Warning Light can be
checked by turning the ignition switch from the OFF
position to the ON/RUN position. The light should
illuminate for approximately two seconds. The light
should then turn off unless the parking brake is
applied or a brake fault is detected. If the light does
not illuminate, have the light inspected by an
authorized dealer.
The light also will turn on when the parking brake
is applied with the ignition switch in the ON/RUN
position.
NOTE:This light shows only that the parking brake is
applied. It does not show the degree of brake appli -
cation.
Battery Charge Warning Light
This warning light will illuminate when the
battery is not charging properly. If it stays
on while the engine is running, there may
be a malfunction with the charging
system. Contact an authorized dealer as soon as
possible.
This indicates a possible problem with the
electrical system or a related component.
Door Open Warning Light — If Equipped
This warning light will illuminate when a
door is ajar/open and not fully closed.
This indicator will reflect which doors are
open.
NOTE:If the vehicle is moving, there will also be a single
chime.
Electric Power Steering (EPS) Fault
Warning Light
This warning light will turn on when
there's a fault with the EPS system
Úpage 118.
Electronic Throttle Control (ETC) Warning
Light
This warning light will illuminate to
indicate a problem with the ETC system.
If a problem is detected while the vehicle
is running, the light will either stay on or
flash depending on the nature of the problem.
Cycle the ignition when the vehicle is safely and completely stopped and the transmission is placed
in the PARK (P) position. The light should turn off.
If the light remains on with the vehicle running,
your vehicle will usually be drivable; however, see
an authorized dealer for service as soon as
possible.
NOTE:This light may turn on if the accelerator and brake
pedals are pressed at the same time.
If the light continues to flash when the vehicle is
running, immediate service is required and you
may experience reduced performance, an
elevated/rough idle, or engine stall and your
vehicle may require towing. The light will come
on when the ignition is placed in the ON/RUN or
ACC/ON/RUN position and remain on briefly as a
bulb check. If the light does not come on during
starting, have the system checked by an
authorized dealer.
Engine Coolant Temperature Warning
Light
This warning light warns of an
overheated engine condition. If the
engine coolant temperature is too high,
this indicator will illuminate and a single
chime will sound. If the temperature reaches the
upper limit, a continuous chime will sound for four
minutes or until the engine is able to cool;
whichever comes first.
WARNING!
Continued operation with reduced assist could
pose a safety risk to yourself and others. Service
should be obtained as soon as possible.
21_RUV_OM_EN_USC_t.book Page 98
Page 101 of 348
GETTING TO KNOW YOUR INSTRUMENT PANEL99
If the light turns on while driving, safely pull over
and stop the vehicle. If the Air Conditioning (A/C)
system is on, turn it off. Also, shift the transmission
into NEUTRAL (N) and idle the vehicle. If the
temperature reading does not return to normal,
turn the engine off immediately and call for service
Úpage 265.
Hood Open Warning Light
This warning light will illuminate when the
hood is left open and not fully closed.
NOTE:If the vehicle is moving, there will also be a single
chime.
Liftgate Open Warning Light
This warning light will illuminate when the
liftgate is open.
NOTE:If the vehicle is moving, there will also be a single
chime.
Oil Pressure Warning Light
This warning light will illuminate to
indicate low engine oil pressure. If the
light turns on while driving, stop the
vehicle, shut off the engine as soon as
possible, and contact an authorized dealer.
A chime will sound when this light turns on.
Do not operate the vehicle until the cause is
corrected. This light does not indicate how much oil
is in the engine. The engine oil level must be
checked under the hood.
Oil Temperature Warning Light
This warning light will illuminate to
indicate the engine oil temperature is
high. If the light turns on while driving,
stop the vehicle and shut off the engine
as soon as possible. Wait for oil temperature to
return to normal levels.
Seat Belt Reminder Warning Light
This warning light indicates when the
driver or passenger seat belt is
unbuckled. When the ignition is first
placed in the ON/RUN or ACC/ON/RUN
position and if the driver’s seat belt is unbuckled,
a chime will sound and the light will turn on. When
driving, if the driver or front passenger seat belt
remains unbuckled, the Seat Belt Reminder Light
will flash or remain on continuously and a chime
will sound
Úpage 202.
Transmission Temperature Warning
Light — If Equipped
This warning light will illuminate to warn
of a high transmission fluid temperature.
This may occur with strenuous usage
such as trailer towing. If this light turns
on, stop the vehicle and run the engine at idle or
slightly faster, with the transmission in PARK (P) or
NEUTRAL (N), until the light turns off. Once the light
turns off, you may continue to drive normally.
WARNING!
If you continue operating the vehicle when the
Transmission Temperature Warning Light is
illuminated you could cause the fluid to boil over,
come in contact with hot engine or exhaust
components and cause a fire.
CAUTION!
Continuous driving with the Transmission
Temperature Warning Light illuminated will
eventually cause severe transmission damage
or transmission failure.
3
21_RUV_OM_EN_USC_t.book Page 99
Page 103 of 348
GETTING TO KNOW YOUR INSTRUMENT PANEL101
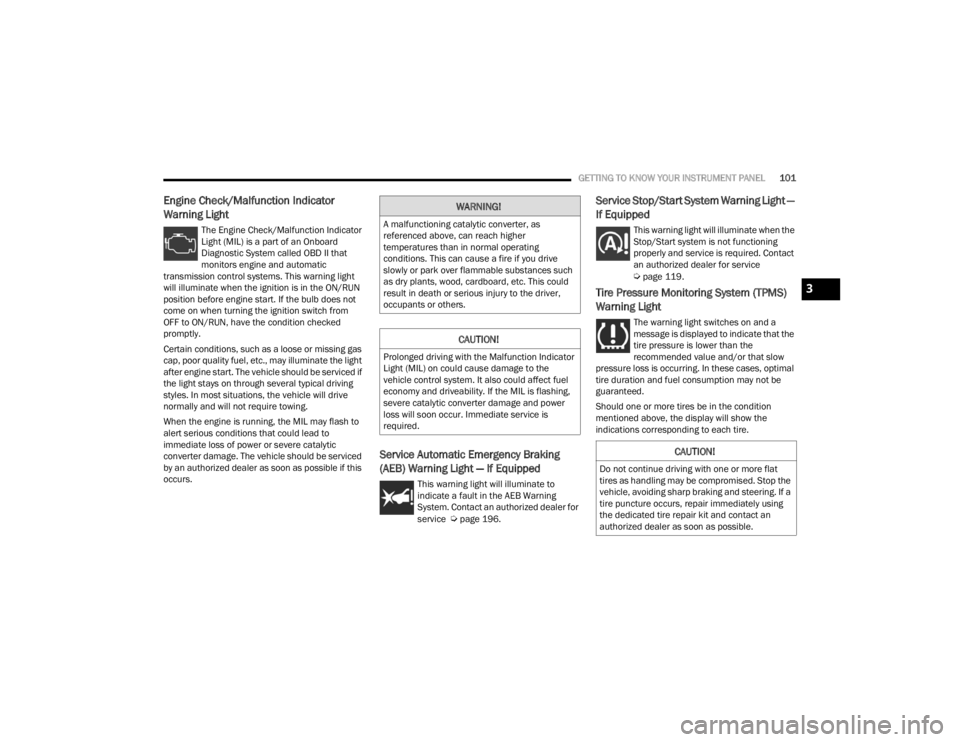
Engine Check/Malfunction Indicator
Warning Light
The Engine Check/Malfunction Indicator
Light (MIL) is a part of an Onboard
Diagnostic System called OBD II that
monitors engine and automatic
transmission control systems. This warning light
will illuminate when the ignition is in the ON/RUN
position before engine start. If the bulb does not
come on when turning the ignition switch from
OFF to ON/RUN, have the condition checked
promptly.
Certain conditions, such as a loose or missing gas
cap, poor quality fuel, etc., may illuminate the light
after engine start. The vehicle should be serviced if
the light stays on through several typical driving
styles. In most situations, the vehicle will drive
normally and will not require towing.
When the engine is running, the MIL may flash to
alert serious conditions that could lead to
immediate loss of power or severe catalytic
converter damage. The vehicle should be serviced
by an authorized dealer as soon as possible if this
occurs.
Service Automatic Emergency Braking
(AEB) Warning Light — If Equipped
This warning light will illuminate to
indicate a fault in the AEB Warning
System. Contact an authorized dealer for
service
Úpage 196.
Service Stop/Start System Warning Light —
If Equipped
This warning light will illuminate when the
Stop/Start system is not functioning
properly and service is required. Contact
an authorized dealer for service
Úpage 119.
Tire Pressure Monitoring System (TPMS)
Warning Light
The warning light switches on and a
message is displayed to indicate that the
tire pressure is lower than the
recommended value and/or that slow
pressure loss is occurring. In these cases, optimal
tire duration and fuel consumption may not be
guaranteed.
Should one or more tires be in the condition
mentioned above, the display will show the
indications corresponding to each tire.
WARNING!
A malfunctioning catalytic converter, as
referenced above, can reach higher
temperatures than in normal operating
conditions. This can cause a fire if you drive
slowly or park over flammable substances such
as dry plants, wood, cardboard, etc. This could
result in death or serious injury to the driver,
occupants or others.
CAUTION!
Prolonged driving with the Malfunction Indicator
Light (MIL) on could cause damage to the
vehicle control system. It also could affect fuel
economy and driveability. If the MIL is flashing,
severe catalytic converter damage and power
loss will soon occur. Immediate service is
required.
CAUTION!
Do not continue driving with one or more flat
tires as handling may be compromised. Stop the
vehicle, avoiding sharp braking and steering. If a
tire puncture occurs, repair immediately using
the dedicated tire repair kit and contact an
authorized dealer as soon as possible.
3
21_RUV_OM_EN_USC_t.book Page 101