maintenance CITROEN AMI 2021 Handbook (in English)
[x] Cancel search | Manufacturer: CITROEN, Model Year: 2021, Model line: AMI, Model: CITROEN AMI 2021Pages: 44, PDF Size: 1.67 MB
Page 4 of 44
2
Contents
■
Overview
■
Eco-driving
1Dashboard instrumentsInstrument panel with monochrome display screen 6
Warning and indicator lamps 6
Charge level 7
Distance recorder 7
2AccessDoors 9
Windows 9
3Ease of use and comfortDriver's seat 10
Door mirrors 10
Ventilation/Heating/Demisting 10
Interior fittings 11
Available accessories 12
4Lighting and visibilityExterior lighting 13
Direction indicators 13
Wipers/Screenwash 13
Changing a wiper blade 14
5SafetySafety - General recommendations 15
Hazard warning lamps 15
Horn 15
Seat belts 15
Child seats 16
6DrivingDriving recommendations 18
Parking brake 18
Drive selector 19
Starting/Stopping the vehicle 19
7Practical informationCharging the traction battery 21
Electric motor 23
Checking levels 23
Checks 24
Free-wheeling 25
Advice on care and maintenance 25
8In the event of a breakdownChanging a wheel 27
Changing a bulb 27
Changing a fuse 28
12 V battery 29
Towing the vehicle 33
9Technical dataElectric motor 34
Dimensions 34
Identification markings 35
■
Alphabetical index
Page 18 of 44

16
Safety
Installation
The lower part of the strap must be
positioned as low as possible on the pelvis.
The upper part must be positioned in the
hollow of the shoulder.
In order to be effective, a seat belt must:
–
be tightened as close to the body as
possible.
–
be pulled in front of you with a smooth
movement, checking that it is not twisted.
–
must only be used to secure one person.
– must not show signs of tearing or fraying.
– must not be changed or modified, in order
to avoid affecting its performance.
Recommendations for children
Use a suitable child seat if the passenger
is less than 12 years old or shorter than one
and a half metres.
Make sure that the seat belt is correctly
positioned and tightened.
Never use the same seat belt to secure more
than one child.
Never carry a child on your lap.
For more information on Child seats, refer to
the corresponding section.
Maintenance
Have the seat belts checked regularly by
a dealer or qualified workshop, particularly if
the straps show signs of damage.
Clean the seat belt straps with soapy water or
a textile cleaning product, sold by dealers or
qualified workshops.
Child seats
The regulations on carrying children are specific to each country. Refer to the
legislation in force in your country.
For maximum safety, please observe the
following recommendations:
–
In accordance with European regulations,
all children under the age of 12 or less than
1.5 metres tall must travel in approved child
seats appropriate for their weight , on seats
fitted with a seat belt.
–
Children weighing less than 9 kg must
travel in the "rearward facing" position .
Advice
An incorrectly installed child seat in a
vehicle compromises the child's safety in
the event of an accident.
Ensure that there is no seat belt or seat belt
buckle under the child seat, as this could
destabilise it.
Remember to fasten the seat belts or the
child seat harness keeping the slack relative
to the child's body to a minimum, even for
short journeys.
Check that the seat belt is properly tightened
over the child seat and that it holds the child
seat firmly against the vehicle seat.
For child seats with a support leg, ensure that
the support leg is in firm and steady contact
with the floor.
Installing a booster seat
The chest part of the seat belt must be
positioned on the child's shoulder without
touching the neck.
Ensure that the lap part of the seat belt
passes correctly over the child's thighs.
Use a booster seat with a backrest, equipped
with a belt guide at shoulder level.
As a safety measure, do not leave: – A child alone and unsupervised inside
the vehicle.
–
A child or an animal in a vehicle exposed to
the sun with the windows closed.
–
The keys inside the vehicle.
Page 26 of 44
24
Practical information
order to avoid any risk of brake fluid splashing
onto them.
Topping up
Use only DOT4 brake fluid from a sealed
container.
►
Clean the cap before removing it to refill.The level of this fluid should be close to the "MAX" mark. If not, check the brake
pads for wear.
Refitting front bumper
► Bring the bumper close to the frame.
► Connect the indicator wiring looms.
► Place it in position and then push the bumper
horizontally until the attachment points clip into
place.
►
Screw the 2 upper side fixing screws into the
flaps.
►
Screw the 2 lower side fixing screws into the
wheel arches.
►
Screw the 2 lower fixing screws into the
frame.
►
Clip the 2 upper access flaps to the wings.
Screenwash fluid
Access/Topping up
The fluid must be topped up with a pre-mixed
product.
In winter (temperatures below 0°C), a fluid
containing an anti-freeze agent which is
appropriate for the temperature conditions
must be used in order to protect the system's
components (pump, tank, ducts, jets).
Filling with pure water is prohibited in all
circumstances (risk of freezing,
limescale, etc.).
► Top up to the required level when
necessary .
Tank capacity: 1 litre.
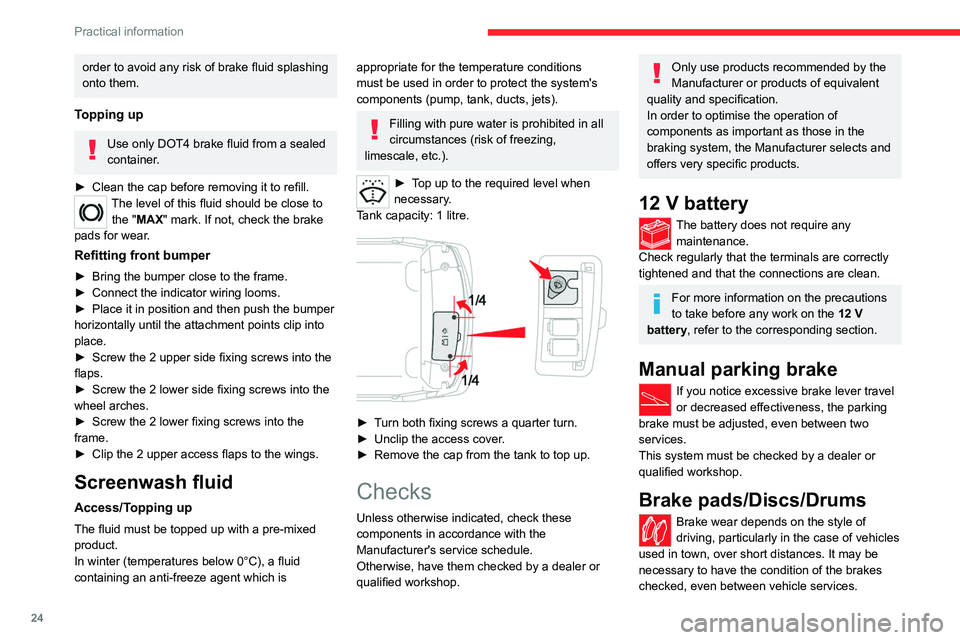
► Turn both fixing screws a quarter turn.
► Unclip the access cover.
► Remove the cap from the tank to top up.
Checks
Unless otherwise indicated, check these
components in accordance with the
Manufacturer's service schedule.
Otherwise, have them checked by a dealer or
qualified workshop.
Only use products recommended by the
Manufacturer or products of equivalent
quality and specification.
In order to optimise the operation of
components as important as those in the
braking system, the Manufacturer selects and
offers very specific products.
12 V battery
The battery does not require any maintenance.
Check regularly that the terminals are correctly
tightened and that the connections are clean.
For more information on the precautions
to take before any work on the 12 V
battery
, refer to the corresponding section.
Manual parking brake
If you notice excessive brake lever travel
or decreased effectiveness, the parking
brake must be adjusted, even between two
services.
This system must be checked by a dealer or
qualified workshop.
Brake pads/Discs/Drums
Brake wear depends on the style of
driving, particularly in the case of vehicles
used in town, over short distances. It may be
necessary to have the condition of the brakes
checked, even between vehicle services.
Page 27 of 44
25
Practical information
7Unless there is a leak in the circuit, a drop in the
brake fluid level indicates that the brake pads
are worn.
For information on checking brake disc/
drum wear, contact a dealer or a qualified
workshop.
After washing the vehicle, moisture, or in wintry conditions, ice can form on the
brake discs and pads: braking efficiency may
be reduced. Gently dab the brakes to dry and
defrost them.
Wheels and tyres
All tyre pressures must be checked when the tyres are cold.
The pressures indicated on the tyre pressure
label are valid for "cold" tyres. If you have driven
for more than 10 minutes or more than 6 miles
(10 kilometres), add 0.3 bar (30 kPa) to the
values indicated on the label.
Under-inflation increases energy
consumption. Non-compliant tyre
pressures cause tyres to wear prematurely
and have an adverse effect on the vehicle's
road holding - risk of accident!
Driving with worn or damaged tyres reduces the
braking and road holding performance of the
vehicle. We recommended regularly checking
the condition of tyres (tread and sidewalls) and
wheel rims as well as the presence of valves. When the wear indicators no longer appear set
back from the tread, the depth of the grooves is
less than 1.6 mm; it is essential to replace the
tyres.
Using different size wheels and tyres from those
specified can affect the lifetime of tyres, wheel
rotation, ground clearance, the speedometer
reading and have an adverse effect on road
holding.
Shock absorbers
It is not easy for drivers to detect when
shock absorbers are worn. Nevertheless,
shock absorbers have a major impact on road
holding and braking performance.
For your safety and driving comfort, it is
important to have them regularly checked by a
dealer or a qualified workshop.
Changing to free-wheeling
In certain situations, you must allow the vehicle
to free-wheel (when being towed, on a rolling
road, transport by rail or sea, etc.).
►
Switch the ignition off.
► Release the parking brake.
Advice on care and maintenance
General information - Exterior
Do not wash the vehicle in full sunshine
or in extremely cold conditions.
Do not use a high pressure washer or
automatic carwash to clean the vehicle.
Use a water jet (temperature between +20°C
and +40°C).
Before starting to clean your vehicle,
remember to lock the windows and
doors.
Use a sponge and soapy water or a pH
neutral product.
Move the water jet perpendicular to the
surface to be cleaned, avoiding the door
seals.
Rinse the vehicle using demineralised water,
then gently wipe the bodywork with a clean
microfibre cloth.
Promptly clean off any marks containing
corrosive chemical substances liable to
damage the vehicle's paintwork (including
tree resin, bird droppings, insect secretions,
pollen and tar).
If justified by the environment, clean the
vehicle more frequently to remove salty
deposits (in coastal areas), soot (in industrial
Page 28 of 44
26
Practical information
areas) and mud (in wet or cold areas). These
substances can be highly corrosive.
Contact a dealer or qualified workshop for
advice on removing stubborn stains requiring
special products (such as tar or insect
removers).
General information - Interior
When cleaning your vehicle, never clean
the interior with a jet of water.
Any liquids carried inside the vehicle in mugs
or other open containers can spill, presenting
a risk of damage if they come into contact
with the controls on the dashboard. Be alert!
Bodywork
Do not use abrasive products or
solvents, petrol or oil to clean the
bodywork.
Never use an abrasive sponge to clean
stubborn stains. Risk of scratching the
paintwork!
Do not apply polish.
Decals
(Depending on version)
Do not use a high-pressure washer to
clean the vehicle - risk of damaging or
detaching the decals!
Use a high-flow hose (temperature
between 25°C and 40°C).
Place the jet of water perpendicular to the
surface to be cleaned.
Rinse the vehicle with demineralised water.
Textile - Maintenance
Do not use aggressive cleaning products
(e.g. alcohol, solvent or ammonia).
Do not use steam-cleaning systems - Risk of
affecting the adhesion of the fabrics!
Remove dust from the textile parts
regularly with a dry cloth, soft brush or
vacuum cleaner.
Rub down the
textile parts once per year with
a clean, damp cloth.
After leaving overnight to
dry, brush with a soft-bristled brush.
Textile - Stain removal
Do not rub the stain or it may spread or
you may cause the substance to
penetrate the surface.
Act quickly by reducing the stain from its edges inwards.
Remove as much substance or solids as
possible using a spoon or spatula, and
remove
as much liquid as possible using
absorbent paper
.
Product/Procedure to use depending
on the type of stain:
–
Grease, oil and ink: clean with a pH-neutral
detergent.
–
Vomit: clean with sparkling mineral water
.
–
Blood: spread flour over the stain and allow
to dry; remove with a slightly damp cloth.
–
Mud: allow to dry and then remove with a
slightly damp cloth.
–
Cake, chocolate, ice cream: clean with
lukewarm water.
–
Sugary and/or alcoholic drinks: clean with
lukewarm water, or lemon juice if the stain is
persistent.
–
Hair gel, coffee, tomato sauce, vinegar:
clean with lukewarm water and lemon juice.
For solid substances, then use a soft brush or
vacuum cleaner.
For liquid substances, then use a damp
microfibre cloth and then dry with another
cloth.
Page 38 of 44
36
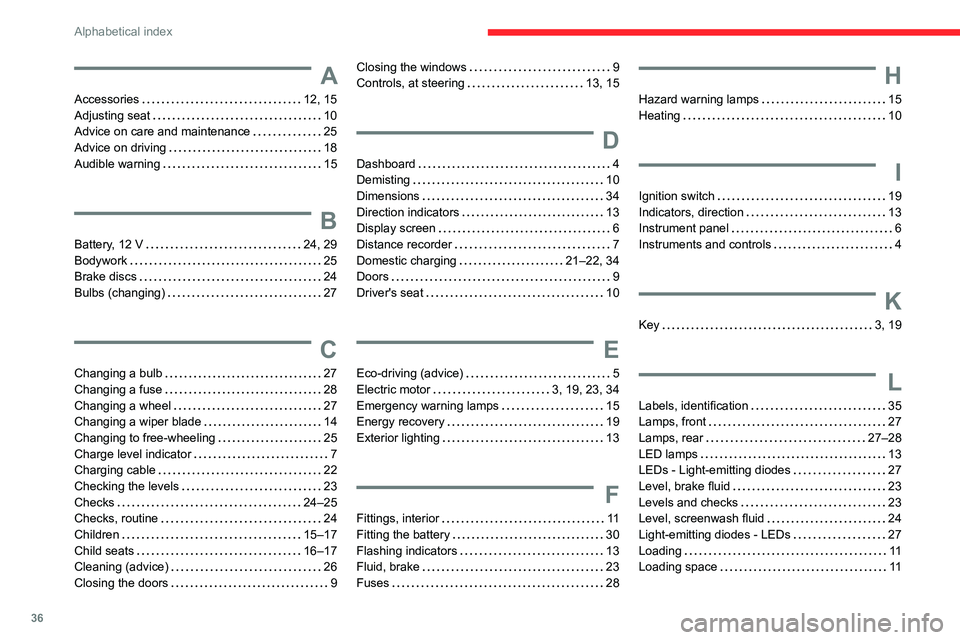
Alphabetical index
A
Accessories 12, 15
Adjusting seat 10
Advice on care and maintenance 25
Advice on driving 18
Audible warning 15
B
Battery, 12 V 24, 29
Bodywork 25
Brake discs
24
Bulbs (changing) 27
C
Changing a bulb 27
Changing a fuse 28
Changing a wheel 27
Changing a wiper blade 14
Changing to free-wheeling 25
Charge level indicator 7
Charging cable 22
Checking the levels 23
Checks
24–25
Checks, routine 24
Children 15–17
Child seats 16–17
Cleaning (advice) 26
Closing the doors 9
Closing the windows 9
Controls, at steering 13, 15
D
Dashboard 4
Demisting 10
Dimensions 34
Direction indicators 13
Display screen 6
Distance recorder 7
Domestic charging 21–22, 34
Doors
9
Driver's seat
10
E
Eco-driving (advice) 5
Electric motor 3, 19, 23, 34
Emergency warning lamps 15
Energy recovery 19
Exterior lighting 13
F
Fittings, interior 11
Fitting the battery 30
Flashing indicators 13
Fluid, brake
23
Fuses
28
H
Hazard warning lamps 15
Heating 10
I
Ignition switch 19
Indicators, direction 13
Instrument panel 6
Instruments and controls
4
K
Key 3, 19
L
Labels, identification 35
Lamps, front 27
Lamps, rear
27–28
LED lamps
13
LEDs - Light-emitting diodes 27
Level, brake fluid 23
Levels and checks 23
Level, screenwash fluid 24
Light-emitting diodes - LEDs 27
Loading 11
Loading space 11
Page 39 of 44
37
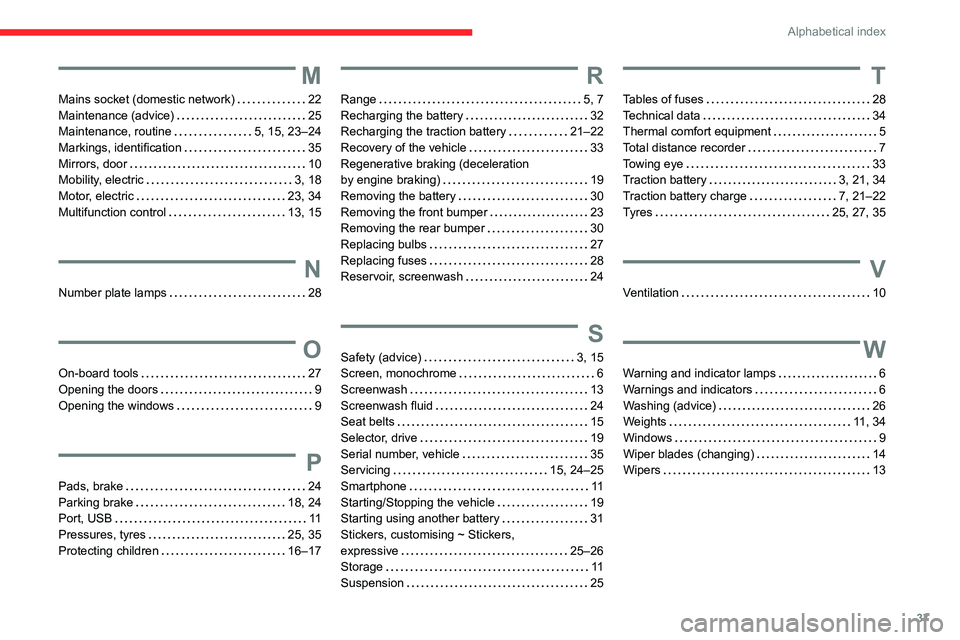
Alphabetical index
M
Mains socket (domestic network) 22
Maintenance (advice) 25
Maintenance, routine 5, 15, 23–24
Markings, identification 35
Mirrors, door
10
Mobility
, electric
3, 18
Motor
, electric
23, 34
Multifunction control 13, 15
N
Number plate lamps 28
O
On-board tools 27
Opening the doors 9
Opening the windows 9
P
Pads, brake 24
Parking brake 18, 24
Port, USB
11
Pressures, tyres
25, 35
Protecting children 16–17
R
Range 5, 7
Recharging the battery 32
Recharging the traction battery 21–22
Recovery of the vehicle 33
Regenerative braking (deceleration
by engine braking)
19
Removing the battery 30
Removing the front bumper 23
Removing the rear bumper 30
Replacing bulbs 27
Replacing fuses 28
Reservoir
, screenwash
24
S
Safety (advice) 3, 15
Screen, monochrome 6
Screenwash 13
Screenwash fluid 24
Seat belts
15
Selector
, drive
19
Serial number
, vehicle
35
Servicing 15, 24–25
Smartphone 11
Starting/Stopping the vehicle 19
Starting using another battery 31
Stickers, customising ~ Stickers,
expressive
25–26
Storage
11
Suspension 25
T
Tables of fuses 28
T echnical data 34
Thermal comfort equipment 5
T
otal distance recorder
7
T
owing eye
33
T
raction battery
3, 21, 34
T
raction battery charge
7, 21–22
T
yres
25, 27, 35
V
Ventilation 10
W
Warning and indicator lamps 6
W arnings and indicators 6
W
ashing (advice)
26
W
eights
1
1, 34
Windows
9
Wiper blades (changing) 14
Wipers
13