lock CITROEN AMI 2023 Owners Manual
[x] Cancel search | Manufacturer: CITROEN, Model Year: 2023, Model line: AMI, Model: CITROEN AMI 2023Pages: 44, PDF Size: 1.45 MB
Page 5 of 44
3
Overview
Safety precautions -
Electric vehicles
An electric vehicle has two types of electrical
circuit:
–
vehicle traction provided by a 48 V battery
module.
–
power supply for the on-board circuit
(instrument panel, lights, ventilation/heating,
USB socket, etc.), provided by a 12
V battery
.
Precautions relating to the 48 V electrical
circuit
The components and cables which make
up the traction electrical circuit are
marked with this symbol.
The electric vehicle's charging system may become hot during use and after the
ignition is switched off.
All work on or modifications to the vehicle’s
electrical system (traction battery, cables and
other components visible from the interior or
exterior) is strictly prohibited - risk of severe
burns or electric shock (short-circuit)!
If required, call a dealer or qualified
workshop.
Precautions relating to the electrical
installation
Before any connection is made, check
that the electrical installation to be used
complies with applicable standards and is
compatible with the vehicle.
In case of doubt, contact a professional
installer.
Precautions related to vehicle cleaning
Before cleaning the vehicle, check that
the windows and doors are properly
closed.
Do not wash the vehicle while the traction
battery is being charged.
Precautions in the event of a breakdown
In the event of a complete loss of power, the
vehicle is no longer driven by the electric motor.
Quickly move the vehicle to a safe place in
accordance with all roadside safety regulations.
Immobilise the vehicle, activate the hazard
warning lamps, put on the high visibility safety
vest, leave the vehicle and find a safe place.
Call a dealer or qualified workshop as soon as
possible.
Precautions related to road accidents
In the event of an accident or impact
to the vehicle's underbody
In situations like these, the electrical circuit or
traction battery may be seriously damaged.
Stop as soon as it is safe to do so.
Apply the parking brake and switch off the
ignition.
Call a dealer or qualified workshop as soon
as possible.
In the event of exposure to a fire
Immediately exit and evacuate all
passengers from the vehicle. Never attempt
to fight the fire yourself - risk of explosion!
You must immediately contact the emergency
services, informing them that the incident
involves an electric vehicle.
Overview
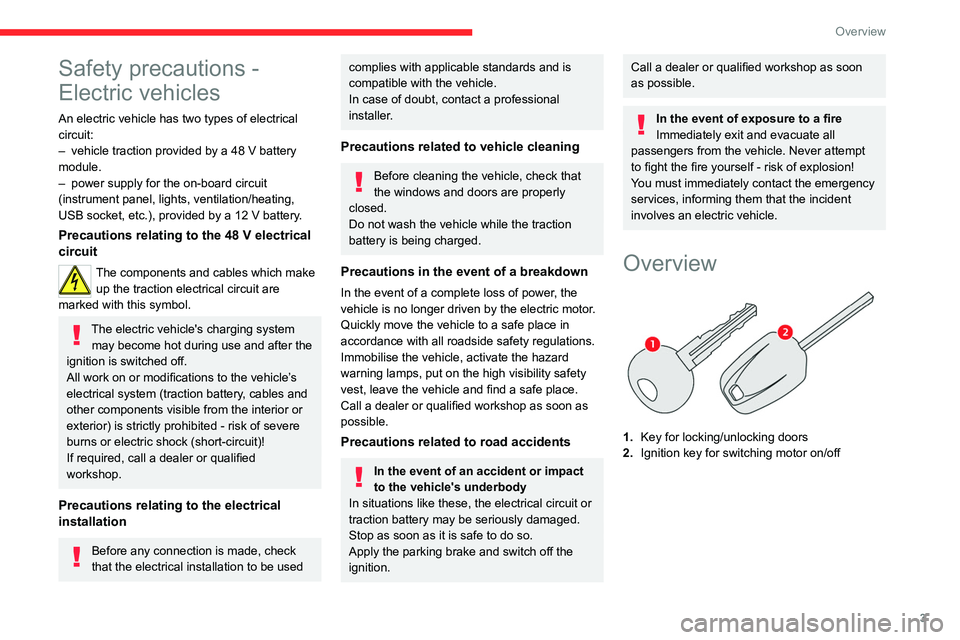
1. Key for locking/unlocking doors
2. Ignition key for switching motor on/off
Page 11 of 44
9
Access
2Doors
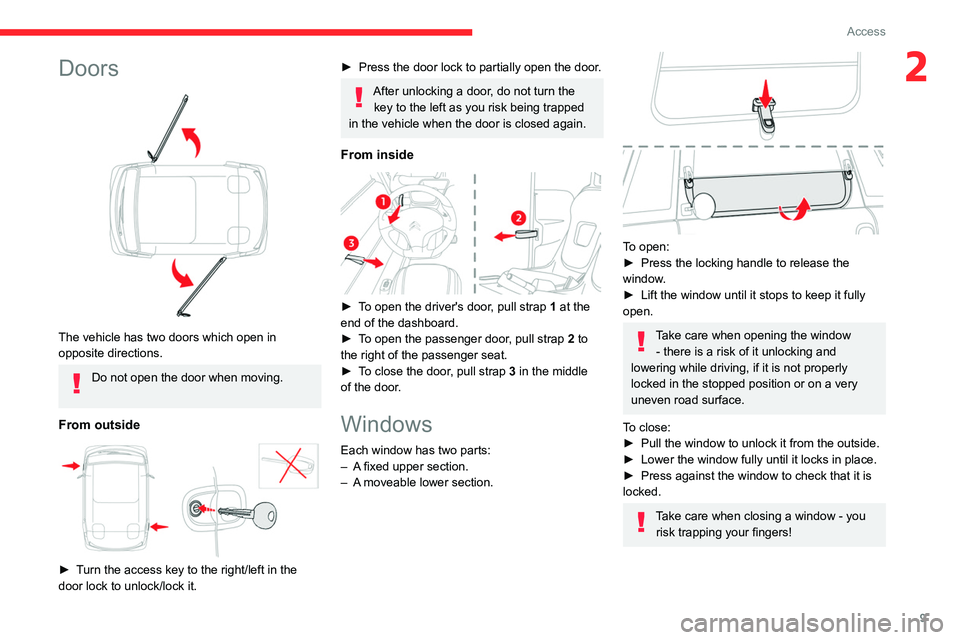
The vehicle has two doors which open in
opposite directions.
Do not open the door when moving.
From outside
► Turn the access key to the right/left in the
door lock to unlock/lock it.
► Press the door lock to partially open the door.
After unlocking a door, do not turn the key to the left as you risk being trapped
in the vehicle when the door is closed again.
From inside
► To open the driver's door, pull strap 1 at the
end of the dashboard.
►
To open the passenger door
, pull strap 2 to
the right of the passenger seat.
►
To close the door
, pull strap 3 in the middle
of the door.
Windows
Each window has two parts:
– A fixed upper section.
– A moveable lower section.
To open:
► Press the locking handle to release the
window.
►
Lift the window until it stops to keep it fully
open.
Take care when opening the window - there is a risk of it unlocking and
lowering while driving, if it is not properly
locked in the stopped position or on a very
uneven road surface.
To close:
►
Pull the window to unlock it from the outside.
► Lower the window fully until it locks in place.
► Press against the window to check that it is
locked.
Take care when closing a window - you risk trapping your fingers!
Page 12 of 44
10
Ease of use and comfort
Driver's seat
Longitudinal adjustment
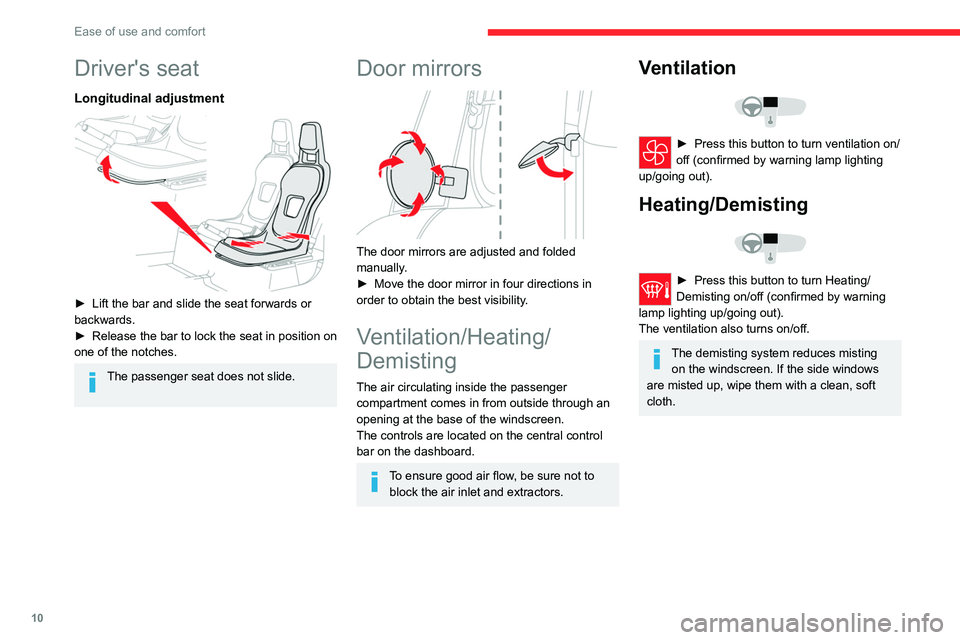
► Lift the bar and slide the seat forwards or
backwards.
►
Release the bar to lock the seat in position on
one of the notches.
The passenger seat does not slide.
Door mirrors
The door mirrors are adjusted and folded
manually.
►
Move the door mirror in four directions in
order to obtain the best visibility.
Ventilation/Heating/
Demisting
The air circulating inside the passenger
compartment comes in from outside through an
opening at the base of the windscreen.
The controls are located on the central control
bar on the dashboard.
To ensure good air flow, be sure not to block the air inlet and extractors.
Ventilation
► Press this button to turn ventilation on/
off (confirmed by warning lamp lighting
up/going out).
Heating/Demisting
► Press this button to turn Heating/
Demisting on/off (confirmed by warning
lamp lighting up/going out).
The ventilation also turns on/off.
The demisting system reduces misting on the windscreen. If the side windows
are misted up, wipe them with a clean, soft
cloth.
Page 17 of 44
15
Safety
5Safety - General
recommendations
Do not remove the labels attached in
different places on your vehicle. They
include safety warnings as well as
identification information for the vehicle.
For any work on your vehicle, use a
qualified workshop that has the technical
information, skills and equipment required, all
of which a dealer or qualified workshop is
able to provide.
Depending on national regulations,
certain safety equipment may be
mandatory: high visibility safety vests,
warning triangles, breathalysers, spare bulbs,
spare fuses, fire extinguisher, first aid kit, etc.
Installing equipment and accessories
Fitting electrical equipment or
accessories not approved by the
Manufacturer may cause excessive power
consumption and faults in your vehicle's
electrical system. Contact a dealer or
qualified workshop for information on the
range of approved accessories.
Any modification or adaptation not intended or
authorised by the Manufacturer or carried out
without meeting the technical requirements
defined by the Manufacturer will result in the
suspension of the commercial warranty.
Hazard warning lamps
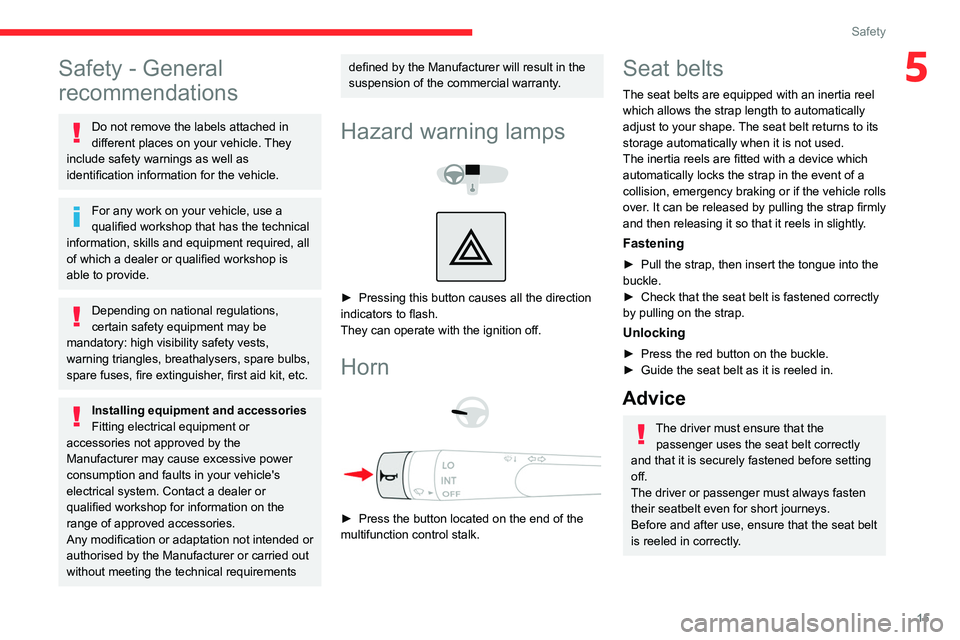
► Pressing this button causes all the direction
indicators to flash.
They can operate with the ignition off.
Horn
► Press the button located on the end of the
multifunction control stalk.
Seat belts
The seat belts are equipped with an inertia reel
which allows the strap length to automatically
adjust to your shape. The seat belt returns to its
storage automatically when it is not used.
The inertia reels are fitted with a device which
automatically locks the strap in the event of a
collision, emergency braking or if the vehicle rolls
over. It can be released by pulling the strap firmly
and then releasing it so that it reels in slightly.
Fastening
► Pull the strap, then insert the tongue into the
buckle.
►
Check that the seat belt is fastened correctly
by pulling on the strap.
Unlocking
► Press the red button on the buckle.
► Guide the seat belt as it is reeled in.
Advice
The driver must ensure that the passenger uses the seat belt correctly
and that it is securely fastened before setting
off.
The driver or passenger must always fasten
their seatbelt even for short journeys.
Before and after use, ensure that the seat belt
is reeled in correctly.
Page 20 of 44
18
Driving
Driving recommendations
General information
► Observe the driving regulations and remain
vigilant whatever the traffic conditions.
►
Monitor your environment and keep your
hands on the wheel to be able to react to
anything that may happen any time.
►
Drive smoothly, anticipate the need for
braking and maintain a longer safety distance,
especially in bad weather
.
►
Stop the vehicle to carry out operations that
require close attention (such as adjustments).
Never drive with the parking brake
applied . Risk of overheating and
damaging the braking system!
Never leave a vehicle running unattended.
If the driver must leave the vehicle, the
parking brake must be applied and N mode
selected using the drive selector.
On flooded roads
We strongly advise against driving on flooded
roads, as this could seriously damage your
vehicle's motor and electrical systems.
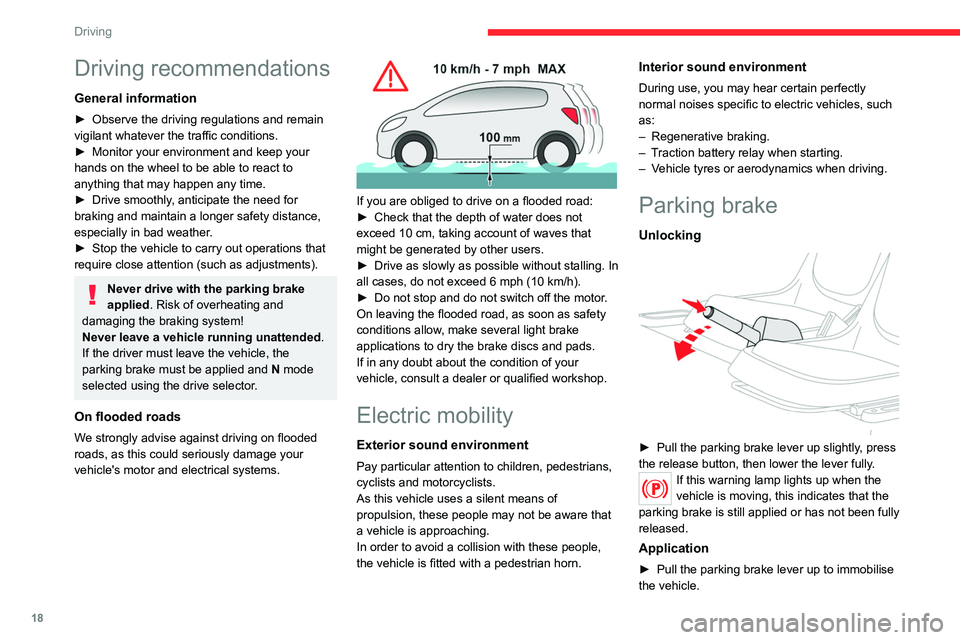
If you are obliged to drive on a flooded road:
► Check that the depth of water does not
exceed 10 cm, taking account of waves that
might be generated by other users.
►
Drive as slowly as possible without stalling. In
all cases, do not exceed 6 mph (10 km/h).
► Do not stop and do not switch off the motor.
On leaving the flooded road, as soon as safety
conditions allow
, make several light brake
applications to dry the brake discs and pads.
If in any doubt about the condition of your
vehicle, consult a dealer or qualified workshop.
Electric mobility
Exterior sound environment
Pay particular attention to children, pedestrians,
cyclists and motorcyclists.
As this vehicle uses a silent means of
propulsion, these people may not be aware that
a vehicle is approaching.
In order to avoid a collision with these people,
the vehicle is fitted with a pedestrian horn.
Interior sound environment
During use, you may hear certain perfectly
normal noises specific to electric vehicles, such
as:
–
Regenerative braking.
– Traction battery relay when starting.
– Vehicle tyres or aerodynamics when driving.
Parking brake
Unlocking
► Pull the parking brake lever up slightly, press
the release button, then lower the lever fully .
If this warning lamp lights up when the
vehicle is moving, this indicates that the
parking brake is still applied or has not been fully
released.
Application
► Pull the parking brake lever up to immobilise
the vehicle.
Page 21 of 44
19
Driving
6When parking on a slope, turn the
wheels against the kerb and/or place a
chock behind one of the wheels, apply the
parking brake and switch off the ignition.
Drive selector
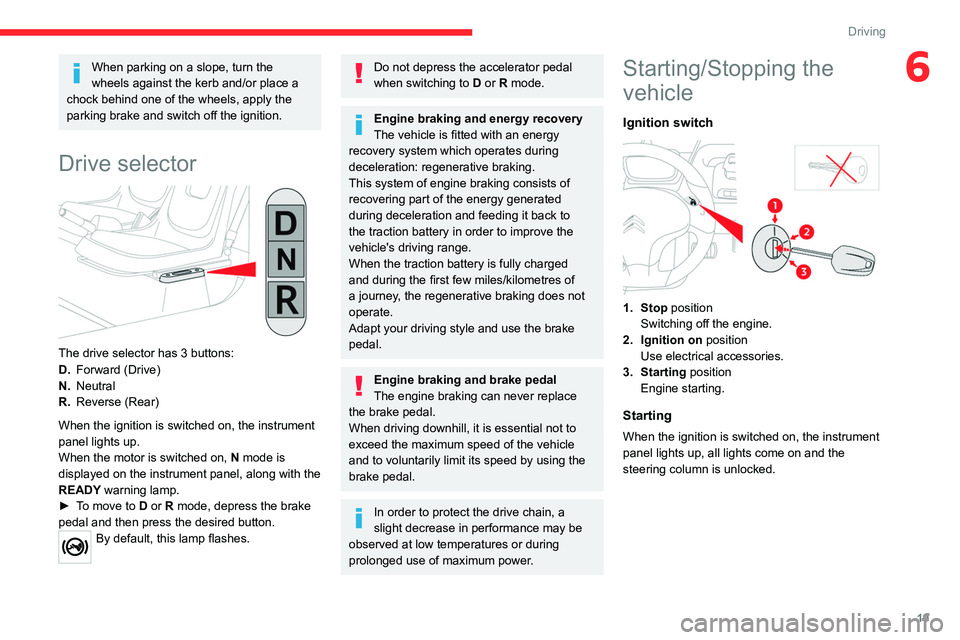
The drive selector has 3 buttons:
D. Forward (Drive)
N. Neutral
R. Reverse (Rear)
When the ignition is switched on, the instrument
panel lights up.
When the motor is switched on, N mode is
displayed on the instrument panel, along with the
READY warning lamp.
►
To move to
D or R mode, depress the brake
pedal and then press the desired button.
By default, this lamp flashes.
Do not depress the accelerator pedal
when switching to D or R mode.
Engine braking and energy recovery
The vehicle is fitted with an energy
recovery system which operates during
deceleration: regenerative braking.
This system of engine braking consists of
recovering part of the energy generated
during deceleration and feeding it back to
the traction battery in order to improve the
vehicle's driving range.
When the traction battery is fully charged
and during the first few miles/kilometres of
a journey, the regenerative braking does not
operate.
Adapt your driving style and use the brake
pedal.
Engine braking and brake pedal
The engine braking can never replace
the brake pedal.
When driving downhill, it is essential not to
exceed the maximum speed of the vehicle
and to voluntarily limit its speed by using the
brake pedal.
In order to protect the drive chain, a
slight decrease in performance may be
observed at low temperatures or during
prolonged use of maximum power.
Starting/Stopping the
vehicle
Ignition switch
1. Stop position Switching off the engine.
2. Ignition on position
Use electrical accessories.
3. Starting position Engine starting.
Starting
When the ignition is switched on, the instrument
panel lights up, all lights come on and the
steering column is unlocked.
Page 22 of 44
20
Driving
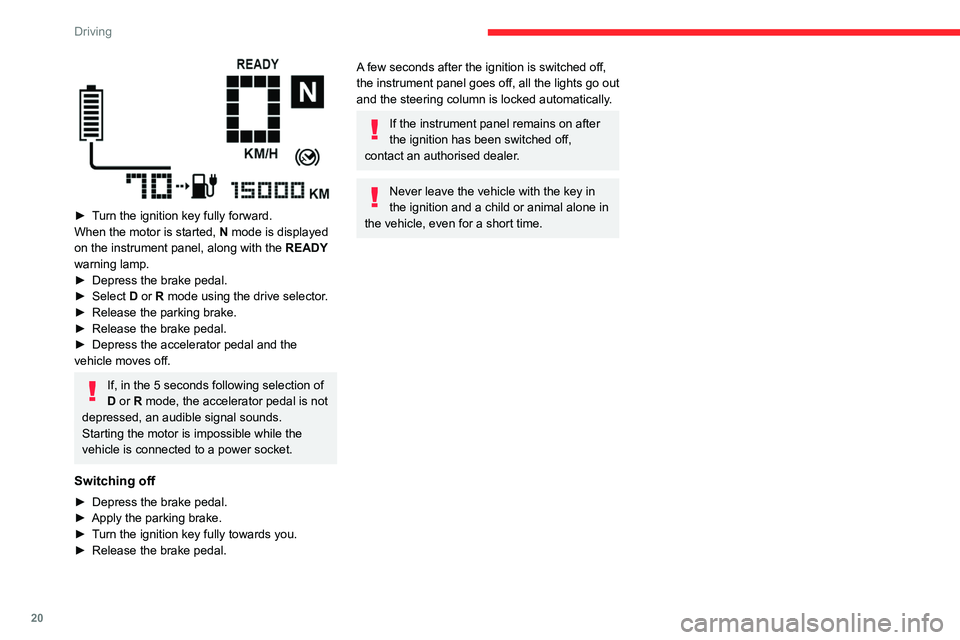
► Turn the ignition key fully forward.
When the motor is started, N mode is displayed
on the instrument panel, along with the READY
warning lamp.
►
Depress the brake pedal.
► Select D
or R mode using the drive selector.
►
Release the parking brake.
► Release the brake pedal.
► Depress the accelerator pedal and the
vehicle moves off.
If, in the 5 seconds following selection of
D or R mode, the accelerator pedal is not
depressed, an audible signal sounds.
Starting the motor is impossible while the
vehicle is connected to a power socket.
Switching off
► Depress the brake pedal.
► Apply the parking brake.
► Turn the ignition key fully towards you.
► Release the brake pedal.
A few seconds after the ignition is switched off,
the instrument panel goes off, all the lights go out
and the steering column is locked automatically.
If the instrument panel remains on after
the ignition has been switched off,
contact an authorised dealer.
Never leave the vehicle with the key in
the ignition and a child or animal alone in
the vehicle, even for a short time.
Page 23 of 44
21
Practical information
Charging the traction
battery
Principle
The traction battery stores the energy needed
to operate the electric motor and the vehicle's
electrical cabin components. It is discharged
during use, and must therefore be regularly
recharged. There is no need to wait for the
traction battery to fall to its reserve level before
recharging.
The traction battery's driving range varies
according to the conditions of use: speed, driving
style, heating, load carried and road surface.
The traction battery's driving range can also
vary depending on whether the age of its
components.
Like any equipment with a lithium-ion battery,
the vehicle incorporates a protection mode to
optimise the durability of its traction battery.
Depending on the charge level and temperature
of its traction battery, power may be limited to
protect the battery cells.
This protection mode affects the maximum
speed of the vehicle at low charge level (< 20%)
and at low or high battery temperature (<
+5°C
or > +45°C).
The relief of the road, such as climbing a steep
slope, also affects the maximum speed that the
vehicle can reach.
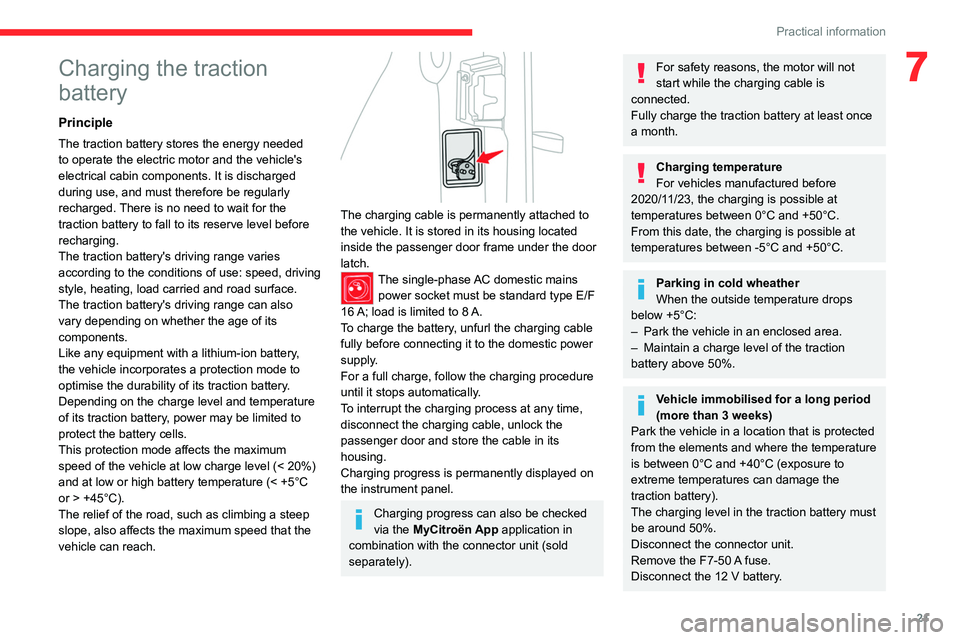
The charging cable is permanently attached to
the vehicle. It is stored in its housing located
inside the passenger door frame under the door
latch.
The single-phase AC domestic mains power socket must be standard type E/F
16
A; load is limited to 8 A.
To charge the battery, unfurl the charging cable
fully before connecting it to the domestic power
supply
.
For a full charge, follow the charging procedure
until it stops automatically.
To interrupt the charging process at any time,
disconnect the charging cable, unlock the
passenger door and store the cable in its
housing.
Charging progress is permanently displayed on
the instrument panel.
Charging progress can also be checked
via the MyCitroën App application in
combination with the connector unit (sold
separately).
For safety reasons, the motor will not
start while the charging cable is
connected.
Fully charge the traction battery at least once
a month.
Charging temperature
For vehicles manufactured before
2020/11/23, the charging is possible at
temperatures between 0°C and +50°C.
From this date, the charging is possible at
temperatures between -5°C and +50°C.
Parking in cold wheather
When the outside temperature drops
below +5°C:
–
Park the vehicle in an enclosed area.
–Maintain a charge level of the traction
battery above 50%.
Vehicle immobilised for a long period
(more than 3 weeks)
Park the vehicle in a location that is protected
from the elements and where the temperature
is between 0°C and +40°C (exposure to
extreme temperatures can damage the
traction battery).
The charging level in the traction battery must
be around 50%.
Disconnect the connector unit.
Remove the F7-50
A fuse.
Disconnect the 12 V battery.
7
Page 27 of 44
25
Practical information
7Unless there is a leak in the circuit, a drop in the
brake fluid level indicates that the brake pads
are worn.
For information on checking brake disc/
drum wear, contact a dealer or a qualified
workshop.
After washing the vehicle, moisture, or in wintry conditions, ice can form on the
brake discs and pads: braking efficiency may
be reduced. Gently dab the brakes to dry and
defrost them.
Wheels and tyres
All tyre pressures must be checked when the tyres are cold.
The pressures indicated on the tyre pressure
label are valid for "cold" tyres. If you have driven
for more than 10 minutes or more than 6 miles
(10 kilometres), add 0.3 bar (30 kPa) to the
values indicated on the label.
Under-inflation increases energy
consumption. Non-compliant tyre
pressures cause tyres to wear prematurely
and have an adverse effect on the vehicle's
road holding - risk of accident!
Driving with worn or damaged tyres reduces the
braking and road holding performance of the
vehicle. We recommended regularly checking
the condition of tyres (tread and sidewalls) and
wheel rims as well as the presence of valves. When the wear indicators no longer appear set
back from the tread, the depth of the grooves is
less than 1.6 mm; it is essential to replace the
tyres.
Using different size wheels and tyres from those
specified can affect the lifetime of tyres, wheel
rotation, ground clearance, the speedometer
reading and have an adverse effect on road
holding.
Shock absorbers
It is not easy for drivers to detect when
shock absorbers are worn. Nevertheless,
shock absorbers have a major impact on road
holding and braking performance.
For your safety and driving comfort, it is
important to have them regularly checked by a
dealer or a qualified workshop.
Changing to free-wheeling
In certain situations, you must allow the vehicle
to free-wheel (when being towed, on a rolling
road, transport by rail or sea, etc.).
►
Switch the ignition off.
► Release the parking brake.
Advice on care and maintenance
General information - Exterior
Do not wash the vehicle in full sunshine
or in extremely cold conditions.
Do not use a high pressure washer or
automatic carwash to clean the vehicle.
Use a water jet (temperature between +20°C
and +40°C).
Before starting to clean your vehicle,
remember to lock the windows and
doors.
Use a sponge and soapy water or a pH
neutral product.
Move the water jet perpendicular to the
surface to be cleaned, avoiding the door
seals.
Rinse the vehicle using demineralised water,
then gently wipe the bodywork with a clean
microfibre cloth.
Promptly clean off any marks containing
corrosive chemical substances liable to
damage the vehicle's paintwork (including
tree resin, bird droppings, insect secretions,
pollen and tar).
If justified by the environment, clean the
vehicle more frequently to remove salty
deposits (in coastal areas), soot (in industrial