auto beam CITROEN BERLINGO 2023 Owners Manual
[x] Cancel search | Manufacturer: CITROEN, Model Year: 2023, Model line: BERLINGO, Model: CITROEN BERLINGO 2023Pages: 324, PDF Size: 9.41 MB
Page 4 of 324

2
Contents
■
OverviewOverview 4
Labels 6
■
Eco-driving
1InstrumentsInstrument panels 10
Digital instrument panel 11
Warning and indicator lamps 13
Indicators 20
Trip computer 27
Touch screen BLUETOOTH audio system 28
Touch screen 29
Setting the date and time 31
2AccessElectronic key with remote control function and
built-in key, 32
Back-up procedures 38
Central locking / unlocking 41
Doors 43
General recommendations for the sliding
side doors
43
Rear roof flap 44
Alarm 45
Electric windows 47
Tilting rear door windows 49
3Ease of use and comfortGeneral recommendations for the seats 50
Front seats 50
Steering wheel adjustment 53
Mirrors 53
2-seat front bench seat 55
Rear bench seat (row 2) 56
Rear seats (row 2) 57
Rear seats (row 3) 57
Interior fittings 60
Two-position luggage cover shelf (removable) 65
Luggage cover (7-seat) 66
Warning triangle 67
Extenso Cab 68
Crew cab 70
Heating and Ventilation 73
Heating 74
Manual air conditioning 74
Dual-zone automatic air conditioning 75
Front demisting - de-icing 77
Heated windscreen 78
Demisting/de-icing the rear screen and/or
the door mirrors
78
Rear heating and air conditioning 79
Additional heating/ventilation system 79
Temperature conditioning (Electric) 81
4Lighting and visibilityLighting control stalk 83
Direction indicators 84
Automatic illumination of headlamps 84
Daytime running lamps / Sidelamps 85
Guide-me-home and welcome lighting 85
Automatic lighting systems - General
recommendations
86
Automatic headlamp dipping 86
Headlamp beam height adjustment 88
Wiper control stalk 88
Changing a wiper blade 90
Automatic wipers 90
5SafetyGeneral safety recommendations 92
Emergency or assistance 92
Hazard warning lamps 94
Horn 95
Pedestrian horn (Electric) 95
Electronic stability control (ESC) 95
Advanced Grip Control 97
Hill Assist Descent Control 98
Seat belts 99
Airbags 103
Child seats 106
Deactivating the front passenger airbag 108
ISOFIX child seats 11 2
i-Size child seats 11 5
Manual child lock 11 6
Electric child lock 11 6
6DrivingDriving recommendations 11 7
Starting/switching off the engine 11 9
Manual parking brake 123
Electric parking brake 123
Hill start assist 126
5-speed manual gearbox 126
6-speed manual gearbox 127
Automatic gearbox 127
Drive selector (Electric) 132
Driving modes 133
Gear shift indicator 134
Stop & Start (Petrol or Diesel) 134
Tyre under-inflation detection 136
Head-up display 138
Driving and manoeuvring aids - General
recommendations
139
Road signs recognition 140
Speed limiter 143
Cruise control - Specific recommendations 146
Programmable cruise control 146
Adaptive cruise control 148
Memorising speeds 152
Active Safety Brake with Collision Risk Alert and
Intelligent emergency braking assistance
152
Active lane departure warning system 155
Blind spot monitoring 158
Page 22 of 324

20
Instruments
The vehicle is being braked; the brake lamps
come on during the descent.
Eco mode (Petrol or Diesel)Fixed.
ECO mode is active.
Some parameters are adjusted to reduce the fuel
consumption.
Automatic wipingFixed.
Automatic windscreen wiping is activated.
Front foglampsFixed.
The front foglamps are on.
SidelampsFixed.
The lamps are on.
Direction indicatorsFlashing with audible signal.
The direction indicators are on.
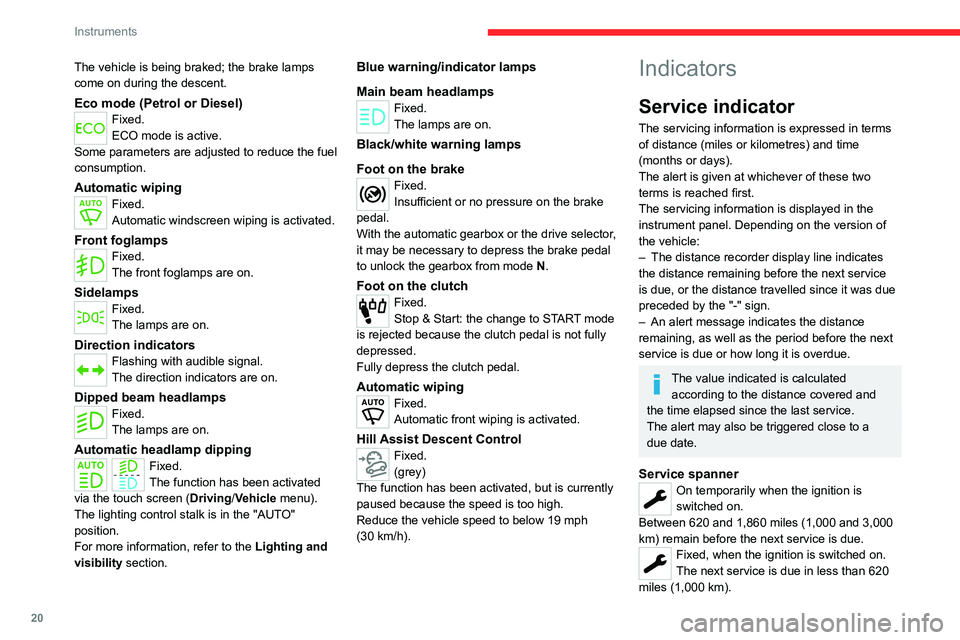
Dipped beam headlampsFixed.
The lamps are on.
Automatic headlamp dippingFixed.
The function has been activated
via the touch screen (Driving/Vehicle menu).
The lighting control stalk is in the "AUTO"
position.
For more information, refer to the Lighting and
visibility section.
Blue warning/indicator lamps
Main beam headlamps
Fixed.
The lamps are on.
Black/white warning lamps
Foot on the brake
Fixed.
Insufficient or no pressure on the brake
pedal.
With the automatic gearbox or the drive selector,
it may be necessary to depress the brake pedal
to unlock the gearbox from mode N.
Foot on the clutchFixed.
Stop & Start: the change to START mode
is rejected because the clutch pedal is not fully
depressed.
Fully depress the clutch pedal.
Automatic wipingFixed.
Automatic front wiping is activated.
Hill Assist Descent ControlFixed.
(grey)
The function has been activated, but is currently
paused because the speed is too high.
Reduce the vehicle speed to below 19 mph
(30
km/h).
Indicators
Service indicator
The servicing information is expressed in terms
of distance (miles or kilometres) and time
(months or days).
The alert is given at whichever of these two
terms is reached first.
The servicing information is displayed in the
instrument panel. Depending on the version of
the vehicle:
–
The distance recorder display line indicates
the distance remaining before the next service
is due, or the distance travelled since it was due
preceded by the "-" sign.
–
An alert message indicates the distance
remaining, as well as the period before the next
service is due or how long it is overdue.
The value indicated is calculated according to the distance covered and
the time elapsed since the last service.
The alert may also be triggered close to a
due date.
Service spannerOn temporarily when the ignition is
switched on.
Between 620 and 1,860 miles (1,000 and 3,000
km) remain before the next service is due.
Fixed, when the ignition is switched on.
The next service is due in less than 620
miles (1,000 km).
Page 85 of 324

83
Lighting and visibility
4Lighting control stalk
Main lighting
Automatic illumination of lamps/daytime running lamps
Sidelamps only
Dipped or main beam headlamps
Operation of the selected lighting is
confirmed by the illumination of the
corresponding indicator lamp.
Headlamp dipping
► Pull the lighting control stalk to switch
between dipped and main beam headlamps.
In "
AUTO" and sidelamps mode, pull the lighting
control stalk to switch the main beam headlamps
on directly ("headlamp flash").
Foglamps selection ring
Rear foglamps
They only work if the sidelamps are on.
► Rotate the ring forwards/backwards to turn
them on/off.
When the lighting is switched off automatically
("AUTO" position) the foglamps and the dipped
beam headlamps remain on.
Front foglamps/Rear foglamps
They operate with the sidelamps, dipped or main beam headlamps on.
► Rotate the ring forwards:
• once to switch on the front foglamps,
•
a second time to switch on the rear
foglamps.
►
T
urn in the opposite direction to switch off.
If the lighting is switched off automatically
("AUTO" position) or the dipped beam
headlamps are switched off manually, the
foglamps and sidelamps remain on.
►
Rotate the ring backwards to switch the
foglamps off; the sidelamps will then switch off.
Switching on the foglamps is prohibited
in clear weather or in rain, both day and
night. In these situations, the power of their
beams may dazzle other drivers. They must
only be used in fog or falling snow (rules may
vary depending on country).
Do not forget to switch off the foglamps when
they are no longer necessary.
Page 86 of 324

84
Lighting and visibility
Switching off of the lighting when the
ignition is switched off
When the ignition is switched off, all of the
lamps turn off immediately, except for the
dipped beam headlamps if automatic guide-
me-home lighting is activated.
Switching on the lamps after
switching off the ignition
If the driver's door is opened, a temporary
audible signal warns the driver that the lamps
are on.
They will go off automatically after a period
of time that depends on the level of charge in
the battery (entering energy economy mode).
In some weather conditions (e.g. low
temperature or humidity), misting on the
internal surface of the glass of the headlamps
and rear lamps is normal, and will disappear
after the lamps have been on for a few
minutes.
Never look too closely at the light beam
of LED technology lamps - risk of serious
eye injury!
Travelling abroad
If planning to use your vehicle in a
country that drives on the other side of the
road, the dipped beam headlamps must be
adjusted to avoid dazzling oncoming drivers.
Contact a CITROËN dealer or a qualified
workshop.
Direction indicators
► Left or right: lower or raise the lighting control
stalk, beyond the point of resistance.
If you keep the direction indicators on for
more than 20 seconds, the volume of the
audible signal will increase if the speed is
above 50 mph (80 km/h).
Three flashes
► Press briefly upwards or downwards, without
going beyond the point of resistance; the
direction indicators will flash 3 times.
Parking lamps
(Depending on version)
Vehicle side marking by lighting the sidelamps
on the traffic side only.
►
Within one minute after switching off the
ignition, operate the lighting control stalk
upwards or downwards, depending on the side
of the traffic (e.g.
when parking on the right, push
the lighting control stalk down to light up on the
left).
This is confirmed by an audible signal and the
lighting of the corresponding direction indicator
lamp on the instrument panel.
►
T
o switch off the parking lamps, return the
lighting control stalk to the central position.
Automatic headlamp illumination
When a low level of ambient light is detected
by a sunshine sensor, the number plate
lamps,
sidelamps and dipped beam headlamps
are switched on automatically, without any action
Page 87 of 324

85
Lighting and visibility
4on the part of the driver. They can also come
on if rain is detected, at the same time as the
automatic rain sensitive wipers.
As soon as the brightness returns to a sufficient
level or after the windscreen wipers are switched
off, the lamps are switched off automatically.
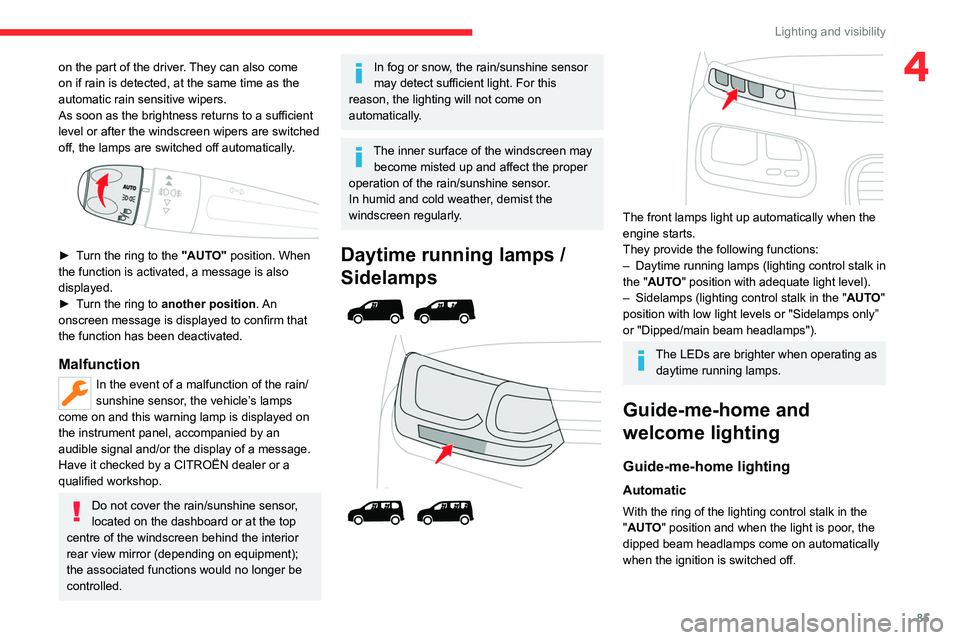
► Turn the ring to the "AUTO" position. When
the function is activated, a message is also
displayed.
►
T
urn the ring to another position . An
onscreen message is displayed to confirm that
the function has been deactivated.
Malfunction
In the event of a malfunction of the rain/
sunshine sensor, the vehicle’s lamps
come on and this warning lamp is displayed on
the instrument panel, accompanied by an
audible signal and/or the display of a message.
Have it checked by a CITROËN dealer or a
qualified workshop.
Do not cover the rain/sunshine sensor,
located on the dashboard or at the top
centre of the windscreen behind the interior
rear view mirror (depending on equipment);
the associated functions would no longer be
controlled.
In fog or snow, the rain/sunshine sensor
may detect sufficient light. For this
reason, the lighting will not come on
automatically.
The inner surface of the windscreen may become misted up and affect the proper
operation of the rain/sunshine sensor.
In humid and cold weather, demist the
windscreen regularly.
Daytime running lamps /
Sidelamps
The front lamps light up automatically when the
engine starts.
They provide the following functions:
–
Daytime running lamps (lighting control stalk in
the "
AUTO" position with adequate light level).
–
Sidelamps (lighting control stalk in the " AUT
O"
position with low light levels or "Sidelamps only”
or "Dipped/main beam headlamps").
The LEDs are brighter when operating as daytime running lamps.
Guide-me-home and
welcome lighting
Guide-me-home lighting
Automatic
With the ring of the lighting control stalk in the
"AUTO" position and when the light is poor, the
dipped beam headlamps come on automatically
when the ignition is switched off.
Page 88 of 324

86
Lighting and visibility
You can activate/deactivate this function and adjust the guide-me-
home lighting duration in the Driving/Vehicle
touch screen menu.
Manual
► With the ignition off, pull the lighting control
stalk toward you ("headlamp flash") to activate/
deactivate the function.
Manual guide-me-home lighting goes off
automatically after a period of time.
Welcome lighting
With the "Automatic headlamp illumination"
function activated, in poor light, the sidelamps
and dipped beam headlamps come on
automatically when the vehicle is unlocked.
Activation, deactivation and the duration of the exterior welcome
lighting are set in the Driving/Vehicle touch
screen menu.
Automatic lighting systems - General
recommendations
The automatic lighting systems use a detection
camera, located at the top of the windscreen.
Operating limits
The system may be disrupted or not work
correctly:
–
When visibility conditions are poor
(e.g.
snowfall, heavy rain).
–
If the windscreen is dirty
, misted-up or
masked (e.g.
sticker) in front of the camera.
–
If the vehicle is facing highly reflective signs
or safety barrier reflectors.
The system is not able to detect:
–
Road users that do not have their own
lighting, such as pedestrians.
–
V
ehicles with hidden lighting (e.g. travelling
behind a safety barrier on the motorway).
–
V
ehicles at the top or bottom of a steep
slope, on winding roads, on crossroads.
Maintenance
Clean the windscreen regularly,
particularly the area in front of the camera.
The internal surface of the windscreen can
also become misted around the camera.
In humid and cold weather, demist the
windscreen regularly.
Do not allow snow to accumulate on the
bonnet or roof of the vehicle as this could
obstruct the camera.
Automatic headlamp dipping
For more information, refer to the
General recommendations for
automatic lighting systems.
With the ring of the lighting control stalk
in the
"AUTO" position and the function activated on
the touch screen, this system automatically
switches between dipped and main beam
headlamps, according to lighting and traffic
conditions, using a camera located at the top of
the windscreen.
Page 89 of 324

87
Lighting and visibility
4This system is a driving aid.The driver remains responsible for
the vehicle's lighting, its correct use in the
prevailing light, visibility and traffic conditions,
and for compliance with driving and vehicle
regulations.
The system becomes operational when the vehicle exceeds 16 mph (25 km/h).
When the speed falls below 9 mph (15 km/h),
the function is no longer operational.
Activation/Deactivation
The settings are changed via the Driving/Vehicle touch screen
menu.
When deactivated, the lighting system changes
to "automatic illumination of headlamps" mode.
The state of the system is stored when the
ignition is switched off.
Operation
If the ambient light level is very low and traffic
conditions permit:
– The main beam headla mps
come on automatically. These
indicator lamps light up on the instrument panel.
If the ambient light level is sufficient and/or the
traffic conditions do not allow the main beam
headlamps to be lit:
– The dipped beam head lamps
remain lit. These indicator lamps
light up on the instrument panel.
The function is deactivated if the foglamps
are switched on or if the system detects poor
visibility conditions (e.g.
fog, heavy rain,
snowfall).
When the foglamps are switched off or when the
visibility conditions become favourable again, the
function is automatically reactivated.
This indicator lamp goes out when the function is deactivated.
Pause
If the situation requires a change of headlamp
beam, the driver can take over at any time.
► A "headlamp flash" pauses the
function and the lighting system switches
to "automatic illumination of lamps" mode:
–
If the "AUT
O" and "Dipped beam" indicator
lamps were on, the system changes to main
beam.
–
If the "AUT
O" and "Main beam"
indicator
lamps were on, the system changes to
dipped beam.
►
T
o reactivate the function, once again switch
the headlamps manually between dipped and
main beam.
The system may be disrupted or not work correctly:
–
When visibility conditions are poor
(snowfall, heavy rain, etc.).
– If the windscreen in front of the camera is
dirty , misted or obscured (for example, by a
sticker).
–
If the vehicle is facing highly reflective
signs.
When the system detects thick fog, it
temporarily deactivates the function.
The system is not able to detect:
–
Road users that do not have their own
lighting, such as pedestrians.
–
V
ehicles whose lighting is obscured (for
example, vehicles driving behind a safety
barrier on a motorway).
–
V
ehicles at the top or bottom of a steep
slope, on winding roads, on crossroads.
Clean the windscreen regularly,
particularly the area in front of the
camera.
The internal surface of the windscreen can
also become misted around the camera.
In humid and cold weather, demist the
windscreen regularly.
Do not allow snow to accumulate on the
bonnet or roof of the vehicle as this could
obstruct the detection camera.
Page 90 of 324

88
Lighting and visibility
Headlamp beam height
adjustment
To avoid inconvenience to other road users,
the height of the halogen headlamps should be
adjusted according to the load in the vehicle.
0(Initial setting)
Unladen.
1 Partial load.
2 Medium load.
3 Maximum
authorised load.
4 5 6 Not used.
Wiper control stalk
Before operating the wipers in wintry
conditions, clear any snow, ice or frost
from the windscreen and around the wiper
arms and blades.
Do not operate the wipers on a dry
windscreen. In extremely hot or cold
weather, check that the wiper blades are not
stuck to the windscreen before operating the
wipers.
After using an automatic car wash, you may temporarily notice abnormal noises
and poorer wiping performance.
You do not
need to replace the wiper blades.
Without AUTO wiping
With AUTO wiping
Windscreen wipers
► To select the wiping speed: raise or lower the
stalk to the desired position.
Fast wiping (heavy rain)
Normal wiping (moderate rain)
Intermittent wiping (proportional to the
vehicle’s speed)
Switching off
Single wipe (press down and release).
or
Automatic wiping
Refer to the corresponding section.
Windscreen wash
► Pull the wiper control stalk towards you and
hold.
A
final wiping cycle is performed when
screenwashing ends.
The windscreen wash jets are incorporated into the tip of each wiper
arm.
Screenwash fluid is sprayed along the length
of the wiper blade. This improves visibility and
reduces screenwash fluid consumption.
With automatic air conditioning, any
action on the screenwash control results
in temporary closure of the air intake to
protect the passenger compartment from any
odour.
Page 120 of 324

11 8
Driving
Noise (Electric)
On the outside
Due to the vehicle’s quiet operation when
driving, the driver must pay particular attention.
When manoeuvring, the driver must always
check the vehicle's immediate surroundings.
At speeds of up to 19 mph (30 km/h), the
pedestrian horn warns other road users of the
vehicle’s presence.
Cooling the traction battery
The cooling fan comes on during
charging to cool the on-board charger and the
traction battery.
On the inside
During use, you may hear certain perfectly
normal noises specific to electric vehicles, such
as:
–
T
raction battery relay when starting.
–
V
acuum pump when braking.
–
V
ehicle tyres or aerodynamics when driving.
–
Jolting and knocking noise during hill starts.
Towing
Driving with a trailer places greater
demands on the towing vehicle and
particular care must be taken.
Do not exceed the maximum towable
weights.
At altitude: reduce the maximum load by
10% per 1,000 metres of altitude; the lower
air density at high altitudes decreases engine
performance.
New vehicle: do not tow a trailer until the
vehicle has driven at least 620 miles
(1,000 kilometres).
If the outside temperature is high, let the
engine idle for 1 to 2 minutes after the
vehicle comes to a stop, to help it to cool.
Before setting off
Nose weight
► Distribute the load in the trailer so that the
heaviest items are as close as possible to the
axle and the nose weight (at the point where it
joins your vehicle) approaches the maximum
permitted without exceeding it.
Tyres
► Check the tyre pressures of the towing
vehicle and of the trailer , observing the
recommended pressures.
Lighting
► Check the electrical signalling on the trailer
and the headlamp beam height of your vehicle.
If a genuine CITROËN towing device is
used, the rear parking sensors will be
deactivated automatically to avoid the audible
signal.
When driving
Cooling
Towing a trailer uphill causes the coolant
temperature to increase. The maximum towable
load depends on the gradient and the exterior
temperature. The fan’s cooling capacity does not
increase with engine speed.
►
Reduce speed and lower the engine speed to
limit the amount of heating produced.
►
Pay constant attention to the coolant
temperature.
If this warning lamp and the STOP
warning lamp come on, stop the
vehicle and switch off the engine as soon as
possible.
Brakes
Using the engine brake is recommended to limit
the overheating of the brakes. Braking distances
are increased when towing a trailer.
Side wind
Bear in mind that the vehicle will be more
susceptible to wind when towing.
Page 189 of 324

187
Practical information
7► If the vehicle is locked, unlock it.
The red indicator lamp in the flap goes out to
confirm that the charging nozzle is unlocked.
►
In modes 2 and 3, remove the charging
nozzle within 30 seconds
.
The locking of the nozzle is linked to the locking of the loading area. For more
information on Complete or selective
unlocking , refer to the corresponding
section.
The charging indicator lamp comes on in white.
With selective door unlocking activated,
press the unlocking button twice to
disconnect the charging nozzle.
When charging is complete, the green
charging indicator lamp in the flap goes
out after about 2 minutes.
Domestic charging, mode 2
The end of charging is confirmed when the green
CHARGE indicator lamp on the control unit and
the green charging indicator lamp in the flap
come on fixed.
►
Replace the protective cover on the charging
nozzle and close the charging flap.
►
Disconnect the control unit end of the
charging cable from the domestic socket.
Accelerated charging, mode 3
The end of charging is indicated by the charging
control unit and by the fixed lighting of the green
indicator lamp in the flap.
►
Hang up the nozzle on the charging unit and
close the charging flap.
Superfast charging, mode 4
The end of charging is indicated by the charger
and by the fixed lighting of the green indicator
lamp in the flap.
► You can also pause charging by
pressing this button in the flap (in mode 4
only).
►
Hang up the nozzle on the charger
.
►
Depending on version, replace the protective
cover on the lower section and close the
charging flap.
When the charging nozzle is
disconnected, a message on the
instrument panel indicates that charging is
complete, even if the charging nozzle was
disconnected before full charging was
completed.
Energy economy mode
This system manages the duration of use of
certain functions, in order to conserve a sufficient
level of charge in the battery with the ignition off.
After switching off the engine and for a maximum
cumulative period of around 30 minutes, you can
continue to use functions such as the audio and
telematics system, dipped beam headlamps or
courtesy lamps.
Selecting the mode
A confirmation message is displayed when
energy economy mode is entered, and the active
functions are placed on standby.
If a telephone call is in progress at the
time, it will be maintained for around 10
minutes via the audio system’s hands-free
system.
Exiting the mode
These functions are automatically reactivated the
next time the vehicle is used.
To restore the use of these functions
immediately, start the engine and let it run:
–
For less than 10 minutes, to use the
equipment for approximately 5 minutes.
–
For more than 10 minutes, to use the
equipment for approximately 30 minutes.
Let the engine run for the specified duration to
ensure that the battery charge is sufficient.
T
o recharge the battery, avoid repeatedly or
continuously restarting the engine.
A flat battery prevents the engine from starting.
For more information on the 12
V battery,
refer to the corresponding section.