light Citroen BERLINGO FIRST 2012 1.G Owner's Guide
[x] Cancel search | Manufacturer: CITROEN, Model Year: 2012, Model line: BERLINGO FIRST, Model: Citroen BERLINGO FIRST 2012 1.GPages: 128, PDF Size: 3.68 MB
Page 62 of 128
LIFE ON BOARD
60 -
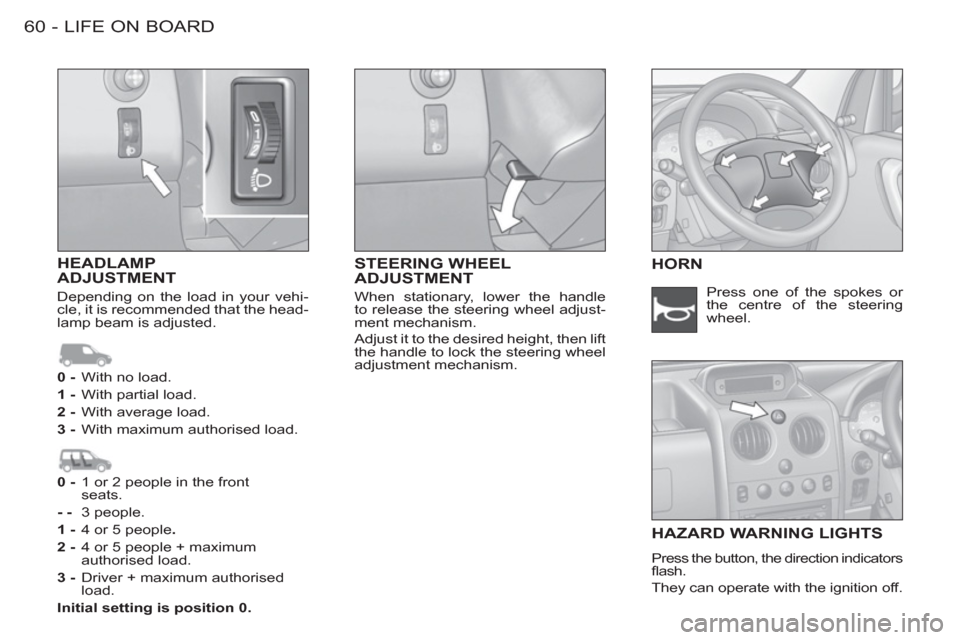
STEERING WHEEL
ADJUSTMENT HEADLAMPADJUSTMENTHORN
HAZARD WARNING LIGHT
S
Press the button, the direction indicators
fl ash.
They can operate with the ignition off. Press one of the spokes or
the centre of the steering
wheel.
0 -
With no load.
1 -
With partial load.
2 -
With average load.
3 -
With maximum authorised load.
0 - 1 or 2 people in the front
seats.
- - 3 people.
1 - 4 or 5 people.
2 -
4 or 5 people + maximum
authorised load.
3 -
Driver + maximum authorised
load.
Initial setting is position 0.
Depending on the load in your vehi-
cle, it is recommended that the head-
lamp beam is adjusted. When stationary, lower the handle
to release the steering wheel adjust-
ment mechanism.
Adjust it to the desired height, then lift
the handle to lock the steering wheel
adjustment mechanism.
Page 66 of 128
DRIVING64 -
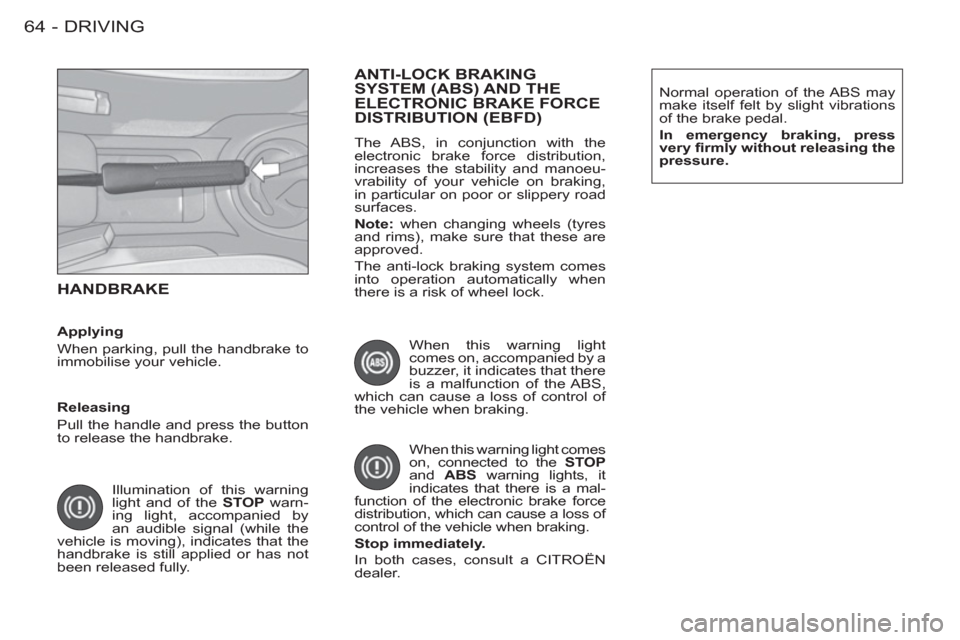
HANDBRAKE
Illumination of this warning
light and of the STOP
warn-
ing light, accompanied by
an audible signal (while the
vehicle is moving), indicates that the
handbrake is still applied or has not
been released fully.
ANTI-LOCK BRAKING
SYSTEM (ABS) AND THE ELECTRONIC BRAKE FORCEDISTRIBUTION (EBFD)
The ABS, in conjunction with the
electronic brake force distribution,
increases the stability and manoeu-
vrability of your vehicle on braking,
in particular on poor or slippery road
surfaces.
Note:
when changing wheels (tyres
and rims), make sure that these are
approved.
The anti-lock braking system comes
into operation automatically when
there is a risk of wheel lock.
When this warning light comes
on, connected to the STOP
and ABS
warning lights, it
indicates that there is a mal-
function of the electronic brake force
distribution, which can cause a loss of
control of the vehicle when braking.
Stop immediately.
In both cases, consult a CITROËN
dealer. When this warning light
comes on, accompanied by a
buzzer, it indicates that there
is a malfunction of the ABS,
which can cause a loss of control of
the vehicle when braking. Normal operation of the ABS may
make itself felt by slight vibrations
of the brake pedal.
In emergency braking, press
very fi rmly without releasing the
pressure.
Releasing
Pull the handle and press the button
to release the handbrake.
Applying
When parking, pull the handbrake to
immobilise your vehicle.
Page 72 of 128

DRIVING70 -
If this warning light comes on,
accompanied by an audible
signal, contact a CITROËN
dealer to have the system
checked. The airbags may
no longer be triggered in the event of
a serious impact.
Front airbag malfunction
Disarming the passenger
airbag
To ensure the safety of your child,
it is essential to disarm the pas-
senger airbag when you install a
rear-facing child seat on the front
passenger seat. Otherwise, the
child would risk being killed or se-
riously injured if the airbag were
to infl ate.
�)
With the ignition switched off
,
insert the key into the passenger
airbag disarming switch 1
, turn it
to the "OFF"
position, then re-
move the key keeping the slot in
this position. The airbag warning light on
the instrument panel is lit
throughout the period of dis-
arming.
In the "OFF"
position, the passen-
ger airbag will not be triggered in the
event of an impact.
As soon as the child seat is removed,
turn the airbag slot to the "ON"
posi-
tion to re-activate the airbag and thus
ensure the safety of your passenger
in the event of an impact.
This is confi rmed by an indi-
cator light, accompanied by
a message on the display.
With the ignition on
(2nd notch), illumination of this
warning light indicates that the pas-
senger airbag is disarmed (switch in
the "OFF"
position).
If the two airbag warning
lights are lit continuously, do
not install a rear-facing child
seat. Consult a CITROËN
dealer.
Disarming check
Page 73 of 128

71 DRIVING
-
SIDE AIRBAGS *
If this warning light comes on,
accompanied by an audible
signal, contact a CITROËN
dealer to have the system
checked. The airbags may
no longer be triggered in the event of
a serious impact.
Airbags malfunction
For the front and lateral
airbags to be fully effec-
tive, observe the following
safety rules:
●
Wear a correctly adjusted seat belt.
●
Sit in a normal upright position.
●
Do not leave anything between
the occupants and the airbags
(child, animal, object, ...).
This could hamper the operation
of the airbags or injure the occu-
pants.
●
All work on the airbag systems
is strictly prohibited unless it is
carried out by trained staff of the
CITROËN network.
●
After an accident or if the ve-
hicle has been stolen or broken
into, have the airbag systems
checked.
Front airbags
●
Do not drive holding the steer-
ing wheel by its spokes or resting
your hands on the centre part of
the wheel.
●
Passengers must not place their
feet on the dashboard.
●
Smoke as little as possible; de-
ployment of the airbags can
cause burns or the risk of injury
from a cigarette or pipe.
●
Never remove or pierce the steering
wheel or hit it violently.
Lateral airbags *
●
Only put approved covers on the
front seats. Consult a CITROËN
dealer.
●
Do not fi x or attach anything to
the front seat backs. This could
cause injury to the chest or arms
when the lateral airbag infl ates.
●
Do not sit with the upper part of
the body any nearer to the door
than necessary.
The side airbags are incorporated
into the front seat backs on the door
side.
The triggering of these airbags re-
quires a serious side impact applied
in the side impact zone B
, perpen-
dicular to the longitudinal centreline
of the vehicle, on a horizontal plane
and from the outside of the vehicle
towards the inside. The side airbag
infl ates between the front occupant
of the vehicle and the door trim pad.
It therefore limits the risk of injury to
the chest.
*
According to version.
Page 82 of 128
PRACTICAL INFORMATION
80 -
For your safety, always
change a wheel:
Refitting the wheel
- After positioning the wheel, lightly
pre-tighten the bolts using the
wheelbrace.
-
Compress the jack and release it.
- Fully tighten the bolts using the
wheelbrace.
- Replace the trim, starting at the
valve passage hole, and press it
on using the palm of the hand.
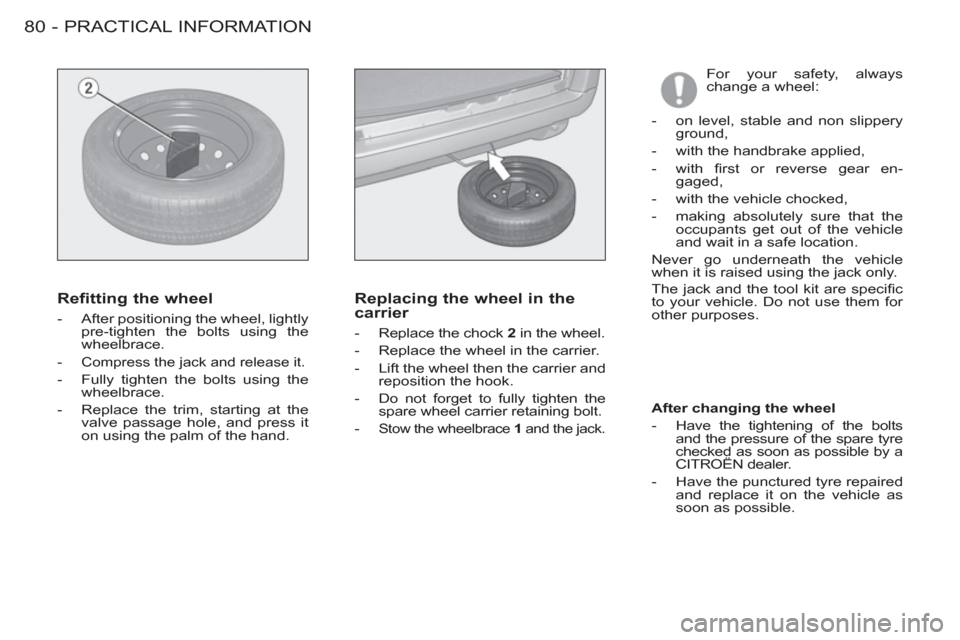
Replacing the wheel in the
carrier
- Replace the chock 2
in the wheel.
- Replace the wheel in the carrier.
- Lift the wheel then the carrier and
reposition the hook.
- Do not forget to fully tighten the
spare wheel carrier retaining bolt.
-
Stow the wheelbrace 1
and the jack.
After changing the wheel
- Have the tightening of the bolts
and the pressure of the spare tyre
checked as soon as possible by a
CITROËN dealer.
- Have the punctured tyre repaired
and replace it on the vehicle as
soon as possible.
- on level, stable and non slippery
ground,
- with the handbrake applied,
- with fi rst or reverse gear en-
gaged,
- with the vehicle chocked,
- making absolutely sure that the
occupants get out of the vehicle
and wait in a safe location.
Never go underneath the vehicle
when it is raised using the jack only.
The jack and the tool kit are specifi c
to your vehicle. Do not use them for
other purposes.
Page 85 of 128

83 PRACTICAL INFORMATION
-
Partially remove the bumper
- Remove the screws ( 1
),
- Remove the screws ( 2
),
- Pull lightly on the side of the
bumper ( 3
),
- Push in the direction of the ar-
row ( B
), on the latch ( A
), via the
opening ( C
),
- Maintain a light sideways pull on
the bumper,
- Push the bumper sharply for-
wards to release the clips at ( D
).
Remove the headlamp
- Remove the screws ( 1
),
- Unclip the index pin on the head-
lamp ( A
),
- Disconnect the connector ( B
) on
the back of the headlamp,
- Remove the headlamp ( 2
).
Page 91 of 128
89 PRACTICAL INFORMATION
-
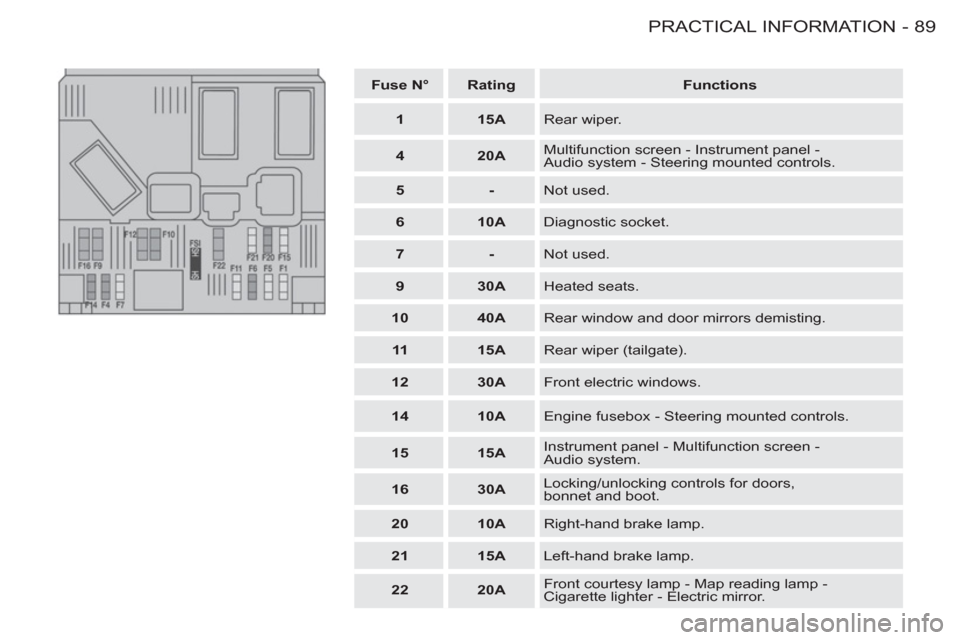
Fuse N°
Rating
Functions
1
15A
Rear wiper.
4
20A
Multifunction screen - Instrument panel -
Audio system - Steering mounted controls.
5
-
Not used.
6
10A
Diagnostic socket.
7
-
Not used.
9
30A
Heated seats.
10
40A
Rear window and door mirrors demisting.
11
15A
Rear wiper (tailgate).
12
30A
Front electric windows.
14
10A
Engine fusebox - Steering mounted controls.
15
15A
Instrument panel - Multifunction screen -
Audio system.
16
30A
Locking/unlocking controls for doors,
bonnet and boot.
20
10A
Right-hand brake lamp.
21
15A
Left-hand brake lamp.
22
20A
Front courtesy lamp - Map reading lamp -
Cigarette lighter - Electric mirror.
Page 94 of 128
PRACTICAL INFORMATION
92 -
ECONOMY MODE FUNCTION
After the engine has stopped, with
the key in the "accessories" position,
certain functions (windscreen wiper,
electric windows, courtesy lights,
audio equipment, etc.) can only be
used for a combined duration of ap-
proximately thirty minutes, to prevent
discharging the battery.
Once the thirty minutes are over, a
switching to economy mode mes-
sage appears on the multi-function
display and the active functions are
put on standby.
These functions are reactivated au-
tomatically next time the vehicle is
driven.
In order to resume the use of these
functions immediately, the engine
must be started and left to run for a
few minutes.
The time available to you will then
be double the duration for which the
engine is left running. However, this
period will always be between fi ve
and thirty minutes.
BATTERY
It is advisable to disconnect the
battery if the vehicle is not to be
used for a period of more than
one month.
Before disconnecting the bat-
tery, you must wait 2 minutes
after switching off the ignition.
Never disconnect a terminal
when the engine is running.
Never charge a battery without fi rst
disconnecting the terminals.
Close the windows and the roof before
disconnecting the battery.
After every reconnection of the bat-
tery, switch on the ignition and wait
1 minute before starting to allow the
electronic systems to be initialised. If
slight diffi culties are experienced af-
ter this, please contact a CITROËN
dealer.
A fl at battery prevents the
engine from starting.
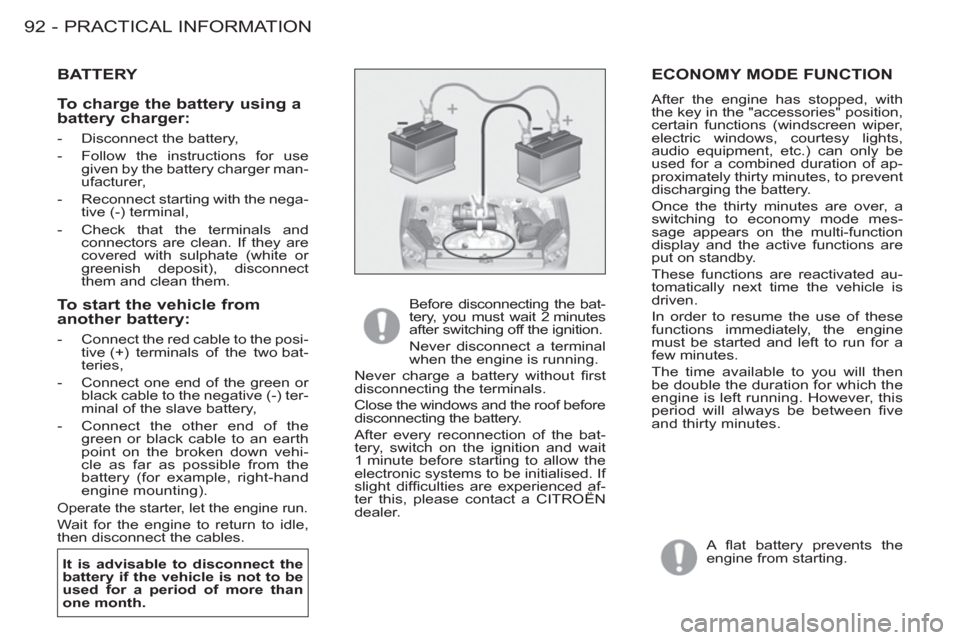
To start the vehicle from
another battery:
- Connect the red cable to the posi-
tive (+) terminals of the two bat-
teries,
- Connect one end of the green or
black cable to the negative (-) ter-
minal of the slave battery,
- Connect the other end of the
green or black cable to an earth
point on the broken down vehi-
cle as far as possible from the
battery (for example, right-hand
engine mounting).
Operate the starter, let the engine run.
Wait for the engine to return to idle,
then disconnect the cables.
To charge the battery using a
battery charger:
- Disconnect the battery,
- Follow the instructions for use
given by the battery charger man-
ufacturer,
- Reconnect starting with the nega-
tive (-) terminal,
- Check that the terminals and
connectors are clean. If they are
covered with sulphate (white or
greenish deposit), disconnect
them and clean them.
Page 98 of 128

PRACTICAL INFORMATION
96 -
TOWING A TRAILER,CARAVAN, BOAT, ETC.
We recommend the use of original
CITROËN towbars and their har-
nesses that have been tested and
approved from the design stage of
your vehicle and that the fi tting of the
towbar is entrusted to a CITROËN
dealer.
If the towbar is not fi tted by a
CITROËN dealer, it is imperative that
it is fi tted using the electrical pre-
equipment installed at the rear of the
vehicle, in accordance with the man-
ufacturer's instructions.
Your vehicle is primarily designed
for transporting people and luggage
but it may also be used for towing a
trailer.
Driving with a trailer subjects the tow-
ing vehicle to more signifi cant stress
and its driver must be particularly
careful.
Air density decreases with altitude,
thus reducing engine performance.
Above 1 000 metres, the maximum
towing load must be reduced by 10 %
and so on for every 1 000 metres of
altitude.
Driving advice
Tyres:
Check the tyre pressures of
the towing vehicle and of the trailer,
observing the recommended pres-
sures.
Cooling:
Towing a trailer on a slope
increases the temperature of the
coolant.
As the fan is electrically controlled,
its cooling capacity is not dependent
on the engine speed.
On the contrary, use a high gear to
lower the engine speed and reduce
your speed.
The maximum towing load on a long
slope depends on the gradient and
the outside temperature.
In all cases, pay attention to the coolant
temperature.
In certain cases of particularly ardu-
ous use (towing the maximum load on
a steep gradient in high temperatures),
switching off the air conditioning permits
the recovery of engine power and there-
fore an increase in the towing capacity.
If the warning light comes on, stop
the vehicle and switch off the engine
as soon as possible.
Distribution of loads:
Distribute the
load in the trailer so that the heaviest
items are as close as possible to the
axle and the nose weight approach-
es the maximum permitted without
exceeding it.
Braking:
Towing increases the braking
distance.
Lights:
Check the electrical signalling
on the trailer.
Side wind:
Take into account the
increased sensitivity to side wind.
Page 101 of 128

99 TECHNICAL DATA
-
Light van
Ludospace
L1
4 137
L2
4 437
-
H
1 796 to 1 819
1 810
A
2 693
B
836
C
608
D
570
550
E
1 440
1 440 or 1 452
F
1 960
G
1 420
1 420 or 1 436
I
1 724