steering wheel Citroen BERLINGO MULTISPACE 2015 2.G User Guide
[x] Cancel search | Manufacturer: CITROEN, Model Year: 2015, Model line: BERLINGO MULTISPACE, Model: Citroen BERLINGO MULTISPACE 2015 2.GPages: 298, PDF Size: 12.69 MB
Page 50 of 298
Berlingo-2-VP_en_Chap03_Pret-a-partir_ed01-2015
48
Acceleration
For optimum acceleration (e.g. to overtake another vehicle), simply
press the pedal beyond the point of
resistance at the end of its travel, by
pressing
down firmly.
Vehicle stationary, with the
engine running
In the event of a prolonged stop with
the engine running, the gearbox
changes automatically to neutral N.
Stopping the vehicle
Before stopping the engine, put the
gear selector in position N.
In all cases, it is essential to apply
the
parking brake. Check that the
parking
brake warning lamp is on in the
instrument
panel.
Before doing anything in the
engine
compartment, check that
the gear selector is in neutral
N.
Changing gear
In situations of high engine speeds
(heavy acceleration), a change
up will not occur unless the driver
operates the electronic gearbox control
paddle. Pull on the "+" control
paddle
to change up.
Pull on the "-" control
paddle to change
down.
-
If the vehicle stops or reduces
speed
(for example when
approaching a stop sign),
the gearbox changes down
automatically
, to first gear if
needed.
-
It is not necessary to release the
accelerator
completely during gear
changes.
-
a
gear change instruction is
accepted only if the engine speed
permits.
-
For safety reasons, depending on
the engine speed, a change down
may
be performed automatically.
Manual mode
Changing to manual mode
Move the gear selector to M. Automatic mode Changing to automatic
mode
Move the gear selector to A.
The gearbox then operates in
automatic
mode,
without
any
action
on
your
part.
It constantly selects the gear that is
best
suited
to
the
following
conditions:
-
driving style,
-
road
profile,
-
optimum
fuel
consumption.
Gearbox and steering wheel
Page 54 of 298
Berlingo-2-VP_en_Chap03_Pret-a-partir_ed01-2015
52
Good practice when stopping Good practice when starting
Diesel pre-heating warning
lamp
If the temperature is high
enough,
the warning lamp
comes
on for less than
one
second, you can start
without
waiting.
In cold weather, wait for this warning
lamp
to
go off then operate the starter
(Starting position) until the engine
starts.
Door or bonnet open warning lamp
If this comes on, a door or the bonnet
is
not closed correctly, check!
Minimise engine and gearbox wear
When switching off the ignition, let the
engine run for a few seconds to allow
the turbocharger (
d iesel engine) to
return
to idle.
d
o not press the accelerator when
switching
off the ignition.
There is no need to engage a gear
after
parking the vehicle.
STARTING AND ST OPPING
Running and accessories position.
To
unlock the steering, turn the
steering wheel gently while turning the
key
, without forcing. In this position,
certain
accessories can be used.
Starting position.
The starter is operated, the engine
turns
over, release the key.
STOP position:
steering lock.
The
ignition is off.
T
urn the steering
wheel
until the steering locks. Remove
the
key.
Starting and stopping
Page 59 of 298
57
Berlingo-2-VP_en_Chap04_Ergonomie_ed01-2015
If the sunshine sensor
does not function correctly,
the lighting comes on
accompanied
by the service
warning
lamp, an audible
signal
and a message in the screen.
Contact a CITR
o Ë n dealer or a
qualified
workshop.
Guide-me-home lighting
Keeping the dipped beam headlamps on temporarily with the ignition off,
makes
the driver's exit easier when the
light
is poor.
HEADLAMP BEAM
The beam setting must be adjusted to suit
the load in the vehicle.
0 -
No load.
1 -
Partial load.
2 -
A
verage load.
3 -
Maximum authorised load.
Manual operation
-
With
the
ignition
off,
"flash"
the
headlamps
within
one
minute
after
switching
off
the
ignition.
The
guide-me-home
lighting
switches
of
f
automatically
after
a
set
time.
Automatic operation
Refer to chapter 10, "Screen
menu
map"
section. Initial setting is position 0.
a
ctivate the function via the
vehicle
configuration
menu. Programming
The
system
is
activated
or
deactivated
in
the
vehicle
configuration
menu.
The
system
is
activated
by
default.
Switching off
The
system
does
not
operate:
-
below a certain angle of rotation of
the steering wheel,
-
above
25
mph
(40
km/h),
-
when
reverse
gear
is
engaged.
Switching on
This
function
starts:
-
when the corresponding direction
indicator is switched on,
or
-
from
a
certain
angle
of
rotation
of
the
steering
wheel.
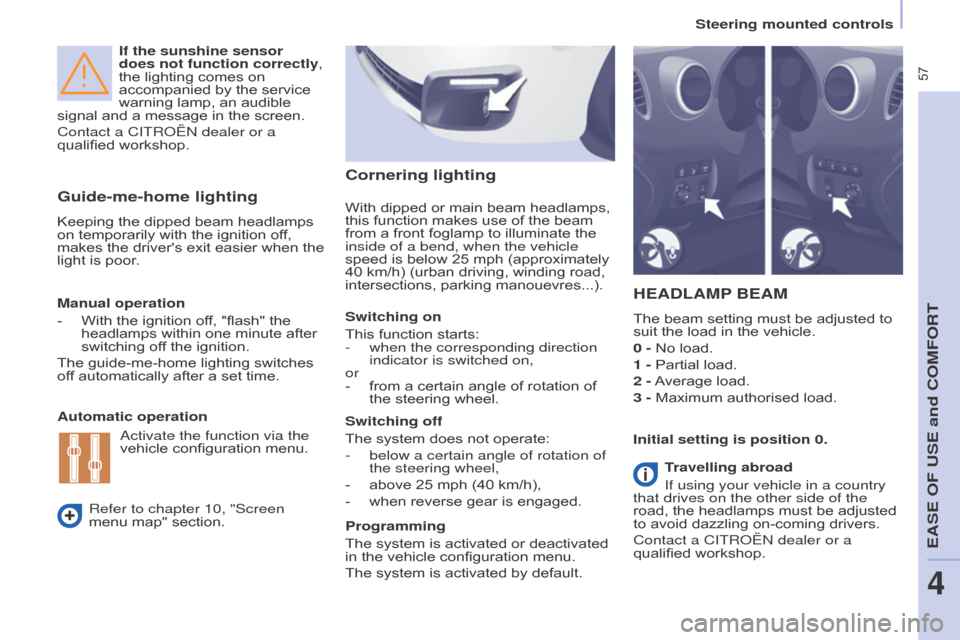
With
dipped
or
main
beam
headlamps,
this
function
makes
use
of
the
beam
from
a
front
foglamp
to
illuminate
the
inside of a bend, when the vehicle
speed
is
below
25
mph
(approximately
40
km/h)
(urban
driving,
winding
road,
intersections,
parking
manouevres...).
Cornering lighting
Travelling abroad
If using your vehicle in a country
that drives on the other side of the
road,
the headlamps must be adjusted
to
avoid dazzling on-coming drivers.
Contact a CITR
o Ë n dealer or a
qualified
workshop.
Steering mounted controls
EASE OF USE and COMFORT
4
Page 93 of 298

91
Berlingo-2-VP_en_Chap04_Ergonomie_ed01-2015Berlingo-2-VP_en_Chap04_Ergonomie_ed01-2015
FRONT FITTINGS
1. Lower glove box
This may or may not be fitted with a lid.
Upper storage compartment
This is located on the dashboard,
behind the steering wheel.
A
recess makes lifting of the lid easier
when
opening. Guide it to its rest
position.
T
o close, guide the lid then press the
centre
gently.
Any
liquid which could spill risks
causing an electrical short circuit and
therefore
a potential fire.
3. Side storage compartment
4. Bag hook
Only hang flexible bags which are not too heavy on this hook.
2. Storage pocket and bottle
holder (1.5 L)
EASE OF USE and COMFORT
4
Practical information
Page 113 of 298

111
Berlingo-2-VP_en_Chap05_Securite_ed01-2015
HAZARD WARNING LAMPS
H
ORN
Press the centre of the steering wheel.
PARKING BRAKE
Applying
Pull the parking brake lever up to immobilise
your vehicle.
Check
that the parking brake is applied
firmly
before leaving the vehicle.Pull
on the parking brake lever, only
with the vehicle stationary.
In the exceptional case of use of the
parking
brake when the vehicle is
moving,
apply the brake by pulling
gently
to avoid locking the rear wheels
(risk
of skidding).
Press this button, the direction
indicators
flash.
They
can
operate
with
the
ignition
off.
The
hazard
warning
lamps
should
only
be used in dangerous situations, when
stopping
in
an
emergency
or
when
driving
in
unusual
conditions.
When
parking on a slope, direct your
wheels
towards the pavement and pull
the
parking brake lever up.
There is no advantage in engaging
a
gear after parking the vehicle,
particularly
if the vehicle is loaded.
If the parking brake is still on or has not been released properly, this is
indicated
by this warning lamp which
comes
on on the instrument panel.
Automatic operation of hazard
warning lamps
When braking in an emergency, depending on the force of deceleration,
the hazard warning lamps come
on
automatically.
They
switch off
automatically
the first time you
accelerate.
It
is also possible to switch them off by
pressing
the switch on the dashboard.Releasing
Pull the lever up slightly and press the
button to lower the parking brake lever.
driving safely
SaFETY
5
Page 122 of 298

120
Berlingo-2-VP_en_Chap05_Securite_ed01-2015
Operation
When your vehicle is too close to or
approaches the vehicle ahead too
quickly the system automatically
applies
the brakes to avoid a collision.
You are then alerted by the display of a
message.
The
brake lamps on your vehicle come
on
to warn other road users.
The collision can be avoided
automatically
if the difference in
speed between your vehicle and the
vehicle
ahead does not exceed 9 mph
(15 km/h).
Above
this threshold, the system will
do what is possible to avoid or reduce
the accident by lowering the speed of
impact.
The
automatic braking may bring
the
vehicle to a complete stop if the
situation
requires it.
In this case, the vehicle is held
stationary
temporarily (for about
1.5 seconds)
to allow the driver to take
back
control by pressing the brake
pedal. The
triggering of the system may cause the engine to stall, unless
the driver depresses the clutch
pedal
quickly enough during automatic
braking.
During
automatic braking, the
driver can always obtain a higher
rate of deceleration than that
controlled
by the system, by pressing
firmly
on the brake pedal.
After
an impact, the system is
automatically
put out of service: it
no
longer operates.
You
must go to a CITROËN dealer or a
qualified
workshop to have the system
made
operational again.
Operating limits
The system only detects vehicles that are stationary or moving in the same
direction
as your vehicle.
It
does not detect small vehicles
(bicycles,
motorcycles),
pedestrians
or animals, nor non-
reflective
stationary objects.
The
system is not triggered or is
interrupted
if the driver:
-
accelerates strongly
-
or turns the steering wheel
suddenly
(avoiding manoeuvre).
In
difficult weather conditions (very
heavy
rain, snow, fog, hail...),
braking
distances increase, which
can
reduce the ability of the system to
avoid
a collision.
The
driver must therefore remain
particularly
vigilant.
Never
leave accumulations of
snow
or any object projecting
above the bonnet or in front of
the
roof: this might fall into the field of
vision of the sensor and generate a
detection.
driving safely
Page 129 of 298
Berlingo-2-VP_en_Chap05_Securite_ed01-2015
127
Good practice
Sit in a normal upright position.
W ear a correctly adjusted seat belt.
d
o not leave anything between the
occupants and the airbags (a child,
pet,
object...).
This
could hinder the
operation
of the airbags or injure the
occupants.
a
fter an accident or if the vehicle has
been
stolen or broken into, have the
airbag
systems checked.
All
work on the airbag system is strictly
forbidden unless it is carried out by
qualified
personnel at a CITROËN
dealer
or a qualified workshop.
Even if all of the precautions
mentioned
are observed, a risk of
injury
or of minor burns to the head,
chest
or arms when an airbag is
deployed
cannot be ruled out. In fact,
the
bag inflates almost instantly (within
a
few milliseconds) then deflates within
the
same time discharging the hot gas
via
openings provided for this purpose.Lateral airbags
Only
put recommended covers on
the
seats.
These
will not hinder
inflation
of the lateral airbags. Contact
a
CITROËN dealer or a qualified
workshop.
Do
not fix or attach anything to the seat
backs.
This
could cause injury to the
chest
or arms when the lateral airbag
inflates.
d
o not sit with the upper part of the
body any nearer to the door than
necessary.
Front airbags
d
o not drive holding the steering wheel
by
its spokes or resting your hands on
the
centre part of the wheel.
d
o not allow passengers to place
their
feet on the dashboard, they risk
serious
injury if the airbag is deployed.
Smoke
as little as possible as
deployment
of the airbags can cause
burns
or the risk of injury from a
cigarette
or pipe.
Never
remove or pierce the steering
wheel
or hit it violently.
Airbags only operate when the
ignition is switched on.
This
equipment
only
operates
once.
If
a
second
impact
occurs
(during
the
same
or
a
subsequent
accident),
the
airbag
will
not
operate.
The
deployment
of
an
airbag
or
airbags
is
accompanied
by
a
slight
discharge
of
smoke
and
a
noise,
due
to
the
activation of the pyrotechnic cartridge
incorporated
in
the
system.
This
smoke
is
not
harmful,
but
sensitive
individuals
may
experience
some
irritation.
The
noise
of
the
detonation
may
result
in a slight loss of hearing for a short
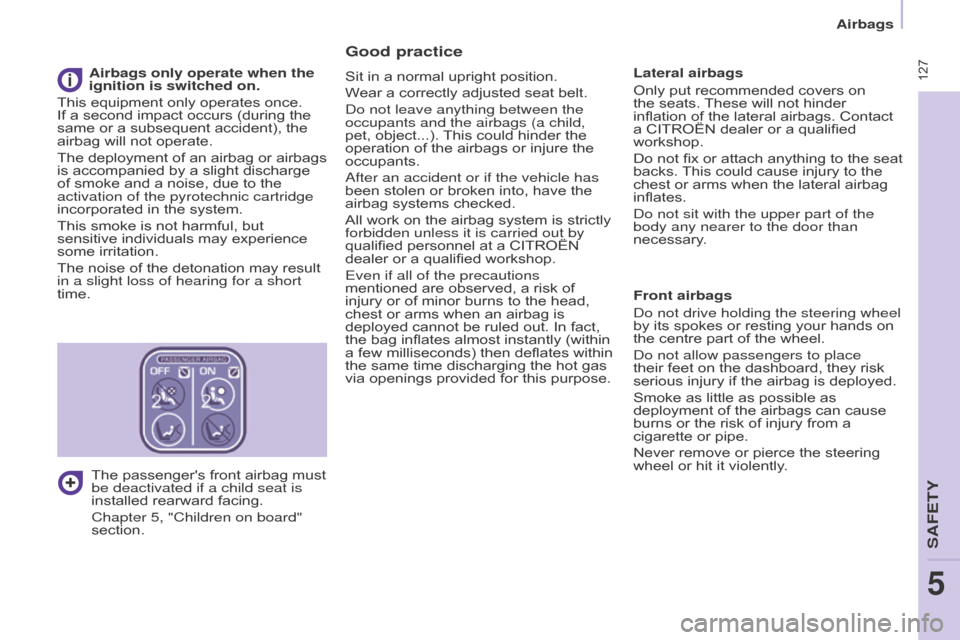
time. The
passenger's
front
airbag
must
be deactivated if a child seat is
installed
rearward
facing.
Chapter 5, "Children on board"
section.
airbags
SaFETY
5
Page 131 of 298
Berlingo-2-VP_en_Chap05_Securite_ed01-2015
129
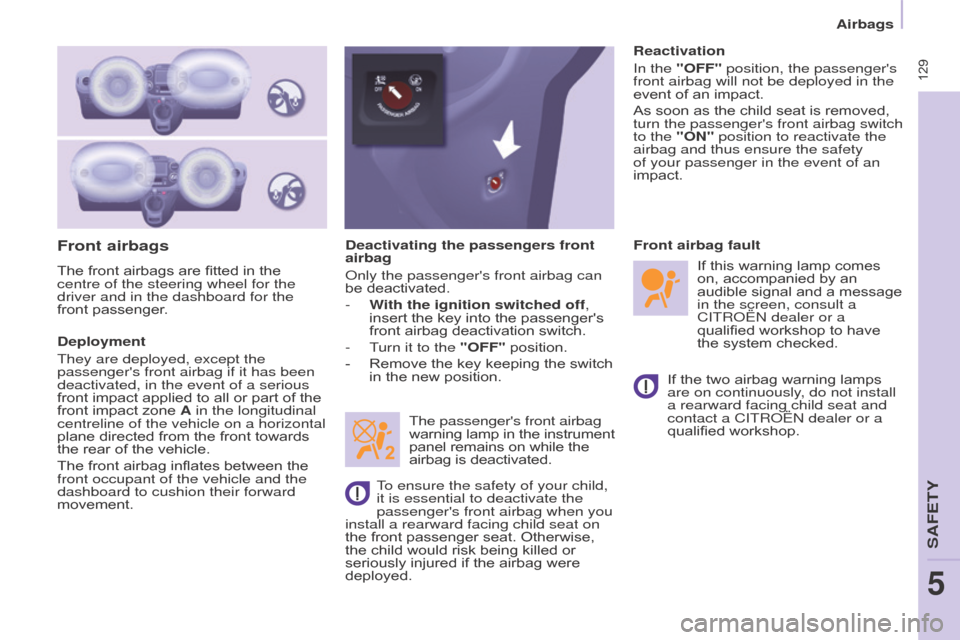
Front airbags
Deployment
They are deployed, except the
passenger's front airbag if it has been
deactivated, in the event of a serious
front impact applied to all or part of the
front
impact zone A in the longitudinal
centreline of the vehicle on a horizontal
plane
directed from the front towards
the
rear of the vehicle.
The
front airbag inflates between the
front occupant of the vehicle and the
dashboard to cushion their forward
movement. Deactivating the passengers front
airbag
o
nly the passenger's front airbag can
be deactivated.
-
W
ith the ignition switched off,
insert the key into the passenger's front
airbag deactivation switch.
- T urn it to the "OFF" position.
-
Remove
the key keeping the switch
in
the new position.
The passenger's front airbag
warning
lamp
in
the
instrument panel
remains on while the
airbag
is deactivated.If
the two airbag warning lamps
are on continuously
, do not install
a rearward facing child seat and
contact a CITR
o Ë n dealer or a
qualified
workshop.
Front airbag fault
To ensure the safety of your child,
it is essential to deactivate the
passenger's front airbag when you
install a rearward facing child seat on
the
front passenger seat. Otherwise,
the
child would risk being killed or
seriously
injured if the airbag were
deployed.Reactivation
In the
"OFF" position, the passenger's
front airbag will not be deployed in the
event of an impact.
As soon as the child seat is removed,
turn the passenger's front airbag switch
to the
"ON" position to reactivate the
airbag and thus ensure the safety
of your passenger in the event of an
impact.
If this warning lamp comes
on,
accompanied by an
audible
signal and a message
in the screen, consult a
CITR
o Ë n dealer or a
qualified workshop to have the
system checked.
The
front airbags are fitted in the
centre of the steering wheel for the
driver and in the dashboard for the
front
passenger.
airbags
SaFETY
5
Page 151 of 298
Berlingo-2-VP_en_Chap06_Accessoire_ed01-2015
149
OTHER ACCESSORIES
These accessories and parts, having
been tested and approved for reliability
and safety, are all adapted to your
vehicle.
A
wide range of recommended
accessories and genuine parts is
available.
a further range is also available,
structured
around comfort, leisure and
maintenance:
Anti-theft
alarm, window etching, first
aid
kit, high visibility vest, front and
rear
parking sensors, warning triangle,
security
bolts for alloy wheels, ...
Seat
covers compatible with airbags
for the front seats, bench seat, rubber
mats,
carpet
mats,
snow
chains,
blinds,
tailgate
bicycle carrier, ...
To
prevent the mat from becoming
caught
under the pedals:
-
ensure
that the mat and its fixings
are positioned correctly
,
-
never
fit one mat on top of another.Audio
equipment, hands-free kit,
speakers,
CD changer, satellite navigation
system, USB box, V ideo kit, ...
Regardless
of the audio and telematic
equipment
offered on the market, the
technical constraints associated with
the
fitting of equipment of these product
groups
mean that the special features
of
the equipment and its compatibility
with the capacities of your vehicle's
standard
equipment must be taken into
account.
Please ask a CITROËN dealer
for
more information before fitting such
equipment.
Maximum weights on bars
-
T
ransverse bars on longitudinal
bars:
75 Kg (these bars are not
compatible
with the Modutop roof).Installing radiocommunication
transmitters
You are advised to contact a CITR
o Ë n
dealer before installing accessory
radiocommunication
transmitters with
external
aerial on your vehicle.
The
CITROËN dealer network
will
inform you of the specification
(frequency
band, maximum output
power
, aerial position, specific
conditions of installation) of the
transmitters
which can be fitted, in
accordance with the Motor V
ehicle
Electromagnetic
Compatibility Directive
(2004/104/EC).
Front
mud flaps, rear mud flaps,
15/17 inch
alloy wheels, wheelarch
trim,
leather steering wheel, ...
Screenwash, interior and exterior
cleaning
and maintenance products,
spare
bulbs, ...
Equipment
ACCESSORIES
6
Page 172 of 298
170
Berlingo-2-VP_en_Chap08_aide-rapide_ed01-2015Berlingo-2-VP_en_Chap08_aide-rapide_ed01-2015
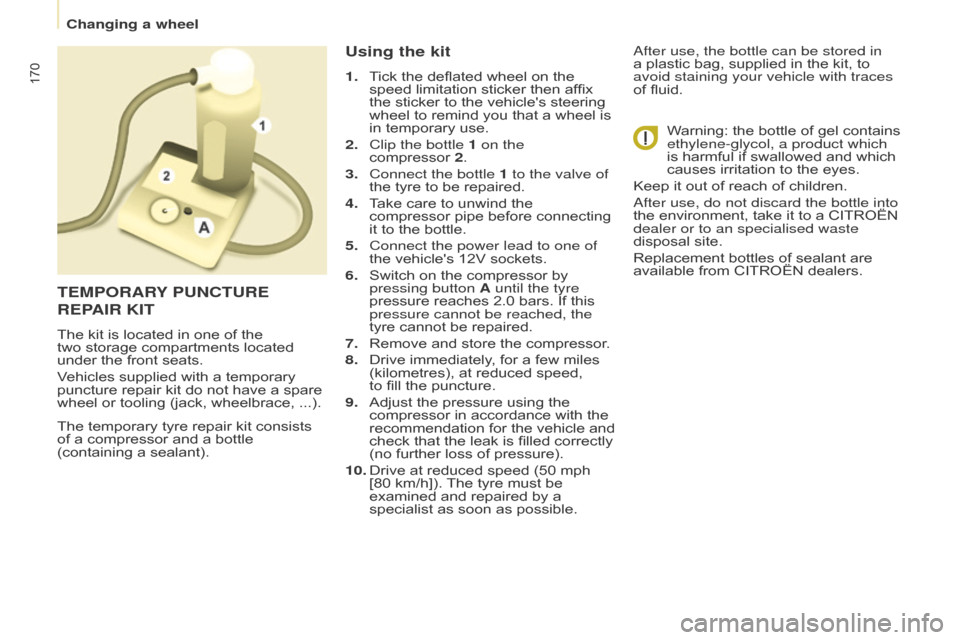
The temporary tyre repair kit consists of a compressor and a bottle
(containing
a sealant).
Using the kit
1. Tick the deflated wheel on the speed
limitation sticker then affix
the
sticker to the vehicle's steering
wheel
to remind you that a wheel is
in
temporary use.
2.
Clip the bottle
1 on the
compressor 2.
3.
Connect the bottle
1 to the valve of
the
tyre to be repaired.
4.
T
ake care to unwind the
compressor
pipe before connecting
it
to the bottle.
5.
Connect the power lead to one of
the
vehicle's 12V sockets.
6.
Switch
on the compressor by
pressing button
A until the tyre
pressure
reaches 2.0 bars. If this
pressure cannot be reached, the
tyre
cannot be repaired.
7.
Remove
and store the compressor.
8.
Drive
immediately, for a few miles
(kilometres),
at reduced speed,
to
fill the puncture.
9.
Adjust
the pressure using the
compressor
in accordance with the
recommendation
for
the
vehicle
and
check
that the leak is filled correctly
(no
further loss of pressure).
10.
Drive
at reduced speed (50 mph
[80
km/h]).
The
tyre must be
examined
and repaired by a
specialist
as soon as possible.
a
fter use, the bottle can be stored in
a plastic bag, supplied in the kit, to avoid staining your vehicle with traces
of
fluid.
Warning:
the bottle of gel contains
ethylene-glycol, a product which
is
harmful if swallowed and which
causes
irritation to the eyes.
Keep
it out of reach of children.
a
fter use, do not discard the bottle into
the
environment, take it to a CITROËN
dealer or to an specialised waste
disposal
site.
Replacement
bottles of sealant are
available
from CITROËN dealers.
TEMPORARY PUNCTURE
REP
AIR KIT
The kit is located in one of the two storage compartments located
under
the front seats.
Vehicles
supplied with a temporary
puncture
repair kit do not have a spare
wheel
or tooling (jack, wheelbrace, ...).
Changing a wheel