wheel Citroen BERLINGO MULTISPACE RHD 2012 2.G Owner's Guide
[x] Cancel search | Manufacturer: CITROEN, Model Year: 2012, Model line: BERLINGO MULTISPACE RHD, Model: Citroen BERLINGO MULTISPACE RHD 2012 2.GPages: 238, PDF Size: 7.53 MB
Page 149 of 238

147
7
Changing a wheel
- Lower the vehicle completely by
folding the jack, then remove the
jack.
- Tighten the bolts again using the
wheelbrace, tighten them fully
without forcing them.
- Place the wheel to be repaired in
the carrier.
- Secure the carrier on the hook then
raise the carrier using the bolt and
the wheelbrace.
Never go underneath a vehicle
that is supported only by a jack
(use a ramp). Never use
a screwdriver in place of the
wheelbrace
.
5. FITTING THE SPARE
WHEEL
- Position the wheel on the hub and
start tightening the bolts by hand.
- Carry out an initial tightening of the
bolts using the wheelbrace.
QUICK HEL
P
Page 150 of 238

148
Snow screen
REMOVABLE SNOW
SCREEN
According to country, the removable
snow screen is installed on the lower
part of the front bumper to prevent the
accumulation of snow at the radiator
cooling fan.
FITTING
REMOVAL
- Pass a screwdriver into the hole
located near each of the clips.
- Use the screwdriver as a lever to
unclip the four clips B
in turn.
- Offer up the snow screen facing its
centring pin A
on the front bumper.
- Put it in place by pressing at each
clip B
located in the four corners.
Do not forget to remove
the
snow screen when the exterior
temperature is higher than 10 °C
(no
risk of snowfall) and when towing.
6. REFITTING THE REPAIRED
WHEEL
The wheel is refi tted as described in
step 5, not forgetting to refi t the wheel
trim.
Refer to the "Identifi cation
markings" section of chapter 8 to
locate the tyre label.
Refer to the "Instruments and
controls" section of chapter 2,
"Tyre under-infl ation detection"
part, for recommendations after
changing a wheel fi tted with a tyre
under-infl ation detection sensor.
The spare wheel is not designed
to be used over long distances.
Have the tightening of the bolts
and the tyre pressure checked by
a CITROËN dealer or a qualifi ed
workshop as soon as possible. Have
the original wheel repaired and refi tted
by a CITROËN dealer or a qualifi ed
workshop as soon as possible.
Page 153 of 238

151
7
Changing a bulb
QUICK HELP
4.
Foglamps
Type C
, H1 - 55W
- Remove the three clips and the
screw securing the wheelarch liner,
located below the bumper.
- Move the wheelarch liner upwards.
- Remove the foglamp by removing
the screw, which can be accessed
via the hole provided for this
purpose in the bumper, using a
Torx
© 30 screwdriver.
- Unclip the foglamp by squeezing
the clip to release it.
-
Remove the foglamp from the outside.
- Turn the yellow cover a 1/4 turn to open.
- Separate the clips which secure
the base of bulb on each side to
release the bulb.
- Remove the bulb by pulling,
keeping it straight.
- Insert the new bulb, reposition the
clips around the base of the bulb
and carry out the operations in
reverse order to put the lamp unit
and the bumper back in position.
SIDE REPEATER
Ty p e A
, WY5W - 5W (amber)
- Push the repeater towards the rear
and disengage it by pulling the
front.
- Contact a CITROËN dealer to
obtain a new repeater which is a
sealed component.
- To refi t, engage the repeater
towards the rear and bring it
towards the front.
COURTESY LAMPS
Type A
, 12V5W - 5W
- Unclip the lens by sliding a
screwdriver in the slots on each
side of the courtesy lamp.
- Pull the bulb out and change it.
- Clip the lens in its housing and
ensure that it is secured correctly.
Front/Rear
Page 159 of 238

157
7
Changing a fuse
QUICK HELP
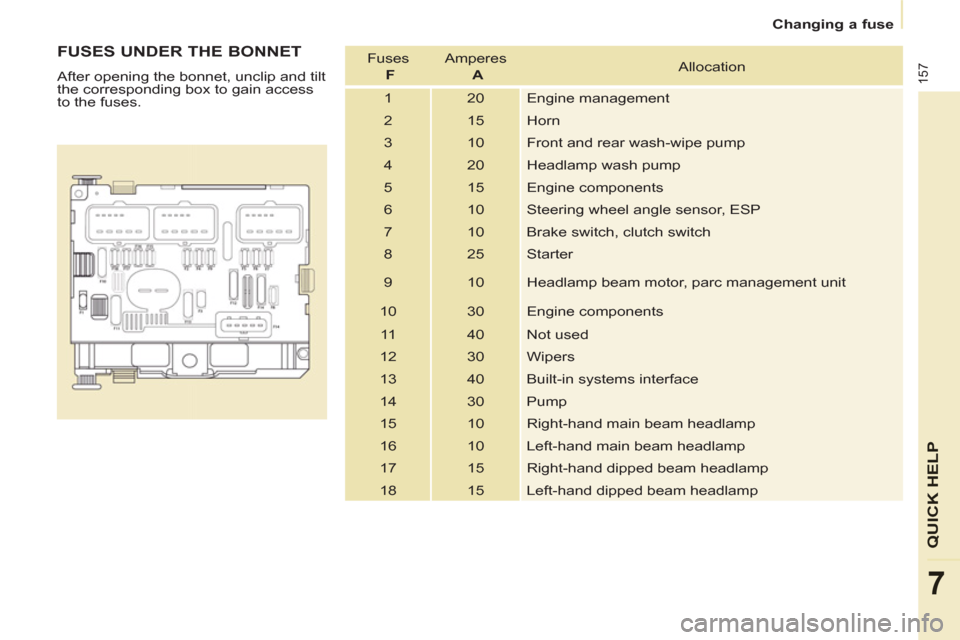
FUSES UNDER THE BONNET
After opening the bonnet, unclip and tilt
the corresponding box to gain access
to the fuses. Fuses
F
Amperes
A
Allocation
1 20 Engine management
2 15 Horn
3 10 Front and rear wash-wipe pump
4 20 Headlamp wash pump
5 15 Engine components
6 10 Steering wheel angle sensor, ESP
7 10 Brake switch, clutch switch
8 25 Starter
9 10 Headlamp beam motor, parc management unit
10 30 Engine components
11 40 Not used
12 30 Wipers
13 40 Built-in systems interface
14 30 Pump
15 10 Right-hand main beam headlamp
16 10 Left-hand main beam headlamp
17 15 Right-hand dipped beam headlamp
18 15 Left-hand dipped beam headlamp
Page 161 of 238

159
7
Having your vehicle towed
QUICK HEL
P
Without lifting
(4 wheels on the road)
You should always use a towing bar.
BEING TOWED
The towing eye is stored in the tool kit,
located under the right-hand seat.
From the front
- Unclip the cover by pressing the
bottom part.
- Fully screw in the removable
towing eye.
From the rear
- Unclip the cover using a coin or the
fl at part of the towing eye,
- Fully screw in the removable
towing eye.
When towing with the engine
switched off, there is no braking or
steering assistance.
Lifting (2 wheels on the road
only)
It is preferable to raise the vehicle
using professional lifting equipment.
Vehicles fitted with a manual
gearbox (Diesel version)
In the case of vehicles fi tted with a
manual gearbox, the gear lever must
be in the neutral position, failure to
observe this special condition may
result in damage to transmission and
braking components and the absence
of braking assistance when the engine
is started again.
Page 165 of 238

16
3
Dimensions
TECHNICAL DAT
A
8
DIMENSIONS (MM)
L Overall length
4380
H Overall height
1801-1862
A Wheelbase
2728
B Front overhang
925
C Rear overhang
727
D Width over panels: without mirrors
1810
with mirrors
2112
E Width of front tracks
1505-1507
F Width of rear tracks
1554-1556
- Length of the loading surface to the
seat Row 2
990
Row 2, seat fully folded
1343
With front passenger seat folded
3000
Page 169 of 238

16
7
TECHNICAL DAT
A
8
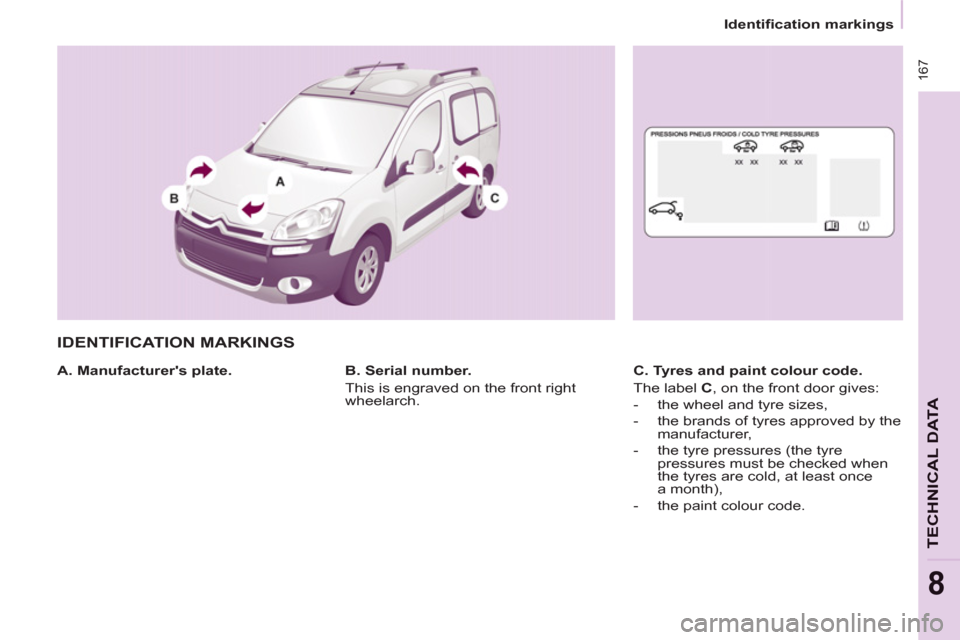
Identification markings
IDENTIFICATION MARKINGS
A. Manufacturer's plate.
C. Tyres and paint colour code.
The label C
, on the front door gives:
- the wheel and tyre sizes,
- the brands of tyres approved by the
manufacturer,
- the tyre pressures (the tyre
pressures must be checked when
the tyres are cold, at least once
a month),
- the paint colour code.
B. Serial number.
This is engraved on the front right
wheelarch.
Page 218 of 238

9.48
06
1
2
1
2
1
OK
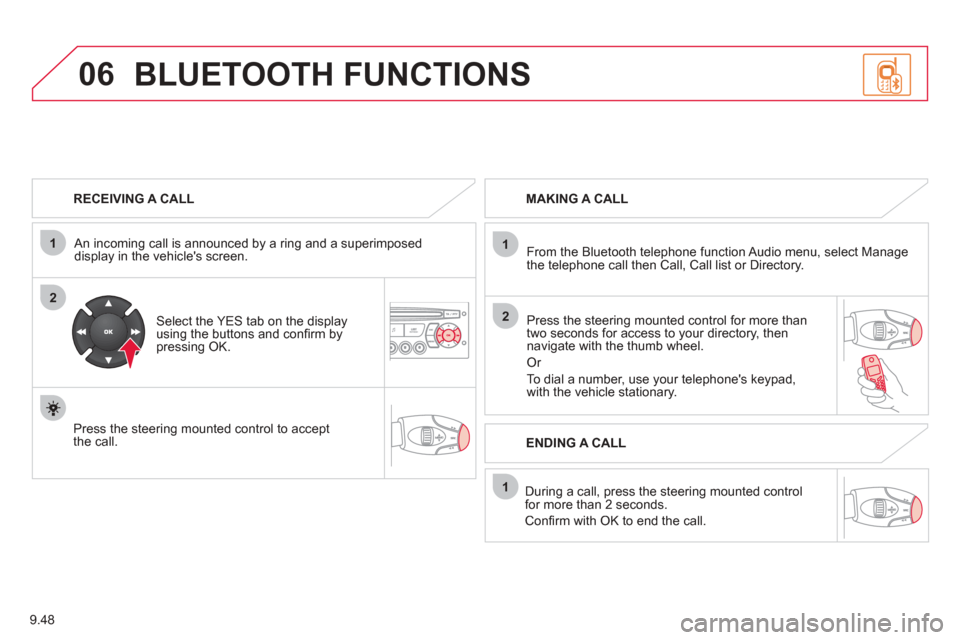
RECEIVING A CALL
An incomin
g call is announced by a ring and a superimposed
display in the vehicle's screen.
Select the YES tab on the display
using the buttons and confi rm bypressing OK.
Press the steering mounted control to accept
the call.
MAKING A CALL
From the Bluetooth telephone
function Audio menu, select Manage
the telephone call then Call, Call list or Directory.
Press the steerin
g mounted control for more than
two seconds for access to your directory, then navigate with the thumb wheel.
Or
To dial a number, use your telephone's keypad,with the vehicle stationary.
Durin
g a call, press the steering mounted control
for more than 2 seconds.
Confi rm with OK to end the call.
BLUETOOTH FUNCTIONS
ENDING A CALL
Page 231 of 238

169
Exterior
VISUAL SEARCH
10
EXTERIOR
Remote control 19-20
Changing the battery,
reinitialisation 20
Key 19
Starting 48
Hill start assist 49
Central locking / unlocking 19, 28
Filler cap, fuel tank 139
Fuel cut-off, Diesel priming 140
Wiper blade 158
Door mirrors 101
Side repeaters 151
Front lamps, foglamps, direction
indicators 50-51, 150-151
Headlamp beam height
adjustment 52
Changing front bulbs 149, 150-151
Headlamp wash 54, 136
Snow cover 148
Front doors 22
Sliding side doors 23-24
Key 19
Opening the bonnet 132
Child lock 125
Towing, lifting 127-128, 159
Towbar 127-128
Parking sesnsors 105-106
Rear roof fl ap 27
Emergency control 24
Spare wheel, jack,
changing a wheel, tools 144-148
Temporary puncture repair kit 143
Infl ation, pressures 167
Modutop roof 88
Roof bars 92, 93
Rear lamps, direction
indicators 50-51, 151-152
3rd brake lamp 153
Changing rear bulbs 152-153
Doors, tailgate 24-26
Accessories 129
Number plate lamp 153
Dimensions 162-165
Brakes, pads 104, 137
Emergency braking 107
ABS, EBFD 107
ASR, ESP 108
"Grip control" 109
Tyres, pressures 167
Tyre under-infl ation detection 38
Page 232 of 238

170
Instruments and controls
ESP 108
Parking sensors 105-106
Electric mirrors 101
Headlamp beam height adjustment 52
Stop & Start 45
Cruise control 55-57
Speed limiter 58-60
Lighting controls 50-51
Automatic illumination of
headlamps 51
Foglamps 51
LED daytime running lamps 51
INSTRUMENTS AND CONTROLS
Parking brake 104
Instrument panels,
screens, dials 29-30
Warning lamps,
indicator lamps 31-36
Indicators, fuel gauge 37
Setting the time in
the instrument panel 30
Lighting dimmer 40
Gear effi ciency indicator 41
Gearbox 41
Ignition switch 48
Wiper control 53-54
Automatic rain sensitive wipers 53
Windscreen/headlamp
wash 54, 136
Trip computer Section 9
Audio equipment steering
mounted controls Section 9
Steering wheel adjustment 44
Horn 104
Passenger's airbag
deactivation 117