change time Citroen BERLINGO MULTISPACE RHD 2013 2.G User Guide
[x] Cancel search | Manufacturer: CITROEN, Model Year: 2013, Model line: BERLINGO MULTISPACE RHD, Model: Citroen BERLINGO MULTISPACE RHD 2013 2.GPages: 268, PDF Size: 8.92 MB
Page 142 of 268

140
Checks
To check the main levels
and certain components,
in accordance with the
manufacturer's servicing schedule,
refer to the pages of the servicing and
warranty booklet which correspond to
your vehicle's engine.
Bleeding water from the Diesel
filter
Manual gearbox
Have the level checked in accordance with
the manufacturer's servicing schedule.
Only use products recommended
by CITROËN or products
of equivalent quality and
specifi cation.
In order to optimise the operation
of units as important as the braking
system, CITROËN selects and offers
specifi c products.
In order to avoid damaging the
electrical units, high pressure washing
to clean the engine compartment is
strictly prohibited.
After washing the vehicle dampness,
or in winter, ice may form on the brake
discs and pads: braking effi ciency may
be reduced. Make some light brake
applications to dry and de-ice the
brakes. If this warning lamp comes
on, bleed the fi lter. Otherwise
bleed regularly each time the
engine oil is changed.
To drain the water, unscrew the bleed
screw located on the fi lter.
Operate until all of the water no longer
fl ows in the transparent pipe, then
tighten the bleed screw.
HDi engines use advanced technology.
All work requires special training, which
is assured by a CITROËN dealer.
Depending on country of sale.
Page 148 of 268

146
Changing a wheel
1. PARKING THE VEHICLE
- The occupants must get out of the
vehicle and wait in a safe location.
- If possible, park the vehicle on
level, stable and non-slippery
ground.
- Apply the parking brake, switch
off the ignition and engage fi rst or
reverse gear.
- If available, place a chock under
the wheel diagonally opposite the
one to be changed.
If the vehicle is fi tted with a towbar,
it is sometimes necessary to raise
the vehicle slightly to make it easier
to remove the spare wheel from its
carrier.
On certain types of ground and/or
if considerable loads are being
transported, call a CITROËN dealer or
a qualifi ed workshop.
CHANGING A WHEEL
2. TOOLS
- The tools are stowed in a storage
compartment located under the left
hand front seat. If necessary, move
the seat to access the storage
compartment from the rear.
- Unscrew the nut then take out the
jack and the wheelbrace.
1.
Wheelbrace.
2.
Jack.
3.
Alloy wheel embellisher remover.
4.
Chock.
The jack and the tool kit are specifi c to
your vehicle. Do not use them for other
purposes.
Page 154 of 268

152
Changing a bulb
CHANGING A BULB
Ty p e A
All glass bulb: pull gently
as it is fi tted by pressure.
High pressure washing
Open the bonnet. To access the bulbs,
reach behind the headlamp unit.
Carry out the operations in reverse
order to refi t each bulb and check that
the bonnet is closed securely.
Ty p e C
Halogen bulb: release the
retaining spring from its
housing.
Ty p e B
Bayonet bulb: press
on the bulb then turn it
anticlockwise.
Halogen bulbs must be changed
with the headlamp off. Wait a few
minutes (risk of serious burns).
Do not touch the bulb directly with your
fi ngers, use lint-free cloths.
It is normal for condensation to form
inside the headlamps. Regular use of
the vehicle eliminates this misting. The bulbs must be changed with
the ignition off or with the battery
disconnected. Wait approximately
3 minutes after changing the bulb
before reconnecting the battery.
Check that the lamps operate correctly
after each operation.
When using this type of washing
on stubborn dirt, do not persist on
the headlamps, the lamps and their
edges to avoid damaging their coating
and seals.
Types of bulb
Various types of bulb are fi tted to your
vehicle. To remove them:
Ty p e D
Light emitting diode
(LED): for replacement
of the daytime running
lamps, contact a
CITROËN dealer or a
qualifi ed workshop.
Page 157 of 268

155
QUICK HEL
P
7
Changing a bulb
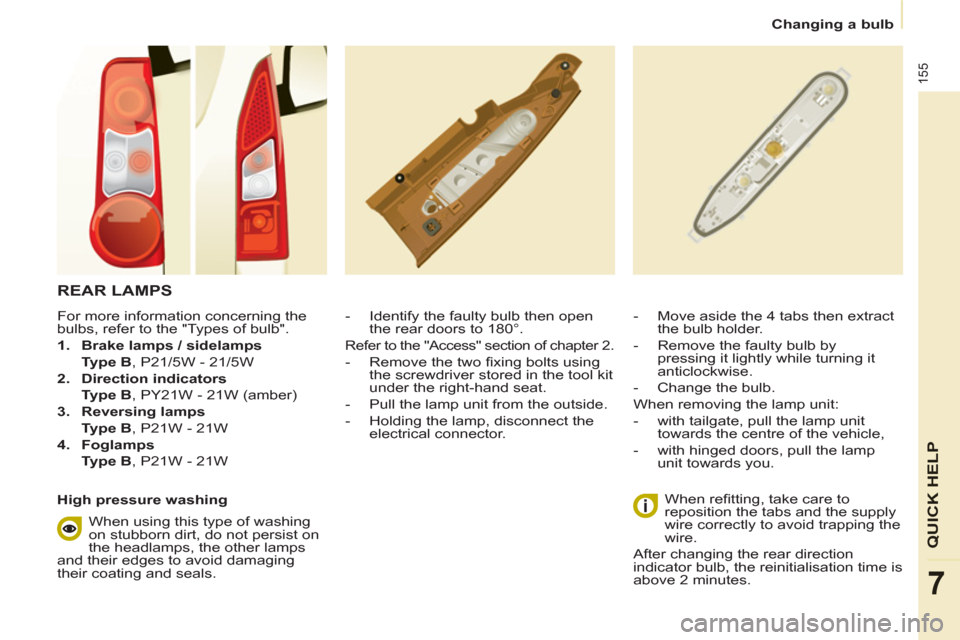
REAR LAMPS
- Identify the faulty bulb then open
the rear doors to 180°.
Refer to the "Access" section of chapter 2.
- Remove the two fi xing bolts using
the screwdriver stored in the tool kit
under the right-hand seat.
- Pull the lamp unit from the outside.
- Holding the lamp, disconnect the
electrical connector.
When refi tting, take care to
reposition the tabs and the supply
wire correctly to avoid trapping the
wire.
After changing the rear direction
indicator bulb, the reinitialisation time is
above 2 minutes.
- Move aside the 4 tabs then extract
the bulb holder.
- Remove the faulty bulb by
pressing it lightly while turning it
anticlockwise.
- Change the bulb.
When removing the lamp unit:
- with tailgate, pull the lamp unit
towards the centre of the vehicle,
- with hinged doors, pull the lamp
unit towards you.
For more information concerning the
bulbs, refer to the "Types of bulb".
1.
Brake lamps / sidelamps
Type B
, P21/5W - 21/5W
2.
Direction indicators
Type B
, PY21W - 21W (amber)
3.
Reversing lamps
Type B
, P21W - 21W
4.
Foglamps
Type B
, P21W - 21W
High pressure washing
When using this type of washing
on stubborn dirt, do not persist on
the headlamps, the other lamps
and their edges to avoid damaging
their coating and seals.
Page 216 of 268

9.44
09MUSIC MEDIA PLAYERS
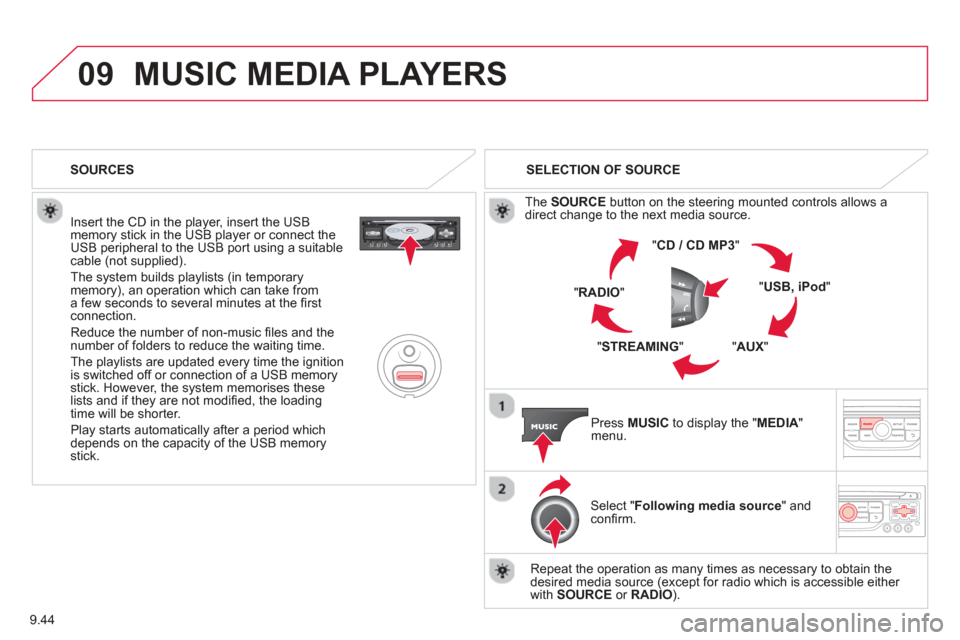
Insert the CD in the player, insert the USBmemory stick in the USB player or connect theUSB peripheral to the USB port using a suitablecable (not supplied).
The s
ystem builds playlists (in temporarymemory), an operation which can take froma few seconds to several minutes at the fi rstconnection.
R
educe the number of non-music fi les and the number of folders to reduce the waiting time.
The pla
ylists are updated every time the ignition
is switched off or connection of a USB memory stick. However, the system memorises these
lists and if they are not modifi ed, the loadingtime will be shorter.
Pla
y starts automatically after a period which
depends on the capacity of the USB memory stick. SELECTION OF SOURCE
Th
e SOURCE button on the steering mounted controls allows a
direct change to the next media source.
" CD / CD MP
3 "
"
USB, iPod "
"AUX " "STREAMING "
"RADIO "
Press MUSICto display the "MEDIA " menu.
Select "Following media source " and confi rm.
Repeat the operation as man
y times as necessary to obtain the
desired media source (except for radio which is accessible either
with SOURCE or RADIO).
SOURCES
Page 223 of 268

9.51
11TRIP COMPUTER
TRIP COMPUTER
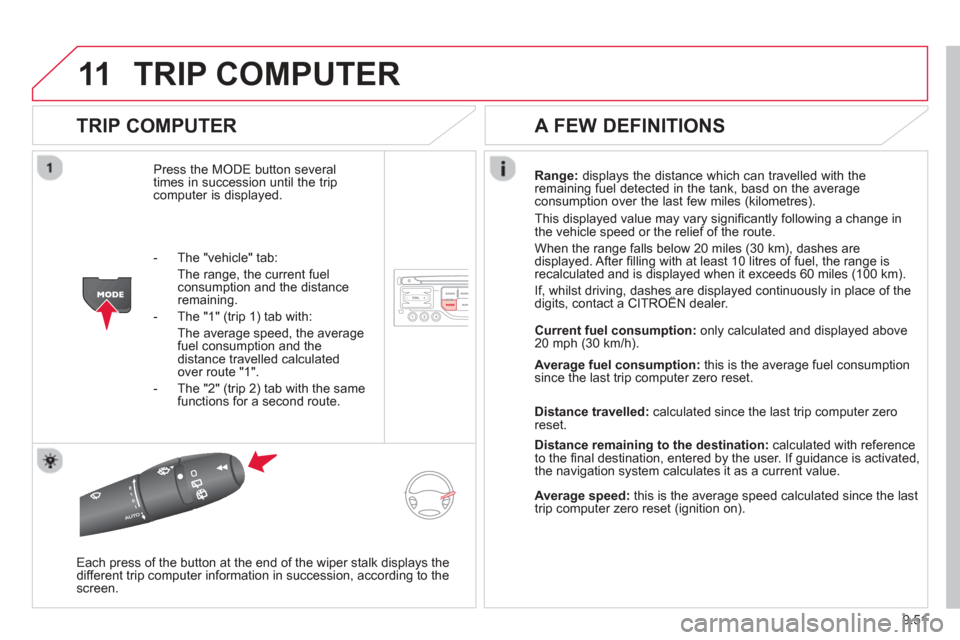
Press the MODE button several
times in succession until the trip computer is displayed.
Range: displays the distance which can travelled with the
remaining fuel detected in the tank, basd on the average consumption over the last few miles (kilometres).
This displayed value may vary signi
fi cantly following a change in
the vehicle speed or the relief of the route.
When the ran
ge falls below 20 miles (30 km), dashes are
displayed. After fi lling with at least 10 litres of fuel, the range is
recalculated and is displayed when it exceeds 60 miles (100 km).
If, whilst driving, dashes are displayed continuously in place of the digits, contact a CITROËN dealer.,g , p
Each press of the button at the end of the wiper stalk displays the
different trip computer information in succession, according to the screen.
A FEW DEFINITIONS
- The "vehicle" tab:
The ran
ge, the current fuelconsumption and the distance remaining.
- The "1"
(trip 1) tab with:
The average speed, the average fuel consumption and the distance travelled calculatedover route "1".
- The "2"
(trip 2) tab with the same
functions for a second route. Current fuel consum
ption:only calculated and displayed above
20 mph (30 km/h).
Avera
ge fuel consumption: this is the average fuel consumption since the last trip computer zero reset.
Distance travelled:calculated since the last trip computer zero
reset.
Distance remaining to the destination:calculated with referenceto the fi nal destination, entered by the user. If guidance is activated,
the navigation system calculates it as a current value.
Average speed: this is the average speed calculated since the last
trip computer zero reset (ignition on).
Page 239 of 268

9.67
04 AUDIO
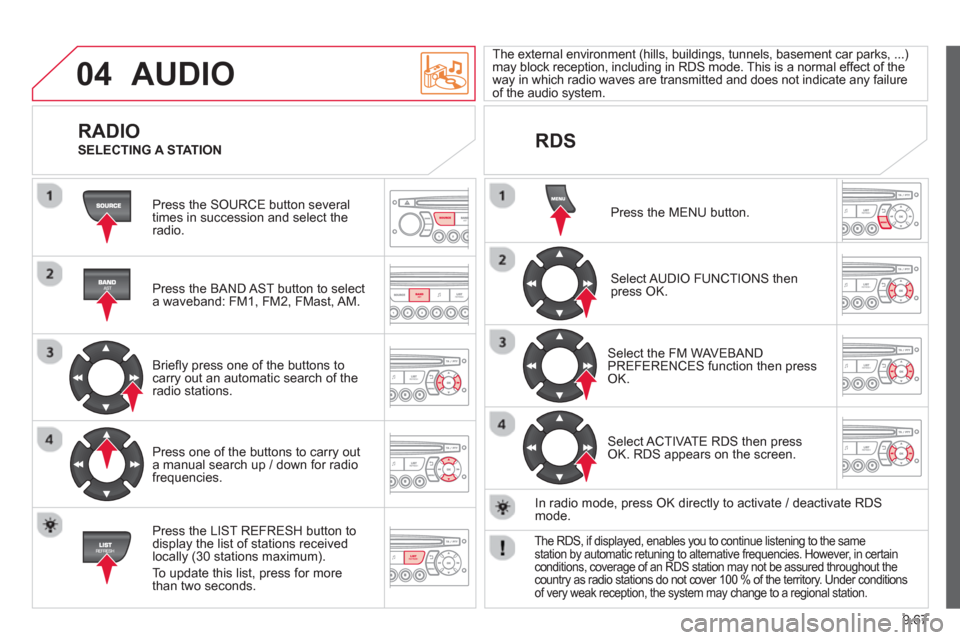
Press the SOURCE button several
times in succession and select theradio.
Press the BAND A
ST button to select
a waveband: FM1, FM2, FMast, AM.
Briefl
y press one of the buttons tocarry out an automatic search of theradio stations.
Press one o
f the buttons to carry out
a manual search up / down for radiofrequencies.
Press the LI
ST REFRESH button to
display the list of stations received
locally (30 stations maximum).
To update this list, press for more
t
han two seconds.
The external environment
(hills, buildings, tunnels, basement car parks, ...) may block reception, including in RDS mode. This is a normal effect of the
way in which radio waves are transmitted and does not indicate any failure of the audio system.
RDS RADIO
SELECTING A STATION
Press the MENU button.
Select AUDIO FUNCTIONS thenpress OK.
Select the FM WAVEBANDPREFERENCES function then pressOK.
Select ACTIVATE RDS then pressOK. RDS appears on the screen.
In radio mode, press
OK directly to activate / deactivate RDSmode.
The RDS, if displayed, enables you to continue listening to the samestation by automatic retuning to alternative frequencies. However, in certainconditions, coverage of an RDS station may not be assured throughout thecountry as radio stations do not cover 100 % of the territory. Under conditionsof very weak reception, the system may change to a regional station.