dashboard Citroen BERLINGO MULTISPACE RHD 2017 2.G User Guide
[x] Cancel search | Manufacturer: CITROEN, Model Year: 2017, Model line: BERLINGO MULTISPACE RHD, Model: Citroen BERLINGO MULTISPACE RHD 2017 2.GPages: 292, PDF Size: 10.19 MB
Page 149 of 292

147
Berlingo2VP_en_Chap05_Securite_ed02-2016
147
Berlingo2VP_en_Chap05_Securite_ed02-2016
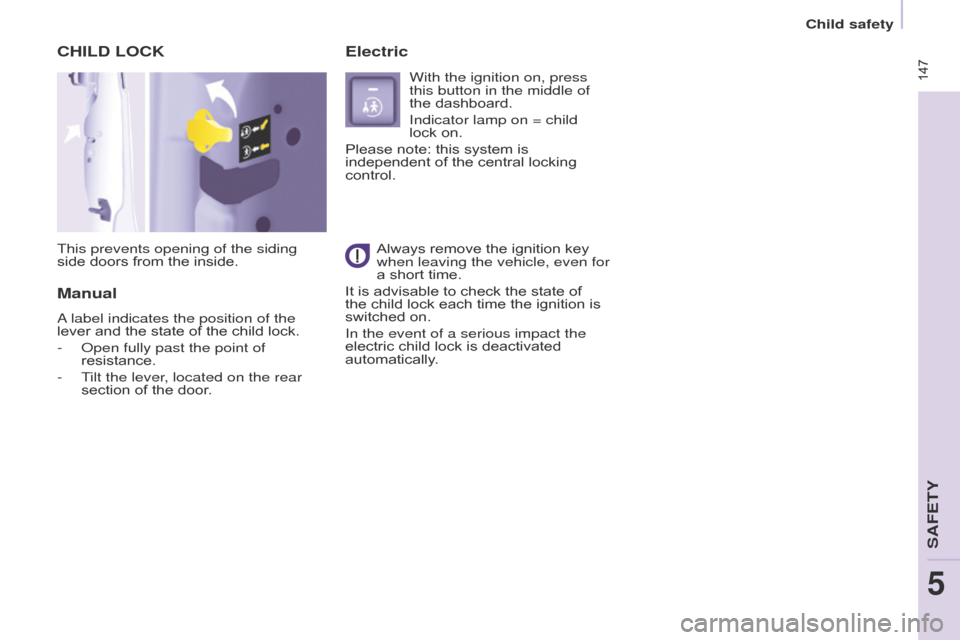
CHILD LOCK
This prevents opening of the siding
side doors from the inside.
Manual Electric
With the ignition on, press
this button in the middle of
the
dashboard.
Indicator lamp on = child
lock on.
Please
note: this system is
independent
of the central locking
control.Always
remove the ignition key
when leaving the vehicle, even for
a
short time.
It
is
advisable to check the state of
the
child
lock each time the ignition is
switched
on.
In the event of a serious impact the
electric
child lock is deactivated
automatically
.
A label indicates the position of the
lever
and
the
state
of
the
child
lock.
-
Open fully past the point of
resistance.
-
T
ilt the lever, located on the rear
section
of
the
door.
SAFETY
5
Child safety
Page 156 of 292

154
Berlingo2VP_en_Chap07_Verification_ed02-2016
OPENING THE BONNET
Bonnet stay
Secure the stay in its location,
identified by a sticker on the right-hand
side of the vehicle, to hold the bonnet
open.
Before closing the bonnet, put the stay
back
in its clip without using excessive
force.
On the outside
Raise the bonnet slightly by reaching
in a flat hand, palm down, to make
access
to the lever easier.
With this hand, push the safety catch
to
the left. Raise the bonnet.
On the inside
Pull the lever below the dashboard
towards you. The bonnet is released.
To close
Lower the bonnet and release it at the
end of its travel. Check that the bonnet
is
secure.
Avoid opening the bonnet in strong
winds.
Opening the bonnet
Page 160 of 292

158
Berlingo2VP_en_Chap07_Verification_ed02-2016Berlingo2VP_en_Chap07_Verification_ed02-2016
Cooling system
Only use the fluid recommended by the manufacturer.
Otherwise,
you risk seriously damaging
your
engine.
When the engine is warm, the
temperature of the coolant is controlled
by
the engine fan.
As
this fan can
operate
with the ignition key removed
and because the cooling system is
pressurised, wait for at least one hour
after the engine has stopped before
carrying
out any work.
Slacken
the cap by 1/4 of a turn to
release the pressure to prevent any
risk
of scalding. When the pressure
has dropped, remove the cap and top
up
the level with coolant.
If
fluid has to be added frequently,
this indicates a fault which must be
checked
by a CITROËN dealer as
soon
as possible.
Power steering fluid level
The vehicle must be parked on level ground with the engine cold. Unscrew
the cap integrated with the gauge and
check
the level which must be between
the
MIN and MAX marks. In
order to regenerate the filter, you are advised to drive at a speed higher
than
40 mph (60 km/h) for at least five minutes as soon as possible, when
traffic
conditions permit (until the
message disappears and the service
warning
lamp goes off).
During regeneration of the particle
emission
filter, the noise of a relay
operating may be heard under the
dashboard.
If the message is still displayed and
if the service warning lamp remains
on, contact a CITROËN dealer or a
qualified
workshop.
Topping up
The level must be between the MIN
and
MAX
marks
on
the
expansion
bottle.
If
more
than
1
litre
of
fluid
is
required to top up the level, have the
system
checked
by
a
CITROËN
dealer
or
a
qualified
workshop.
Screenwash level
For best quality cleaning and for your
safety, we would advise that you use
products of the CITROËN range.
For optimum cleaning and to avoid
freezing,
this fluid must not be topped
up
or replaced with plain water.
Capacity
of the screenwash reservoir:
approximately
3 litres.
Diesel additive level
(Diesel with particle
filter)
Topping up
This additive must be topped up by
a CITROËN dealer or a qualified
workshop
without delay.
Waste products
Avoid prolonged contact of used oil
with the skin.
Brake
fluid is harmful to health and
very
corrosive.
Do
not dispose of used oil, brake fluid
or coolant into drains or into the ground
but into the containers dedicated to this
use at a CITROËN dealer (France) or
an
authorised waste disposal site.
The minimum level of this additive
is indicated by lighting of the service
warning lamp, accompanied by an
audible signal and a message in the
screen.
When this occurs with the engine
running it is due to the start of
saturation
of
the
particle
filter
(exceptionally prolonged urban type
driving
conditions:
low
speed,
long
traffic
jams,
...).
Levels
Page 189 of 292

187
Berlingo2VP_en_Chap08_Aide-rapide_ed02-2016Berlingo2VP_en_Chap08_Aide-rapide_ed02-2016
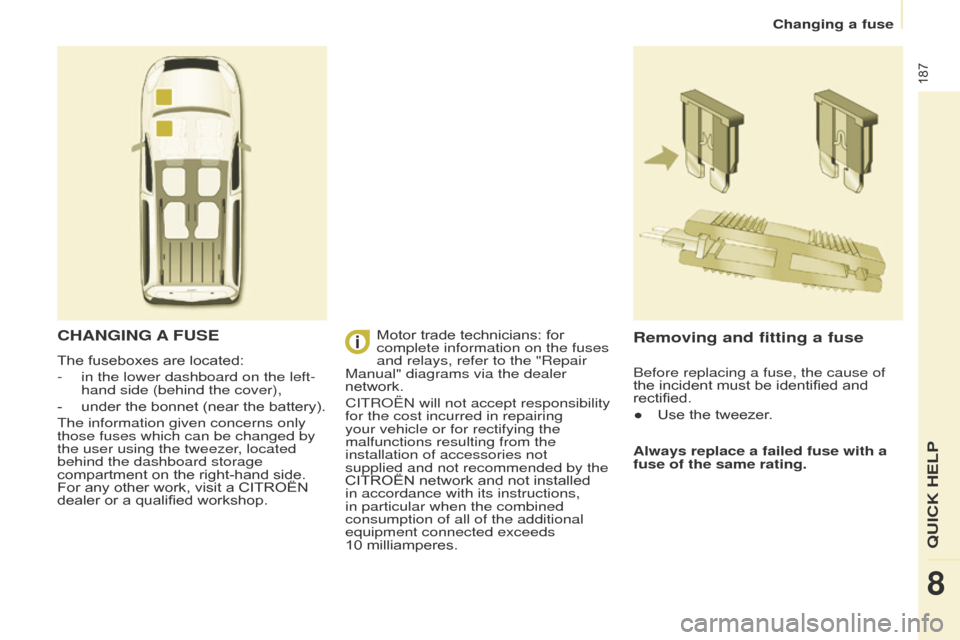
CHANGING A FUSE
The fuseboxes are located:
-
in the lower dashboard on the left-
hand side (behind the cover),
-
under
the bonnet (near the battery).
The information given concerns only
those fuses which can be changed by
the user using the tweezer, located
behind the dashboard storage
compartment
on the right-hand side.
For
any other work, visit a CITROËN
dealer
or a qualified workshop.
Removing and fitting a fuse
Always replace a failed fuse with a
fuse of the same rating.
Motor
trade
technicians:
for
complete information on the fuses
and relays, refer to the "Repair
Manual" diagrams via the dealer
network.
CITROËN will not accept responsibility
for the cost incurred in repairing
your vehicle or for rectifying the
malfunctions resulting from the
installation of accessories not
supplied and not recommended by the
CITROËN
network
and
not
installed
in accordance with its instructions,
in particular when the combined
consumption of all of the additional
equipment connected exceeds
10 millia
mperes. Before replacing a fuse, the cause of
the
incident must be identified and
rectified.
●
Use
the tweezer.
QUICK HELP
8
Changing a fuse
Page 190 of 292

188
Berlingo2VP_en_Chap08_Aide-rapide_ed02-2016Berlingo2VP_en_Chap08_Aide-rapide_ed02-2016
Dashboard fuses
Tilt the cover to gain access to the
fuses.Fuses
F Amperes
A Allocation
1 15 Rear wiper
2 - Not used
3 5 Airbag
4 10 Air
conditioning, diagnostic socket, mirror control,
headlamp beam
5 30 Electric windows
6 30 Locks
7 5Rear courtesy lamp, front map reading lamp, roof
console
8 20 Audio
equipment, screen, tyre under-inflation
detection, alarm and siren
9 30 Front
and rear 12V socket
10 15 Central column 11 15 Low current ignition switch
12 15 Rain and sunshine sensor, airbag
13 5 Instrument panel
14 15 Parking
sensors, digital air conditioning controls,
hands-free
phone kit
15 30 Locks
16 - Not used
17 40Rear
screen/mirrors demist/defrost
Changing a fuse