ECU CITROEN C-ELYSÉE 2018 Handbook (in English)
[x] Cancel search | Manufacturer: CITROEN, Model Year: 2018, Model line: C-ELYSÉE, Model: CITROEN C-ELYSÉE 2018Pages: 260, PDF Size: 8.4 MB
Page 97 of 260

95
On a steep descent or in the event of
sharp acceleration, the speed limiter will
not be able to prevent the vehicle from
exceeding the programmed speed.
To avoid any risk of jamming the pedals:
-
e
nsure that the mat is secured
c o r r e c t l y,
-
d
o not fit one mat on top of another.Cruise control
System which automatically
maintains the speed of the vehicle
at the value programmed by the
driver, without any action on the
accelerator pedal.
The cruise control is switched on manually: it
requires a minimum vehicle speed of 25
mph
(40
km/h).
As well as the engagement of:
-
F
ourth gear on a manual gearbox.
-
S
econd gear on an automatic gearbox, in
sequential mode.
-
Position D with an automatic gearbox.
The cruise control is switched off manually
or by pressing the brake or clutch pedal or on
triggering of the trajectory control systems for
safety reasons.
It is possible to exceed the programmed speed
temporarily by pressing the accelerator pedal.
To return to the programmed speed, simply
release the accelerator pedal.
Switching off the ignition cancels any
programmed speed setting.
Cruise control cannot, in any circumstances, replace
the need to respect speed limits, nor can it replace
the need for vigilance on the part of the driver.
Steering mounted controls
1 Cruise control mode selection wheel.
2 Value decrease button.
3 Value increase button.
4 Cruise control off/resume button.
6
Driving
Page 99 of 260
97
Operating fault
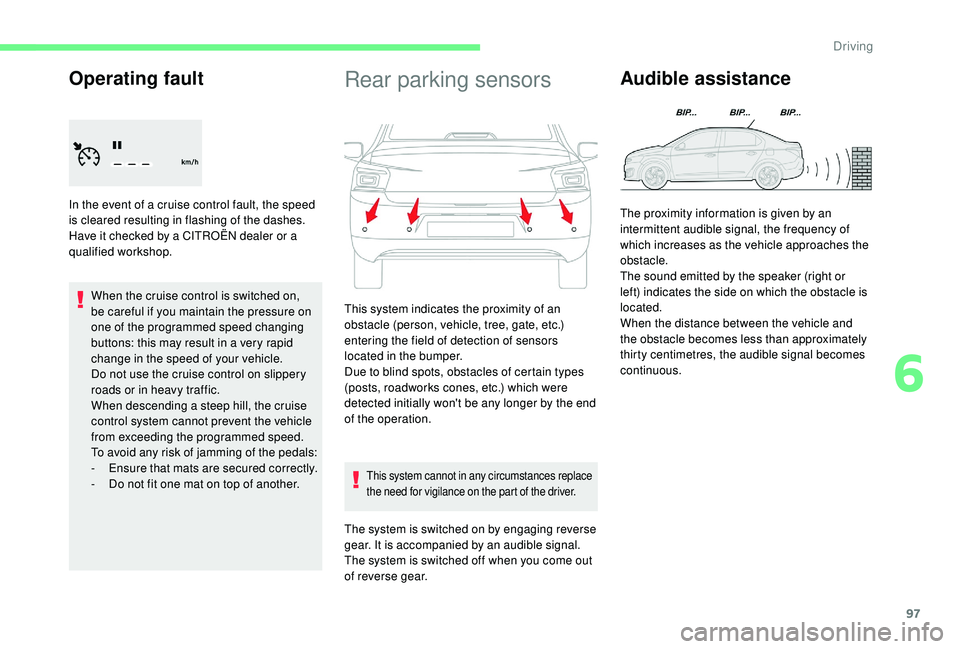
In the event of a cruise control fault, the speed
is cleared resulting in flashing of the dashes.
Have it checked by a CITROËN dealer or a
qualified workshop.When the cruise control is switched on,
be careful if you maintain the pressure on
one of the programmed speed changing
buttons: this may result in a very rapid
change in the speed of your vehicle.
Do not use the cruise control on slippery
roads or in heavy traffic.
When descending a steep hill, the cruise
control system cannot prevent the vehicle
from exceeding the programmed speed.
To avoid any risk of jamming of the pedals:
-
E
nsure that mats are secured correctly.
-
D
o not fit one mat on top of another.
Rear parking sensors
This system indicates the proximity of an
obstacle (person, vehicle, tree, gate, etc.)
entering the field of detection of sensors
located in the bumper.
Due to blind spots, obstacles of certain types
(posts, roadworks cones, etc.) which were
detected initially won't be any longer by the end
of the operation.
This system cannot in any circumstances replace
the need for vigilance on the part of the driver.
The system is switched on by engaging reverse
gear. It is accompanied by an audible signal.
The system is switched off when you come out
of reverse gear.
Audible assistance
The proximity information is given by an
intermittent audible signal, the frequency of
which increases as the vehicle approaches the
obstacle.
The sound emitted by the speaker (right or
left) indicates the side on which the obstacle is
located.
When the distance between the vehicle and
the obstacle becomes less than approximately
thirty centimetres, the audible signal becomes
continuous.
6
Driving
Page 121 of 260

119
The vehicle's electrical system allows the
connection of the compressor for long
enough to inflate a tyre after a puncture
repair.
Composition of the kit
1.12 V compressor, with built-in pressure
gauge.
2. Bottle of sealant, with built-in hose.
3. Speed limit sticker.
The speed limit sticker must be secured
to the interior of the vehicle in the driver's
field of vision, to remind you that a wheel
is in temporary use. Do not exceed a speed of 50
mph
(80 km/h) when driving with a tyre repaired
using this type of kit.
Repair procedure
F Switch off the ignition.
F S ecure the speed limit sticker inside the
vehicle.
F
U
ncoil the pipe stowed under the
compressor.
Avoid removing any foreign bodies which
have penetrated into the tyre.
F
C
onnect the pipe from the compressor to
the bottle of sealant. F
R
emove the valve cap from the tyre to be
repaired, and place it in a clean area.
F
T
urn the sealant bottle over and secure it in
the cut-out provided on the compressor.
F
C
onnect the hose from the bottle of sealant
to the valve of the tyre to be repaired and
tighten firmly.
8
In the event of a breakdown
Page 128 of 260
126
List of operations
Changing a bulb
The headlamps have polycarbonate
lenses with a protective coating:
F
d
o not clean them using a dr y or
abrasive cloth, nor with a detergent
or solvent product,
F
u
se a sponge and soapy water or a pH
neutral product,
F
w
hen using a high pressure washer
on persistent marks, do not keep the
lance directed towards the lamps or
their edges for too long, so as not to
damage their protective coating and
seals.
A bulb must only be changed with the
ignition off and after the headlamp has
been switched off for several minutes –
Risk of serious burns!
F
D
o not touch the bulb directly with your
fingers, use a lint-free cloth.
It is essential only to use anti-ultraviolet
(UV) type bulbs, so as not to damage the
headlamp.
Always replace a faulty bulb with a new
bulb of the same type and specification.
Fastening the spare wheel
If your vehicle is fitted with alloy wheels,
when tightening the bolts on fitting, it is
normal to notice that the washers do not
come into contact with the spare wheel.
The wheel is secured by the conical
contact of each bolt.
After changing a wheel
Do not exceed 50 mph (80 km/h) when
using a "space-saver" type spare wheel.
Have the tightening of the bolts and the
pressure of the spare wheel checked by a
CITROËN dealer or a qualified workshop
without delay.
Have the punctured wheel repaired and
refit it on the vehicle as soon as possible.
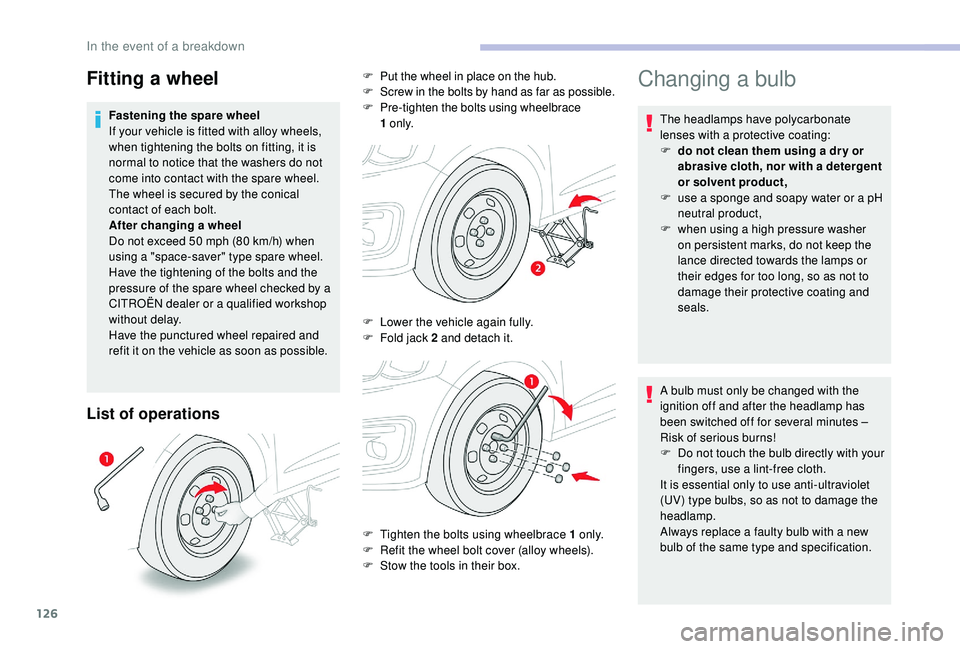
Fitting a wheelF Put the wheel in place on the hub.
F S
crew in the bolts by hand as far as possible.
F
P
re-tighten the bolts using wheelbrace
1
o
n l y.
F
L
ower the vehicle again fully.
F
F
old jack 2 and detach it.
F
T
ighten the bolts using wheelbrace 1 o n l y.
F
R
efit the wheel bolt cover (alloy wheels).
F
S
tow the tools in their box.
In the event of a breakdown
Page 138 of 260
136
Versions equipped with Stop & Start are
fitted with a 12 V lead-acid battery of
specific technology and specification.
Its replacement should be carried out
only by a CITROËN dealer or a qualified
workshop.
If your vehicle has an automatic gearbox,
do not try to start the engine by pushing
the vehicle.
Access to the battery Starting using another
battery
When your vehicle's battery is discharged, the
engine can be started using a backup battery
(external or from another vehicle) and jump
leads or a battery booster.
Never try to start the engine by connecting
a battery charger.
Never use a 24V or higher battery booster.
Check beforehand that the backup
battery has a nominal voltage of 12V and
a capacity at least equal to that of the
discharged battery.
The two vehicles must not be in contact
with each other.
Switch off all the electrical consumers
on both vehicles (audio system, wipers,
lighting, etc.).
Make sure that the jump leads are not
close to moving parts of the engine (fan,
belts, etc.).
Do not disconnect the (+) terminal while
the engine is running. F
S
tart the engine of the vehicle with the
good battery and leave it running for a few
minutes.
F
O
perate the starter on the broken down
vehicle and let the engine run.
If the engine does not start straight away,
switch off the ignition and wait a few moments
before trying again.
The battery is located under the bonnet.
To gain access to it:
F
O
pen the bonnet using the interior release
lever, then the exterior safety catch.
F
S
ecure the bonnet stay.
F
R
emove the plastic cover on the (+)
terminal. The battery (-) terminal is not accessible. A
remote earth point is located on the engine.
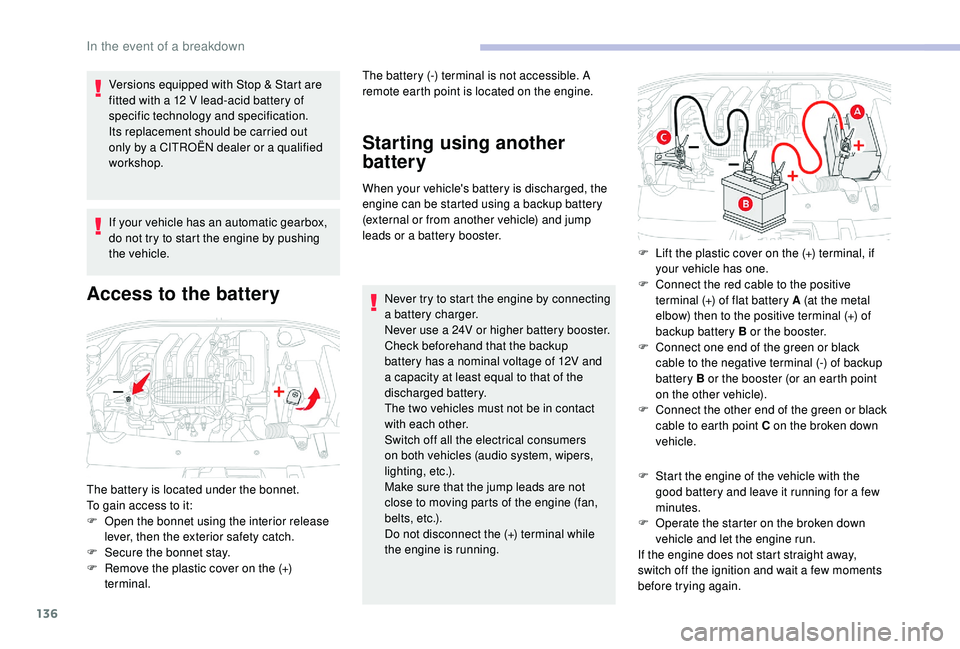
F
L
ift the plastic cover on the (+) terminal, if
your vehicle has one.
F
C
onnect the red cable to the positive
terminal (+) of flat battery A (at the metal
elbow) then to the positive terminal (+) of
backup battery B or the booster.
F
C
onnect one end of the green or black
cable to the negative terminal (-) of backup
battery B or the booster (or an earth point
on the other vehicle).
F
C
onnect the other end of the green or black
cable to earth point C on the broken down
vehicle.
In the event of a breakdown
Page 170 of 260
22
Connection sharing
The system offers to connect the telephone
with 3 profiles:
-
"Telephone " (hands-free kit, telephone
only),
-
"Streaming " (streaming: wireless playing of
the audio files on the telephone),
-
"Mobile internet data ".
The " Mobile internet data " profile
must be activated for connected
navigation (where the vehicle does not
have "Emergency and assistance call"
services), having first activated sharing of
this connection on your smartphone.
Select one or more profiles.
Press " OK" to confirm.
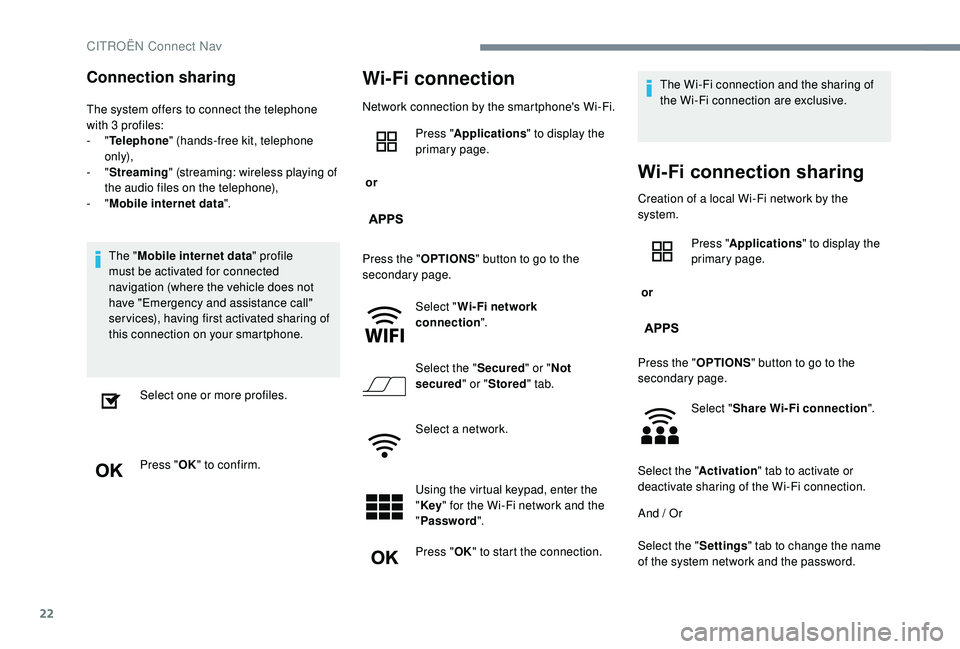
Wi-Fi connection
Network connection by the smartphone's Wi-Fi.
or Press "
Applications " to display the
primary page.
Press the " OPTIONS" button to go to the
secondary page.
Select "Wi- Fi network
connection ".
Select the " Secured" or "Not
secured " or "Stored " tab.
Select a network.
Using the virtual keypad, enter the
" Key " for the Wi-Fi network and the
" Password ".
Press " OK" to start the connection. The Wi-Fi connection and the sharing of
the Wi-Fi connection are exclusive.
Wi-Fi сonnection sharing
Creation of a local Wi-Fi network by the
system.
or
Press "
Applications " to display the
primary page.
Press the " OPTIONS" button to go to the
secondary page.
Select "Share Wi-Fi connection ".
Select the " Activation" tab to activate or
deactivate sharing of the Wi-Fi connection.
And / Or
Select the " Settings" tab to change the name
of the system network and the password.
CITROËN Connect Nav
Page 171 of 260
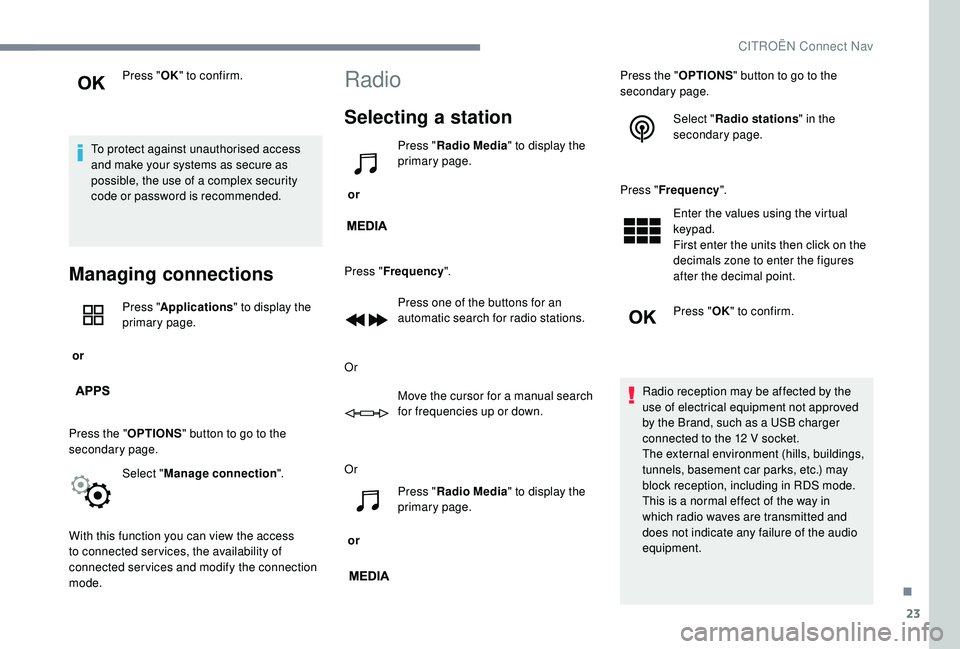
23
Press "OK" to confirm.
To protect against unauthorised access
and make your systems as secure as
possible, the use of a complex security
code or password is recommended.
Managing connections
or Press "
Applications " to display the
primary page.
Press the " OPTIONS" button to go to the
secondary page.
Select "Manage connection ".
With this function you can view the access
to connected ser vices, the availability of
connected services and modify the connection
mode.
Radio
Selecting a station
or Press "
Radio Media " to display the
primary page.
Press " Frequency ".
Press one of the buttons for an
automatic search for radio stations.
Or Move the cursor for a manual search
for frequencies up or down.
Or
or Press "
Radio Media " to display the
primary page. Press the "
OPTIONS" button to go to the
secondary page.
Select "Radio stations " in the
secondary page.
Press " Frequency ".
Enter the values using the virtual
keypad.
First enter the units then click on the
decimals zone to enter the figures
after the decimal point.
Press " OK" to confirm.
Radio reception may be affected by the
use of electrical equipment not approved
by the Brand, such as a USB charger
connected to the 12
V socket.
The external environment (hills, buildings,
tunnels, basement car parks, etc.) may
block reception, including in RDS mode.
This is a normal effect of the way in
which radio waves are transmitted and
does not indicate any failure of the audio
equipment.
.
CITROËN Connect Nav