display CITROEN C-ELYSÉE 2018 Handbook (in English)
[x] Cancel search | Manufacturer: CITROEN, Model Year: 2018, Model line: C-ELYSÉE, Model: CITROEN C-ELYSÉE 2018Pages: 260, PDF Size: 8.4 MB
Page 26 of 260
24
Distance recorders
Total distance recorder
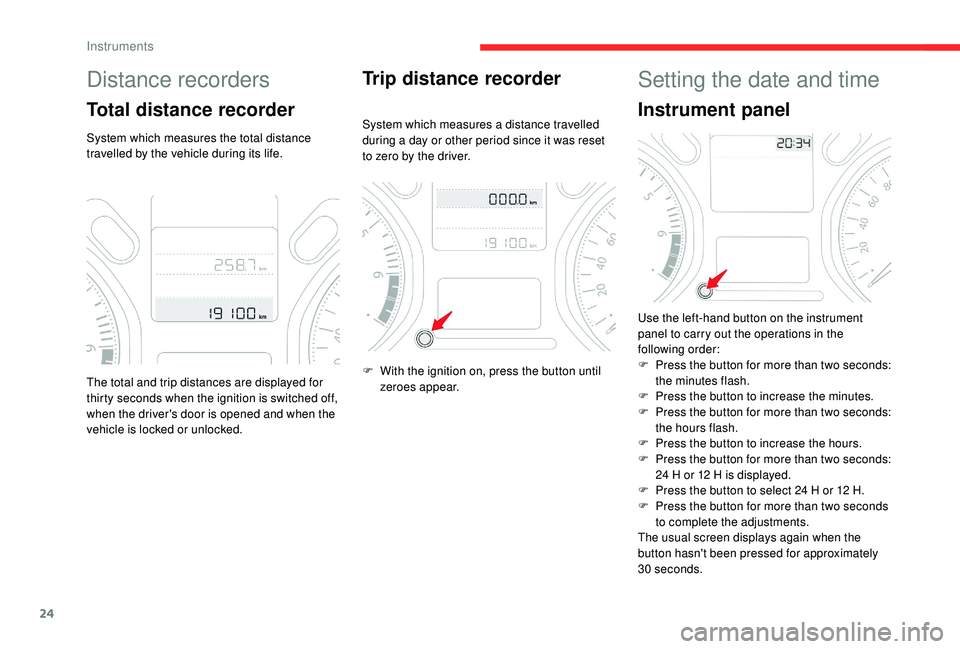
System which measures the total distance
travelled by the vehicle during its life.
Trip distance recorder
System which measures a distance travelled
during a day or other period since it was reset
to zero by the driver.
The total and trip distances are displayed for
thirty seconds when the ignition is switched off,
when the driver's door is opened and when the
vehicle is locked or unlocked. F
W
ith the ignition on, press the button until
zeroes appear.
Setting the date and time
Instrument panel
Use the left-hand button on the instrument
panel to carry out the operations in the
following order:
F
P
ress the button for more than two seconds:
the minutes flash.
F
P
ress the button to increase the minutes.
F
P
ress the button for more than two seconds:
the hours flash.
F
P
ress the button to increase the hours.
F
P
ress the button for more than two seconds:
24
H or 12 H is displayed.
F
P
ress the button to select 24 H or 12 H.
F
P
ress the button for more than two seconds
to complete the adjustments.
The usual screen displays again when the
button hasn't been pressed for approximately
30
seconds.
Instruments
Page 27 of 260
25
Audio system / Bluetooth With CITROËN Connect Radio
F Select the "Settings" menu.
F
Sel
ect "Date and time ".
F
Sel
ect the " Date" or "Time " tab.
F
C
hoose the display formats.
F
C
hange the date and/or time using the
numeric keypad.
F
C
onfirm with " OK".
The system does not automatically
manage the change between winter and
summer time (depending on country).
With CITROËN Connect Nav
Adjustment of the time and date is only
available if synchronisation with GPS is
deactivated.
F
Sel
ect the " Settings " menu.
F
P
ress the " OPTIONS " button to go to the
secondary page.
F
Sel
ect "Setting the time- date". F
Sel
ect the "
Date" or "Time " tab.
F
A
djust the date and/or time using the
numeric keypad.
F
C
onfirm with "
OK".
Additional adjustments
You can choose:
-
T o change the display format of the date
and time (12h/24h).
-
T
o change the time zone.
-
T
o activate or deactivate synchronisation
with the GPS (UTC).
The system does not automatically
manage the change between winter and
summer time (depending on country).
The change between winter and summer
time is done by changing the time zone.
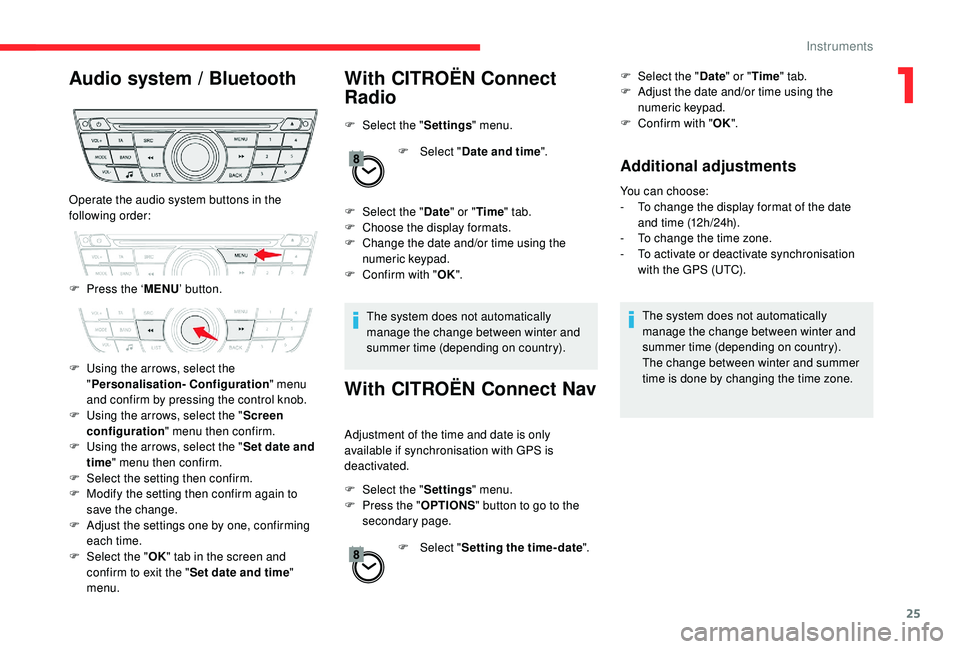
Operate the audio system buttons in the
following order:
F
P
ress the ‘ MENU’ button.
F
U
sing the arrows, select the
" Personalisation- Configuration " menu
and confirm by pressing the control knob.
F
U
sing the arrows, select the " Screen
configuration " menu then confirm.
F
U
sing the arrows, select the " Set date and
time " menu then confirm.
F
S
elect the setting then confirm.
F
M
odify the setting then confirm again to
save the change.
F
A
djust the settings one by one, confirming
each time.
F
Sel
ect the " OK" tab in the screen and
confirm to exit the " Set date and time"
menu.
1
Instruments
Page 28 of 260

26
Trip computer
Information displayed about the current journey
(range, fuel consumption, average speed, etc.).
Instrument Panel Screen
Monochrome screen C
Data displays
F Press the button at the end of the wiper stalk to display successively the different
trip computer data. The trip computer data
is as follows:
-
Range.
-
C
urrent fuel consumption.
-
D
istance travelled.
-
A
verage fuel consumption.
-
A
verage speed.
F
T
he next press then returns you to the
normal display.
Zero reset
F Hold the control down for more than two seconds to reset to zero the distance
travelled, the average fuel consumption and
the average speed.
Touch screen
Information is accessible from the
menu Driving / Vehicle .
Instruments
Page 29 of 260

27
Display of information in the touch screen
Permanent display:
With CITROËN Connect Radio
F
Sel
ect the " Applications " menu, then " Tr i p
computer ".
With CITROËN Connect Nav
F
Sel
ect the " Applications " menu then the
" Vehicle apps " tab then "Trip computer ".
The trip computer information is displayed in
tabs.
F
P
ress one of the buttons to display the
desired tab.
Temporar y display in a specific window:
F
P
ress the end of the wiper control stalk
to access the information and display the
different tabs. The current information tab with:
-
Range.
-
C
urrent fuel consumption.
-
S
top & Start time counter.
The trip " 1" tab with:
-
A
verage speed for the first trip.
-
A
verage fuel consumption.
-
D
istance travelled.
The trip " 2" tab with:
-
A
verage speed for the second trip.
-
A
verage fuel consumption.
-
D
istance travelled.
Trip reset
F When the desired trip is displayed, press the reset button or on the end of the wiper
control stalk.
Tr i p s " 1" and " 2" are independent and are used
identically.
Tr i p " 1" allows daily calculations to be carried
out, for example, and trip " 2" allows monthly
calculations.
1
Instruments
Page 30 of 260
28
This value may vary following a change
in the driving style or the relief, resulting
in a significant change in the current fuel
consumption.
When the range falls below 18
miles (30 km),
dashes are displayed. After filling with at least
5
litres of fuel, the range is recalculated and is
displayed if it exceeds 60
miles (100 km).
If dashes are displayed continuously while
driving instead of the digits, contact a
CITROËN dealer or a qualified workshop.
Current fuel consumption
(mpg or l/100 km or km/l)
C alculated over the last few
seconds. This function is only displayed from
18
mph (30 km/h).
Average fuel consumption
(mpg or l/100 km or km/l)
C alculated since the last time the
trip was reset.
Average speed
(mph or km/h)
Calculated since the last time the
trip was reset.
Distance travelled
(miles or km)
Calculated since the last time the
trip was reset.
Stop & Start time counter
or (minutes/seconds or hours/minutes) If your vehicle is fitted with the Stop & Start, a
time counter adds up the time spent in STOP
mode during a journey.
It resets to zero every time the ignition is
switched on.
Trip computer, some
definitions
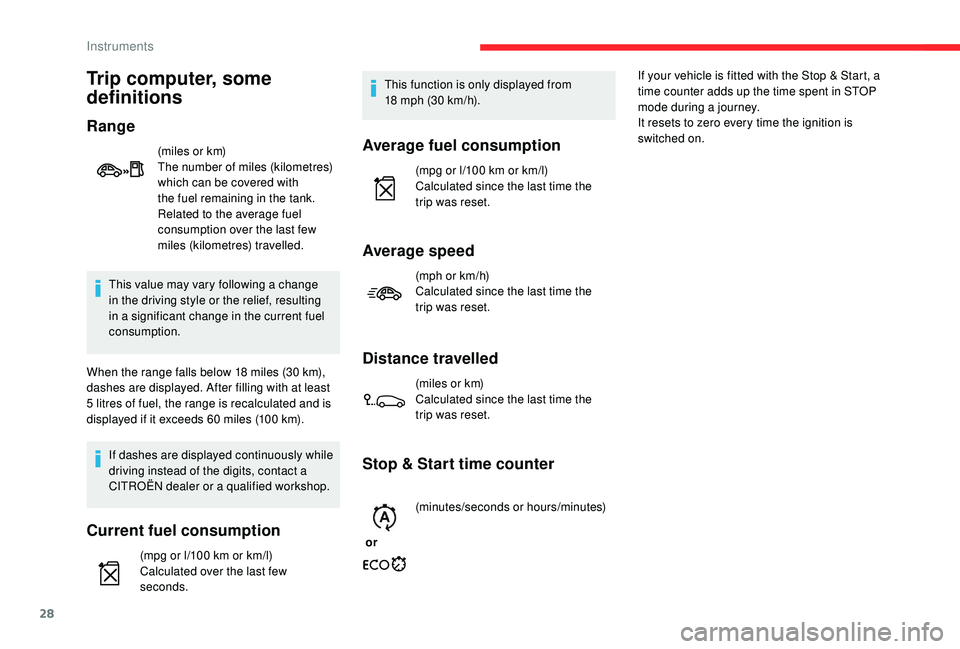
Range
(miles or km)
The number of miles (kilometres)
which can be covered with
the fuel remaining in the tank.
Related to the average fuel
consumption over the last few
miles (kilometres) travelled.
Instruments
Page 44 of 260

42
Deactivation
If you put the air flow control in the 0 position,
t he temperature is no longer controlled.
A slight flow of air can still be felt, resulting from
the for ward movement of the vehicle.
Air distribution
Windscreen and side windows.
Windscreen, side windows and
footwells.
Footwells.
Centre and side air vents,
footwells.
Central and side vents.
The air distribution can be adapted
by placing the thumb wheel in an
intermediate position or by closing
the vents.
Air intake / Air recirculation
Recirculation of the interior air isolates the
passenger compartment from exterior odours
and fumes.
Return to exterior air intake as soon as possible
to avoid deterioration of the air quality and the
formation of mist.
F
M
ove the manual control to the
left for the "Recirculation of
interior air" position.
F
M
ove the manual control to the
right to return to the "Exterior air
intake" position.
Manual air conditioning
(without display screen)
This system operates only with the engine
running.
1 Temperature.
2 A ir f low.
3 Air distribution.
4 Air intake / Air recirculation.
5 Air conditioning.
Temperature
F Turn the thumb wheel from
blue (cold) to red (hot) to adjust
the temperature to your liking.
Air flow
F Turn the thumb wheel to obtain a comfortable air flow.
Ease of use and comfort
Page 46 of 260

44
Electronic air conditioning
(with display screen)
This system operates only with the engine
running.
1Air intake / Air recirculation.
2 Temperature.
3 Air conditioning.
4 Faster air conditioning.
5 Air distribution.
6 A ir f low.
Air intake/air recirculation
The recirculation of interior air isolates the
passenger compartment from exterior odours
and smoke.
Avoid prolonged use of interior air
recirculation (risk of misting and
deterioration of air quality). F
P
ress the button to prevent
fresh air from entering and
recirculate the interior air. The
indicator lamp illuminates in the
display screen to confirm this.
F
P
ress the button again to allow
fresh air to enter. The indicator
lamp goes off in the display
screen to confirm this.
Temperature
F Press these buttons (red for hot and blue for cold), to
adjust the temperature to your
requirements.
The temperature bars come on or go off
progressively on the display.
Air conditioning
Switching on
F Press this button, its indicator lamp appears on the display.
Switching off
F Press this button again, the indicator lamp goes off.
Switching the system off could result in
discomfort (humidity, condensation).
Faster air conditioning
This button activates rapid cooling of the air in
the passenger compartment.
Switching on
F Press this button, its indicator lamp appears in the display.
Switching off
F Press this button again, its indicator lamp goes off.
Ease of use and comfort
Page 47 of 260
45
Air distribution
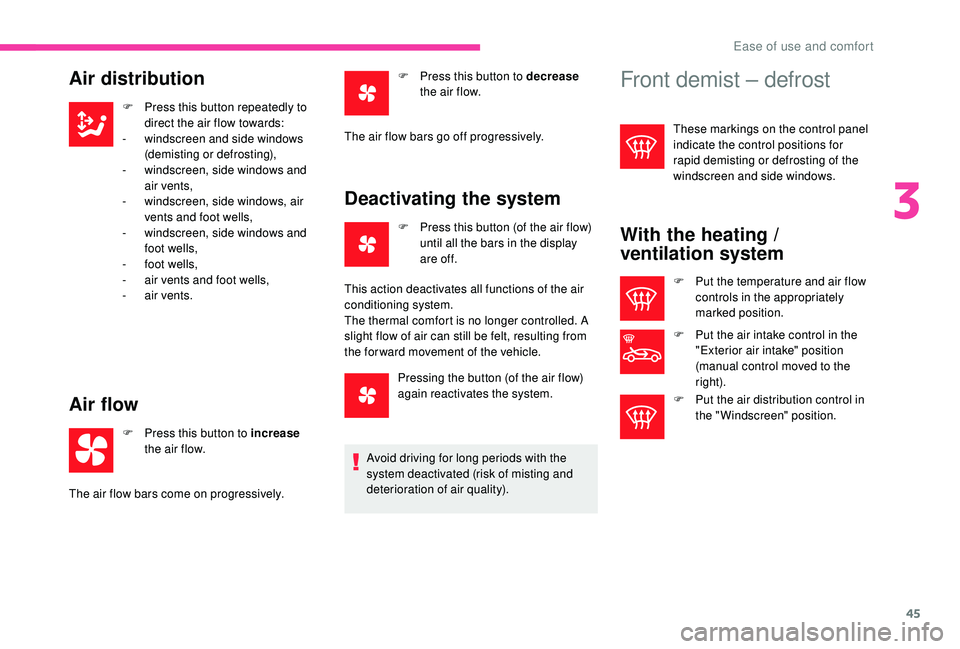
F Press this button repeatedly to direct the air flow towards:
-
w
indscreen and side windows
(demisting or defrosting),
-
w
indscreen, side windows and
air vents,
-
w
indscreen, side windows, air
vents and foot wells,
-
w
indscreen, side windows and
foot wells,
-
f
oot wells,
-
a
ir vents and foot wells,
-
a
ir vents.
Air flow
F Press this button to increase
the air flow.
Deactivating the system
F Press this button (of the air flow) until all the bars in the display
are of f.
F
P
ress this button to decrease
the air flow.
The air flow bars come on progressively. The air flow bars go off progressively.
This action deactivates all functions of the air
conditioning system.
The thermal comfort is no longer controlled. A
slight flow of air can still be felt, resulting from
the for ward movement of the vehicle.
Pressing the button (of the air flow)
again reactivates the system.
Avoid driving for long periods with the
system deactivated (risk of misting and
deterioration of air quality).
Front demist – defrost
These markings on the control panel
indicate the control positions for
rapid demisting or defrosting of the
windscreen and side windows.
With the heating /
ventilation system
F Put the temperature and air flow controls in the appropriately
marked position.
F
P
ut the air intake control in the
"Exterior air intake" position
(manual control moved to the
right).
F
P
ut the air distribution control in
the "Windscreen" position.
3
Ease of use and comfort
Page 51 of 260
49
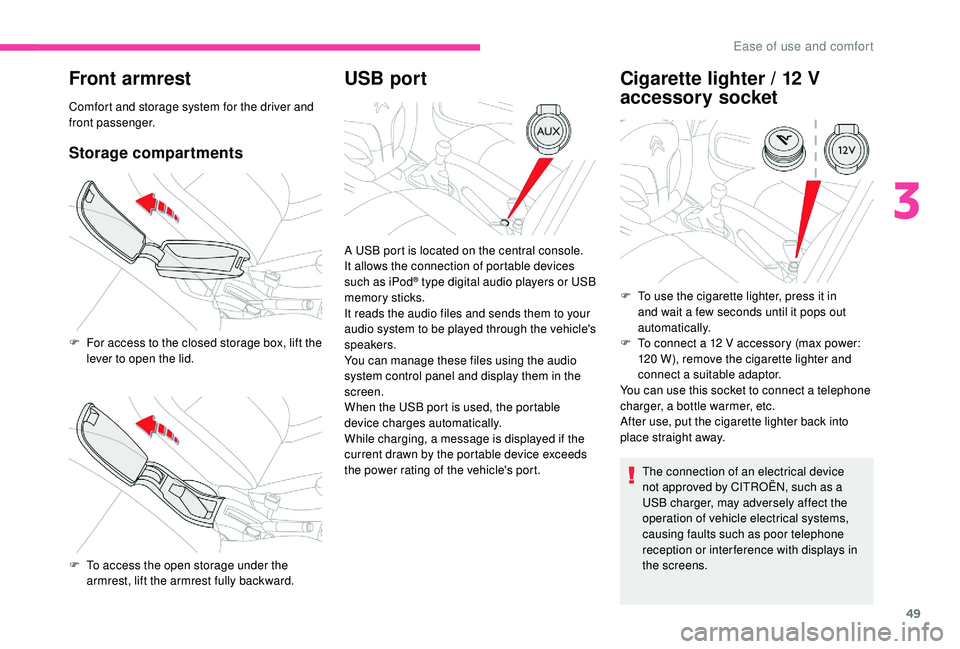
Front armrest
Comfort and storage system for the driver and
front passenger.
Storage compartments
USB portCigarette lighter / 12 V
accessory socket
The connection of an electrical device
not approved by CITROËN, such as a
USB charger, may adversely affect the
operation of vehicle electrical systems,
causing faults such as poor telephone
reception or inter ference with displays in
the screens.
F
F
or access to the closed storage box, lift the
lever to open the lid.
F
T
o access the open storage under the
armrest, lift the armrest fully backward. A USB port is located on the central console.
It allows the connection of portable devices
such as iPod
® type digital audio players or USB
memory sticks.
It reads the audio files and sends them to your
audio system to be played through the vehicle's
speakers.
You can manage these files using the audio
system control panel and display them in the
screen.
When the USB port is used, the portable
device charges automatically.
While charging, a message is displayed if the
current drawn by the portable device exceeds
the power rating of the vehicle's port. F
T o use the cigarette lighter, press it in
and wait a few seconds until it pops out
automatically.
F
T
o connect a 12 V accessory (max power:
120
W), remove the cigarette lighter and
connect a suitable adaptor.
You can use this socket to connect a telephone
charger, a bottle warmer, etc.
After use, put the cigarette lighter back into
place straight away.
3
Ease of use and comfort
Page 53 of 260

51
Lighting control
In some weather conditions (e.g. low
temperature or humidity), the presence
of misting on the internal sur face of the
glass of the headlamps and rear lamps is
normal; it disappears after the lamps have
been on for a few minutes.
Travelling abroad
The design of the dipped beam headlamps
allows, without modification, driving in a
country that drives on the other side of
the road than the country in which your
vehicle was sold.
Selection ring for main
lighting mode
Lamps off (ignition off) / Daytime
running lamps (engine running).
Sidelamps only.
Dipped or main beam headlamps.
Dipping the headlamps
Pull the lever to switch the lighting
between dipped and main beam
headlamps.
When the lamps are off or only the sidelamps
are on, the driver can switch on the main beam
headlamps (headlamp flash) by pulling and
releasing the stalk.
Display
Turn to align the desired symbol with the mark. Illumination of the corresponding indicator
lamp in the instrument panel confirms that the
lighting selected is on.
Foglamp selection ring
The foglamps operate with the dipped and main
beam headlamps.
Rear foglamp only
F To switch it on, turn the ring for wards.
F
T o switch it off, turn the ring rear wards.
4
Lighting and visibility