seat adjustment CITROEN C-ELYSÉE 2018 Handbook (in English)
[x] Cancel search | Manufacturer: CITROEN, Model Year: 2018, Model line: C-ELYSÉE, Model: CITROEN C-ELYSÉE 2018Pages: 260, PDF Size: 8.4 MB
Page 4 of 260

2
.
.
Instrument Panel 8
W arning and indicator lamps 9
I
ndicators
19
Distance recorders
2
4
Setting the date and time
2
4
Trip computer
2
6Remote control
2
9
Alarm
32
Doors
33
Boot
34
Window controls
3
6
Front seats 3 7
Rear bench seat 3 9
Steering wheel adjustment 4
0
Mirrors
4
0
Heating
4
1
Manual air conditioning
(without display screen)
4
2
Electronic air conditioning
(with display screen)
4
4
Front demist – defrost
4
5
Rear screen demist – defrost
4
6
Fittings
4
8Lighting control
5
1
Direction indicators
5
3
Headlamp adjustment
5
4
Wiper control stalk
5
4
Courtesy lamps
5
5
General safety recommendations
5
7
Hazard warning lamps
5
8
Horn 58
Emergency or assistance call 5 8
Electronic stability control (ESC)
6
0
Seat belts
6
2
Airbags
65
Child seats
6
8
Deactivating the passenger's front airbag
7
0
ISOFIX mountings
7
5
Child lock
7
9
Over view
Instruments Access
Ease of use and comfort Safety
Lighting and visibility
Eco-driving
Eco-driving 6
Contents
Page 39 of 260

37
Front seats
As a safety measure, adjustments to the
driver's seat must only be done when
stationary.
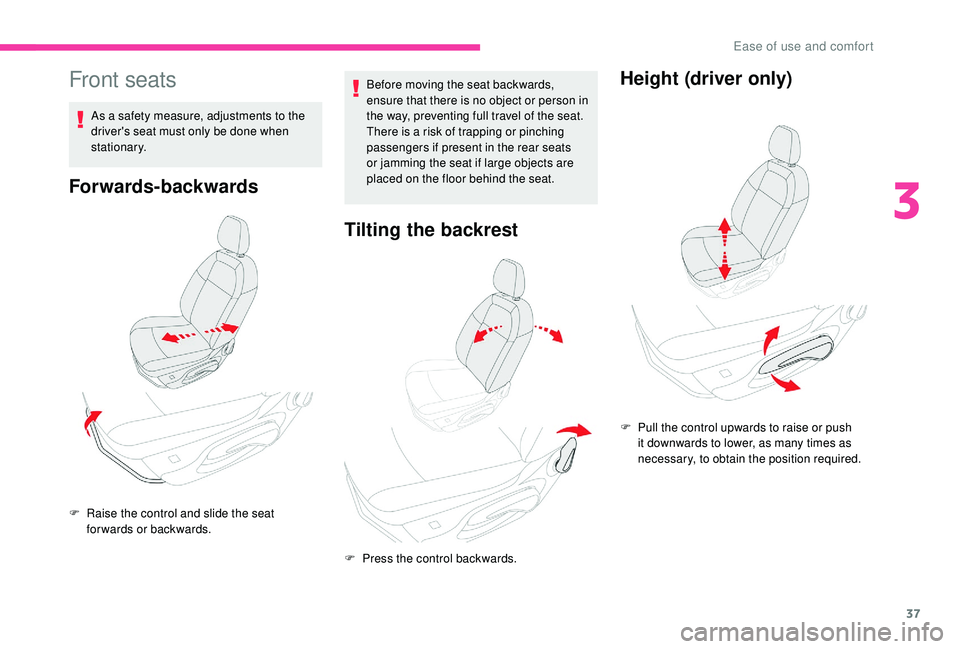
Forwards-backwards
Before moving the seat backwards,
ensure that there is no object or person in
the way, preventing full travel of the seat.
There is a risk of trapping or pinching
passengers if present in the rear seats
or jamming the seat if large objects are
placed on the floor behind the seat.
Tilting the backrest
F Raise the control and slide the seat forwards or backwards.
F
P
ress the control backwards.
Height (driver only)
F Pull the control upwards to raise or push it downwards to lower, as many times as
necessary, to obtain the position required.
3
Ease of use and comfort
Page 40 of 260

38
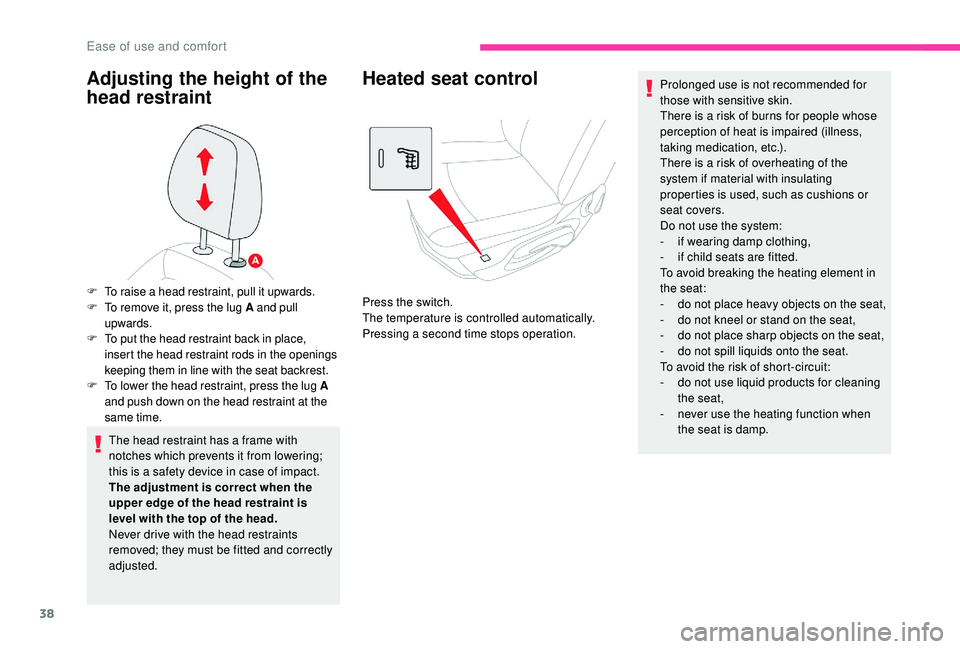
Adjusting the height of the
head restraint
The head restraint has a frame with
notches which prevents it from lowering;
this is a safety device in case of impact.
The adjustment is correct when the
upper edge of the head restraint is
level with the top of the head.
Never drive with the head restraints
removed; they must be fitted and correctly
adjusted.
Heated seat controlProlonged use is not recommended for
those with sensitive skin.
There is a risk of burns for people whose
perception of heat is impaired (illness,
taking medication, etc.).
There is a risk of overheating of the
system if material with insulating
properties is used, such as cushions or
seat covers.
Do not use the system:
-
i
f wearing damp clothing,
-
i
f child seats are fitted.
To avoid breaking the heating element in
the seat:
-
d
o not place heavy objects on the seat,
-
d
o not kneel or stand on the seat,
-
d
o not place sharp objects on the seat,
-
d
o not spill liquids onto the seat.
To avoid the risk of short-circuit:
-
d
o not use liquid products for cleaning
the seat,
-
n
ever use the heating function when
the seat is damp.
F
T
o raise a head restraint, pull it upwards.
F
T
o remove it, press the lug A and pull
upwards.
F
T
o put the head restraint back in place,
insert the head restraint rods in the openings
keeping them in line with the seat backrest.
F
T
o lower the head restraint, press the lug A
and push down on the head restraint at the
same time. Press the switch.
The temperature is controlled automatically.
Pressing a second time stops operation.
Ease of use and comfort
Page 56 of 260

54
Headlamp adjustment
To avoid causing a nuisance to other road
users, the height of the headlamp beams
should be adjusted according to the load in the
vehicle.
Depending on the version, this adjustment can
be carried out using the control located:
-
U
nder the bonnet.
-
T
o the left of the steering wheel
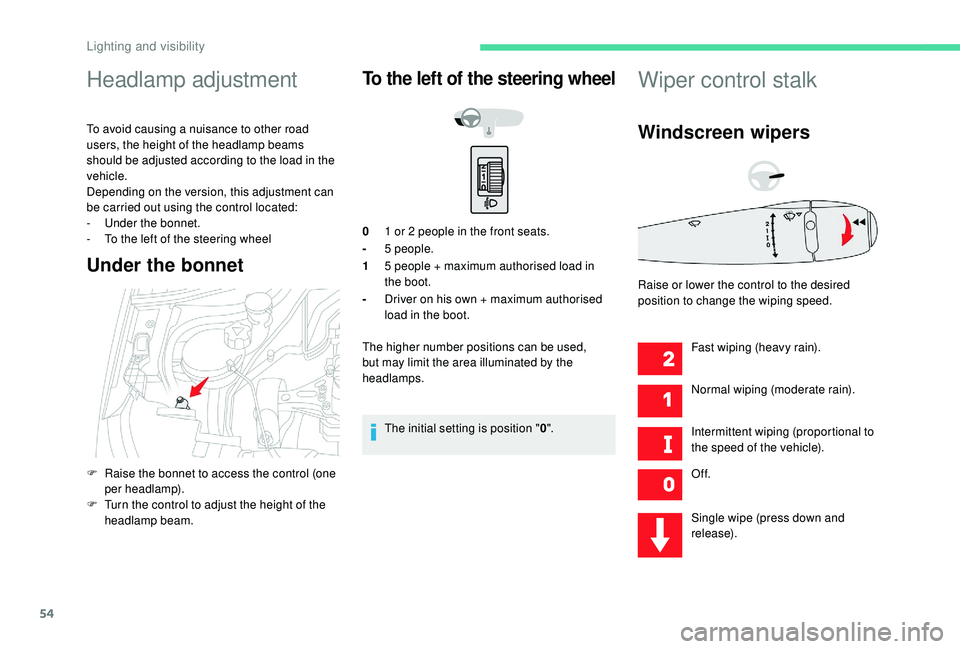
Under the bonnet
To the left of the steering wheel
01 or 2 people in the front seats.
- 5
people.
1 5
people + maximum authorised load in
the boot.
- Driver on his own + maximum authorised
load in the boot.
The higher number positions can be used,
but may limit the area illuminated by the
headlamps.
The initial setting is position " 0".
Wiper control stalk
Windscreen wipers
Fast wiping (heavy rain).
Normal wiping (moderate rain).
Intermittent wiping (proportional to
the speed of the vehicle).
Of f.
Single wipe (press down and
release).
F
R
aise the bonnet to access the control (one
per headlamp).
F
T
urn the control to adjust the height of the
headlamp beam. Raise or lower the control to the desired
position to change the wiping speed.
Lighting and visibility