light Citroen C ZERO 2010.5 1.G Owner's Manual
[x] Cancel search | Manufacturer: CITROEN, Model Year: 2010.5, Model line: C ZERO, Model: Citroen C ZERO 2010.5 1.GPages: 164, PDF Size: 4.86 MB
Page 4 of 164
.
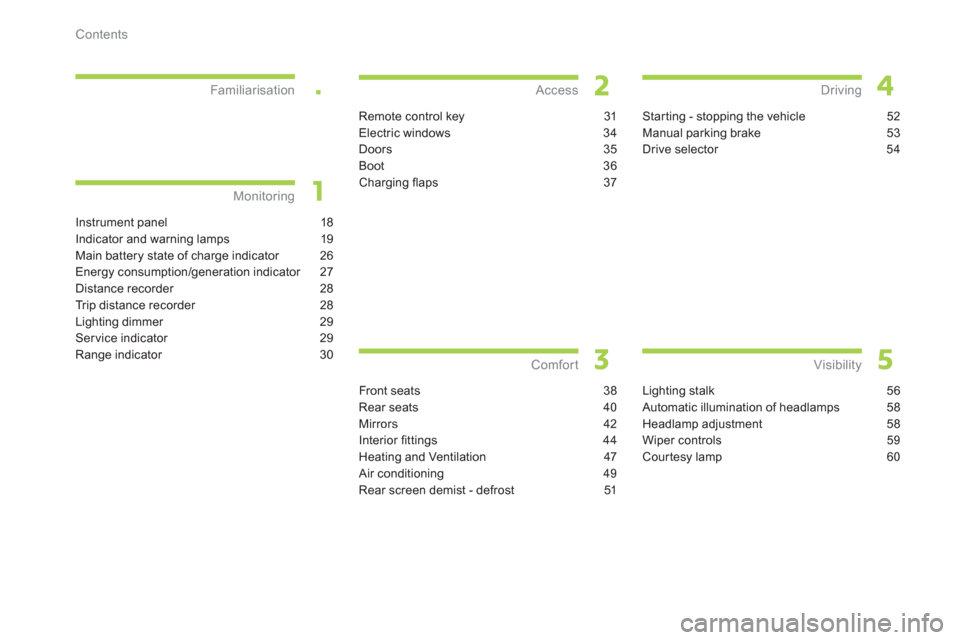
Contents
Instrument panel 18
Indicator and warning lamps 19
Main battery state of charge indicator 26
Energy consumption/generation indicator 27
Distance recorder 28
Trip distance recorder 28
Lighting dimmer 29
Ser vice indicator 29
Range indicator 30
Monitoring Familiarisation
Remote control key 31
Electric windows 34
Doors 35
Boot 36
Charging fl aps 37
Access
Front seats 38
Rear seats 40
Mirrors 42
Interior fi ttings 44
Heating and Ventilation 47
Air conditioning 49
Rear screen demist - defrost 51
Comfort
Starting - stopping the vehicle 52
Manual parking brake 53
Drive selector 54
Driving
Lighting stalk 56
Automatic illumination of headlamps 58
Headlamp adjustment 58
Wiper controls 59
Courtesy lamp 60
Visibility
Page 10 of 164
Familiarisation
8
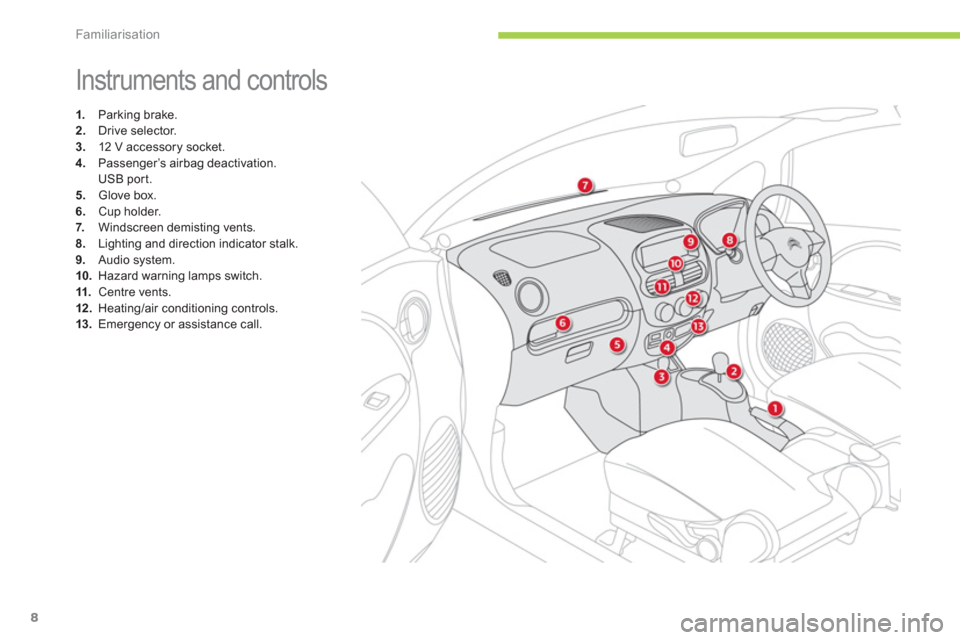
Instruments and controls
1.
Parking brake.2.
Drive selector. 3.
12 V accessory socket.
4.
Passenger’s airbag deactivation.
USB por t. 5. Glove box.
6.Cup holder.
7. Windscreen demisting vents.8.Lighting and direction indicator stalk.9.
Audio system.10.Hazard warning lamps switch. 11.
Centre vents. 12 .Heating/air conditioning controls.13.Emergency or assistance call.
Page 13 of 164

.Familiarisation
11
Seeing clearly
Lighting
Ring A
Rin
g B
Wipers
56
Windscreen wiper
59
Rear wiper
59
Dipped or main beam headlamps.
Sidelamps.
Automatic illumination of headlamps.
Li
ghting off.
Front and rear
foglamps. P
ark.
Intermittent wipe.
Wash
/wipe.
Single wipe.
Park.
Intermittent wipe
(speed adjustable
manually).
Slow.
Fast.
Page 20 of 164

Monitoring
18
Instrument panel
1.State of charge gauge for the main battery.Driveselector position indicator.2.Energy consumption/generation indicator.3.Speedometer4.Screen.
A.Total distance recorder.B.Trip distance recorder (Trip A or B).C.Instrument panel lighting dimmer.D.Indicator of distance remaining to the
next service.E.Indicator of time remaining to the next
service.F.Indicator of remaining range.
5.Screen control button. Displays the various functions in turn.
Resets the function selected (trip recorder or ser vice indicator).
Adjusts the level of instrument lighting.
For more information, refer to thecorresponding section.
Gauges and indicators
Screen
Page 21 of 164
1
!
Monitoring
19
Indicator and warning
lamps
Visual indicators informing the driver that a
system is in operation, is deactivated or has a
fault.
When the ignition is switched on
Cer tain warning lamps come on for
a few seconds when the vehicle's ignition is switched on.
These same warning lamps go off after a few seconds.
If you notice one of these warning lamps
remaining on, refer to the information on the
warning lamp in question.
Associated warnings
The illumination of cer tain warning lamps may
be accompanied by an audible signal.
The warning lamps may come on continuously (fixed) or flash.
Cer tain warning lamps may come on in one of two modes. Only by relatingthe type of lighting to the operatingstatus of the vehicle can it be ascertained whether the situation isnormal or whether a fault has occurred.
Page 22 of 164

Monitoring
20
Operation indicator lamps
If one of the following indicator lamps comes on in the instrument panel, this confirms that the corresponding system has come into operation.
Warning/indicator lampStateCauseAction/Observations
Left-hand direction indicatorFlashing with audible signal. The lighting stalk is pushed down.
Right-handdirection indicatorFlashing with audible signal. The lighting stalk is pushed up.
Hazard warning lampsFlashing with audible signal. The hazard warning lamps switch,located on the dashboard, has been
operated. The left-hand and ri
ght-hand direction indicators and
their associated indicator lamps flash simultaneously.
Sidelampsand/or dipped beamheadlamps
On fixed. The sidelamps and/or dipped beamheadlamps are on.
Front foglampsOn fixed. The front foglamps are switched on. Turn the ring on the stalk rear wards twice to switch off
the front foglamps.
Rear foglampOn fixed. The rear foglamp is switched on. Turn the ring on the stalk rear wards to switch off the
rear foglamp.
Main beam headlampsOn fixed. The lighting stalk is pulled towardsyou. Pull the stalk to return to dipped beam headlamps.
Page 31 of 164
1
Monitoring
29
Service indicator
When the ignition is switched on, pressbutton A
several times in succession until
the ser vice indicator is displayed in the desired units. This point can be indicated in one o
f two ways:
- the miles (km) remaining,
- the time remaining to the next ser vice.
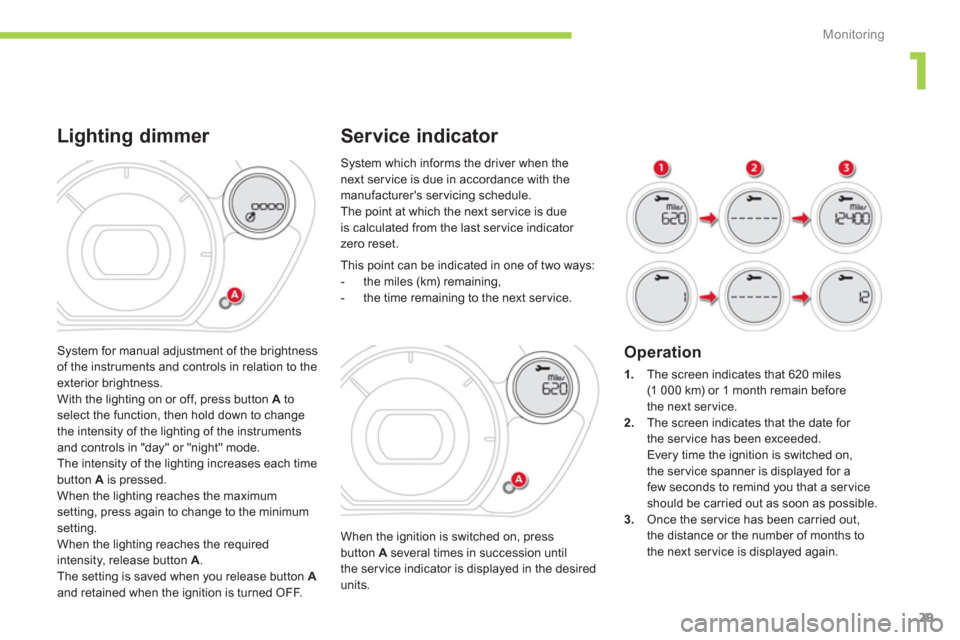
Operation
1.
The screen indicates that 620 miles (1 000 km) or 1 month remain before
the next service.2.The screen indicates that the date for
the service has been exceeded.
Every time the ignition is switched on,
the ser vice spanner is displayed for a
few seconds to remind you that a ser vice should be carried out as soon as possible.3.Once the ser vice has been carried out,
th
e distance or the number of months to
the next ser vice is displayed again.
System which informs the driver when the next service is due in accordance with the
manufacturer's servicing schedule.
The point at which the next ser vice is dueis calculated from the last service indicator zero reset.
S
ystem for manual adjustment of the brightness of the instruments and controls in relation to theexterior brightness.
With the lighting on or off, press button Ato select the function, then hold down to change
the intensity of the lighting of the instruments
and controls in "day" or "night" mode.
The intensity of the lighting increases each timebutton Ais pressed.
When the lighting reaches the maximumsetting, press again to change to the minimum setting.
When the lighting reaches the requiredintensity, release button A. The setting is saved when you release button A
and retained when the i
gnition is turned OFF.
Lighting dimmer
Page 33 of 164

2
i
!
Access
31
System which permits central unlocking or locking of the vehicle using the door lock or from a distance. It is also used to start the vehicle, as well as providing protection against theft.
Remote control key
Unlocking the vehicle
Unfolding the key
�)First press button A
to unfold the key.
Unlocking using the remote control
�)
Press the open padlock to unlock
th
e vehicle.
Locking the vehicle
Unlocking is confirmed by the interior lightingwhich comes on for approximately 15 seconds and the direction indicators which flash twice.The door mirrors unfold at the same time.
Unlocking using the key
�)
Turn the key to the right in the driver's doorlock to unlock the vehicle. rLocking is confirmed by the interior lighting,which comes on for about 15 seconds and the
direction indicators, which flash twice . On the other hand, the door mirrors are not unfolded (see § "door mirrors").
Normal locking using the remotecontrol
�)
Press the closed padlock to lock
th
e vehicle.
Lockin
g is confirmed by the direction indicators
which come on once .
The door mirrors unfold at the same time.
Normal locking using the key
�)
Turn the key to the left in the driver's doorlock to lock the vehicle.
Locking is confirmed by the direction indicators,
which flash once .
On the other hand, the door mirrors are not
unfolded (see § "door mirrors").
The vehicle will lock itself again automatically after thirty secondsunless a door or the boot is opened. This function avoids inadvertent
unlocking.
The passenger's door lock barrel does not lock or unlock the other doors and the boot.
Page 58 of 164

Visibility
56
Lighting stalk
Main lighting
The various front and rear lamps of the vehicleare designed to adapt the lighting progressivelyin relation to the climatic conditions and so ensure the best visibility for the driver:
- sidelamps, to be seen,
- dipped beam headlamps to see without
dazzling other drivers,
- main beam headlamps to see clearl
y when
the road is clear.
Additional lighting
Other lamps are provided to fulfil therequirements of particular driving conditions:
- a rear foglamp to be seen from a distance,
- front foglamps for even better visibility,
- daytime running lamps to be seen during
the day.
Selection ring for main lightingmode
Turn the ring to position the symbol required
facing the mark.
Automatic illumination of headlamps.
Sidelamps only.
Di
pped or main beam headlamps.
Stalk for switching headlamp beam
Pull the stalk to switch the lighting between
dipped/main beam headlamps.
In the li
ghting off and sidelamps modes, the driver can switch on the main beam headlamps
temporaril
y ("headlamp flash") by maintaininga pull on the stalk.
Displays
Illumination of the corresponding indicator lamp
in the instrument panel confirms the lightingswitched on.
Li
ghting off.
Page 59 of 164
5
i !
Visibility
57
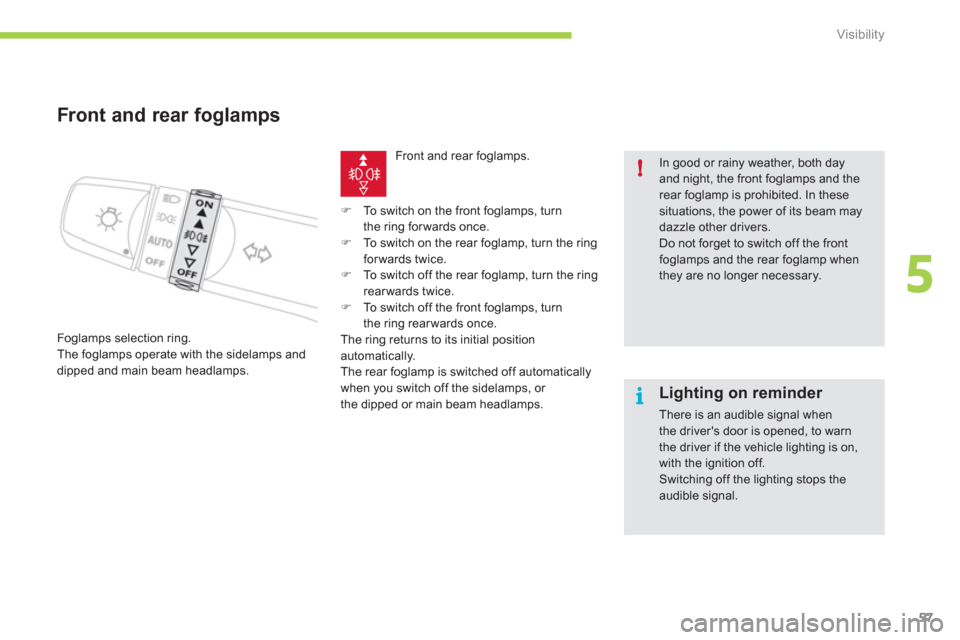
Front and rear foglamps
Foglamps selection ring.
The foglamps operate with the sidelamps and
dipped and main beam headlamps. Front and rear
foglamps. In good or rainy weather, both dayand night, the front foglamps and the rear foglamp is prohibited. In these situations, the power of its beam may
dazzle other drivers. Do not forget to switch off the front foglamps and the rear foglamp whenthey are no longer necessary.
Lighting on reminder
There is an audible signal when the driver's door is opened, to warnthe driver if the vehicle lighting is on, with the ignition off. Switching off the lighting stops theaudible signal.
�)
To switch on the front foglamps, turn
the ring for wards once. �) To switch on the rear foglamp, turn the ring
forwards twice.�) To switch off the rear foglamp, turn the ring rearwards twice.�)
To switch off the front foglamps, turn
the ring rearwards once.
The ring returns to its initial position
automatically.
The rear foglamp is switched off automatically when you switch off the sidelamps, or
the dipped or main beam headlamps.