run flat CITROEN C1 2020 Owners Manual
[x] Cancel search | Manufacturer: CITROEN, Model Year: 2020, Model line: C1, Model: CITROEN C1 2020Pages: 269, PDF Size: 7.63 MB
Page 142 of 269

140
C1_en_Chap07_info-pratiques_ed01-2016
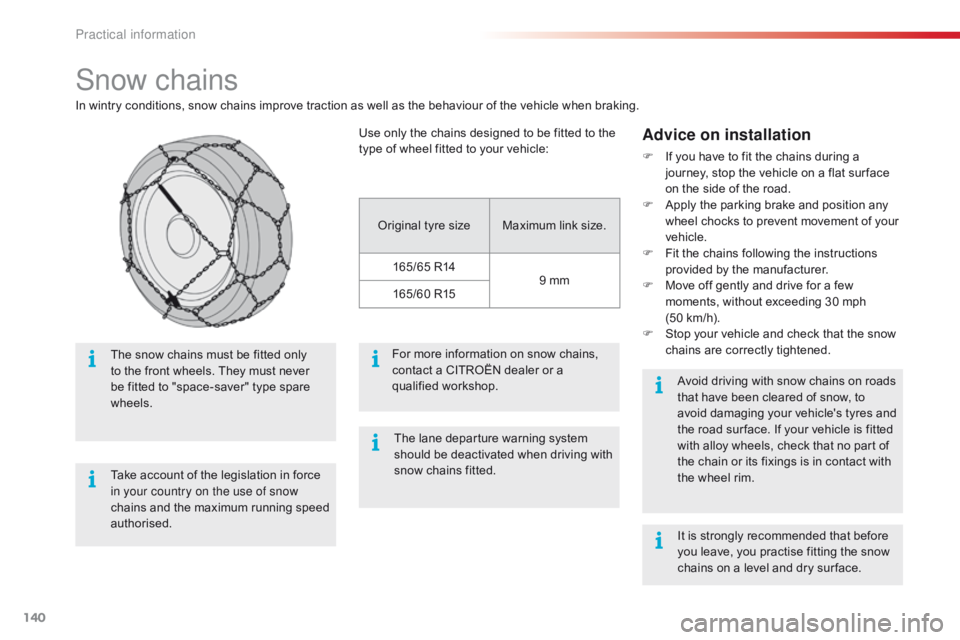
Snow chains
In wintry conditions, snow chains improve traction as well as the behaviour of the vehicle when braking.
Advice on installation
F If you have to fit the chains during a j
ourney, stop the vehicle on a flat sur face
o
n the side of the road.
F
A
pply the parking brake and position any
w
heel chocks to prevent movement of your
v
ehicle.
F
F
it the chains following the instructions
p
rovided by the manufacturer.
F
M
ove off gently and drive for a few
m
oments, without exceeding 30 mph
(50
km/h).
F
S
top your vehicle and check that the snow
c
hains are correctly tightened.
Take
account
of
the
legislation
in
force
i
n your country on the use of snow
chains
and
the
maximum
running
speed
a
uthorised.
The
snow
chains
must
be
fitted
only
t
o
the
front
wheels.
They
must
never
b
e
fitted
to
"space-saver"
type
spare
w
heels. Avoid
driving with snow chains on roads
t
hat have been cleared of snow, to
a
void damaging your vehicle's tyres and
t
he road sur face. If your vehicle is fitted
w
ith alloy wheels, check that no part of
t
he chain or its fixings is in contact with
t
he wheel rim.
Use
only
the
chains
designed
to
be
fitted
to
the
t
ype
of
wheel
fitted
to
your
vehicle:
Original
tyre
size Maximum
link
size.
165/65
R14 9
mm
165/60
R15
For
more
information
on
snow
chains,
c
ontact
a
CITROËN
dealer
or
a
q
ualified
w
orkshop. It
is strongly recommended that before
y
ou leave, you practise fitting the snow
c
hains on a level and dry sur face.
The
lane
departure
warning
system
s
hould
be
deactivated
when
driving
with
s
now
chains
fitted.
Practical information
Page 143 of 269

141
C1_en_Chap07_info-pratiques_ed01-2016
Electrical energy economy mode*
System which manages the duration of use of certain functions to conserve a sufficient level of charge in the battery.
After
the engine has stopped, you can still use functions such as the audio system, windscreen
w
ipers, dipped beam headlamps, courtesy lamps, etc. for a maximum combined duration of
t
wenty minutes.
This
period may be greatly reduced if the battery is not fully charged.
Let
the engine run for the duration
s
pecified to ensure that the battery
c
harge is sufficient.
Do
not repeatedly and continuously
r
estart the engine in order to charge the
b
attery.
A
flat battery prevents the engine from
s
tarting.
Refer
to the "Battery" section.
Switching to economy mode
Once this time has elapsed the active functions are put on standby.
Exiting economy mode
These functions are reactivated automatically next time the vehicle is driven.
To restore the use of these functions
immediately,
start the engine and let it run for at
l
east 5 minutes.
*
O
nly on vehicles with the "Keyless Entry and
S
tarting" system.
7
Practical information
Page 180 of 269

178
C1_en_Chap08_en-cas-pannes_ed01-2016
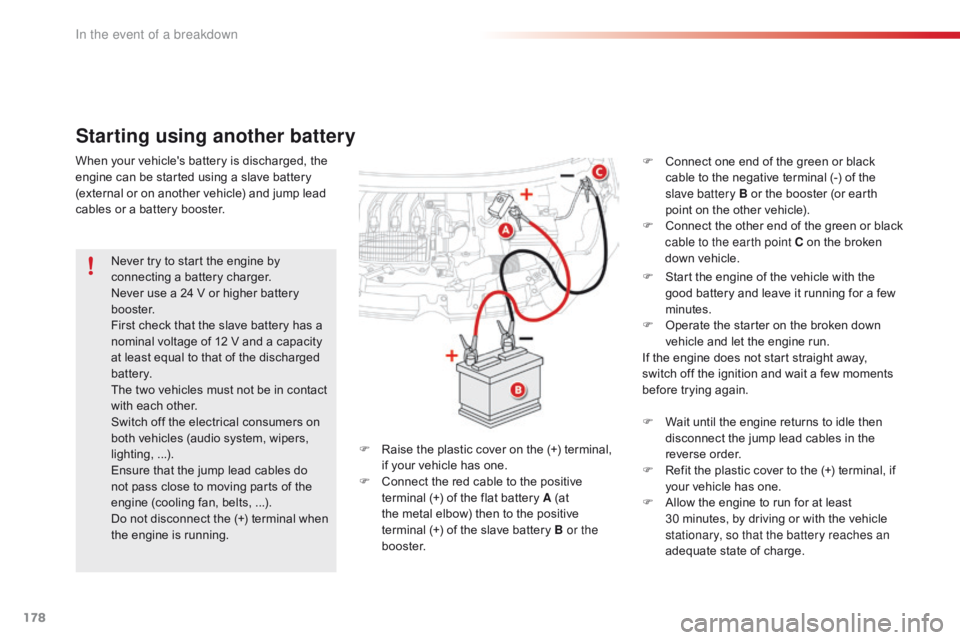
Starting using another battery
F Start the engine of the vehicle with the g
ood battery and leave it running for a few
m
inutes.
F
O
perate the starter on the broken down
v
ehicle and let the engine run.
If
the engine does not start straight away,
s
witch off the ignition and wait a few moments
b
efore trying again.
Never
try
to
start
the
engine
by
c
onnecting
a
battery
charger.
Never
use
a
24
V
or
higher
battery
b
o o s t e r.
First
check
that
the
slave
battery
has
a
n
ominal
voltage
of
12
V
and
a
capacity
a
t
least
equal
to
that
of
the
discharged
b
attery.
The
two
vehicles
must
not
be
in
contact
w
ith
each
other.
Switch
off
the
electrical
consumers
on
b
oth
vehicles
(audio
system,
wipers,
l
ighting,
...
).
Ensure
that
the
jump
lead
cables
do
n
ot
pass
close
to
moving
parts
of
the
e
ngine
(cooling
fan,
belts,
...).
Do
not
disconnect
the
(+)
terminal
when
t
he
engine
is
running. F
W
ait until the engine returns to idle then
d
isconnect the jump lead cables in the
r
everse
o
rder.
F
R
efit the plastic cover to the (+) terminal, if
y
our vehicle has one.
F
A
llow the engine to run for at least
3
0 minutes, by driving or with the vehicle
s
tationary, so that the battery reaches an
adequate
state of charge.
When
your
vehicle's
battery
is
discharged,
the
e
ngine
can
be
started
using
a
slave
battery
(
external
or
on
another
vehicle)
and
jump
lead
c
ables
or
a
battery
booster.
F
R
aise
the
plastic
cover
on
the
(+)
terminal,
i
f
your
vehicle
has
one.
F
C
onnect
the
red
cable
to
the
positive
t
erminal
(+)
of
the
flat
battery
A
(at
t
he
metal
elbow)
then
to
the
positive
t
erminal (+)
of
the
slave
battery
B or the
b o o s t e r. F
C
onnect one end of the green or black
c
able to the negative terminal (-) of the
s
lave battery B or the booster (or earth
p
oint on the other vehicle).
F
C
onnect
t
he
o
ther
e
nd
o
f
t
he
g
reen
o
r
b
lack
c
able to the earth point C on the broken
d
own vehicle.
In the event of a breakdown