spare wheel CITROEN C1 2022 Owners Manual
[x] Cancel search | Manufacturer: CITROEN, Model Year: 2022, Model line: C1, Model: CITROEN C1 2022Pages: 269, PDF Size: 7.63 MB
Page 5 of 269
.
C1_en_Chap00a_sommaire_ed01-2016
Exterior lighting control stalk 98
Automatic illumination of headlamps
1
01
Direction
indicators
1
03
Headlamp
beam height adjustment
1
03
Wiper
control stalk
1
04
Lighting and v isibility
Horn 10 6
Hazard warning lamps
1
06
ESC
system
1
07
Active
City Brake
1
10
Seat
belts
1
15
Airbags
1
18
Child
seats
1
23
Deactivating the passenger's front airbag 126
ISOFIX
child
seats
1
32
Child
lock
1
37
Safety
In
t
he
e
vent
o
f
a
b
reakdown
Fuel tank 138
Snow chains
1
40
Electrical
energy economy mode
1
41
Accessories
1
42
Changing
a wiper blade
1
44
Fitting
roof bars
1
44
Bonnet
14
6
Petrol
engines
1
47
Checking
levels
1
48
C h e c ks
1
51
Practical information Technical da ta
7-inch touch screen tablet 185
Audio system
2
35
Audio and telematics
Alphabetical
in
dex
Temporary puncture repair kit 1 53
Spare wheel
1
58
Changing
a bulb
1
63
Changing
a fuse
1
68
12
V battery
1
77
Towing
the vehicle
1
80Engines
1
81
Weights
1
82
Dimensions
1
83
Identification
ma
rkings
1
84
Contents
Page 12 of 269
10
C1_en_Chap00c_eco-conduite_ed01-2016
Limit the causes of excess consumption
Spread loads throughout the vehicle; place the heaviest items in the bottom of the boot, as close as possible to the rear seats.
Limit
the loads carried in the vehicle and reduce wind resistance
(roof
bars, roof rack...). Use a roof box in preference.
Remove
roof bars and roof racks after use.
At
the end of winter, remove snow tyres and refit your summer tyres.
Observe the recommendations on
maintenance
Check the tyre pressures regularly, when cold, referring to the label in the door aperture, driver's side.
Carry
out this check in particular:
-
b
efore a long journey,
-
a
t each change of season,
-
a
fter a long period out of use.
Don't
forget the spare wheel and the tyres on any trailer or caravan.
Have
your vehicle serviced regularly (engine oil, oil filter, air filter,
p
assenger compartment filter...) and observe the schedule of
o
perations recommended in the maintenance and warranty guide.
When
refuelling, do not continue after the third cut-off of the nozzle to
a
void any over flow.
At
the wheel of your new vehicle, it is only after the first 1 800 miles
(
3 000 kilometres) that you will see the fuel consumption settle down to
a
consistent average.
Eco-driving
Page 70 of 269
68
C1_en_Chap03_ergonomie-confort_ed01-2016
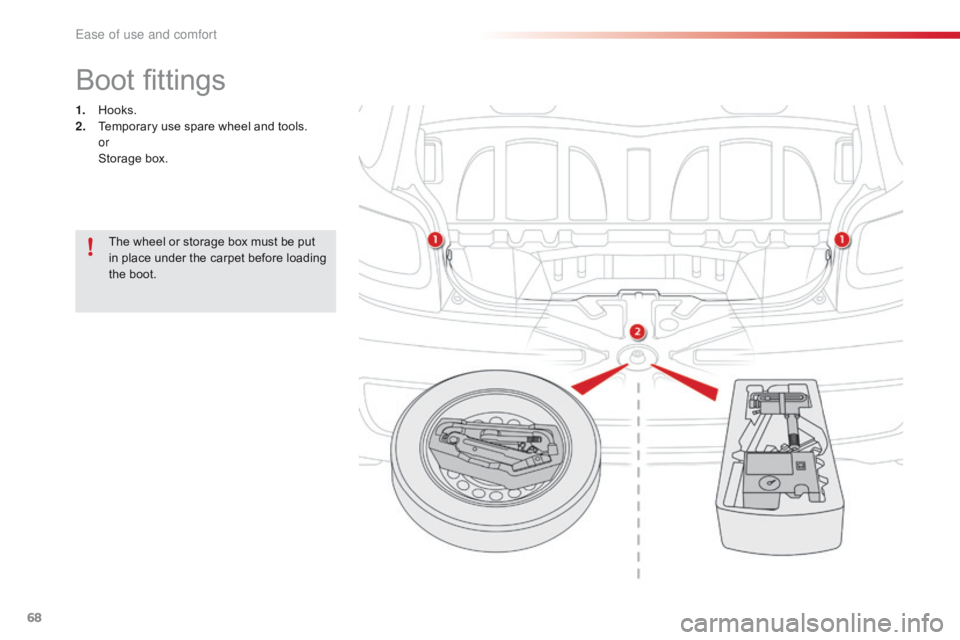
Boot fittings
1. Hooks.
2. Temporary use spare wheel and tools.
or
St
orage
b
ox.
The
wheel or storage box must be put
i
n place under the carpet before loading
t
he boot.
Ease of use and comfort
Page 98 of 269
96
C1_en_Chap04_conduite_ed01-2016
Under-inflation alert
This is given by fixed illumination of this warning lamp, accompanied by
a
n audible signal.
F
R
educe speed immediately, avoid
e
xcessive steering movements and sudden
b
raking.
F
S
top the vehicle as soon as it is safe to
do so.
The
loss of pressure detected does not
a
lways cause visible bulging of the tyre.
D
o
not satisfy yourself with just a visual
c
heck.
F
I
f
you
have a compressor (such as the one
i
n
the
temporary puncture repair kit) check
t
he
pressures of the four tyres when cold.
I
f
it
is
not possible to carry out this check
s
traight away, drive carefully at reduced
s
peed.
or
F
I
n the event of a puncture, use the
temporary
puncture repair kit or the spare
w
heel (depending on equipment).
The
alert is maintained until the system
i
s
r
einitialised.
Reinitialisation
Before reinitialising the system, ensure t hat the pressures of the four tyres are
correct
for the use of the vehicle and in
l
ine with the recommendations on the
t
yre pressure label.
The
under-inflation alert can only be
r
elied on if the reinitialisation of the
s
ystem has done with the pressures in
t
he four tyres correctly adjusted.
The
under-inflation detection system
d
oes not give a warning if a pressure is
i
ncorrect at the time of reinitialisation.
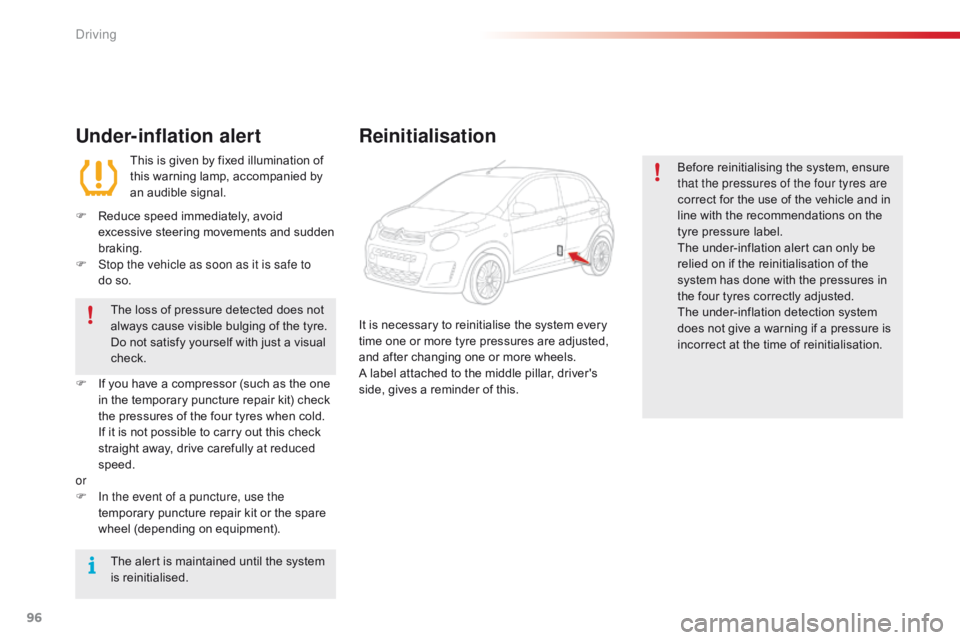
It
is
necessary
to
reinitialise
the
system
every
t
ime
one
or
more
tyre
pressures
are
adjusted,
a
nd
after
changing
one
or
more
wheels.
A
label
attached
to
the
middle
pillar,
driver's
s
ide,
gives
a
reminder
of
this.
Driving
Page 142 of 269
140
C1_en_Chap07_info-pratiques_ed01-2016
Snow chains
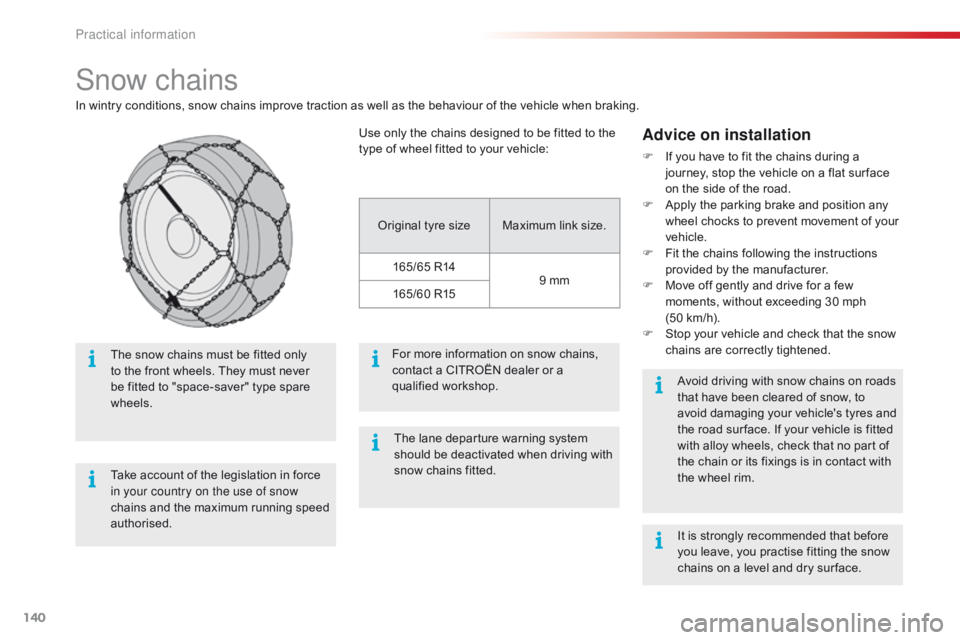
In wintry conditions, snow chains improve traction as well as the behaviour of the vehicle when braking.
Advice on installation
F If you have to fit the chains during a j
ourney, stop the vehicle on a flat sur face
o
n the side of the road.
F
A
pply the parking brake and position any
w
heel chocks to prevent movement of your
v
ehicle.
F
F
it the chains following the instructions
p
rovided by the manufacturer.
F
M
ove off gently and drive for a few
m
oments, without exceeding 30 mph
(50
km/h).
F
S
top your vehicle and check that the snow
c
hains are correctly tightened.
Take
account
of
the
legislation
in
force
i
n your country on the use of snow
chains
and
the
maximum
running
speed
a
uthorised.
The
snow
chains
must
be
fitted
only
t
o
the
front
wheels.
They
must
never
b
e
fitted
to
"space-saver"
type
spare
w
heels. Avoid
driving with snow chains on roads
t
hat have been cleared of snow, to
a
void damaging your vehicle's tyres and
t
he road sur face. If your vehicle is fitted
w
ith alloy wheels, check that no part of
t
he chain or its fixings is in contact with
t
he wheel rim.
Use
only
the
chains
designed
to
be
fitted
to
the
t
ype
of
wheel
fitted
to
your
vehicle:
Original
tyre
size Maximum
link
size.
165/65
R14 9
mm
165/60
R15
For
more
information
on
snow
chains,
c
ontact
a
CITROËN
dealer
or
a
q
ualified
w
orkshop. It
is strongly recommended that before
y
ou leave, you practise fitting the snow
c
hains on a level and dry sur face.
The
lane
departure
warning
system
s
hould
be
deactivated
when
driving
with
s
now
chains
fitted.
Practical information
Page 160 of 269
158
C1_en_Chap08_en-cas-pannes_ed01-2016
Spare wheel
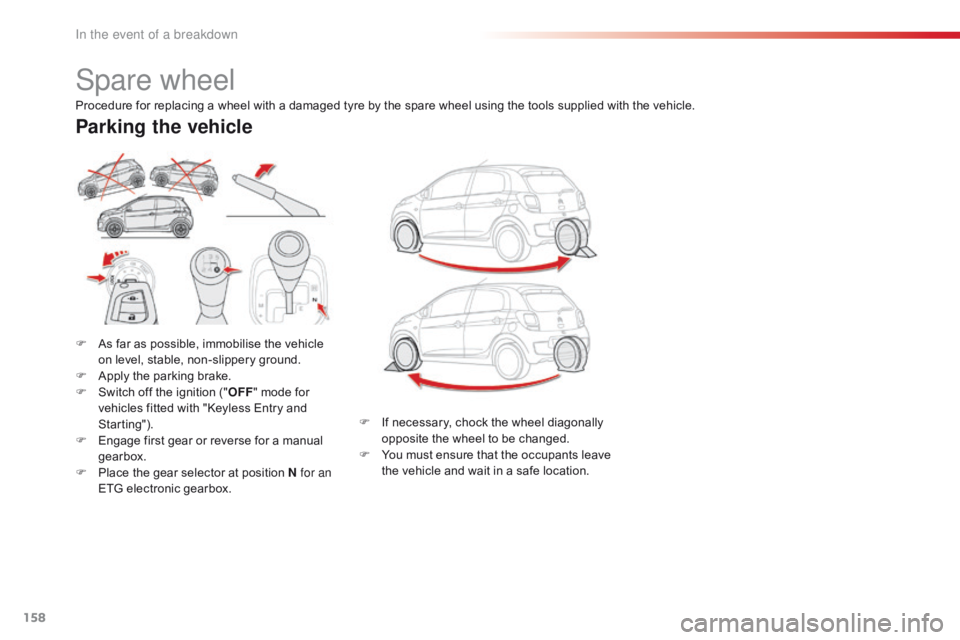
F As far as possible, immobilise the vehicle o
n level, stable, non-slippery ground.
F
A
pply the parking brake.
F
S
witch off the ignition ("OFF "
mode for
v
ehicles fitted with "Keyless Entry and
S
tarting").
F
E
ngage first gear or reverse for a manual
g
earbox.
F
P
lace the gear selector at position N for an
ETG
electronic gearbox.
Parking the vehicle
Procedure for replacing a wheel with a damaged tyre by the spare wheel using the tools supplied with the vehicle.
F
I
f necessary, chock the wheel diagonally
o
pposite the wheel to be changed.
F
Y
ou must ensure that the occupants leave
t
he vehicle and wait in a safe location.
In the event of a breakdown
Page 161 of 269
159
C1_en_Chap08_en-cas-pannes_ed01-2016
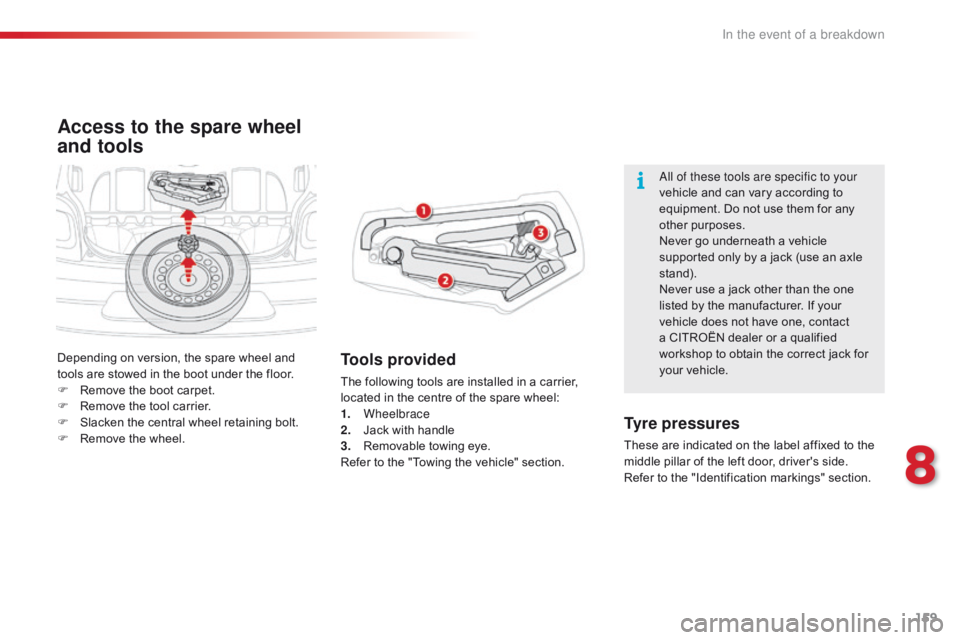
Access to the spare wheel
and tools
Tools provided
The following tools are installed in a carrier, located in the centre of the spare wheel:
1.
Wheelbrace
2.
J
ack with handle
3.
R
emovable towing eye.
Refer
to the "Towing the vehicle" section.
Tyre pressures
These are indicated on the label affixed to the middle pillar of the left door, driver's side.
Refer
to the "Identification markings" section.
All of these tools are specific to your
vehicle
and can vary according to
e
quipment. Do not use them for any
o
ther
p
urposes.
Never go underneath a vehicle
s
upported only by a jack (use an axle
s
tand).
Never use a jack other than the one
l
isted by the manufacturer. If your
v
ehicle does not have one, contact
a
CITROËN dealer or a qualified
w
orkshop to obtain the correct jack for
y
our vehicle.
Depending
on
version,
the
spare
wheel
and
t
ools
are
stowed
in
the
boot
under
the
floor.
F
R
emove
the
boot
carpet.
F
R
emove
the
tool
carrier.
F
S
lacken
the
central
wheel
retaining
bolt.
F
R
emove
the
wheel.
8
In the event of a breakdown
Page 163 of 269

161
C1_en_Chap08_en-cas-pannes_ed01-2016
Fitting the "space-saver"
type spare wheel
If your vehicle is fitted with alloy wheels, it is normal to notice when tightening
t
he wheel bolts that the washers do not
c
ome into contact with the "space-
saver"
type spare wheel. The wheel is
s
ecured by the conical contact sur face
o
n each bolt.
Fitting a wheel
F Remove the bolts and put then in a clean p
lace.
F
R
emove the wheel.
F
Ra
ise the vehicle until there is sufficient
space
between
the
wheel
and
the
ground,
s
o
that
the
(not
punctured)
spare
wheel
can
b
e
easily
fitted.
8
In the event of a breakdown
Page 164 of 269
162
C1_en_Chap08_en-cas-pannes_ed01-2016
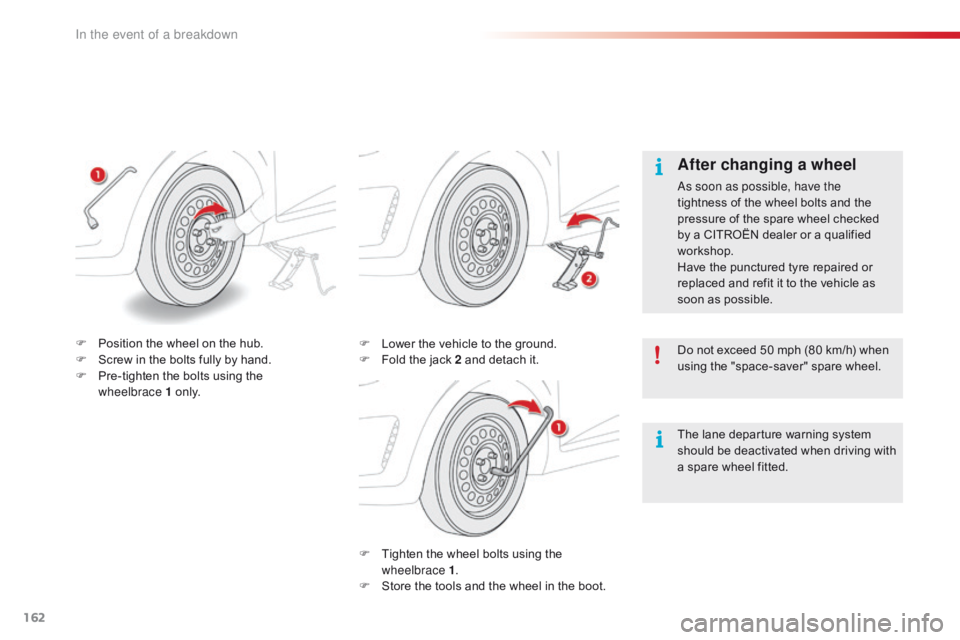
F Tighten the wheel bolts using the w
heelbrace 1 .
F
S
tore the tools and the wheel in the boot.
F
L
ower the vehicle to the ground.
F
F
old the jack 2 and detach it.
After changing a wheel
As soon as possible, have the
tightness
of the wheel bolts and the
p
ressure of the spare wheel checked
b
y a CITROËN dealer or a qualified
w
orkshop.
Have
the punctured tyre repaired or
r
eplaced and refit it to the vehicle as
s
oon as possible.
Do
not exceed 50 mph (80 km/h) when
u
sing the "space-saver" spare wheel.
F
P
osition
the
wheel
on
the
hub.
F
S
crew
in
the
bolts
fully
by
hand.
F
P
re-tighten
the
bolts
using
the
w
heelbrace
1
o
n l y. The
lane departure warning system
s
hould be deactivated when driving with
a
spare wheel fitted.
In the event of a breakdown
Page 260 of 269
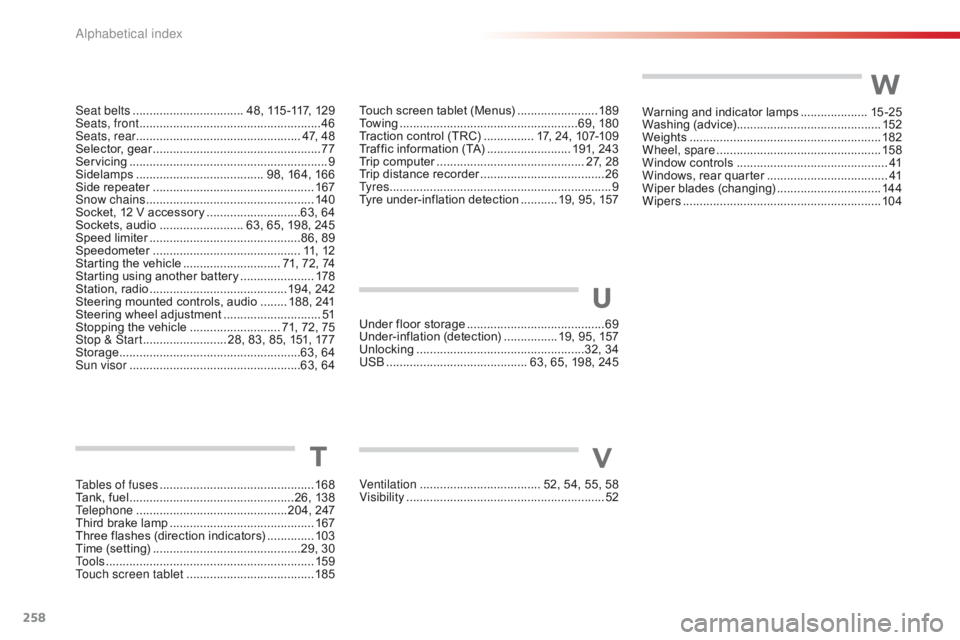
258
C1_en_Chap11_index-alpha_ed01-2016
T
Tables of fuses ..............................................16 8
Tank, fuel ............................... ..................26, 138
Telephone
.............................................2
04, 247
Third
brake lamp
........................................... 16
7
Three
flashes (direction indicators)
..............10
3
Time
(setting)
..............................
..............29, 30
To o l s
................
.............................................. 159
Touch screen tablet
...................................... 18
5
Seat belts
................................. 4
8, 115 -117, 129
Seats, front
...............................
.......................
46
Seats, rear
................................................. 4
7, 48
Selector,
ge
ar
..................................................
77
S
ervicing
...............................
............................ 9
Sidelamps
...................................... 9
8, 164, 166
Side
r
epeater
..............................
..................
167
Snow chains
.................................................. 14
0
Socket, 12 V accessory
............................6
3, 64
Sockets, audio
......................... 6
3, 65, 198, 245
Speed
l
imiter
...............................
..............86, 89
Speedometer
..............................
..............
11,
12
S
tarting the vehicle
............................. 7
1, 72, 74
Starting using another battery
......................
17
8
Station,
ra
dio
.........................................1
94, 242
Steering mounted controls, audio
........ 1
88, 241
Steering wheel adjustment
.............................
51
S
topping the vehicle
........................... 7
1, 72, 75
Stop & Start
......................... 2
8, 83, 85, 151, 177
Storage
................
......................................63, 64
Sun visor
...................................................6
3, 64Touch screen tablet (Menus)
........................
18
9
To w i n g
.....................................................6
9, 180
Traction control (TRC)
............... 1
7, 24, 107-109
Traffic information (TA)
......................... 1
91, 243
Trip computer
............................................ 2
7, 28
Trip distance recorder
.....................................
26
T
y r e s
..............................................................
.... 9
Tyre under-inflation detection
........... 1
9, 95, 157
Under floor storage
.........................................
69
U
nder-inflation
(
detection)
................ 1
9, 95, 157
Unlocking
..............................
....................32, 34
USB
........
.................................. 63, 65, 198, 245
U
V
W
Ventilation ..............................
...... 52, 54, 55, 58
Visibility ............................... ............................52Warning
and indicator lamps
....................
15
-25
Washing
(
advice)
........................................... 152
Weights
...............
..........................................
182
Wheel, spare
................................................. 15
8
Window controls
.............................................
41
W
indows, rear quarter
....................................
41
W
iper
b
lades
(
changing)
...............................
14
4
Wipers
........................................................... 10
4
Alphabetical index