Citroen C1 RHD 2015 1.G Owners Manual
Manufacturer: CITROEN, Model Year: 2015, Model line: C1 RHD, Model: Citroen C1 RHD 2015 1.GPages: 260, PDF Size: 6.35 MB
Page 91 of 260

89
Switching off
F Press the end of the control stalk The display of information related to the
speed limiter disappears.
Operating fault
Illumination of this warning lamp in
the instrument panel indicates a fault
with the speed limiter.
The use of mats not approved by
CITROËN may inter fere with the
operation of the speed limiter.
To avoid any risk of jamming of the
pedals:
-
e
nsure that the mat is secured
c o r r e c t l y,
-
d
o not fit one mat on top of another.
Temporarily exceeding the
programmed speed
F Press f irmly on the accelerator pedal,
going beyond the point of resistance ,
to
exceed the programmed speed limit.
The speed limiter is deactivated temporarily
and the displayed programmed speed flashes. Have it checked by a CITROËN dealer or a
qualified workshop.
An audible signal accompanies the
flashing of the programmed speed
when exceeding the speed is not due to
an action by the driver (steep hill...).
As soon as the vehicle's speed returns to the
programmed value, the limiter operates again:
the display of the programmed speed becomes
steady again.
5
Driving
Page 92 of 260

90
Reversing camera
The reversing camera is activated automatically when reverse gear is engaged.The reversing camera cannot in any
circumstances replace the need for the
vigilance on the part of the driver. The image is provided in the touch screen
only, with an indication of the limit of the rear
bumpers (red line) and the general direction of
the vehicle (blue lines).
Clean the reversing camera regularly
using a soft, dry cloth.
The field of vision covered by the camera is
limited: objects in the immediate proximity of
the bumper or located below it are not visible.
The camera's wide-angle lens deforms the
image presented in the screen: the distances
visible in the screen may be different from
the true distances. This deformation varies
according to the loading of the vehicle and the
slope of the road.
High pressure jet washing
When washing your vehicle, do not
direct the lance within 30 cm of the
camera lens. Never reverse the vehicle looking only
at the screen.
Driving
Page 93 of 260

91
Lane departure warning system
System which detects the unintended crossing of longitudinal traffic lane markings on the ground, using a camera that recognises both solid and
broken lines.
To improve your safety, the camera analyses the image and then triggers a warning if the vehicle wanders over a lane marking (speed higher than
30 mph (50 km/h)).
This system is particularly suitable for motor ways and dual carriageways.
The lane departure warning system
cannot in any circumstances replace
the need for vigilance on the part of the
driver.
It is necessary to observe driving
regulations and take a break every
two
hours.
Activation
F Press this button, located on the steering wheel.
Detection
You are alerted by an audible signal and the
display of a warning lamp in the instrument
panel.
No alert is given if the direction
indicators are on and for around
20
seconds after they stop flashing.
5
Driving
Page 94 of 260

92
Deactivation
Operating fault
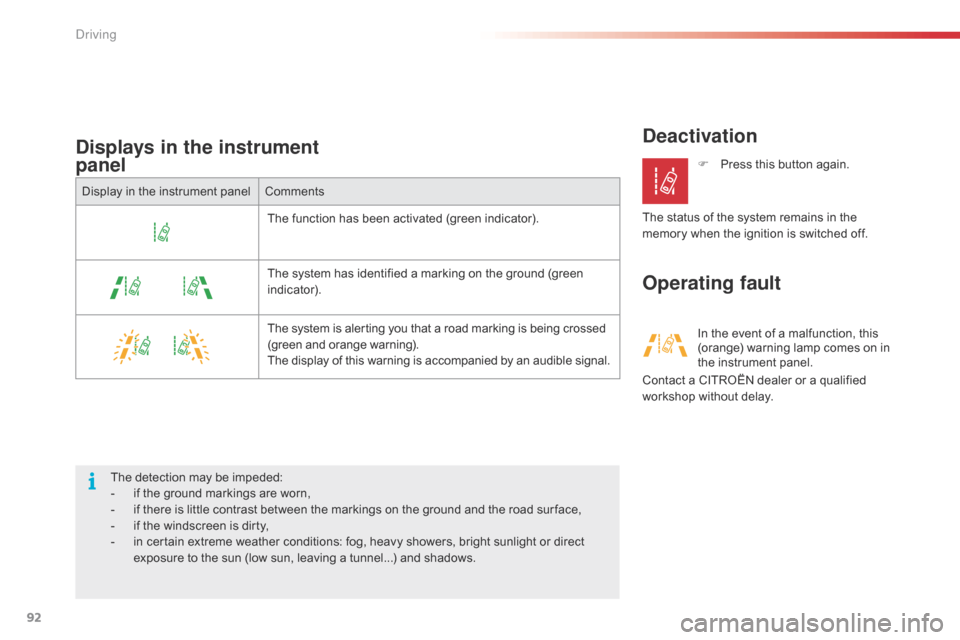
Displays in the instrument
panel
Display in the instrument panel
Comments
The function has been activated (green indicator).
The system has identified a marking on the ground (green
indicator).
The system is alerting you that a road marking is being crossed
(green and orange warning).
The display of this warning is accompanied by an audible signal.
The detection may be impeded:
-
i
f the ground markings are worn,
-
i
f there is little contrast between the markings on the ground and the road sur face,
-
i
f the windscreen is dirty,
-
i
n certain extreme weather conditions: fog, heavy showers, bright sunlight or direct
exposure to the sun (low sun, leaving a tunnel...) and shadows. F
P
ress this button again.
The status of the system remains in the
memory when the ignition is switched off.
In the event of a malfunction, this
(orange) warning lamp comes on in
the instrument panel.
Contact a CITROËN dealer or a qualified
workshop without delay.
Driving
Page 95 of 260

93
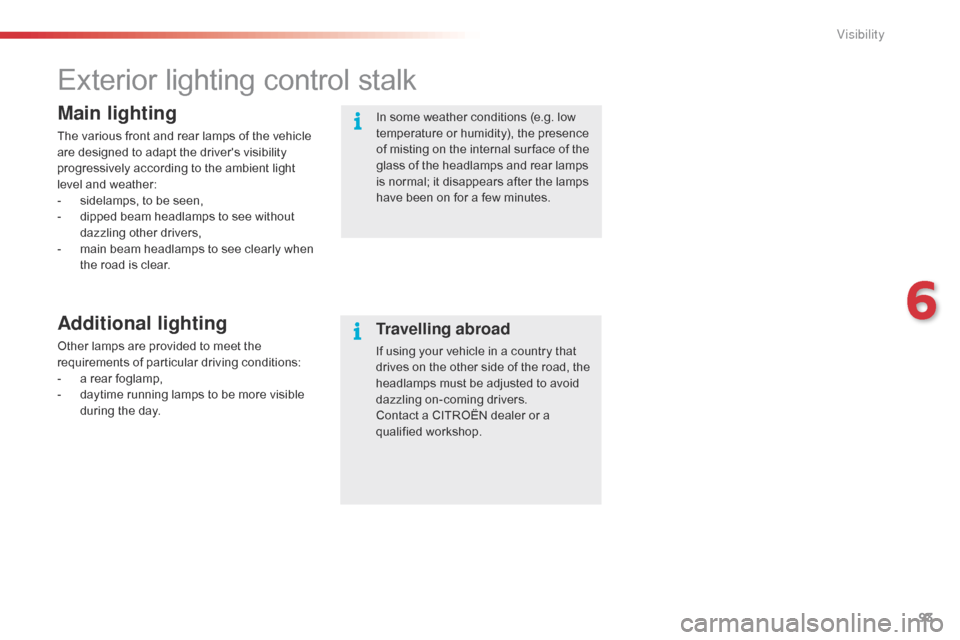
Exterior lighting control stalk
Main lighting
The various front and rear lamps of the vehicle
are designed to adapt the driver's visibility
progressively according to the ambient light
level and weather:
-
s
idelamps, to be seen,
-
d
ipped beam headlamps to see without
dazzling other drivers,
-
m
ain beam headlamps to see clearly when
the road is clear.
Additional lighting
Other lamps are provided to meet the
requirements of particular driving conditions:
-
a r
ear foglamp,
-
d
aytime running lamps to be more visible
during the day. In some weather conditions (e.g. low
temperature or humidity), the presence
of misting on the internal sur face of the
glass of the headlamps and rear lamps
is normal; it disappears after the lamps
have been on for a few minutes.Travelling abroad
If using your vehicle in a country that
drives on the other side of the road, the
headlamps must be adjusted to avoid
dazzling on-coming drivers.
Contact a CITROËN dealer or a
qualified workshop.
6
Visibility
Page 96 of 260

94
Model without AUTO lighting
Model with AUTO lightingSelection ring for main lighting
mode
Turn the ring to position the symbol required
facing the mark.
Lighting off / Daytime running lamps.
Sidelamps only.
Dipped or main beam headlamps.
Automatic illumination of
headlamps.
Dipping the headlamps
With dipped beam on, push the control stalk
away from you to change to main beam. Pull
the stalk toward you change back to dipped
beam.
In the lighting off and sidelamps modes, the
driver can switch on the main beam headlamps
temporarily ("headlamp flash") by maintaining a
pull on the stalk.
Displays
Illumination of the corresponding indicator lamp
in the instrument panel confirms the lighting
switched on.
Visibility
Page 97 of 260

95
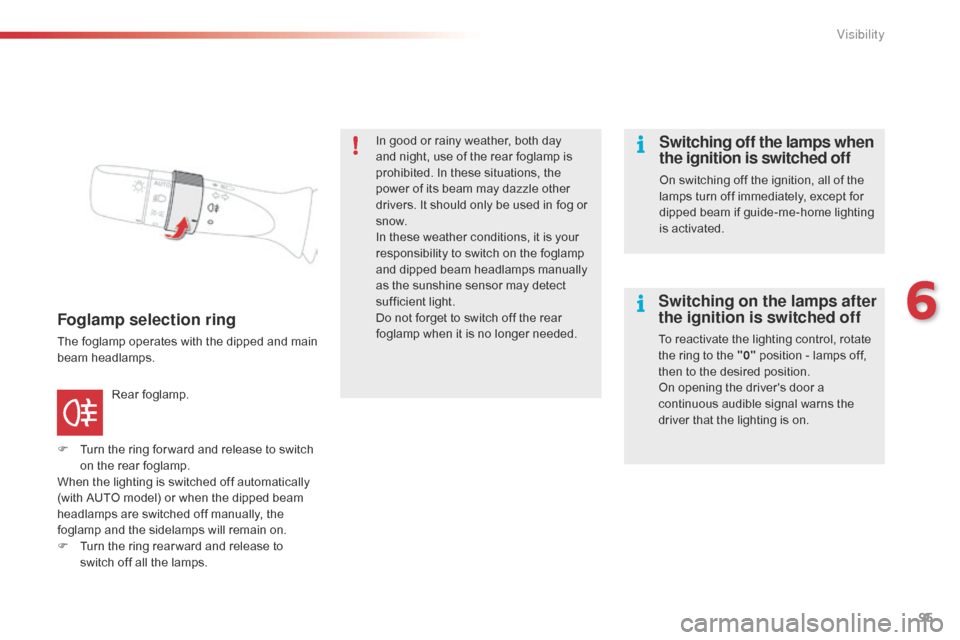
Foglamp selection ring
The foglamp operates with the dipped and main
beam headlamps.
F
T
urn the ring for ward and release to switch
on the rear foglamp.
When the lighting is switched off automatically
(with AUTO model) or when the dipped beam
headlamps are switched off manually, the
foglamp and the sidelamps will remain on.
F
T
urn the ring rear ward and release to
switch off all the lamps. Rear foglamp. In good or rainy weather, both day
and night, use of the rear foglamp is
prohibited. In these situations, the
power of its beam may dazzle other
drivers. It should only be used in fog or
snow.
In these weather conditions, it is your
responsibility to switch on the foglamp
and dipped beam headlamps manually
as the sunshine sensor may detect
sufficient light.
Do not forget to switch off the rear
foglamp when it is no longer needed.
Switching off the lamps when
the ignition is switched off
On switching off the ignition, all of the
lamps turn off immediately, except for
dipped beam if guide-me-home lighting
is activated.
Switching on the lamps after
the ignition is switched off
To reactivate the lighting control, rotate
the ring to the "0"
position - lamps off,
then to the desired position.
On opening the driver's door a
continuous audible signal warns the
driver that the lighting is on.
6
Visibility
Page 98 of 260

96
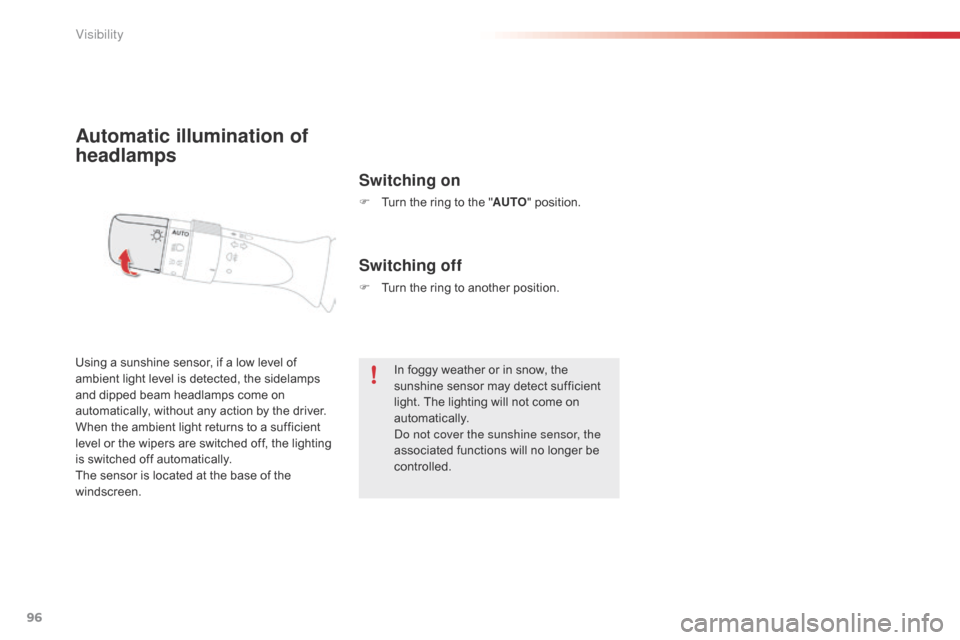
Automatic illumination of
headlamps
Switching on
F Turn the ring to the "AUTO" position.
Using a sunshine sensor, if a low level of
ambient light level is detected, the sidelamps
and dipped beam headlamps come on
automatically, without any action by the driver.
When the ambient light returns to a sufficient
level or the wipers are switched off, the lighting
is switched off automatically.
The sensor is located at the base of the
windscreen.
Switching off
F Turn the ring to another position. In foggy weather or in snow, the
sunshine sensor may detect sufficient
light. The lighting will not come on
automatically.
Do not cover the sunshine sensor, the
associated functions will no longer be
controlled.
Visibility
Page 99 of 260

97
Manual guide-me-home
lighting*
Temporarily keeping the dipped beam
headlamps on after the vehicle's ignition has
been switched off makes the exit of the vehicle's
occupants easier when the light is poor.
Switching on
F Place the lighting control stalk in the "lighting off " or "AUTO" position.
F
W
ith the ignition off, "flash" the headlamps
using the lighting control stalk.
The lighting comes on for about 30 seconds.
Switching off
The manual guide-me-home lighting switches
off immediately if you.
-
f
lash the headlamps again,
-
p
lace the lighting control stalk in another
position,
-
s
witch the ignition on.
* Depending on version.
6
Visibility
Page 100 of 260

98
Headlamp
adjustment
To avoid causing a nuisance to other road
users, the height of the headlamps should be
adjusted according to the load in the vehicle.
0.
D
river only.
0.5.
D
river + front passenger.
1.5.
4 p
eople.
3.
4 p
eople + maximum authorised load.
3.5.
D
river + maximum authorised load.
The initial setting is position "0" . In this position, it comes on
when one of the doors is
opened.
The courtesy lamp is permanently off.
The courtesy lamp is permanently on.
Courtesy lamp Boot lamp*
This comes on automatically when the boot is
opened and goes off automatically when the
boot is closed.
If left in the "permanently on" position,
the courtesy lamp will switch off about
20 minutes after the last door is closed. * Depending on version.
Visibility