oil pressure Citroen C1 RHD 2016 1.G Owner's Manual
[x] Cancel search | Manufacturer: CITROEN, Model Year: 2016, Model line: C1 RHD, Model: Citroen C1 RHD 2016 1.GPages: 268, PDF Size: 7.09 MB
Page 12 of 268
10
Limit the causes of excess consumption
Spread loads throughout the vehicle; place the heaviest items in the bottom of the boot, as close as possible to the rear seats.
Limit
the loads carried in the vehicle and reduce wind resistance
(roof
bars, roof rack...). Use a roof box in preference.
Remove
roof bars and roof racks after use.
At
the end of winter, remove snow tyres and refit your summer tyres.
Observe the recommendations on
maintenance
Check the tyre pressures regularly, when cold, referring to the label in the door aperture, driver's side.
Carry
out this check in particular:
-
b
efore a long journey,
-
a
t each change of season,
-
a
fter a long period out of use.
Don't
forget the spare wheel and the tyres on any trailer or caravan.
Have
your vehicle serviced regularly (engine oil, oil filter, air filter,
p
assenger compartment filter...) and observe the schedule of
o
perations recommended in the maintenance and warranty guide.
When
refuelling, do not continue after the third cut-off of the nozzle to
a
void any over flow.
At
the wheel of your new vehicle, it is only after the first 1 800 miles
(
3 000 kilometres) that you will see the fuel consumption settle down to
a
consistent average.
Eco-driving
Page 18 of 268
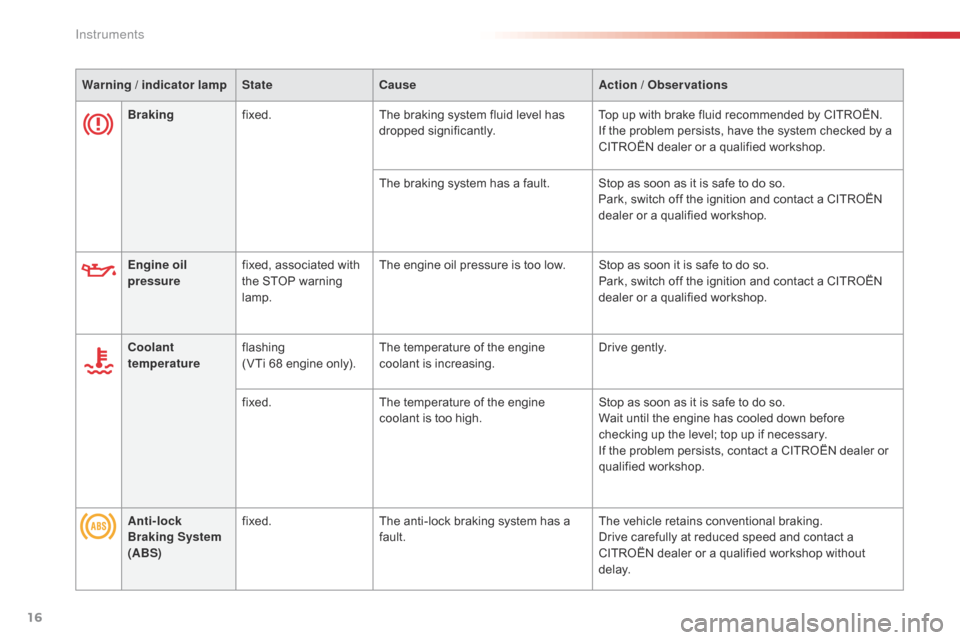
16
Brakingfixed. The braking system fluid level has d
ropped s ignificantly.Top
up with brake fluid recommended by CITROËN.
If the problem persists, have the system checked by a
C
ITROËN dealer or a qualified workshop.
The
braking system has a fault. Stop as soon as it is safe to do so.
Park,
switch off the ignition and contact a CITROËN
d
ealer or a qualified workshop.
Warning
/ indicator lamp
State Cause Action
/ Observations
Engine oil
pressure fixed,
associated with
t
he STOP warning
lam
p.The
engine oil pressure is too low. Stop as soon it is safe to do so.
Park,
switch off the ignition and contact a CITROËN
d
ealer or a qualified workshop.
Coolant
temperature flashing
(
VTi 68 engine only).The
temperature of the engine
c
oolant
i
s
inc
reasing.Drive
gently.
fixed. The
temperature of the engine
c
oolant is too high.Stop
as soon as it is safe to do so.
Wait
until the engine has cooled down before
c
hecking up the level; top up if necessary.
If
the problem persists, contact a CITROËN dealer or
q
ualified
w
orkshop.
Anti-lock
Braking System
(ABS) fixed.
The
anti-lock braking system has a
f
ault.The
vehicle retains conventional braking.
Drive
carefully at reduced speed and contact a
C
ITROËN dealer or a qualified workshop without
d
e l ay.
Instruments
Page 151 of 268
149
Topping-up the engine oil
Oil grade
The oil must be the correct grade for your
e
ngine and conform to the manufacturer's
r
ecommendations.
Refer
to the under-bonnet view for the location
o
f the oil filler cap on your vehicle.
F
U
nscrew the filler cap for access to the
filler
orifice.
F
P
our in the oil in small quantities, avoiding
s
pills onto the engine (risk of fire).
F
W
ait a few minutes before checking the
l
evel again using the dipstick.
F
T
op-up again if necessary.
F
A
fter checking and topping up, carefully
r
efit the oil filler cap and the dipstick to its
h
ousing.
Engine oil change
Refer to the manufacturer's service schedule for details of the interval for this operation.
In
order to maintain the reliability of the engine
a
nd emissions control system, never use
a
dditives in the engine oil.
Coolant level
The coolant level must be:
- b etween the "FULL " or "F"
and
"LO
W" or " L"
marks for VTi 68
a
nd VTi 68 S&S engines,
In
addition, as the cooling system is pressurised,
w
ait
at
least one hour after switching off the
e
ngine
before carrying out any work.
To
avoid
any risk of scalding, unscrew the cap
b
y
two
turns to allow the pressure to drop. When
t
he
pressure has dropped, remove the cap and
t
op
up
the
level.
Fluid specification
The coolant must conform to the ma nufacturer's r ecommendations.
The cooling fan may star t after switching
off the engine: take care with ar ticles and
clothing that might be caught by the fan
blades. -
b
etween the "
MIN " and "
MAX " marks for
t
he PureTech 82 engine.
When the engine is warm, the temperature of
t
he coolant is regulated by the fan.
7
Practical information
Page 154 of 268
152
ETG gearbox
The ETG gearbox does not require any maintenance (no oil change).
Refer
to the manufacturer's service
s
chedule for the checking interval for
t
his
c
omponent.
Brake
wear depends on the style
o
f driving, particularly in the case
o
f vehicles used in town, over short
d
istances. It may be necessary to
Brake pads
For information on checking brake disc wear, contact a CITROËN dealer
o
r a qualified workshop.
Brake disc wearOnly use products recommended by CITROËN or products of equivalent
q
uality
an
d
sp
ecification.
In
order to optimise the operation of
u
nits as important as those in the
b
raking system, CITROËN selects and
o
ffers very specific products.
After
washing the vehicle, dampness,
o
r in wintry conditions, ice can form
o
n the brake discs and pads: braking
e
fficiency may be reduced. Make light
b
rake applications to dry and defrost
t
he brakes.
Parking brake
If excessive travel or a loss of effectiveness of this system is
n
oticed, the parking brake must be
c
hecked,
e
ven
b
etween
t
wo services.
Checking
this system must be done by a
C
ITROËN
dealer or a qualified workshop.
have
the
condition
of
the
brakes
checked,
even
b
etween
v
ehicle
s
ervices.
Unless
there
is
a
leak
in
the
circuit,
a
drop
in
t
he
brake
fluid
level
indicates
that
the
brake
p
ads
are
worn. To
avoid damaging the electrical units,
n
ever use a high pressure jet wash in
t
he engine compartment.
Practical information
Page 157 of 268
155
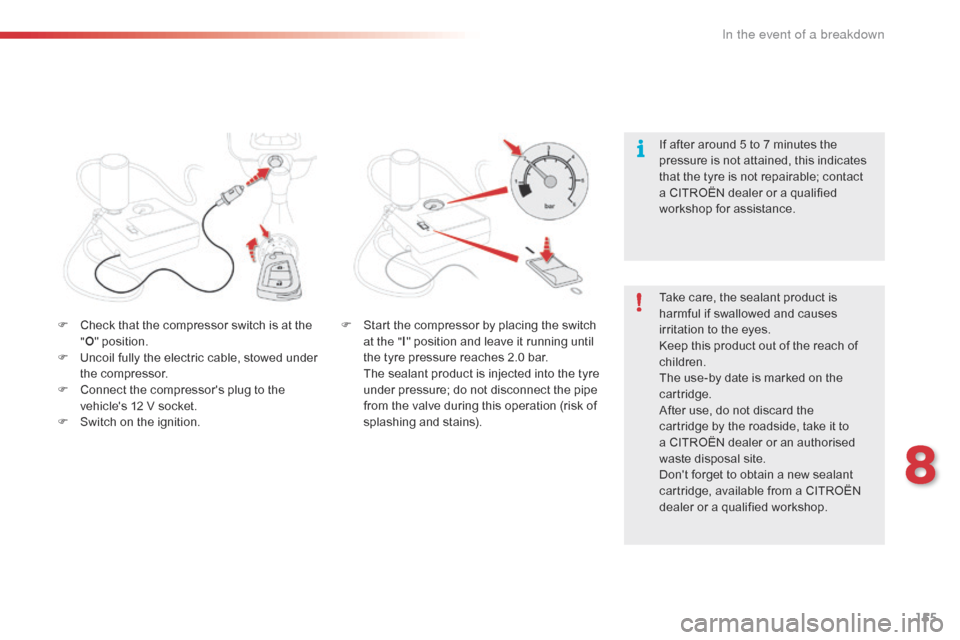
F Check that the compressor switch is at the "O "
position.
F
U
ncoil fully the electric cable, stowed under
t
he compressor.
F
C
onnect the compressor's plug to the
v
ehicle's 12 V socket.
F
S
witch on the ignition. Take
care, the sealant product is h
armful if swallowed and causes i
rritation to the eyes.
Keep
this product out of the reach of
c
hildren.
The
use-by date is marked on the
c
artridge.
After
use, do not discard the
c
artridge by the roadside, take it to
a
CITROËN dealer or an authorised
w
aste disposal site.
Don't
forget to obtain a new sealant
c
artridge, available from a CITROËN
d
ealer or a qualified workshop.
If
after around 5 to 7 minutes the
p
ressure is not attained, this indicates
t
hat the tyre is not repairable; contact
a
CITROËN dealer or a qualified
w
orkshop for assistance.
F S tart the compressor by placing the switch a
t the "I"
position and leave it running until
t
he tyre pressure reaches 2.0 bar.
T
he sealant product is injected into the tyre
u
nder pressure; do not disconnect the pipe
f
rom the valve during this operation (risk of
sp
lashing
an
d
s
tains).
8
In the event of a breakdown
Page 158 of 268
156
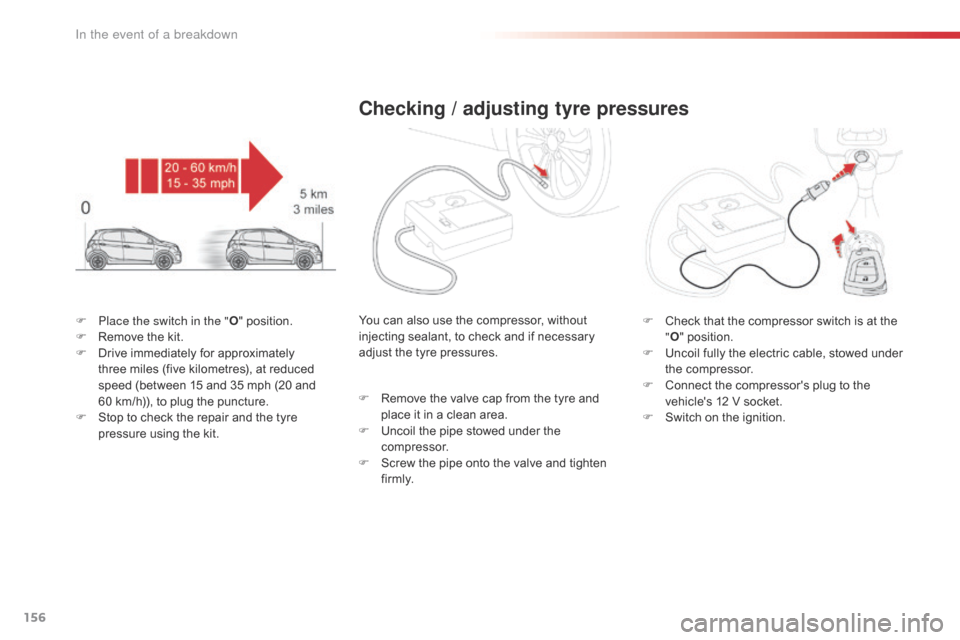
F Place the switch in the "O" position.
F R emove the kit.
F
D
rive immediately for approximately
t
hree miles (five kilometres), at reduced
s
peed (between 15 and 35 mph (20 and
6
0 km/h)), to plug the puncture.
F
S
top to check the repair and the tyre
p
ressure using the kit.
Checking / adjusting tyre pressures
F Check that the compressor switch is at the "O "
position.
F
U
ncoil fully the electric cable, stowed under
t
he compressor.
F
C
onnect the compressor's plug to the
v
ehicle's 12 V socket.
F
S
witch on the ignition.
You
can
also
use
the
compressor,
without
i
njecting
sealant,
to
check
and
if
necessary
a
djust
the
tyre
pressures.
F
R
emove
the
valve
cap
from
the
tyre
and
p
lace
it
in
a
clean
area.
F
U
ncoil
the
pipe
stowed
under
the
c
ompressor.
F
S
crew
the
pipe
onto
the
valve
and
tighten
f
i r m l y.
In the event of a breakdown