power steering Citroen C1 RHD 2016 1.G Owner's Manual
[x] Cancel search | Manufacturer: CITROEN, Model Year: 2016, Model line: C1 RHD, Model: Citroen C1 RHD 2016 1.GPages: 268, PDF Size: 7.09 MB
Page 20 of 268
18
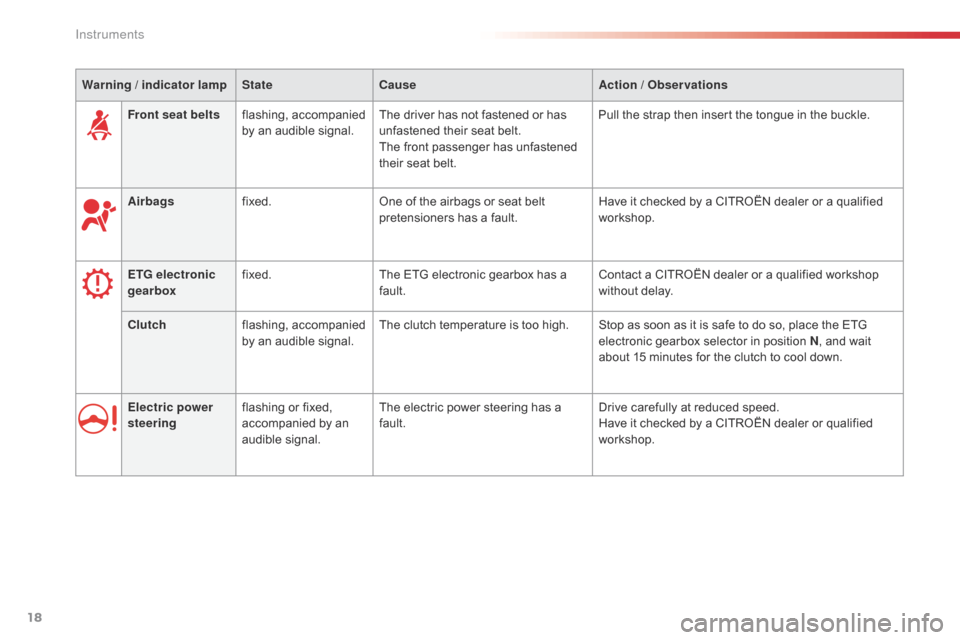
Front seat beltsflashing, a ccompanied b
y  an  audible  signal.The
 driver  has  not  fastened  or  has  u
nfastened  their  seat  belt.
The
 front  passenger  has  unfastened Â
t
heir  seat  belt.Pull
 the  strap  then  insert  the  tongue  in  the  buckle.
Warning
/ indicator lamp
State Cause Action
/ Observations
Electric power
steering flashing
 or  fixed, Â
a
ccompanied  by  an Â
a
udible
 s
ignal.The
 electric  power  steering  has  a Â
f
ault.Drive
 carefully  at  reduced  speed.
Have
 it  checked  by  a  CITROĂ‹N  dealer  or  qualified Â
w
orkshop.
Airbags
fixed. One
 of  the  airbags  or  seat  belt Â
p
retensioners  has  a  fault.Have
 it  checked  by  a  CITROĂ‹N  dealer  or  a  qualified Â
w
orkshop.
ETG electronic
gearbox fixed.
The
 ETG  electronic  gearbox  has  a Â
f
ault.Contact
 a  CITROĂ‹N  dealer  or  a  qualified  workshop Â
w
ithout  delay.
Clutch flashing,
 a
ccompanied
 b
y  an  audible  signal.The
 clutch  temperature  is  too  high. Stop  as  soon  as  it  is  safe  to  do  so,  place  the  ETG Â
e
lectronic  gearbox  selector  in  position  N,
 and  wait Â
a
bout  15  minutes  for  the  clutch  to  cool  down.
Instruments
Page 53 of 268
51
Steering wheel adjustment
(with  power  steering)
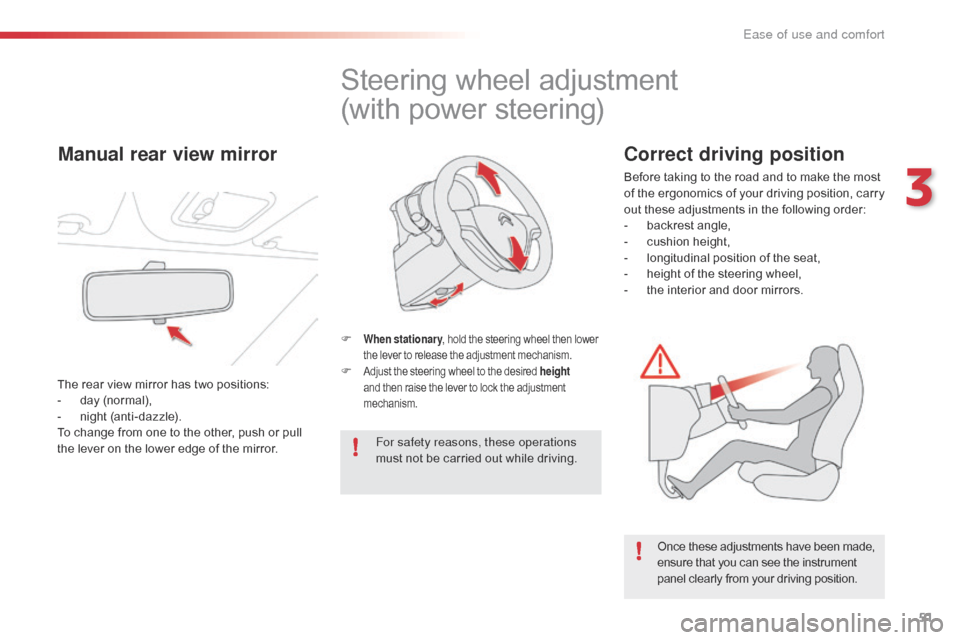
F When stationary ,  hold  the  steering  wheel  then  lower t
he  lever  to  release  the  adjustment  mechanism.
F Adjust the  steering  wheel  to  the  desired  height
and  then  raise  the  lever  to  lock  the  adjustment m
echanism.
For safety reasons, these operations
must  not  be  carried  out  while  driving.
Once
 these  adjustments  have  been  made,
 e
nsure  that  you  can  see  the  instrument
 p
anel  clearly  from  your  driving  position.
Manual rear view mirror
The rear view mirror has two positions:
-  d ay  (normal),
-
Â
n
ight  (anti-dazzle).
To
 change  from  one  to  the  other,  push  or  pull Â
t
he  lever  on  the  lower  edge  of  the  mirror.
Correct driving position
Before taking to the road and to make the most of  t he  e rgonomics  o f  y our  d riving  p osition,  c arry Â
o
ut  these  adjustments  in  the  following  order:
-
Â
b
ackrest  angle,
-
Â
c
ushion  height,
-
Â
l
ongitudinal  position  of  the  seat,
-
Â
h
eight  of  the  steering  wheel,
-
Â
t
he  interior  and  door  mirrors.
3
Ease of use and comfort
Page 85 of 268
83
Stop & Start (VTi 68 S&S engine)
Operation
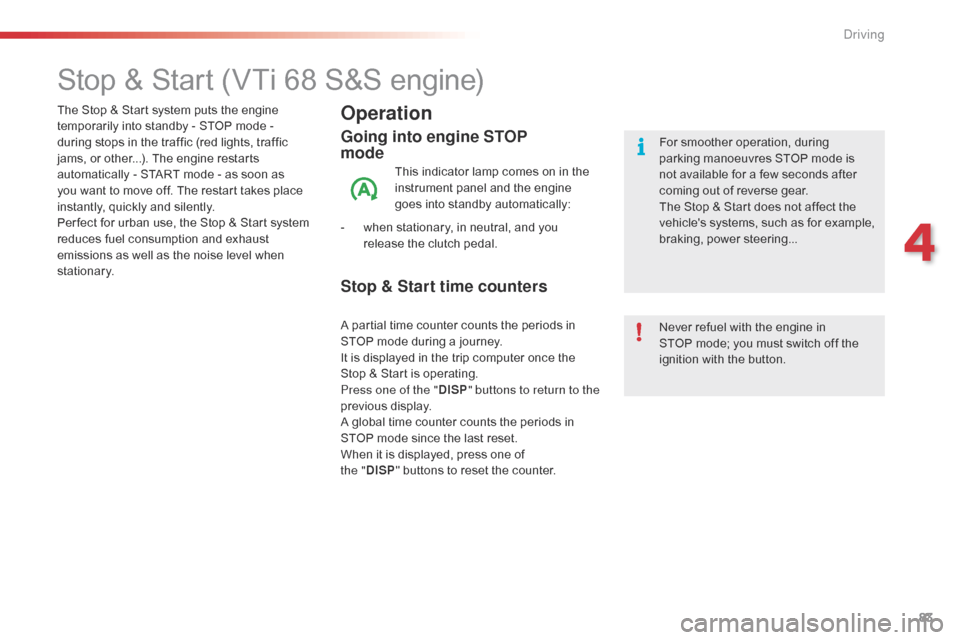
Going into engine STOP
mode
This indicator lamp comes on in the instrument  panel  and  the  engine Â
g
oes  into  standby  automatically:
-
Â
w
hen
 stationary,  in  neutral,  and  you Â
r
elease  the  clutch  pedal.
Never
 refuel  with  the  engine  in Â
S
TOP mode;  you  must  switch  off  the Â
i
gnition  with  the  button.
For
 smoother  operation,  during  p
arking  manoeuvres  STOP  mode  is  n
ot  available  for  a  few  seconds  after Â
c
oming  out  of  reverse  gear.
The
 Stop  &  Start  does  not  affect  the Â
v
ehicle's  systems,  such  as  for  example, Â
b
raking,  power  steering...
The
Â
Stop
Â
&
Â
Start system
Â
puts
Â
the
Â
engine
Â
t
emporarily
Â
into
Â
standby
Â
-
Â
STOP
Â
mode
Â
-
Â
d
uring
Â
stops
Â
in
Â
the
Â
traffic
Â
(red
Â
lights,
Â
traffic
 j
ams,
Â
or
Â
other...).
Â
The
Â
engine
Â
restarts
 a
utomatically - START
Â
mode
Â
-
Â
as
Â
soon
Â
as
Â
y
ou
Â
want
Â
to
Â
move
Â
off.
Â
The
Â
restart
Â
takes
Â
place
Â
i
nstantly,
Â
quickly
Â
and
Â
silently.
Per fect
Â
for
Â
urban
Â
use,
Â
the
Â
Stop
Â
&
Â
Start
Â
system
Â
r
educes
Â
fuel
Â
consumption
Â
and
Â
exhaust
Â
e
missions
Â
as
Â
well
Â
as
Â
the
Â
noise
Â
level
Â
when
Â
s
tationary.
Stop & Start time counters
A partial time counter counts the periods in S TOP  mode  during  a  journey.
It
 is  displayed  in  the  trip  computer  once  the Â
S
top  &  Start  is  operating.
Press one of the " DISP" buttons to return to the
previous
 d
isplay.
A
 global  time  counter  counts  the  periods  in Â
S
TOP  mode  since  the  last  reset.
When
 it  is  displayed,  press  one  of Â
t
he "DISP "Â buttons
 to  reset  the  counter.
4
Driving
Page 172 of 268
170
Dashboard fuses
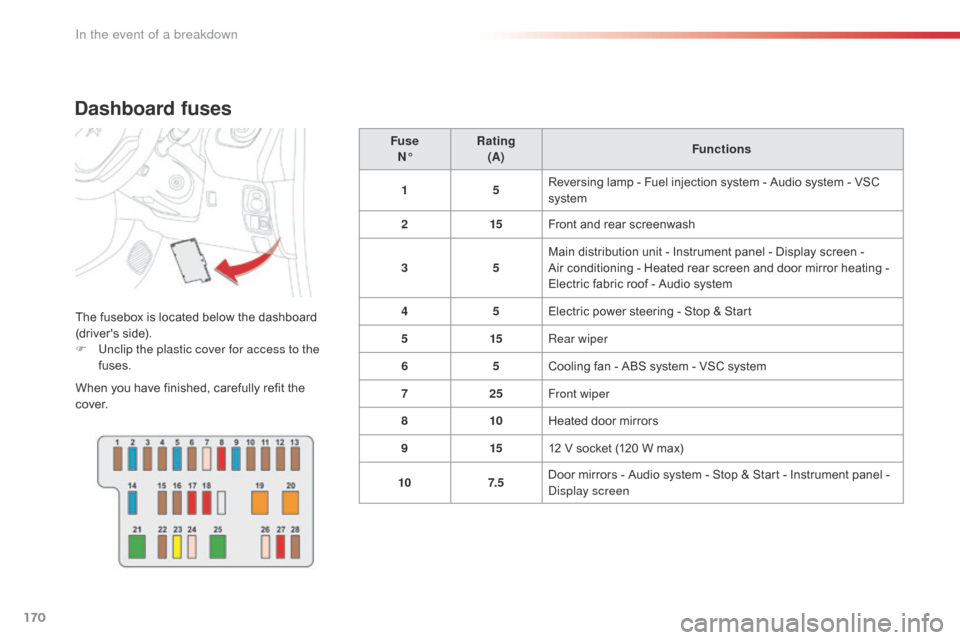
The fusebox is located below the dashboard (driver's  side).
F
U
nclip the plastic cover for access to the
fuses.
When
 you  have  finished,  carefully  refit  the Â
c
ove r. Fuse
N° Rating
(A) Functions
1 5Reversing  lamp  -  Fuel  injection  system  -  Audio  system  -  VSC Â
s
ystem
2 15Front  and  rear  screenwash
3 5Main  distribution  unit  -  Instrument  panel  -  Display  screen  - Â
Air  conditioning  -  Heated  rear  screen  and  door  mirror  heating  - Â
E
lectric  fabric  roof  -  Audio  system
4 5Electric  power  steering  -  Stop  &  Start
5 15Rear wiper
6 5Cooling
 fan  -  ABS  system  -  VSC  system
7 25Front wiper
8 10Heated
 door  mirrors
9 1512
 V  socket  (120  W  max)
10 7. 5Door
 mirrors  -  Audio  system  -  Stop  &  Start  -  Instrument  panel  - Â
D
isplay screen
In the event of a breakdown
Page 182 of 268
180
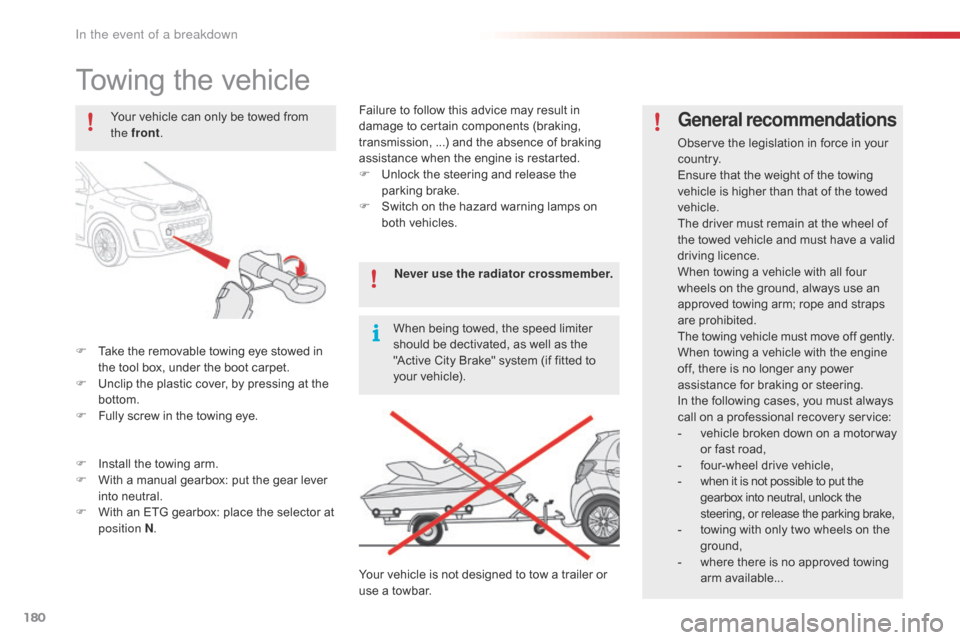
Towing the vehicle
F Take the  removable  towing  eye  stowed  in  t
he  tool  box,  under  the  boot  carpet.
F
Â
U
nclip  the  plastic  cover,  by  pressing  at  the Â
b
ottom.
F
Â
F
ully  screw  in  the  towing  eye.
General recommendations
Observe the legislation in force in your co unt r y.
Ensure
 that  the  weight  of  the  towing Â
v
ehicle  is  higher  than  that  of  the  towed Â
v
ehicle.
The
 driver  must  remain  at  the  wheel  of Â
t
he  towed  vehicle  and  must  have  a  valid Â
d
riving
 l
icence.
When
 towing  a  vehicle  with  all  four Â
w
heels  on  the  ground,  always  use  an Â
a
pproved  towing  arm;  rope  and  straps Â
ar
e
 p
rohibited.
The
 towing  vehicle  must  move  off  gently.
When
 towing  a  vehicle  with  the  engine Â
o
ff,  there  is  no  longer  any  power Â
a
ssistance  for  braking  or  steering.
In
 the  following  cases,  you  must  always Â
c
all  on  a  professional  recovery  service:
-
Â
v
ehicle  broken  down  on  a  motor way Â
o
r  fast  road,
-
Â
f
our-wheel  drive  vehicle,
-
 w
hen  it  is  not  possible  to  put  the
 g
earbox  into  neutral,  unlock  the
 s
teering,  or  release  the  parking  brake,
-
Â
t
owing  with  only  two  wheels  on  the Â
g
round,
-
Â
w
here  there  is  no  approved  towing Â
ar
m
 a
vailable...
Your
Â
vehicle
Â
can
Â
only
Â
be
Â
towed
Â
from
 t
he front
.
F
Â
I
nstall
Â
the
Â
towing
Â
arm.
F
Â
W
ith
Â
a
Â
manual
Â
gearbox:
Â
put
Â
the
Â
gear
Â
lever
Â
i
nto
Â
neutral.
F
Â
W
ith
Â
an
Â
ETG
Â
gearbox:
Â
place
Â
the
Â
selector
Â
at
Â
p
osition N . Never use the radiator crossmember.
When
Â
being
Â
towed,
Â
the
Â
speed
Â
limiter
Â
s
hould
Â
be
Â
dectivated,
Â
as
Â
well
Â
as
Â
the
Â
"
Active
Â
City
Â
Brake"
Â
system
Â
(if
Â
fitted
Â
to
Â
y
our
Â
vehicle).
Your
Â
vehicle
Â
is
Â
not
Â
designed
Â
to
Â
tow
Â
a
Â
trailer
Â
or
Â
u
se
Â
a
Â
towbar.
Failure
Â
to
Â
follow
Â
this
Â
advice
Â
may
Â
result
Â
in
Â
d
amage
Â
to
Â
certain
Â
components
Â
(braking,
 t
ransmission,
Â
...)
Â
and
Â
the
Â
absence
Â
of
Â
braking
 a
ssistance
Â
when
Â
the
Â
engine
Â
is
Â
restarted.
F
Â
U
nlock
Â
the
Â
steering
Â
and
Â
release
Â
the
Â
par
king
 b
rake.
F
Â
S
witch
Â
on
Â
the
Â
hazard
Â
warning
Â
lamps
Â
on
Â
b
oth
Â
vehicles.
In the event of a breakdown