dashboard CITROEN C3 2022 User Guide
[x] Cancel search | Manufacturer: CITROEN, Model Year: 2022, Model line: C3, Model: CITROEN C3 2022Pages: 450, PDF Size: 10.11 MB
Page 194 of 450

192
B618_en_Chap06_conduite_ed01-2016
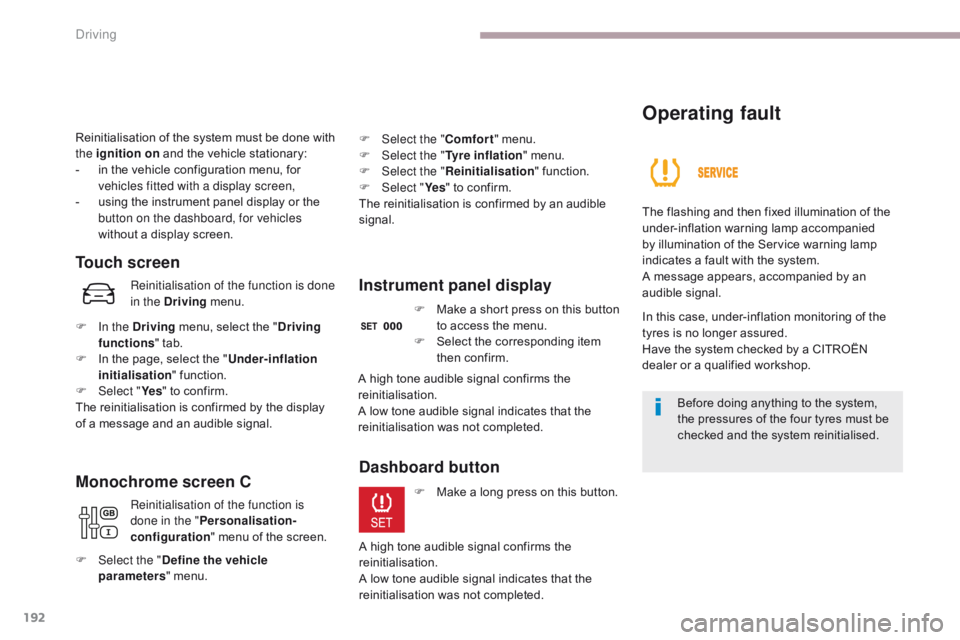
Reinitialisation of the system must be done with
the ignition on and the vehicle stationary:
-
i
n the vehicle configuration menu, for
vehicles fitted with a display screen,
-
u
sing the instrument panel display or the
button on the dashboard, for vehicles
without a display screen.
Touch screen
Monochrome screen C
Operating fault
The flashing and then fixed illumination of the
under-inflation warning lamp accompanied
by illumination of the Service warning lamp
indicates a fault with the system.
A message appears, accompanied by an
audible signal.
In this case, under-inflation monitoring of the
tyres is no longer assured.
Have the system checked by a CITROËN
dealer or a qualified workshop.
Before doing anything to the system,
the pressures of the four tyres must be
checked and the system reinitialised.
Instrument panel displayReinitialisation of the function is done
in the Driving menu.
F
I
n the Driving menu, select the " Driving
functions " tab.
F
I
n the page, select the " Under-inflation
initialisation " function.
F
Sel
ect " Ye s" to confirm.
The reinitialisation is confirmed by the display
of a message and an audible signal.
Reinitialisation of the function is
done in the " Personalisation-
configuration " menu of the screen.
F
Sel
ect the " Define the vehicle
parameters " menu. F
M
ake a short press on this button
to access the menu.
F
S
elect the corresponding item
then confirm.
A high tone audible signal confirms the
reinitialisation.
A low tone audible signal indicates that the
reinitialisation was not completed.
Dashboard button
F Make a long press on this button.
A high tone audible signal confirms the
reinitialisation.
A low tone audible signal indicates that the
reinitialisation was not completed. F
Sel
ect the "
Comfort " menu.
F
Sel
ect the "
Tyre inflation " menu.
F
Sel
ect the "
Reinitialisation " function.
F
Sel
ect "
Ye s" to confirm.
The reinitialisation is confirmed by an audible
signal.
Driving
Page 243 of 450

241
B618_en_Chap08_En-cas-de-panne_ed01-2016
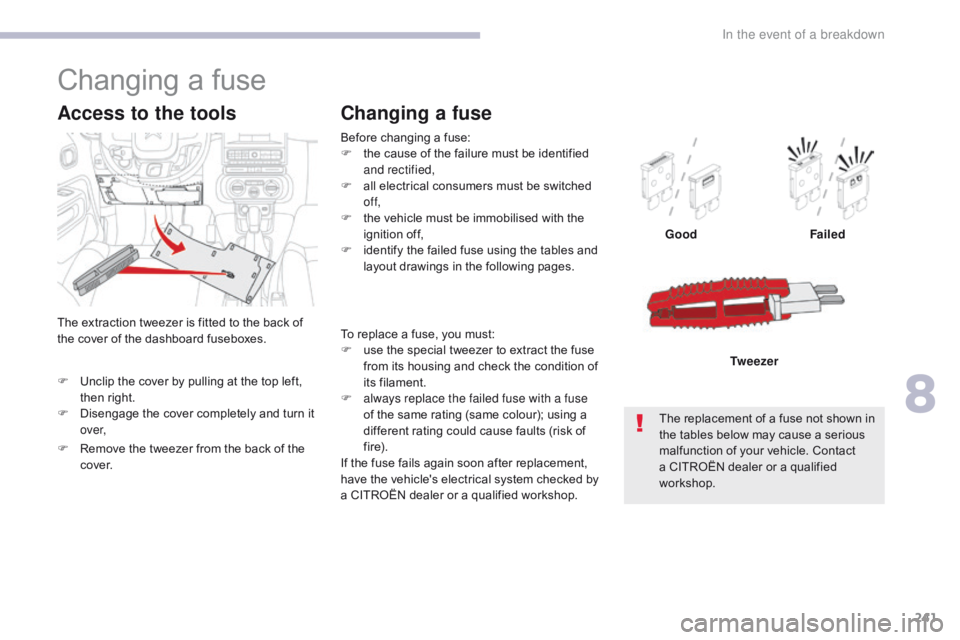
To replace a fuse, you must:
F u se the special tweezer to extract the fuse
from its housing and check the condition of
its filament.
F
a
lways replace the failed fuse with a fuse
of the same rating (same colour); using a
different rating could cause faults (risk of
f i r e).
If the fuse fails again soon after replacement,
have the vehicle's electrical system checked by
a CITROËN dealer or a qualified workshop. Good
Failed
The replacement of a fuse not shown in
the tables below may cause a serious
malfunction of your vehicle. Contact
a CITROËN dealer or a qualified
workshop. Tw e e z e r
Changing a fuse
Changing a fuse
Before changing a fuse:
F
t he cause of the failure must be identified
and rectified,
F
a
ll electrical consumers must be switched
of f,
F
t
he vehicle must be immobilised with the
ignition off,
F
i
dentify the failed fuse using the tables and
layout drawings in the following pages.
The extraction tweezer is fitted to the back of
the cover of the dashboard fuseboxes.
Access to the tools
F Unclip the cover by pulling at the top left, then right.
F
D
isengage the cover completely and turn it
ove r,
F
R
emove the tweezer from the back of the
c ove r.
8
In the event of a breakdown
Page 245 of 450

243
B618_en_Chap08_En-cas-de-panne_ed01-2016
Dashboard fuses
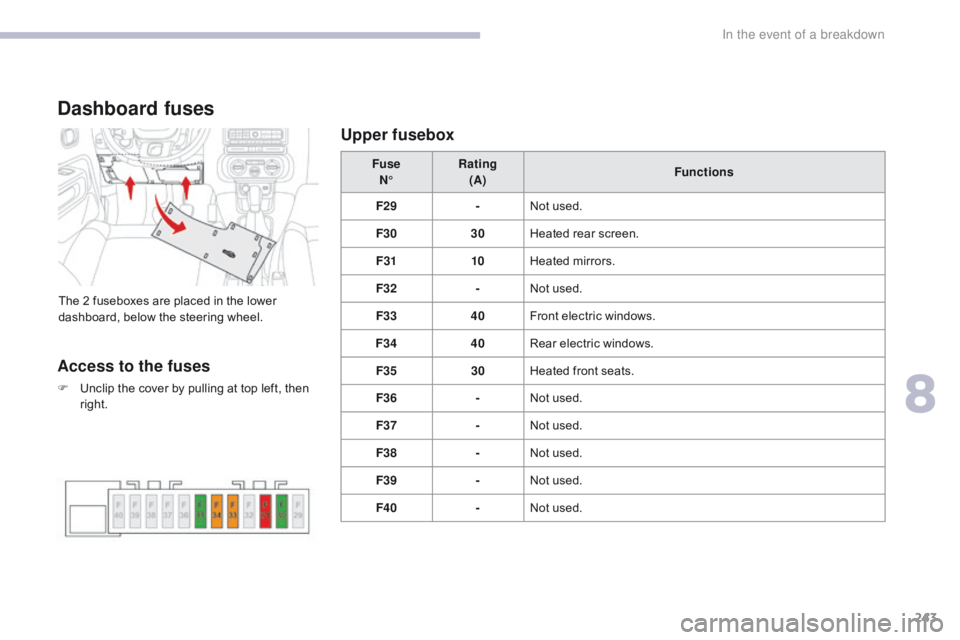
The 2 fuseboxes are placed in the lower
dashboard, below the steering wheel.Fuse
N° Rating
(A) Functions
F29 -Not used.
F30 30Heated rear screen.
F31 10Heated mirrors.
F32 -Not used.
F33 40Front electric windows.
F34 40Rear electric windows.
F35 30Heated front seats.
F36 -Not used.
F37 -Not used.
F38 -Not used.
F39 -Not used.
F40 -Not used.
Access to the fuses
F Unclip the cover by pulling at top left, then
right.
Upper fusebox
8
In the event of a breakdown
Page 260 of 450

258
B618_en_Chap09_caracteristiques-techniques_ed01-2016
Identification markings
A. Vehicle identification number (VIN),
under the bonnet.
The number is engraved on the body structure.-
t he maximum authorised vehicle weight
(the Gross Vehicle Weight or GV W),
-
t
he maximum authorised vehicle + trailer
weight (the Gross Train Weight or GTW),
-
t
he maximum weight on the front axle,
-
t
he maximum weight on the rear axle.-
t
he spare tyre pressure.
It also indicates the paint colour code.
B. Vehicle identification number (VIN), on
the dashboard.
The number is on a label, visible through the
windscreen. Checking tyre pressures
The tyre pressures should be checked when
cold at least monthly.
The pressures given on the label are valid for
cold tyres. If you have driven for more than
10
minutes or more than 6 miles (10 kilometres)
at more than 30 mph (50 km/h), the tyres will be
warm; in this case 0.3 bar (30 kPa) should be
added to the pressures given on the label.
Different visible markings for the identification of your vehicle.
Low tyre pressures increase fuel
consumption.Never reduce the pressure of a warm
tyre. The original tyres fitted to the vehicle
may have a load index or speed rating
higher than those given on the label;
this has no effect on the inflation
pressures.
C. Manufacturer's label.
This self-destructing label is affixed to the right-
hand door aperture.
It bears the following information:
-
t
he name of the manufacturer,
-
t
he European Whole Vehicle Type Approval
number,
-
t
he vehicle identification number (VIN), D. Tyres / paint code label.
This label is affixed to the driver's door
aperture.
It bears the following information on the tyres:
-
t
he tyre pressures, unladen and laden,
-
t
he reference, size, type, load index and
speed rating,
Technical data
Page 357 of 450

83
.
1
17
18
1
1
20
19
21
22
Audio and Telematics
Level 2Level 3Level 4Comments
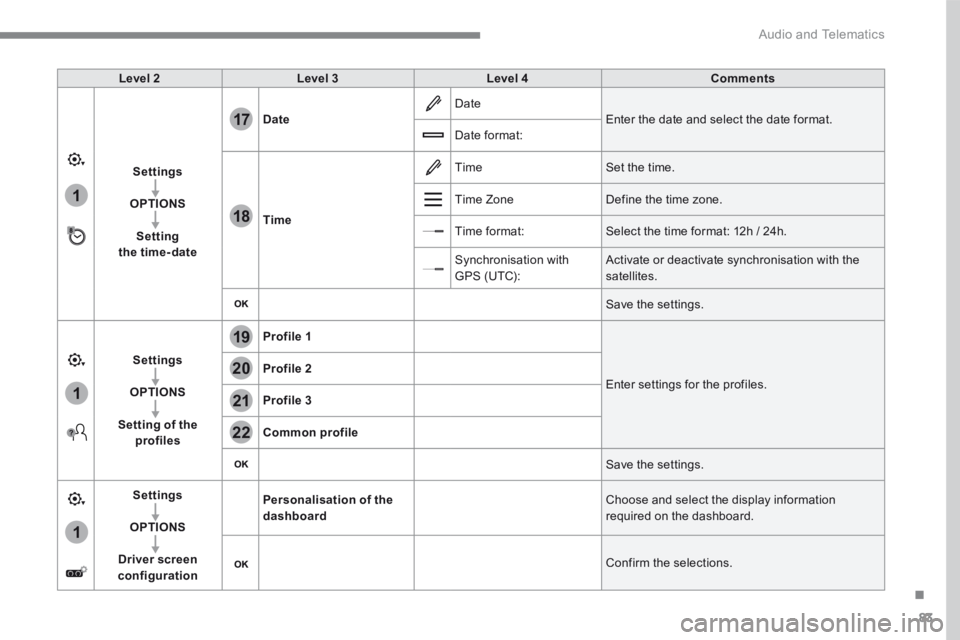
Settings
OPTIONS
Setting the time-date
Date Date Enter the date and select the date format. Date format:
Time
Time Set the time.
Time Zone Define the time zone.
Time format: Select the time format: 12h / 24h.
Synchronisation with GPS (UTC): Activate or deactivate synchronisation with the satellites.
Save the settings.
Settings
OPTIONS
Setting of the profiles
Profile 1
Enter settings for the profiles. Profile 2
Profile 3
Common profile
Save the settings.
Settings
OPTIONS
Driver screen configuration
Personalisation of the dashboard Choose and select the display information required on the dashboard.
Confirm the selections.