headlamp CITROEN C3 2023 Owners Manual
[x] Cancel search | Manufacturer: CITROEN, Model Year: 2023, Model line: C3, Model: CITROEN C3 2023Pages: 104, PDF Size: 2.38 MB
Page 4 of 104
2
Contents
■
Overview
■
Driving tips
1InstrumentsInstrument panel 5
Warning and indicator lamps 5
Indicators 7
Trip computer 7
2AccessKey 9
Key with remote control function 9
Central locking 10
Back-up procedures 10
Doors 11
Boot 11
Windows 12
3Ease of use and comfortFront seats 14
Steering wheel adjustment 15
Rear seats 15
Heating and Ventilation 16
Manual air conditioning 17
Front demist - defrost 18
Interior fittings 18
Front courtesy lamps 19
Boot fittings 19
4Lighting and visibilityExterior lighting control stalk 20
Direction indicators 20
Headlamp beam height adjustment 20
Wiper control stalk 21
Changing a wiper blade 21
5SafetyGeneral safety recommendations 23
Hazard warning lamps 23
Horn 23
Seat belts 24
Airbags 26
Child seats 28
Child lock 30
6DrivingDriving recommendations 31
Starting / Switching off the engine 31
5-speed manual gearbox 32
6-speed manual gearbox 32
Gear efficiency indicator 33
Overspeed alert 33
Parking sensors 33
7Practical informationRefuelling 35
Bonnet 35
Engine compartment 36
Checking levels 37
Checks 39
Advice on care and maintenance 41
8In the event of a breakdownTool kit 42
Spare wheel 42
Changing a bulb 45
Changing a fuse 48
12
V battery 56
Towing the vehicle 58
9Technical dataEngines technical data 60
Dimensions 60
Identification markings 60
1010" Touch Screen
■
Alphabetical index
Page 5 of 104
3
Overview
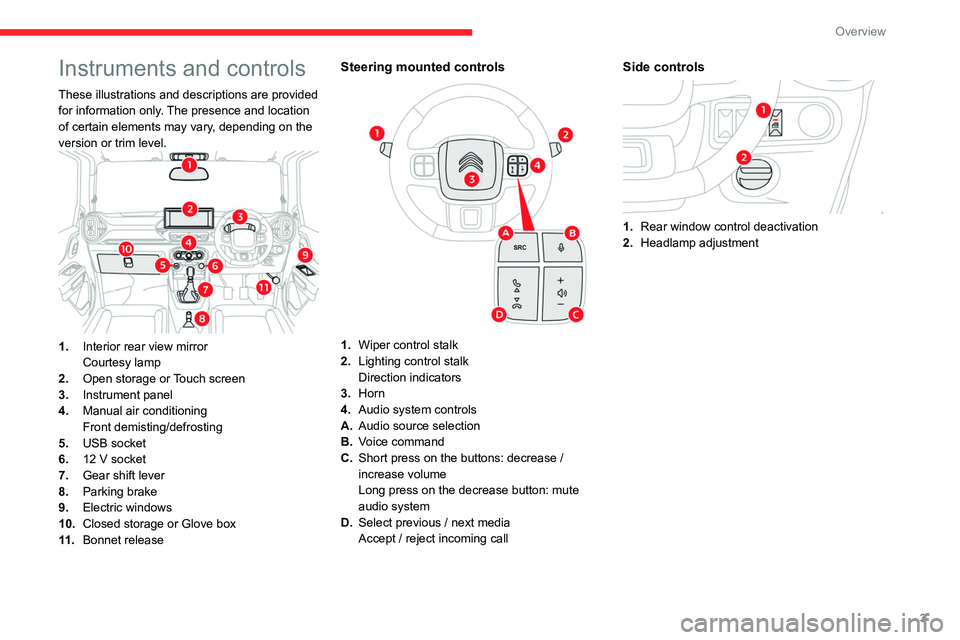
Instruments and controls
These illustrations and descriptions are provided
for information only. The presence and location
of certain elements may vary, depending on the
version or trim level.
1.Interior rear view mirror
Courtesy lamp
2. Open storage or Touch screen
3. Instrument panel
4. Manual air conditioning
Front demisting/defrosting
5. USB socket
6. 12 V socket
7. Gear shift lever
8. Parking brake
9. Electric windows
10. Closed storage or Glove box
11 . Bonnet release
Steering mounted controls
1.Wiper control stalk
2. Lighting control stalk
Direction indicators
3. Horn
4. Audio system controls
A. Audio source selection
B. Voice command
C. Short press on the buttons: decrease
/
increase volume
Long press on the decrease button: mute
audio system
D. Select previous
/ next media
Accept
/ reject incoming call
Side controls
1.Rear window control deactivation
2. Headlamp adjustment
Page 8 of 104
6
Instruments
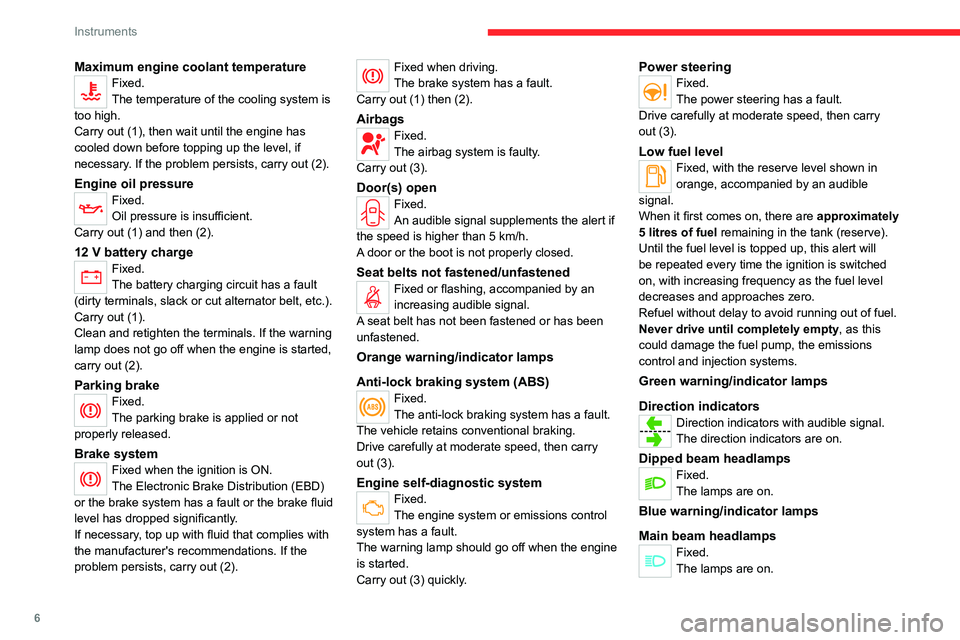
Maximum engine coolant temperatureFixed.
The temperature of the cooling system is
too high.
Carry out (1), then wait until the engine has
cooled down before topping up the level, if
necessary. If the problem persists, carry out (2).
Engine oil pressureFixed.
Oil pressure is insufficient.
Carry out (1) and then (2).
12 V battery chargeFixed.
The battery charging circuit has a fault
(dirty terminals, slack or cut alternator belt, etc.).
Carry out (1).
Clean and retighten the terminals. If the warning
lamp does not go off when the engine is started,
carry out (2).
Parking brakeFixed.
The parking brake is applied or not
properly released.
Brake systemFixed when the ignition is ON.
The Electronic Brake Distribution (EBD)
or the brake system has a fault or the brake fluid
level has dropped significantly.
If necessary, top up with fluid that complies with
the manufacturer's recommendations. If the
problem persists, carry out (2).
Fixed when driving.
The brake system has a fault.
Carry out (1) then (2).
AirbagsFixed.
The airbag system is faulty.
Carry out (3).
Door(s) openFixed.
An audible signal supplements the alert if
the speed is higher than 5
km/h.
A door or the boot is not properly closed.
Seat belts not fastened/unfastenedFixed or flashing, accompanied by an
increasing audible signal.
A seat belt has not been fastened or has been
unfastened.
Orange warning/indicator lamps
Anti-lock braking system (ABS)
Fixed.
The anti-lock braking system has a fault.
The vehicle retains conventional braking.
Drive carefully at moderate speed, then carry
out (3).
Engine self-diagnostic systemFixed.
The engine system or emissions control
system has a fault.
The warning lamp should go off when the engine
is started.
Carry out (3) quickly.
Power steeringFixed.
The power steering has a fault.
Drive carefully at moderate speed, then carry
out (3).
Low fuel levelFixed, with the reserve level shown in
orange, accompanied by an audible
signal.
When it first comes on, there are
approximately
5 litres of fuel remaining in the tank (reserve).
Until the fuel level is topped up, this alert will
be repeated every time the ignition is switched
on, with increasing frequency as the fuel level
decreases and approaches zero.
Refuel without delay to avoid running out of fuel.
Never drive until completely empty, as this
could damage the fuel pump, the emissions
control and injection systems.
Green warning/indicator lamps
Direction indicators
Direction indicators with audible signal.
The direction indicators are on.
Dipped beam headlampsFixed.
The lamps are on.
Blue warning/indicator lamps
Main beam headlamps
Fixed.
The lamps are on.
Page 22 of 104

20
Lighting and visibility
Exterior lighting control
stalk
Main lighting
Lighting off (ignition off)
Sidelamps only
Dipped or main beam headlamps
Headlamp dipping
► Turn and align the selection ring to switch
between dipped and main beam headlamps.
In the lighting off and sidelamps modes, the
driver can switch on the main beam headlamps
temporarily (“headlamp flash”) by pulling up the
stalk.
Switching on the lamps after
switching off the ignition
To reactivate the lighting control, rotate the
ring to the "0" position - lamps off, then to the
desired position.
If the driver's door is opened, a temporary
audible signal warns the driver that the lamps
are on.
In some weather conditions (e.g. low
temperature or humidity), the presence
of misting on the internal surface of the glass
of the headlamps and rear lamps is normal; it
disappears after the lamps have been on for a
few minutes.
Direction indicators
► Left or right: lower or raise the lighting control
stalk, beyond the point of resistance.
Three flashes
► Press briefly upwards or downwards, without
going beyond the point of resistance; the
direction indicators will flash 3 times.
Headlamp beam height
adjustment
To avoid disturbing other road users, the height
of the headlamp beams should be adjusted
according to the load in the vehicle.
Knob
switch
position Static loading condition
0 Driver only
Page 47 of 104

45
In the event of a breakdown
8► Tighten the spare wheel fixing screw by a few
turns.
After changing a wheel
The temporary spare wheel is only intended for temporary emergency use,
until the conventional wheel can be repaired
or replaced.
Continuous use of this spare can result in tire
failure and loss of control. Always observe
these precautions when using this spare:
–
Y
our vehicle will respond differently with
this temporary spare.
–
Do not exceed 80 km/h speed.
–
Replace this spare with a standard tire and
wheel as soon as possible.
–
Use of this spare will reduce ground
clearance.
–
Set the specified tire pressure indicated
on the tire information label located on the
driver's door lock pillar
.
–
Do not use tire chains on the temporary
spare. If you must use tire chains, rearrange
the wheels so standard tires and wheels are
fitted to the front axle.
–
The temporary spare wheel has a much
shorter tread life than the conventional
wheels
on your vehicle. Replace the tire as soon as
possible as the tread wear indicator appears.
The inflation pressure of the temporary spare
wheel should be checked at least monthly. At
the same time, check that the tire is stored
securely. If it is not, tighten it.
Note that two or more temporary spare
wheels should not be used on one vehicle
simultaneously.
Changing a bulb
In some weather conditions (e.g. low
temperature or humidity), misting on the
internal surface of the glass of the headlamps
and rear lamps is normal, and will disappear
after the lamps have been on for a few
minutes.
The headlamps have polycarbonate lenses with a protective coating:
–
Do not clean them with a dry or abrasive
cloth, nor with detergent or solvent
products.
–
Use a sponge and soapy water or a pH
neutral product.
–
When using a high-pressure washer on
persistent marks, do not keep the lance
directed towards the headlamps, lamps or
their edges for too long, so as not to damage
their protective coating and seals.
Changing a bulb must only be done with
the ignition off and after the headlamp /
lamp has been switched off for several
minutes - risk of serious burns!
Do not touch the bulb directly with your
fingers; use a lint-free cloth.
It is essential only to use anti-ultraviolet
(UV) type bulbs, so as not to damage the
headlamp.
Always replace a failed bulb with a new bulb
of the same type and specification. To avoid
lighting imbalance, replace the bulbs in pairs.
Refitting the lamp units
Perform the operations in the reverse
order to dismantling.
Opening the bonnet / Accessing the
bulbs
With the engine warm, proceed with caution -
risk of burns!
Take care with objects or clothing that could
be caught in the blades of the cooling fan -
risk of strangulation!
Halogen bulbs (Hx)
To ensure good quality lighting, check
that the bulb is correctly positioned in its
housing.
Page 48 of 104

46
In the event of a breakdown
Light-emitting diode (LED)
headlamps and lamps
Depending on version, the affected types of
headlamps / lamps are:
–
Daytime running lamps / sidelamps.
–
Direction indicator side repeaters.
–
Third brake lamp.
–
Number plate lamps.
Light emitting diodes (LED)
For the replacement of this type of bulb,
you must contact a CITROËN dealer.
Do not touch the LED technology lamps - risk
of electrocution!
Front lamps
Model 1
1. Daytime running lamps/sidelamps (W5W
bulb)
2. Direction indicators (PY21W
- 12V - 21W)
3. Beam headlamps (H4
- 12V - 60/55W)
Model 2
1.Daytime running lamps/sidelamps (LED)
2. Direction indicators (PY21W
- 12V - 21W)
3. Beam headlamps (H4
- 12V - 60/55W)
Daytime running lamps/sidelamps
► Turn the bulb holder a quarter of a turn and
pull it out.
►
Pull the bulb out and change it.
Direction indicators
Rapid flashing of a direction indicator
lamp (left or right) indicates that one of
the bulbs on the corresponding side has
failed.
► Turn the bulb holder a eighth of a turn anti-
clockwise and remove it.
►
Remove the bulb and replace it.
Amber coloured bulbs, such as the direction indicators, must be replaced by
bulbs with identical colour and specifications.
Beam headlamps
► Remove the protective cover by pulling on
the tab.
►
Disconnect the bulb connector
.
►
Release the retaining tab.
►
Change the bulb taking care to align the
metal part with the grooves on the lamp.
►
Reposition the retaining tab.
►
Reconnect the bulb connector
.
Page 72 of 104
70
Alphabetical index
A
ABS 23
Adjusting headlamps
20
Adjusting seat
14
Adjusting the air distribution
17
Adjusting the air flow
17
Adjusting the headlamp beam height
20
Adjusting the height and reach of
the steering wheel
15
Adjusting the temperature
17
Advice on care and maintenance
41
Advice on driving
4, 31
Airbags
26–27
Airbags, front
26–27
Air conditioning
16–17
Air conditioning, manual
17
Air intake
18
Air vents
16
Anti-lock braking system (ABS)
23
Antitheft / Immobiliser
10
B
Battery, 12 V 39, 56, 58
Battery, remote control
10
Bodywork
41
Bonnet
35–36
Boot
11
Brake discs
40
Brake lamps
47
Brakes 40
Bulbs
45
Bulbs (changing)
45–47
C
Capacity, fuel tank 35
Cap, fuel filler
35
Care of the bodywork
41
Central locking
9–10
Changing a bulb
45–47
Changing a fuse
48, 51
Changing a wheel
42
Changing the remote control battery
10
Checking the levels
37–38
Checks
37, 39–41
Checks, routine
39–40
Child lock
30
Children
25
Children (safety)
30
Child seats
25, 28–29
Child seats, conventional
29
Cleaning (advice)
41
Closing the boot
11
Control, emergency boot release
11
Control, emergency door
10
Control stalk, lighting
20
Control stalk, wipers
21
Courtesy lamp
47
Courtesy lamps
19
D
Dimensions 60
Dipstick
37
Direction indicators (turn signals)
20, 46–47
Doors
11
Driving
31
Driving economically
4
E
EBFD 23
Eco-driving (advice)
4
Electric windows
12
Electronic brake force distribution (EBFD)
23
Emergency warning lamps
23
Engine
35–36, 41
Engine compartment
37
Engine, petrol
60
Engines
60
Environment
10
F
Filling the fuel tank 35
Filter, air
40
Filter, oil
40
Filter, passenger compartment
16, 40
Fitting a wheel
43–44
Fittings, boot
19
Page 73 of 104
71
Alphabetical index
Fittings, interior 18
Flap, fuel filler
35
Flashing indicators
20, 46
Fluid, brake
38
Fluid, engine coolant
38
Folding the rear seats
15–16
Fuel
4
Fuel consumption
4
Fuel level, low
35
Fuel (tank)
35
Fusebox, dashboard
48
Fusebox, engine compartment
48, 51
Fuses
48, 51
G
Gauge, fuel 35
Gearbox, manual
32, 40
Gear lever, manual gearbox
32
Gear shift indicator
33
Glove box
18
H
Hazard warning lamps 23
Headlamps (adjustment)
20
Headlamps, dipped beam
46
Headlamps, halogen
20, 45
Headlamps, main beam
46
Heating
16
Hooks 19
Horn
23
I
Indicator, coolant temperature 7
Indicators, direction
20, 46
Indicator, service
7
Inflating tyres
40, 61
Instrument panels
5
J
Jack 42
Jump starting
56
K
Key 9–10
Key with remote control
9, 31
L
Labels, identification 60
Lamps, rear
47
LEDs - Light-emitting diodes
46–47
Level, brake fluid
38
Level, engine coolant
7, 38
Level, engine oil 37
Levels and checks
37–38
Level, screenwash fluid
21, 38
Light-emitting diodes - LEDs
46–47
Lighting, exterior
20
Lighting, interior
19
Locating your vehicle
9
Locking
9
Locking from the inside
10
Locking the doors
10
M
Maintenance (advice) 41
Maintenance, routine
39
Map reading lamps
19
Markings, identification
60
Mirrors, door
15
O
Obstacle detection 33
Oil change
37
Oil consumption
37
Oil, engine
37
On-board tools
42
Opening the bonnet
35–36
Opening the boot
11
Opening the doors
11