spare wheel CITROEN C3 AIRCROSS 2018 Owners Manual
[x] Cancel search | Manufacturer: CITROEN, Model Year: 2018, Model line: C3 AIRCROSS, Model: CITROEN C3 AIRCROSS 2018Pages: 308, PDF Size: 9.13 MB
Page 5 of 308
3
.
.
bit.ly/helpPSA
Driving recommendations 118
Anti-theft protection 1 19
Starting/Switching off the engine
with the key
1
20
Starting/Switching off the engine with
K
eyless Entry and Starting
1
21
Parking brake
1
24
5-speed manual gearbox
1
24
6-speed manual gearbox
1
24
Automatic gearbox (EAT6)
1
25
Gear ef ficiency indicator
1
28
Hill start assist
1
29
Stop & Start
1
29
Head-up display
1
32
Memorising speeds
1
33
Recognition of speed limit signs and
recommendation 1 34
Speed limiter 137
Cruise control 1 39
Collision Risk Alert and Active Safety Brake 1 42Fatigue detection system 146
Lane Departure Warning System 1 48
Blind spot monitoring
1
49
Parking assistance
1
51
Top Rear Vision camera
1
52
Park Assist
1
55
Under-inflation detection
1
61Compatibility of fuels
1
65
Fuel tank
1
66
Misfuel prevention (Diesel)
1
67
Snow chains
1
67
Towbar with quickly detachable towball
1
68
Towing device
1
71
Load reduction mode
1
72
Energy economy mode
1
72
Changing a wiper blade
1
73
Roof bars
1
73
B o n n e t
174
Engines
175
Checking levels
1
76
C h e c ks
178
AdBlue
® (BlueHDi engines) 1 80
Running out of fuel (Diesel)
1
84
Temporary puncture repair kit
1
84
Spare wheel
1
88
Changing a bulb
1
93
Changing a fuse
1
97
12
V battery
2
02
To w i n g
2 0 5
Characteristics of engines and towed loads 2 07Engines and towed loads - PETROL 208
Engines and towed loads - DIESEL 2 09
Dimensions
210
Identification markings
2
11
DrivingPractical information
In the event of a breakdown Technical data
Alphabetical index
Access to additional videos
Audio and telematics
CITROËN Connect Nav
CITROËN Connect Radio
Bluetooth audio system
.
Contents
Page 9 of 308
7
Limit the causes of excess
consumption
Spread loads throughout the vehicle; place
the heaviest items in the bottom of the boot,
as close as possible to the rear seats.
Limit the loads carried in the vehicle and
reduce wind resistance (roof bars, roof rack,
bicycle carrier, trailer, etc.). Preferably, use a
roof box.
Remove roof bars and roof racks after use.
At the end of winter, remove snow tyres and
refit your summer tyres.
Observe the recommendations
on maintenance
Check the tyre pressures regularly, when cold,
referring to the label in the door aperture,
driver's side.
Carry out this check in particular:
-
b
efore a long journey,
-
a
t each change of season,
-
a
fter a long period out of use. Have your vehicle ser viced regularly
(engine oil, oil filter, air filter, passenger
compartment filter, etc.) and obser ve the
schedule of operations recommended in the
manufacturer's service schedule.
With a BlueHDi Diesel engine, if the SCR
system is faulty, your vehicle becomes
polluting. Visit a CITROËN dealer or a
qualified workshop as soon as possible to
make your vehicle’s level of nitrogen oxide
emissions compliant to the standard.
When refuelling, do not continue after the 3
rd
cut-off of the nozzle, to avoid any over flow.
At the wheel of your new vehicle, it is only
after approximately the first 1,850 miles
(3,000
kilometres) that you will see the fuel
consumption settle down to a consistent average.
Do not forget the spare wheel and the tyres on
any trailer or caravan.
.
Eco-driving
Page 138 of 308
136
Operating limits
The legislation on speed limits is specific to
each country.
The system does not take account of reduced
speed limits in the following cases:
-
p
oor weather (rain, snow),
-
a
tmospheric pollution,
-
t
railer, caravan,
-
d
riving with a space-saver type spare wheel
or snow chains fitted,
-
p
uncture repair using the temporary repair
kit,
-
y
oung drivers, etc.
F
O
r, depending on equipment, press the
thumbwheel on the steering wheel .
The following situations may inter fere with the
operation of the system or prevent it working:
-
p
oor visibility (inadequate street lighting,
falling snow, rain, fog),
-
w
indscreen area located in front of the
camera dirty, misted, frost-covered, snow-
covered, damaged or covered by a sticker,
Memorising the speed
setting
This memorisation is in addition to the display
of Speed limit recognition .
For more information on the Speed
limiter or Cruise control , refer to the
corresponding sections.
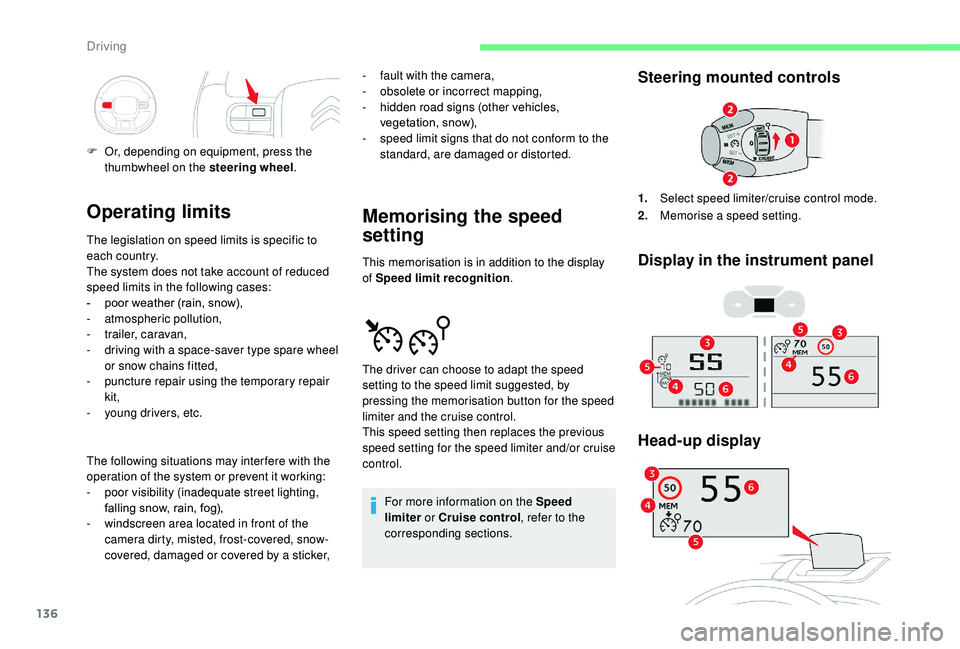
Steering mounted controls
Display in the instrument panel
Head-up display
The driver can choose to adapt the speed
setting to the speed limit suggested, by
pressing the memorisation button for the speed
limiter and the cruise control.
This speed setting then replaces the previous
speed setting for the speed limiter and/or cruise
control. 1.
Select speed limiter/cruise control mode.
2. Memorise a speed setting.
-
f
ault with the camera,
-
o
bsolete or incorrect mapping,
-
h
idden road signs (other vehicles,
vegetation, snow),
-
s
peed limit signs that do not conform to the
standard, are damaged or distorted.
Driving
Page 145 of 308
143
The system is activated from 3 mph (5 km/h).
I t takes account of:
-
v
ehicles driving in the same direction or
stationary,
-
p
edestrians in the traffic lane (bicycles,
motorcycles, animals and objects on the
road are not necessarily detected).
This system is designed to assist the
driver and improve road safety.
It is the driver's responsibility to
continuously monitor the state of the
traffic, observing the driving regulations.
This system does not replace the need for
vigilance on the part of the driver.
As soon as the system detects a potential
obstacle, it prepares the braking circuit in
case automatic braking is needed. This
may cause a slight noise and a sense of
deceleration.
Operating limits
In the following cases, deactivating the
system via the vehicle's configuration menu is
recommended:
-
w
hen towing a trailer,
-
w
hen carrying long objects on roof bars or a
roof rack,
-
b
efore using an automatic car wash, with
the engine running,
-
b
efore placing the vehicle on a rolling stand
in a workshop,
-
w
hen the vehicle is being towed, with the
engine running,
-
w
hen a "space-saver" type spare wheel is
fitted (depending on version),
-
fo
llowing impact damage to the windscreen
close to the detection camera,
-
i
f the brake lamps are not working.It is possible that warnings are not given,
are given too late or seem unjustified.
Consequently, always stay alert and be
prepared to react at any time to avoid an
accident.
Collision Risk Alert
Depending on the degree of risk of collision
detected by the system and the alert threshold
chosen by the driver, different levels of
alert can be triggered and displayed in the
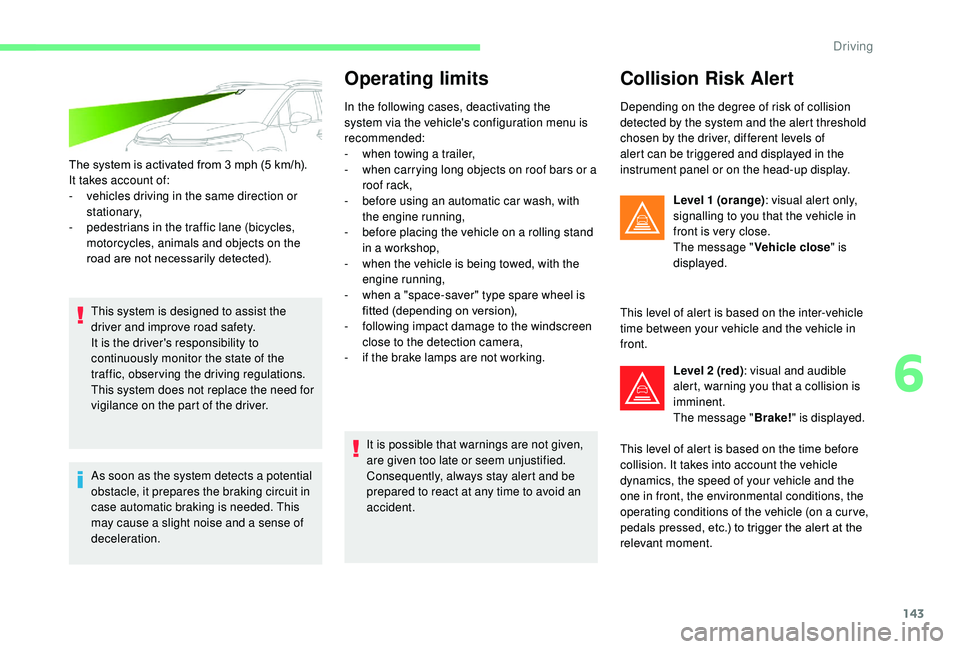
instrument panel or on the head-up display. Level 1 (orange) : visual alert only,
signalling to you that the vehicle in
front is very close.
The message " Vehicle close" is
displayed.
This level of alert is based on the inter-vehicle
time between your vehicle and the vehicle in
front. Level 2 (red) : visual and audible
alert, warning you that a collision is
imminent.
The message " Brake!" is displayed.
This level of alert is based on the time before
collision. It takes into account the vehicle
dynamics, the speed of your vehicle and the
one in front, the environmental conditions, the
operating conditions of the vehicle (on a cur ve,
pedals pressed, etc.) to trigger the alert at the
relevant moment.
6
Driving
Page 163 of 308
161
Malfunctions
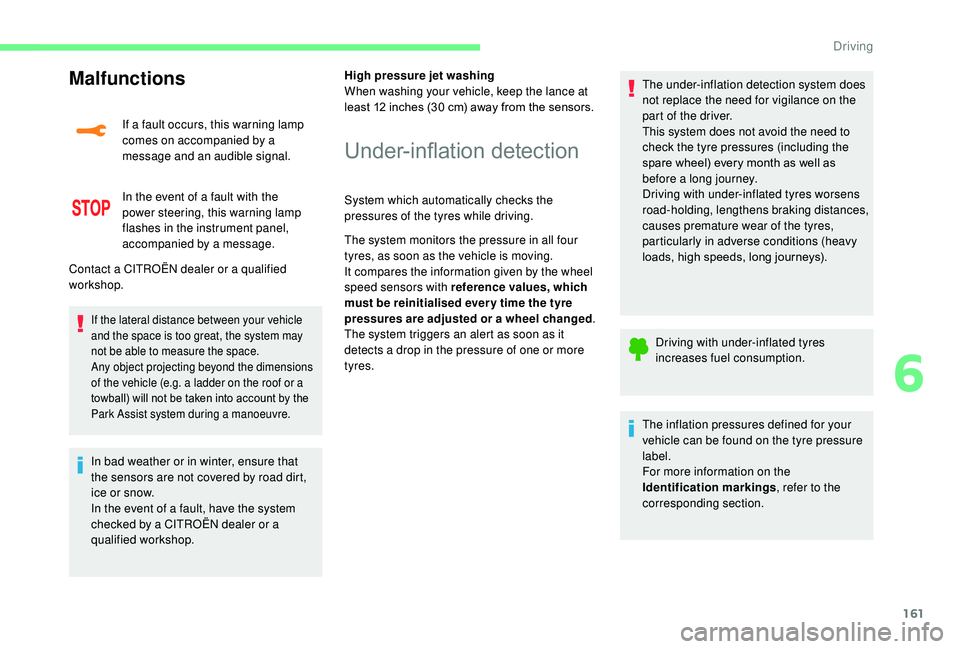
If a fault occurs, this warning lamp
comes on accompanied by a
message and an audible signal.
In the event of a fault with the
power steering, this warning lamp
flashes in the instrument panel,
accompanied by a message.
If the lateral distance between your vehicle
and the space is too great, the system may
not be able to measure the space.
Any object projecting beyond the dimensions
of the vehicle (e.g. a ladder on the roof or a
towball) will not be taken into account by the
Park Assist system during a manoeuvre.
In bad weather or in winter, ensure that
the sensors are not covered by road dirt,
ice or snow.
In the event of a fault, have the system
checked by a CITROËN dealer or a
qualified workshop.High pressure jet washing
When washing your vehicle, keep the lance at
least 12 inches (30
cm) away from the sensors.
Contact a CITROËN dealer or a qualified
workshop.
Under-inflation detection
System which automatically checks the
pressures of the tyres while driving.
The system monitors the pressure in all four
tyres, as soon as the vehicle is moving.
It compares the information given by the wheel
speed sensors with reference values, which
must be reinitialised ever y time the tyre
pressures are adjusted or a wheel changed .
The system triggers an alert as soon as it
detects a drop in the pressure of one or more
tyres. The under-inflation detection system does
not replace the need for vigilance on the
part of the driver.
This system does not avoid the need to
check the tyre pressures (including the
spare wheel) every month as well as
before a long journey.
Driving with under-inflated tyres worsens
road-holding, lengthens braking distances,
causes premature wear of the tyres,
particularly in adverse conditions (heavy
loads, high speeds, long journeys).
Driving with under-inflated tyres
increases fuel consumption.
The inflation pressures defined for your
vehicle can be found on the tyre pressure
label.
For more information on the
Identification markings , refer to the
corresponding section.
6
Driving
Page 164 of 308
162
Checking tyre pressures
This check should be done when the tyres
are "cold" (vehicle stopped for 1 hour or
after a journey of less than 6
miles (10 km)
at moderate speeds).
Other wise, add 0.3
bar to the pressures
shown on the label.
Snow chains
The system does not have to be
reinitialised after fitting or removing snow
chains.
Under-inflation alert
This warning is indicated by
continuous illumination of this
warning lamp, an audible signal
and, depending on equipment, a
message displayed on the screen.
F
R
educe speed immediately, avoid excessive
steering movements and sudden braking.
F
S
top the vehicle as soon as it is safe to do
so. The loss of pressure detected does not
always cause visible bulging of the tyre.
Do not satisfy yourself with just a visual
check.
F
I
f you have a compressor, such as the one
in the temporary puncture repair kit, check
the pressures of the four tyres when cold.
F
I
f it is not possible to make this check
immediately, drive carefully at reduced
speed.
or
F
I
n case of a puncture, use the temporary
tyre repair kit or the spare wheel (depending
on equipment).
The alert is kept active until the system is
reinitialised.
Reinitialisation
The system must be reinitialised after any
adjustment to the pressures of one or more
tyres, and after changing one or more wheels. Before reinitialising the system, ensure
that the pressures of the four tyres
are correct for the conditions of use
of the vehicle and conform to the
recommendations on the tyre pressure
label.
The under-inflation alert can only be relied
on if the reinitialisation of the system has
been done with the pressures in the four
tyres correctly adjusted.
The under-inflation detection system
does not give a warning if a pressure is
incorrect at the time of reinitialisation.
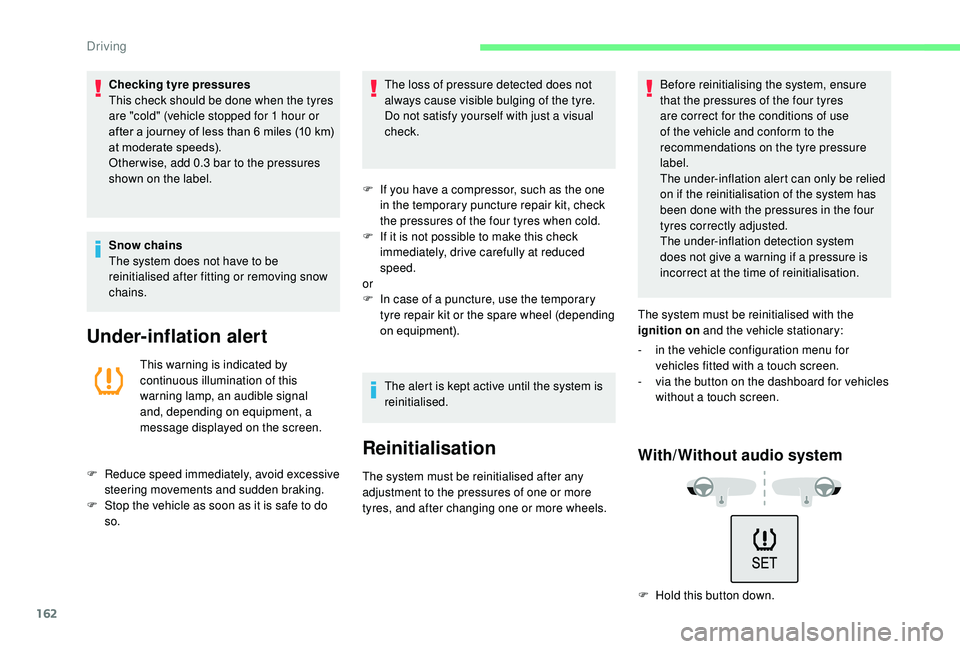
The system must be reinitialised with the
ignition on and the vehicle stationary:
-
i
n the vehicle configuration menu for
vehicles fitted with a touch screen.
-
v
ia the button on the dashboard for vehicles
without a touch screen.
With/Without audio system
F Hold this button down.
Driving
Page 169 of 308
167
Fuel cut- of f
Your vehicle is equipped with a safety device
which cuts off the fuel supply in the event of a
collision.
Misfuel prevention
(Diesel)
(Depending on country of sale)
Mechanical device which prevents filling the
tank of a Diesel vehicle with petrol. It helps
avoid the risk of engine damage that can result
from filling with the wrong fuel.
Operation
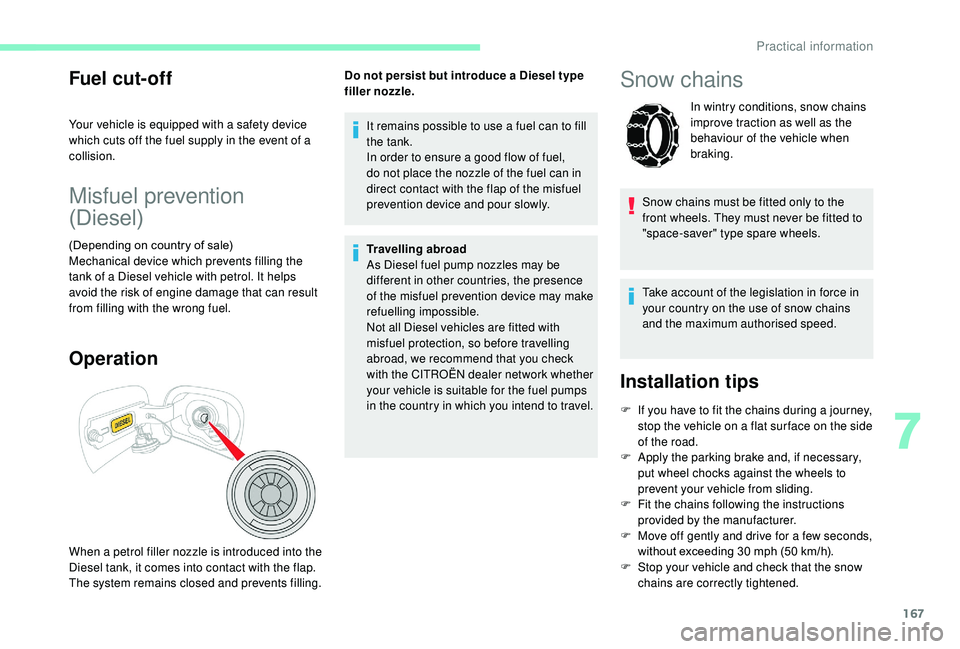
When a petrol filler nozzle is introduced into the
Diesel tank, it comes into contact with the flap.
The system remains closed and prevents filling.It remains possible to use a fuel can to fill
the tank.
In order to ensure a good flow of fuel,
do not place the nozzle of the fuel can in
direct contact with the flap of the misfuel
prevention device and pour slowly.
Travelling abroad
As Diesel fuel pump nozzles may be
different in other countries, the presence
of the misfuel prevention device may make
refuelling impossible.
Not all Diesel vehicles are fitted with
misfuel protection, so before travelling
abroad, we recommend that you check
with the CITROËN dealer network whether
your vehicle is suitable for the fuel pumps
in the country in which you intend to travel.
Do not persist but introduce a Diesel type
filler nozzle.
Snow chains
In wintry conditions, snow chains
improve traction as well as the
behaviour of the vehicle when
braking.
Snow chains must be fitted only to the
front wheels. They must never be fitted to
"space-saver" type spare wheels.
Take account of the legislation in force in
your country on the use of snow chains
and the maximum authorised speed.
Installation tips
F If you have to fit the chains during a journey, stop the vehicle on a flat sur face on the side
of the road.
F
A
pply the parking brake and, if necessary,
put wheel chocks against the wheels to
prevent your vehicle from sliding.
F
F
it the chains following the instructions
provided by the manufacturer.
F
M
ove off gently and drive for a few seconds,
without exceeding 30
mph (50 km/h).
F
S
top your vehicle and check that the snow
chains are correctly tightened.
7
Practical information
Page 190 of 308
188
F Check that the compressor switch is at the "O " position.
F
F
ully uncoil the electric cable, stowed under
the compressor.
F
C
onnect the compressor's electrical
connector to the vehicle's 12
V socket.
F
S
witch on the ignition.
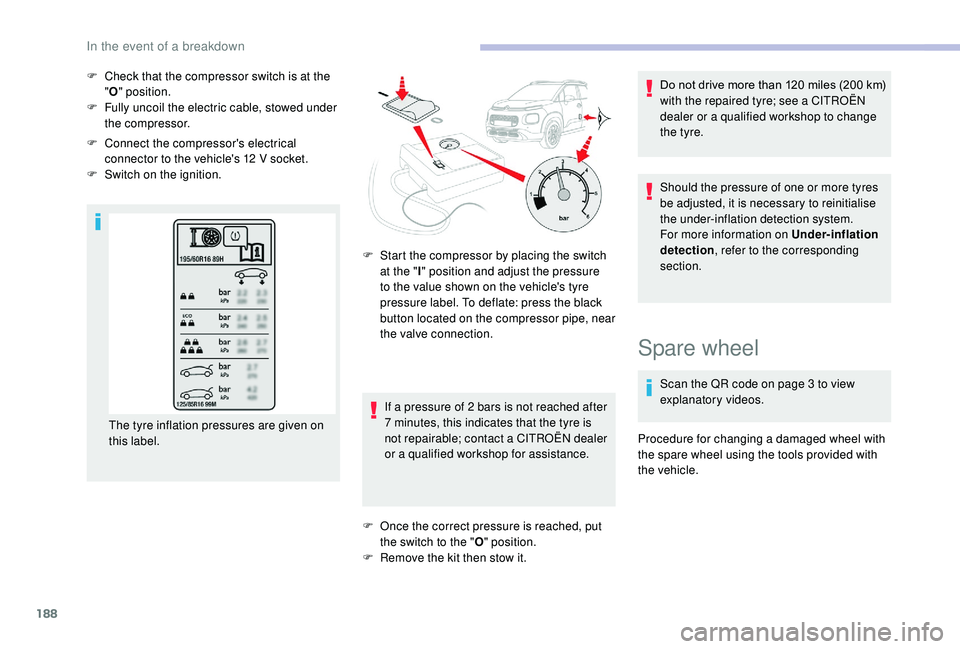
The tyre inflation pressures are given on
this label. F
S
tart the compressor by placing the switch
at the " I" position and adjust the pressure
to the value shown on the vehicle's tyre
pressure label. To deflate: press the black
button located on the compressor pipe, near
the valve connection.
If a pressure of 2
bars is not reached after
7
minutes, this indicates that the tyre is
not repairable; contact a CITROËN dealer
or a qualified workshop for assistance.
F
O
nce the correct pressure is reached, put
the switch to the " O" position.
F
R
emove the kit then stow it.Do not drive more than 120
miles (200 km)
with the repaired tyre; see a CITROËN
dealer or a qualified workshop to change
the tyre.
Should the pressure of one or more tyres
be adjusted, it is necessary to reinitialise
the under-inflation detection system.
For more information on Under-inflation
detection , refer to the corresponding
section.
Spare wheel
Scan the QR code on page 3 to view
explanatory videos.
Procedure for changing a damaged wheel with
the spare wheel using the tools provided with
the vehicle.
In the event of a breakdown
Page 192 of 308

190
Access to the spare wheel
Removing the wheel
The spare wheel is installed in the boot, under
t h e f l o o r.
F
U
nclip and remove the tool storage box
or pull out the polystyrene cover plate
(depending on version).
F
U
nscrew the central nut. F
R
emove the fastening device (nut and bolt).
F
R
aise the spare wheel towards you from the
r e a r.
F
T
ake the wheel out of the boot.
Putting the wheel back in place
F Put the wheel back in its housing.
F
S lacken the nut on the bolt by a few turns. If there is no wheel in the well, the
fastening device (nut and bolt) cannot be
refitted.
Removing a wheel
* Position
P for the automatic gearbox
Parking the vehicle
Stop the vehicle where it does not block
traffic: the ground must be level, stable
and non-slippery.
Apply the parking brake, switch off the
ignition and engage first gear* so as to
block the wheels.
Check that the parking brake warning
lamp comes on fixed in the instrument
panel.
The occupants must get out of the vehicle
and wait in a safe place.
Make sure that the jack is correctly
positioned at one of the vehicle's jacking
points.
Incorrect use of the jack could cause the
vehicle to collapse.
Never go underneath a vehicle raised
using a jack; use an axle stand.
F
P
osition the fastening device (nut and bolt)
in the middle of the wheel.
F
T
ighten the central nut to retain the wheel
c o r r e c t l y.
F
C
lip the tool storage box back into place
or reinsert the polystyrene cover plate
(depending on version).
In the event of a breakdown
Page 193 of 308

191
Ensure that the jack is stable. If the
ground is slippery or loose, the jack may
slip or collapse – Risk of injury!
Take care to place the jack only at the
jacking points A or B under the vehicle,
making sure that the jack head is centred
at the contact point on the vehicle.
Other wise, there is a risk of damage to the
vehicle and/or the jack collapsing – Risk
of injury!
F
P
lace the foot of the jack 2 on the ground
and ensure that it is directly below the front
A or rear B jacking point provided on the
underbody, whichever is closest to the
wheel to be changed. F
E
xtend the jack 2 until its head comes
into contact with the jacking point A or
B , whichever is used, having the contact
sur face A or B on the vehicle correctly
engaged with the central part of the head of
the jack.
F
Ra
ise the vehicle until there is sufficient
space between the wheel and the ground
to admit the spare (not punctured) wheel
easily.
Wheel with hub cap
When refitting the wheel
, after tightening
the wheel bolts, refit the wheel trim,
starting by placing its aperture in line with
the valve and then pushing it into place all
round its edge with the palm of your hand.
List of operations
F If your vehicle has steel wheels, remove the hub cap.
F
I
f your vehicle has alloy wheels, remove the
central bolt covers using tool 3 .
F
I
f your vehicle has security wheel bolts, fit
security bolt socket 5 to wheelbrace 1 to
slacken the security bolt.
F
S
lacken the other bolts using wheelbrace 1
o n l y.
8
In the event of a breakdown