audio CITROEN C3 AIRCROSS 2022 User Guide
[x] Cancel search | Manufacturer: CITROEN, Model Year: 2022, Model line: C3 AIRCROSS, Model: CITROEN C3 AIRCROSS 2022Pages: 308, PDF Size: 9.13 MB
Page 66 of 308
64
Folding/unfolding during locking/unlocking
can be disabled. Contact a CITROËN
dealer or a qualified workshop.
If necessary, the mirrors can be folded
manually.
Rear view mirror
Equipped with an anti-dazzle system, which
darkens the mirror glass and reduces the
nuisance to the driver caused by the sun,
headlamps from other vehicles, etc.
Manual model
Adjustment
F A djust the mirror so that the mirror is
directed correctly in the "day" position.
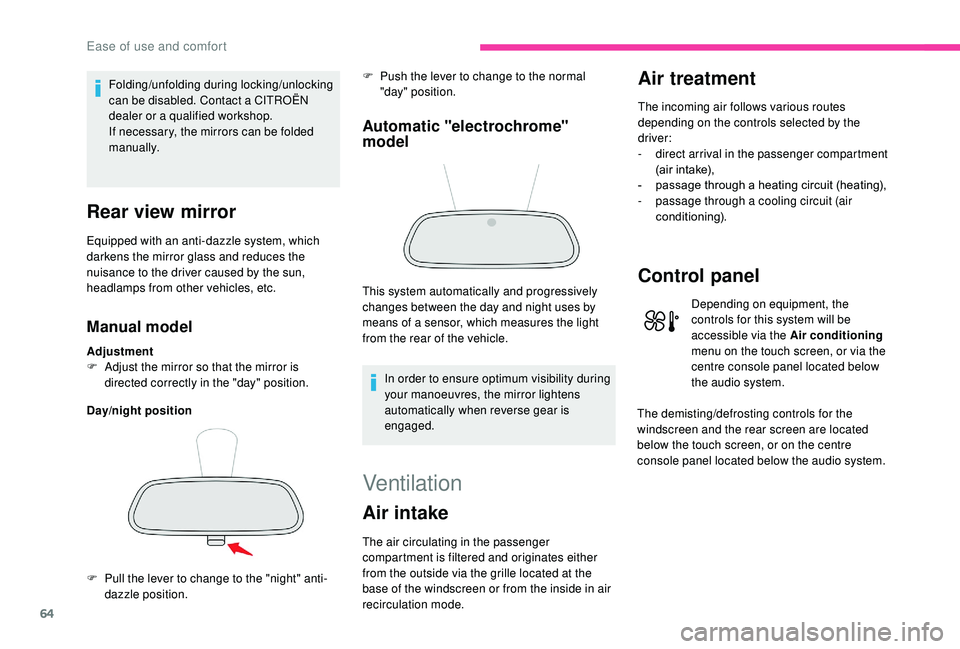
Day/night position
Automatic "electrochrome"
model
In order to ensure optimum visibility during
your manoeuvres, the mirror lightens
automatically when reverse gear is
engaged.
F
P
ull the lever to change to the "night" anti-
dazzle position. F
P
ush the lever to change to the normal
"day" position.
This system automatically and progressively
changes between the day and night uses by
means of a sensor, which measures the light
from the rear of the vehicle.
Ventilation
Air intake
The air circulating in the passenger
compartment is filtered and originates either
from the outside via the grille located at the
base of the windscreen or from the inside in air
recirculation mode.
Air treatment
The incoming air follows various routes
depending on the controls selected by the
driver:
-
d
irect arrival in the passenger compartment
(air intake),
-
p
assage through a heating circuit (heating),
-
p
assage through a cooling circuit (air
conditioning).
Control panel
Depending on equipment, the
controls for this system will be
accessible via the Air conditioning
menu on the touch screen, or via the
centre console panel located below
the audio system.
The demisting/defrosting controls for the
windscreen and the rear screen are located
below the touch screen, or on the centre
console panel located below the audio system.
Ease of use and comfort
Page 75 of 308
73
Checking operation
The state of the charge indicator lamp allows
the operation of the charger to be monitored.
If the indicator lamp is lit orange:
USB port
When the USB port is used, the portable
device charges automatically.
A message is displayed if the power drawn
by the portable device exceeds the current
supplied by the vehicle.
Charge indicator lampMeaning
Off Engine switched off.
No compatible portable device detected.
Charging finished.
Fixed, green Compatible portable device detected.
Charging...
Flashing, orange Foreign object detected in the charging zone.
Portable device not well centred in the charging zone.
Fixed, orange Fault with the portable device's battery meter.
Temperature of the portable device's battery too high.
Charger fault.
-
r
emove the portable device, then replace it
in the middle of the charging zone.
or
-
r
emove the portable device and try again in
a quarter of an hour.
If the problem persists, have the system
checked by a CITROËN dealer or a qualified
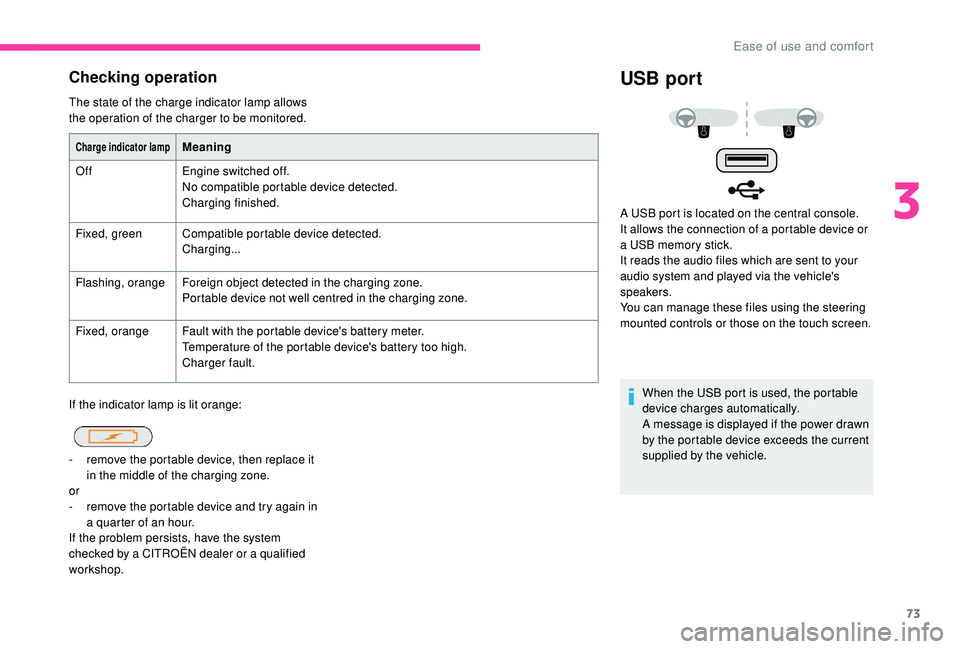
workshop. A USB port is located on the central console.
It allows the connection of a portable device or
a USB memory stick.
It reads the audio files which are sent to your
audio system and played via the vehicle's
speakers.
You can manage these files using the steering
mounted controls or those on the touch screen.
3
Ease of use and comfort
Page 88 of 308
86
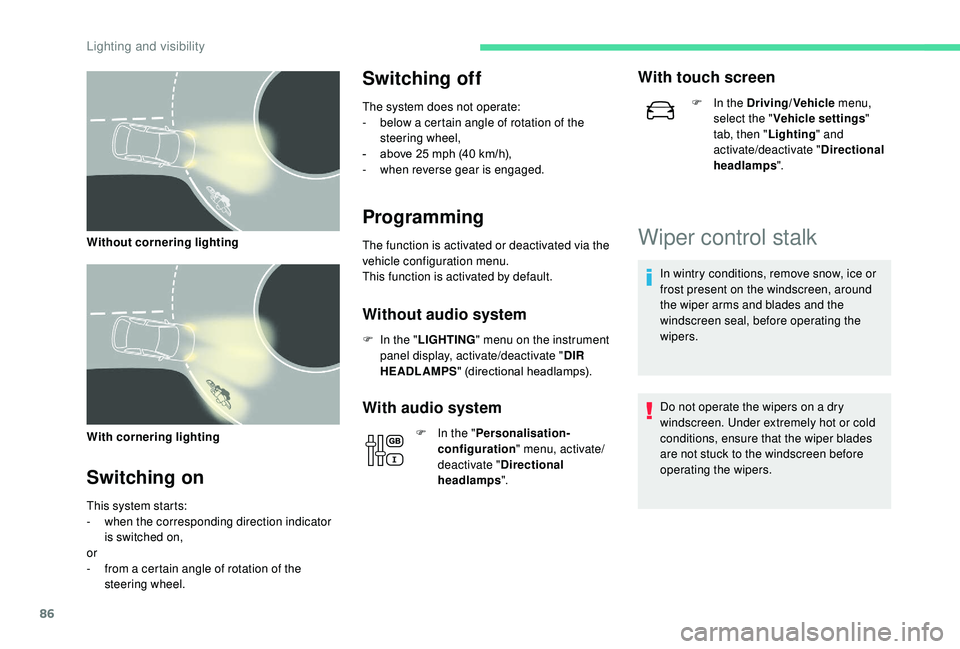
With cornering lighting
Switching on
This system starts:
- w hen the corresponding direction indicator
is switched on,
or
-
f
rom a certain angle of rotation of the
steering wheel.
Switching off
The system does not operate:
- b elow a certain angle of rotation of the
steering wheel,
-
a
bove 25 mph (40 km/h),
-
w
hen reverse gear is engaged.
Programming
The function is activated or deactivated via the
vehicle configuration menu.
This function is activated by default.
Without audio system
F In the " LIGHTING " menu on the instrument
panel display, activate/deactivate " DIR
HEADLAMPS " (directional headlamps).
With audio system
F In the "Personalisation-
configuration " menu, activate/
deactivate " Directional
headlamps ".
With touch screen
F In the Driving/Vehicle menu,
select the " Vehicle settings "
tab, then " Lighting" and
activate/deactivate " Directional
headlamps ".
Wiper control stalk
In wintry conditions, remove snow, ice or
frost present on the windscreen, around
the wiper arms and blades and the
windscreen seal, before operating the
wipers.
Do not operate the wipers on a dry
windscreen. Under extremely hot or cold
conditions, ensure that the wiper blades
are not stuck to the windscreen before
operating the wipers.
Without cornering lighting
Lighting and visibility
Page 89 of 308

87
Manual controls
The windscreen wipers are controlled directly
by the driver.
With manual wiping
With AUTO wiping
Windscreen wipers
Wiping speed control stalk: raise or lower the
stalk to the desired position.Normal wiping (moderate rain).
Intermittent wiping (proportional to
the speed of the vehicle).
Of f.
Single wipe (press downwards or
pull the stalk briefly towards you,
then release).
Automatic wiping (press down,
then release) or single wipe (pull
the stalk briefly towards you).
Rear wiper
Rear wiper selection ring: Of f.
Intermittent wiping (proportional to
the speed of the vehicle). Wash-wipe (set duration).
Reverse gear
When reverse gear is engaged, the rear wiper
will come into operation automatically if the
windscreen wipers are operating.
Activation/Deactivation
The function is activated or deactivated via the
vehicle configuration menu.
This function is activated by default.
If a significant accumulation of snow or ice
is present, or when using a bicycle carrier
on the boot, deactivate the automatic rear
w i p e r.
Without audio system
F In the " COMFORT " menu on the instrument
panel display, activate/deactivate " REAR
WIPE REV " (automatic wiping in reverse).
Fast wiping (heavy rain). or
4
Lighting and visibility
Page 90 of 308
88
With audio system
In the "Personalisation-
configuration " menu, activate/
deactivate " Rear wipe in reverse
gear ".
With touch screen
F In the Driving/Vehicle menu,
select the " Vehicle settings "
tab, then " Comfort" and
activate/deactivate " Rear wiper
in reverse ".
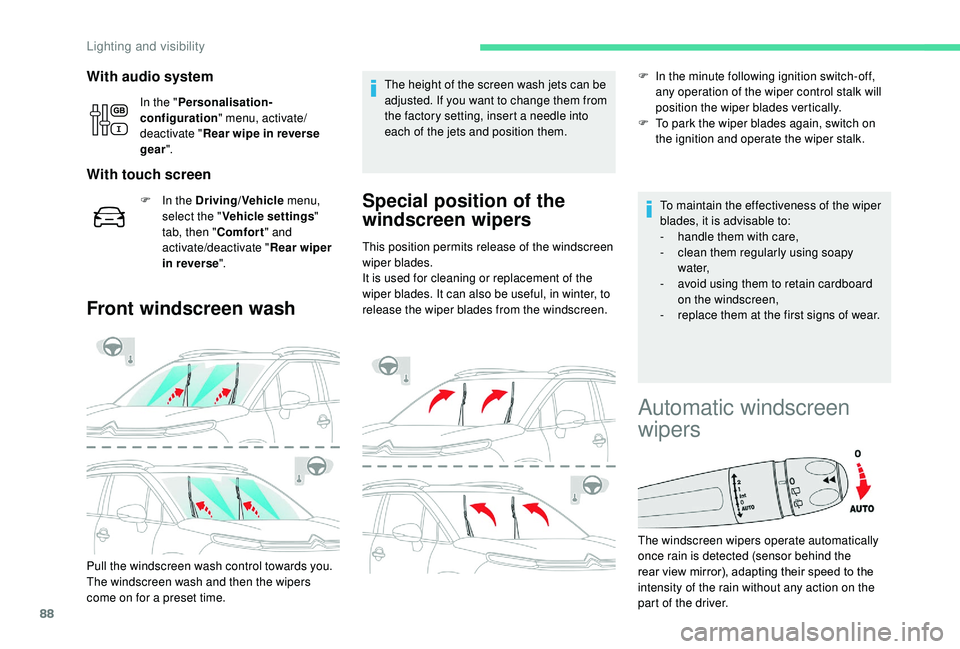
Front windscreen wash
Pull the windscreen wash control towards you.
The windscreen wash and then the wipers
come on for a preset time. The height of the screen wash jets can be
adjusted. If you want to change them from
the factory setting, insert a needle into
each of the jets and position them.
Special position of the
windscreen wipers
This position permits release of the windscreen
wiper blades.
It is used for cleaning or replacement of the
wiper blades. It can also be useful, in winter, to
release the wiper blades from the windscreen.
F
I
n the minute following ignition switch-off,
any operation of the wiper control stalk will
position the wiper blades vertically.
F
T
o park the wiper blades again, switch on
the ignition and operate the wiper stalk.
To maintain the effectiveness of the wiper
blades, it is advisable to:
- h andle them with care,
- c lean them regularly using soapy
water,
-
a
void using them to retain cardboard
on the windscreen,
-
r
eplace them at the first signs of wear.
Automatic windscreen
wipers
The windscreen wipers operate automatically
once rain is detected (sensor behind the
rear view mirror), adapting their speed to the
intensity of the rain without any action on the
part of the driver.
Lighting and visibility
Page 123 of 308

121
Never leave the engine running in
an enclosed area without adequate
ventilation: internal combustion engines
emit toxic exhaust gases, such as carbon
monoxide. There is a risk of intoxication
and death!
In very extreme wintry conditions
(temperature below -23°C), to guarantee
correct operation and the longevity of
the mechanical elements of your vehicle,
engine and gearbox, the engine must be
left running for 4 minutes before starting
the vehicle.
Switching off the engine
F Stop the vehicle.
F W ith the engine running in idle, turn the key
to position 1 .
F
R
emove the key from the ignition switch.
F
T
o lock the steering column, turn the
steering wheel until it locks.
To facilitate unlocking of the steering
column, it is recommended that the
wheels be returned to the straight ahead
position before switching off the engine. F
C
heck that the parking brake is correctly
applied, particularly on sloping ground.
Never switch off the ignition before the
vehicle is at a complete stop. With the
engine off, the braking and steering
assistance systems are also cut off: risk of
loss of control of the vehicle.
When you leave the vehicle, keep the key
with you and lock the vehicle.Energy economy mode
After switching off the engine (position 1
– Stop ), for a maximum of 30
minutes you
can still use functions such as the audio and
telematic system, the wipers, dipped beam
headlamps, courtesy lamps, etc.
For more information on Energy
economy mode , refer to the
corresponding section. Key left in
If the key has been left in the ignition
switch at position 2 (Ignition on)
, the
ignition will be switched off automatically
after one hour.
To switch the ignition back on, turn the key
to position 1 (Stop) , then back to position
2 (Ignition on) .
Starting/Switching off the
engine with
K
eyless Entry
and Starting
Starting the engine
F With a manual gearbox , put the gear lever
into neutral.
F
W
ith the electronic key inside the vehicle,
fully depress the clutch pedal.
6
Driving
Page 133 of 308

131
Deactivation/Reactivation
In this case, this indicator lamp
flashes for a few seconds then goes
of f.
This operation is perfectly normal.
In certain circumstances, such as the need
to maintain the temperature in the passenger
compartment, it may be useful to deactivate the
Stop & Start system.
The system can be deactivated at any time,
once the ignition is switched on.
If the engine is in STOP mode, it then restarts.
The Stop & Start system is reactivated
automatically every time the ignition is switched
on.
With/Without audio system
F Press this button.
Deactivation is confirmed by illumination of the
indicator lamp for the button and the display of
a message. Pressing this button again reactivates the
function.
The indicator lamp for the button is turned off
and a message is displayed.
With touch screen
F In the Driving/Vehicle
menu,
select the " Driving functions "
tab, then " Stop & Star t ".
Opening the bonnet
Before doing anything under the bonnet,
deactivate the Stop & Start system to
avoid any risk of injury resulting from an
automatic change to START mode.
Driving on flooded roads
Before driving in a flooded area, it is
strongly recommended that you deactivate
the Stop & Start system.
For more information on Driving
recommendations , particularly on
flooded roads, refer to the corresponding
section. If a fault occurs in STOP mode, the engine may
stall.
All of the instrument panel warning lamps come on.It is then necessary to switch off the ignition
and start the engine again.
The Stop & Start system requires a
12
V battery of specific technology and
specification.
All work on this type of battery must be
carried out only by a CITROËN dealer or a
qualified workshop.
For more information on the 12
V batter y,
refer to the corresponding section.
Malfunction
In the event of a fault with the system, the
button’s indicator lamp flashes for a few
moments, then remains on.
Have it checked by a CITROËN dealer or a
qualified workshop.
6
Driving
Page 134 of 308
132
Head-up display
System which projects various information onto
a smoked blade in the driver's field of vision so
that they do not have to take their eyes off the
road.
Displays during operation
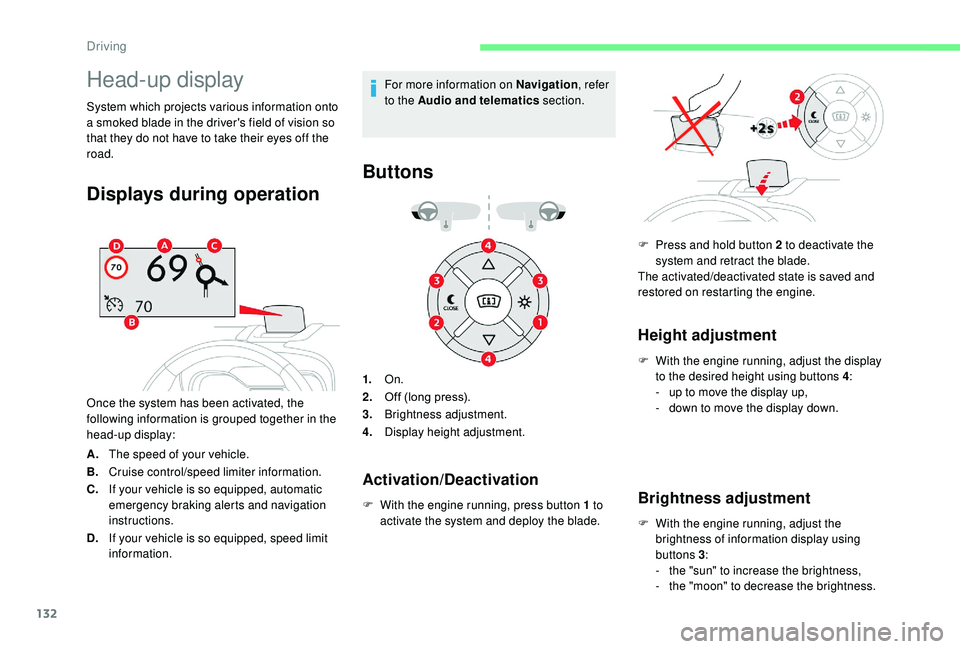
Once the system has been activated, the
following information is grouped together in the
head-up display:
A.The speed of your vehicle.
B. Cruise control/speed limiter information.
C. If your vehicle is so equipped, automatic
emergency braking alerts and navigation
instructions.
D. If your vehicle is so equipped, speed limit
information. For more information on Navigation
, refer
to the Audio and telematics section.
Buttons
1.On.
2. Off (long press).
3. Brightness adjustment.
4. Display height adjustment.
F
W
ith the engine running, press button 1 to
activate the system and deploy the blade.
Height adjustment
F With the engine running, adjust the display to the desired height using buttons 4 :
-
u
p to move the display up,
-
d
own to move the display down.
Brightness adjustment
F With the engine running, adjust the brightness of information display using
buttons 3 :
-
t
he "sun" to increase the brightness,
-
t
he "moon" to decrease the brightness.
Activation/Deactivation
F Press and hold button 2 to deactivate the system and retract the blade.
The activated/deactivated state is saved and
restored on restarting the engine.
Driving
Page 137 of 308
135
It is necessary to update your navigation
mapping regularly in order to receive
accurate information on speed limits from
the system.
Display on the instrument panel
Head-up display
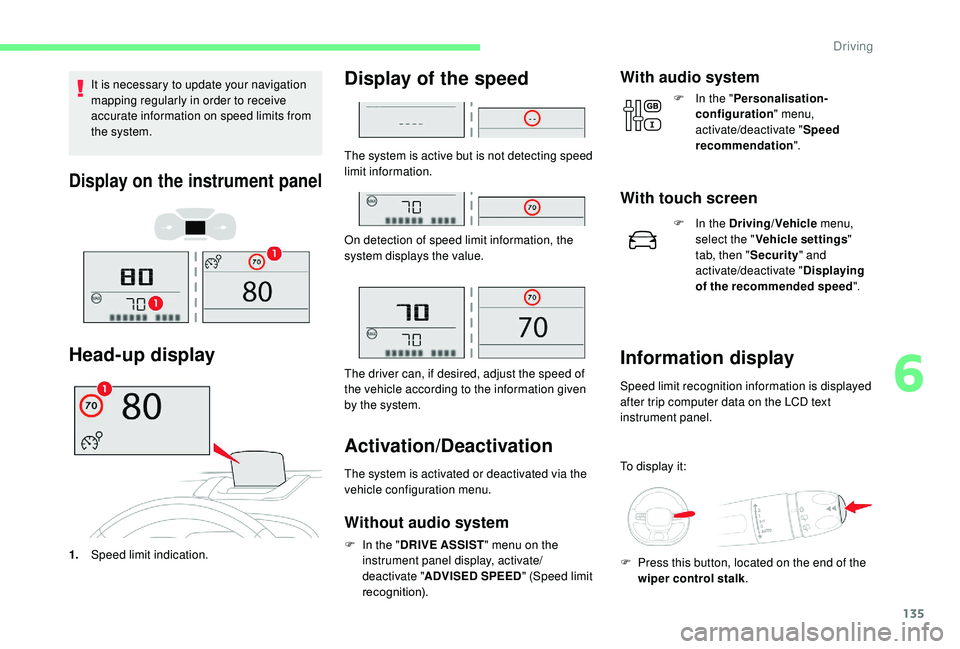
1.Speed limit indication.
Display of the speed
The system is active but is not detecting speed
limit information.
On detection of speed limit information, the
system displays the value.
The driver can, if desired, adjust the speed of
the vehicle according to the information given
by the system.
Activation/Deactivation
The system is activated or deactivated via the
vehicle configuration menu.
Without audio system
F In the " DRIVE ASSIST " menu on the
instrument panel display, activate/
deactivate " ADVISED SPEED " (Speed limit
recognition).
With audio system
F In the " Personalisation-
configuration " menu,
activate/deactivate " Speed
recommendation ".
With touch screen
F In the Driving/Vehicle menu,
select the " Vehicle settings "
tab, then " Security" and
activate/deactivate " Displaying
of the recommended speed ".
Information display
Speed limit recognition information is displayed
after trip computer data on the LCD text
instrument panel.
To display it:
F
P
ress this button, located on the end of the
wiper control stalk .
6
Driving
Page 146 of 308
144
Where the speed of your vehicle is too
high approaching another vehicle, the first
level of alert may not be displayed: the
level 2 alert may be displayed directly.
Important: the level 1 alert is never
displayed when the " Close" trigger
threshold has been selected.
Modifying the alert trigger
threshold
This threshold determines how you wish
to be alerted of the presence of a moving
or stationary vehicle in front of you, or a
pedestrian present in your traffic lane.
The current threshold can be modified via the
vehicle configuration menu.
You can select one of three predefined
thresholds:
-
"Distant ",
-
"Normal ",
-
"Close ".
The last threshold selected is kept in memory
when the ignition is switched off.
Without audio system
With audio systemIntelligent emergency
braking assistance
If the driver brakes, but not sufficiently to avoid
a collision, this system will supplement the
braking, within the limits of the laws of physics.
This assistance will only be provided if you
press the brake pedal.
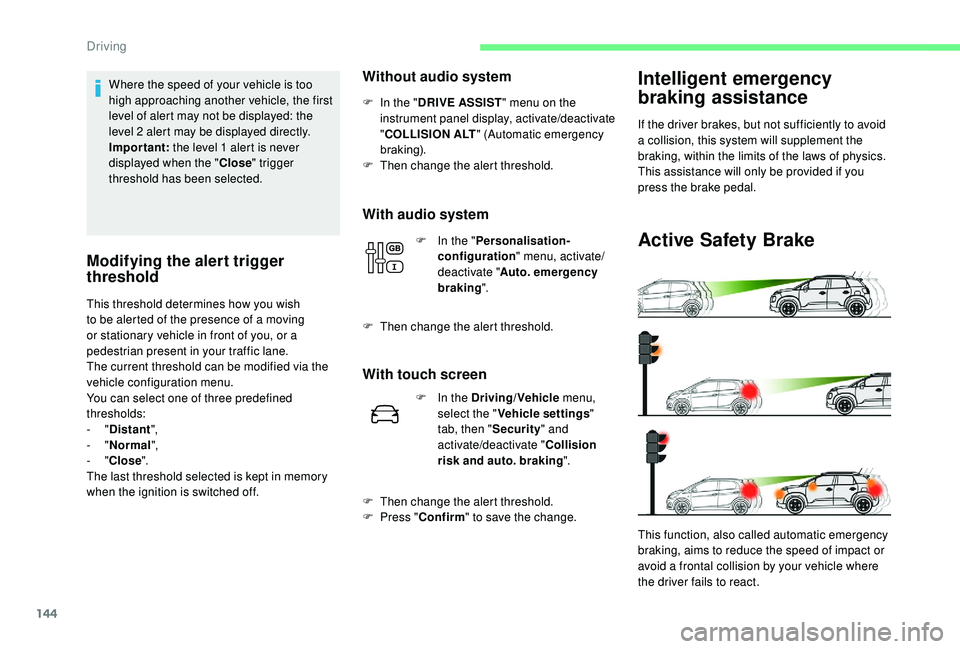
Active Safety Brake
This function, also called automatic emergency
braking, aims to reduce the speed of impact or
avoid a frontal collision by your vehicle where
the driver fails to react.
F
I
n the "
DRIVE ASSIST " menu on the
instrument panel display, activate/deactivate
" COLLISION ALT " (Automatic emergency
b r ak ing).
F
T
hen change the alert threshold.
F
I
n the "
Personalisation-
configuration " menu, activate/
deactivate " Auto. emergency
braking ".
F
T
hen change the alert threshold.
With touch screen
F In the Driving/Vehicle
menu,
select the " Vehicle settings "
tab, then " Security" and
activate/deactivate " Collision
risk and auto. braking ".
F
T
hen change the alert threshold.
F
P
ress " Confirm " to save the change.
Driving