ESP CITROEN C3 AIRCROSS 2022 Workshop Manual
[x] Cancel search | Manufacturer: CITROEN, Model Year: 2022, Model line: C3 AIRCROSS, Model: CITROEN C3 AIRCROSS 2022Pages: 308, PDF Size: 9.13 MB
Page 133 of 308

131
Deactivation/Reactivation
In this case, this indicator lamp
flashes for a few seconds then goes
of f.
This operation is perfectly normal.
In certain circumstances, such as the need
to maintain the temperature in the passenger
compartment, it may be useful to deactivate the
Stop & Start system.
The system can be deactivated at any time,
once the ignition is switched on.
If the engine is in STOP mode, it then restarts.
The Stop & Start system is reactivated
automatically every time the ignition is switched
on.
With/Without audio system
F Press this button.
Deactivation is confirmed by illumination of the
indicator lamp for the button and the display of
a message. Pressing this button again reactivates the
function.
The indicator lamp for the button is turned off
and a message is displayed.
With touch screen
F In the Driving/Vehicle
menu,
select the " Driving functions "
tab, then " Stop & Star t ".
Opening the bonnet
Before doing anything under the bonnet,
deactivate the Stop & Start system to
avoid any risk of injury resulting from an
automatic change to START mode.
Driving on flooded roads
Before driving in a flooded area, it is
strongly recommended that you deactivate
the Stop & Start system.
For more information on Driving
recommendations , particularly on
flooded roads, refer to the corresponding
section. If a fault occurs in STOP mode, the engine may
stall.
All of the instrument panel warning lamps come on.It is then necessary to switch off the ignition
and start the engine again.
The Stop & Start system requires a
12
V battery of specific technology and
specification.
All work on this type of battery must be
carried out only by a CITROËN dealer or a
qualified workshop.
For more information on the 12
V batter y,
refer to the corresponding section.
Malfunction
In the event of a fault with the system, the
button’s indicator lamp flashes for a few
moments, then remains on.
Have it checked by a CITROËN dealer or a
qualified workshop.
6
Driving
Page 135 of 308

133
When stationary or while driving, no objects
should be placed around the blade (or in its
recess) so as to not impede deployment of
the blade and its correct operation.
In certain extreme weather conditions
(rain and/or snow, bright sunshine, etc.)
the head-up display may not be legible or
may suffer temporary interference.
Some sunglasses may hamper reading of
the information.
To clean the blade, use a clean, soft cloth
(such as a spectacles cloth or microfibre
cloth). Do not use a dry or abrasive cloth
or detergent or solvent products as these
could scratch the blade or damage the
anti-reflection coating.
This system operates when the engine is
running, and the settings are stored when
the ignition is switched off.
Memorising speeds
This function allows speed settings to be stored
that will then be offered for configuration of two
systems: speed limiter or cruise control.
You can store up to six speed settings for each
system.
Default speed settings have already been
stored.As a safety measure, the driver must only
carry out these operations to change
speed settings when the vehicle is
stationary.
Changing a speed setting
This function can be accessed in the
Driving/Vehicle menu of the touch
screen. F
Sel
ect the "
Driving functions " tab.
F
Sel
ect the "
Adjusting Speeds " function.
F
Sel
ect the "
Speed limiter " or "Cruise
control" tab corresponding to the
equipment you want to memorise new
speed settings for.
F
S
elect the speed setting you want to
change.
F
E
nter the new value using the numeric
keyboard and confirm.
F
C
onfirm to store the changes and exit the
menu.
6
Driving
Page 136 of 308
134
"MEM" button
For more information on the Speed limiter
or Cruise control , refer to the corresponding
section. With this button, you can select a memorised
speed setting to use with the speed limiter or
the programmable cruise control.
Recognition of
speed limit signs and
recommendation
The units for the speed limits (mph or
km/h) depend on the country you are
driving in.
This should be taken into account in order
to obser ve the speed limit.
For the system to operate correctly when
you change country, the units for speed in
the instrument panel must be set to those
for the country you are driving in.
The automatic reading of road signs is a
driving assistance system and does not
always display speed limits correctly.
The speed limit signs present on the road
always take priority over the display by the
system.
The system cannot in any circumstances
replace the need for vigilance on the part
of the driver.
The driver must observe the driving
regulations and must adapt the speed of
the vehicle to suit the weather and traffic.
It is possible for the system to not display
the speed limit if it does not detect a
speed limit sign within a preset period.
The system is designed to detect signs
that conform to the Vienna Convention on
road signs. To maintain correct operation of the
system: regularly clean the area in front of
the camera.
The internal sur face of the windscreen can
also become misted around the camera.
In humid and cold weather, demist the
windscreen regularly.
Principles
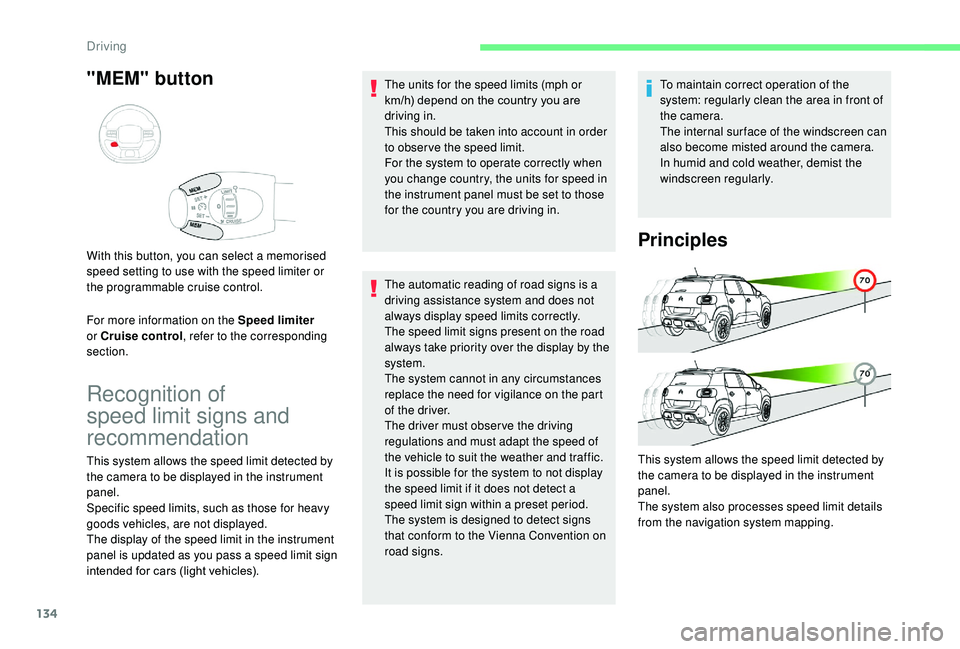
This system allows the speed limit detected by
the camera to be displayed in the instrument
panel.
The system also processes speed limit details
from the navigation system mapping.
This system allows the speed limit detected by
the camera to be displayed in the instrument
panel.
Specific speed limits, such as those for heavy
goods vehicles, are not displayed.
The display of the speed limit in the instrument
panel is updated as you pass a speed limit sign
intended for cars (light vehicles).
Driving
Page 138 of 308

136
Operating limits
The legislation on speed limits is specific to
each country.
The system does not take account of reduced
speed limits in the following cases:
-
p
oor weather (rain, snow),
-
a
tmospheric pollution,
-
t
railer, caravan,
-
d
riving with a space-saver type spare wheel
or snow chains fitted,
-
p
uncture repair using the temporary repair
kit,
-
y
oung drivers, etc.
F
O
r, depending on equipment, press the
thumbwheel on the steering wheel .
The following situations may inter fere with the
operation of the system or prevent it working:
-
p
oor visibility (inadequate street lighting,
falling snow, rain, fog),
-
w
indscreen area located in front of the
camera dirty, misted, frost-covered, snow-
covered, damaged or covered by a sticker,
Memorising the speed
setting
This memorisation is in addition to the display
of Speed limit recognition .
For more information on the Speed
limiter or Cruise control , refer to the
corresponding sections.
Steering mounted controls
Display in the instrument panel
Head-up display
The driver can choose to adapt the speed
setting to the speed limit suggested, by
pressing the memorisation button for the speed
limiter and the cruise control.
This speed setting then replaces the previous
speed setting for the speed limiter and/or cruise
control. 1.
Select speed limiter/cruise control mode.
2. Memorise a speed setting.
-
f
ault with the camera,
-
o
bsolete or incorrect mapping,
-
h
idden road signs (other vehicles,
vegetation, snow),
-
s
peed limit signs that do not conform to the
standard, are damaged or distorted.
Driving
Page 140 of 308

138
Displays in the instrument panel
For more information on Memorising speeds
or Speed limit recognition, refer to the
corresponding sections.
Head-up display
9. Speed suggested by the speed limit
recognition system.
Switching on
F If the speed setting is suitable (last speed
setting programmed in the system), press
button 4 to switch the speed limiter on.
F
T
urn the thumbwheel 1 to the LIMIT position
to select the speed limiter; the function is
paused.
F
P
ressing button 4 again temporarily
interrupts the function (pause).
Adjusting the limit speed
setting
To modify the limit speed setting:
F i n steps of + or -1 mph (km/h), make
repeated short presses on button 2 or 3 ,
F
c
ontinuously, in increments of +/- 5 mph
(km/h), press and hold button 2 or 3 .
To modify the limit speed setting using
memorised speeds and from the touch screen:
F
p
ress button 5 to display the six memorised
speed settings,
F
p
ress the button for the desired speed
setting.
This setting becomes the new limit speed.
To modify the speed limiter setting using the
speed suggested by the speed limit recognition
system:
F
t
he speed suggested is displayed in the
instrument panel,
F
m
ake a first press on button 5 ; a message
is displayed to confirm the memorisation
request,
F
p
ress button 5 again to save the suggested
speed.
The speed is then displayed in the instrument
panel as the new speed setting.
6. Speed limiter mode selection indication.
7. Speed limiter on/pause indication.
8. Programmed speed setting value.
Driving
Page 142 of 308
140
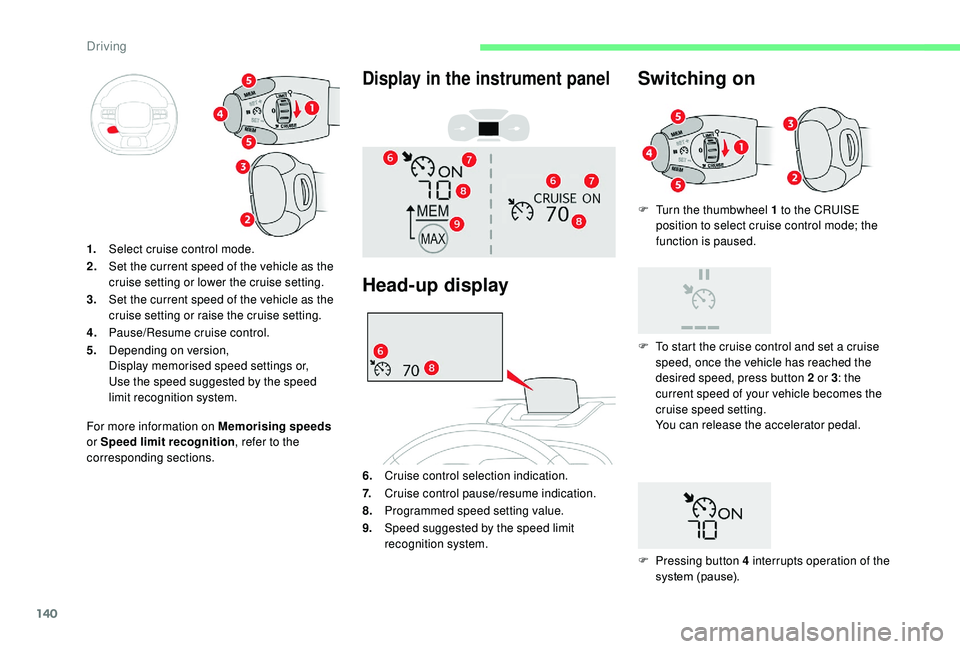
F Turn the thumbwheel 1 to the CRUISE position to select cruise control mode; the
function is paused.
1. Select cruise control mode.
2. Set the current speed of the vehicle as the
cruise setting or lower the cruise setting.
3. Set the current speed of the vehicle as the
cruise setting or raise the cruise setting.
4. Pause/Resume cruise control.
5. Depending on version,
Display memorised speed settings or,
Use the speed suggested by the speed
limit recognition system.
For more information on Memorising speeds
or Speed limit recognition , refer to the
corresponding sections.
6.Cruise control selection indication.
7. Cruise control pause/resume indication.
8. Programmed speed setting value.
9. Speed suggested by the speed limit
recognition system.
Switching on
F Pressing button 4 interrupts operation of the
system (pause).
Display in the instrument panel
Head-up display
F To start the cruise control and set a cruise speed, once the vehicle has reached the
desired speed, press button 2 or 3 : the
current speed of your vehicle becomes the
cruise speed setting.
You can release the accelerator pedal.
Driving
Page 145 of 308
143
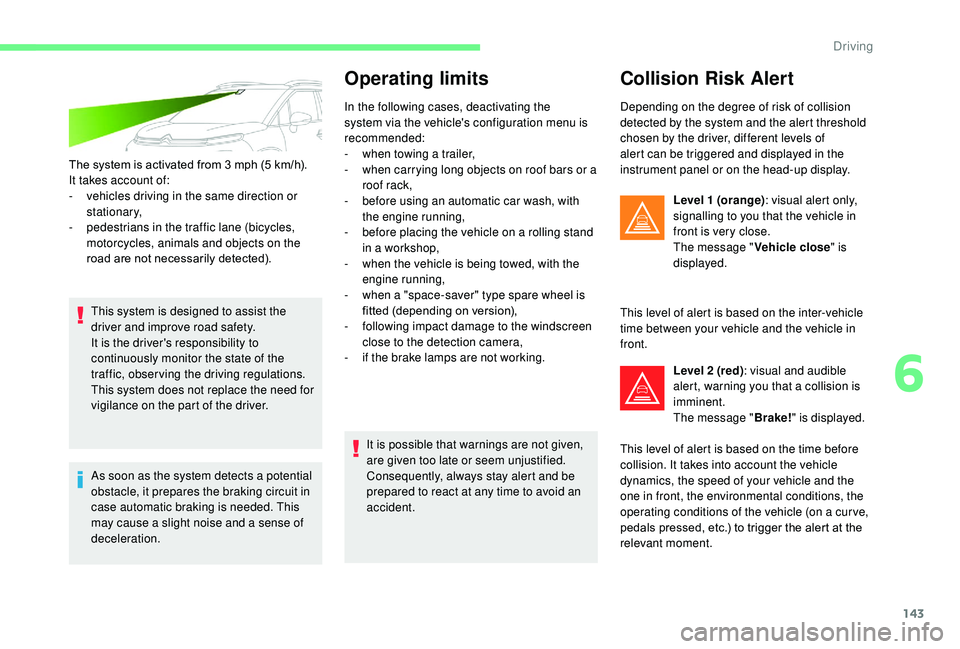
The system is activated from 3 mph (5 km/h).
I t takes account of:
-
v
ehicles driving in the same direction or
stationary,
-
p
edestrians in the traffic lane (bicycles,
motorcycles, animals and objects on the
road are not necessarily detected).
This system is designed to assist the
driver and improve road safety.
It is the driver's responsibility to
continuously monitor the state of the
traffic, observing the driving regulations.
This system does not replace the need for
vigilance on the part of the driver.
As soon as the system detects a potential
obstacle, it prepares the braking circuit in
case automatic braking is needed. This
may cause a slight noise and a sense of
deceleration.
Operating limits
In the following cases, deactivating the
system via the vehicle's configuration menu is
recommended:
-
w
hen towing a trailer,
-
w
hen carrying long objects on roof bars or a
roof rack,
-
b
efore using an automatic car wash, with
the engine running,
-
b
efore placing the vehicle on a rolling stand
in a workshop,
-
w
hen the vehicle is being towed, with the
engine running,
-
w
hen a "space-saver" type spare wheel is
fitted (depending on version),
-
fo
llowing impact damage to the windscreen
close to the detection camera,
-
i
f the brake lamps are not working.It is possible that warnings are not given,
are given too late or seem unjustified.
Consequently, always stay alert and be
prepared to react at any time to avoid an
accident.
Collision Risk Alert
Depending on the degree of risk of collision
detected by the system and the alert threshold
chosen by the driver, different levels of
alert can be triggered and displayed in the
instrument panel or on the head-up display. Level 1 (orange) : visual alert only,
signalling to you that the vehicle in
front is very close.
The message " Vehicle close" is
displayed.
This level of alert is based on the inter-vehicle
time between your vehicle and the vehicle in
front. Level 2 (red) : visual and audible
alert, warning you that a collision is
imminent.
The message " Brake!" is displayed.
This level of alert is based on the time before
collision. It takes into account the vehicle
dynamics, the speed of your vehicle and the
one in front, the environmental conditions, the
operating conditions of the vehicle (on a cur ve,
pedals pressed, etc.) to trigger the alert at the
relevant moment.
6
Driving
Page 151 of 308
149
Blind spot monitoring
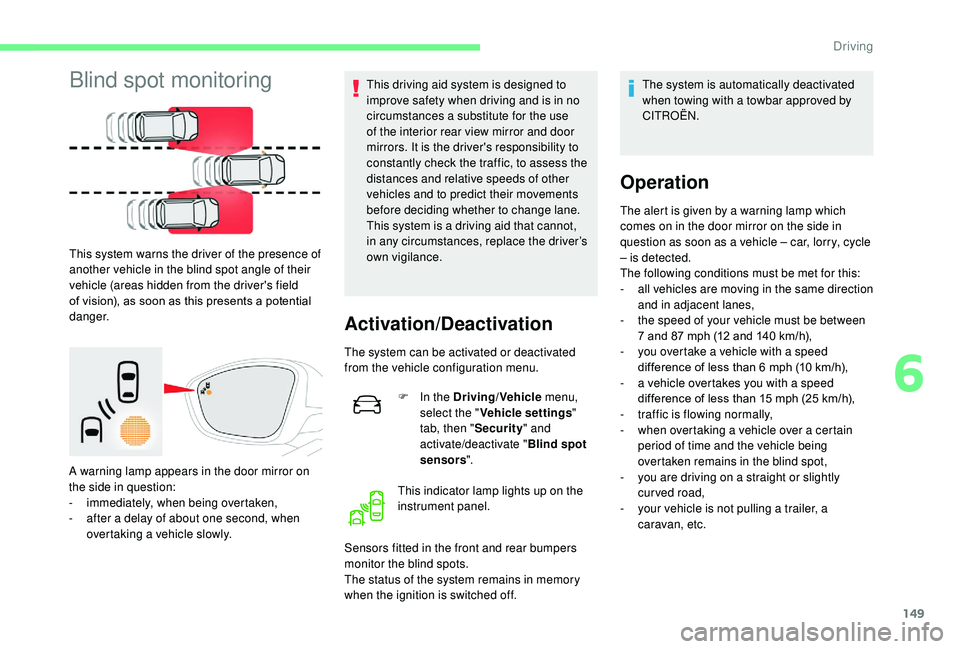
This system warns the driver of the presence of
another vehicle in the blind spot angle of their
vehicle (areas hidden from the driver's field
of vision), as soon as this presents a potential
danger.
A warning lamp appears in the door mirror on
the side in question:
-
i
mmediately, when being overtaken,
-
a
fter a delay of about one second, when
overtaking a vehicle slowly. This driving aid system is designed to
improve safety when driving and is in no
circumstances a substitute for the use
of the interior rear view mirror and door
mirrors. It is the driver's responsibility to
constantly check the traffic, to assess the
distances and relative speeds of other
vehicles and to predict their movements
before deciding whether to change lane.
This system is a driving aid that cannot,
in any circumstances, replace the driver’s
own vigilance.
Activation/Deactivation
The system can be activated or deactivated
from the vehicle configuration menu.
F
I
n the Driving/Vehicle menu,
select the " Vehicle settings "
tab, then " Security" and
activate/deactivate " Blind spot
sensors ".
This indicator lamp lights up on the
instrument panel.
Sensors fitted in the front and rear bumpers
monitor the blind spots.
The status of the system remains in memory
when the ignition is switched off. The system is automatically deactivated
when towing with a towbar approved by
CITROËN.
Operation
The alert is given by a warning lamp which
comes on in the door mirror on the side in
question as soon as a vehicle – car, lorry, cycle
– is detected.
The following conditions must be met for this:
-
a
ll vehicles are moving in the same direction
and in adjacent lanes,
-
t
he speed of your vehicle must be between
7 and 87
mph (12 and 140 km/h),
-
y
ou overtake a vehicle with a speed
difference of less than 6
mph (10 km/h),
-
a v
ehicle overtakes you with a speed
difference of less than 15
mph (25 km/h),
-
t
raffic is flowing normally,
-
w
hen overtaking a vehicle over a certain
period of time and the vehicle being
overtaken remains in the blind spot,
-
y
ou are driving on a straight or slightly
curved road,
-
y
our vehicle is not pulling a trailer, a
caravan, etc.
6
Driving
Page 156 of 308
154
Activation
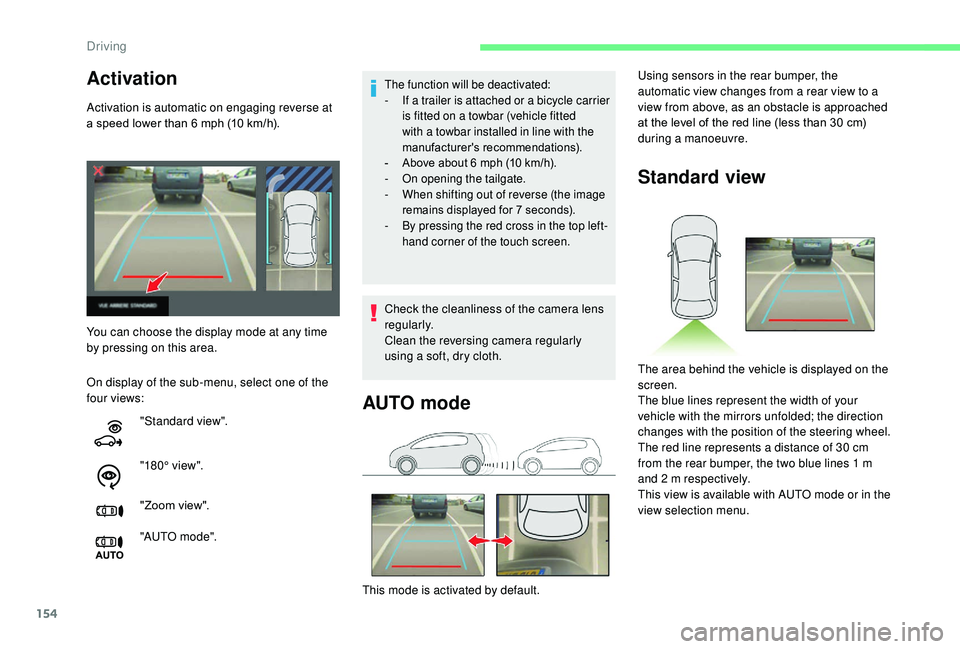
Activation is automatic on engaging reverse at
a speed lower than 6 mph (10 km/h).
On display of the sub-menu, select one of the
four views:
The function will be deactivated:
- I f a trailer is attached or a bicycle carrier
is fitted on a towbar (vehicle fitted
with a towbar installed in line with the
manufacturer's recommendations).
-
A
bove about 6 mph (10 km/h).
-
O
n opening the tailgate.
-
W
hen shifting out of reverse (the image
remains displayed for 7
seconds).
-
B
y pressing the red cross in the top left-
hand corner of the touch screen.
You can choose the display mode at any time
by pressing on this area.
"Standard view".
"180° view".
"Zoom view".
"AUTO m o de". Check the cleanliness of the camera lens
regularly.
Clean the reversing camera regularly
using a soft, dry cloth.
AUTO mode
This mode is activated by default. Using sensors in the rear bumper, the
automatic view changes from a rear view to a
view from above, as an obstacle is approached
at the level of the red line (less than 30
cm)
during a manoeuvre.
Standard view
The area behind the vehicle is displayed on the
screen.
The blue lines represent the width of your
vehicle with the mirrors unfolded; the direction
changes with the position of the steering wheel.
The red line represents a distance of 30
cm
from the rear bumper, the two blue lines 1
m
and 2
m respectively.
This view is available with AUTO mode or in the
view selection menu.
Driving
Page 162 of 308
160
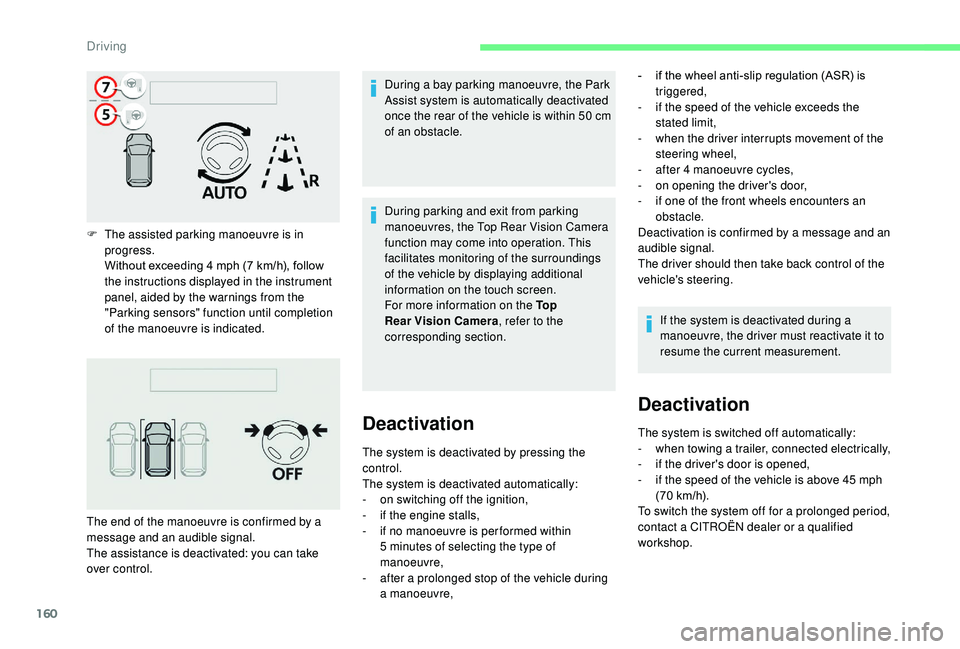
F The assisted parking manoeuvre is in progress.
Without exceeding 4
mph (7 km/h), follow
the instructions displayed in the instrument
panel, aided by the warnings from the
"Parking sensors" function until completion
of the manoeuvre is indicated. During a bay parking manoeuvre, the Park
Assist system is automatically deactivated
once the rear of the vehicle is within 50
cm
of an obstacle.
The end of the manoeuvre is confirmed by a
message and an audible signal.
The assistance is deactivated: you can take
over control. During parking and exit from parking
manoeuvres, the Top Rear Vision Camera
function may come into operation. This
facilitates monitoring of the surroundings
of the vehicle by displaying additional
information on the touch screen.
For more information on the To p
Rear Vision Camera
, refer to the
corresponding section.
Deactivation
The system is deactivated by pressing the
control.
The system is deactivated automatically:
-
o
n switching off the ignition,
-
i
f the engine stalls,
-
i
f no manoeuvre is per formed within
5
minutes of selecting the type of
manoeuvre,
-
a
fter a prolonged stop of the vehicle during
a manoeuvre, -
i
f the wheel anti-slip regulation (ASR) is
triggered,
-
i
f the speed of the vehicle exceeds the
stated limit,
-
w
hen the driver interrupts movement of the
steering wheel,
-
a
fter 4 manoeuvre cycles,
-
o
n opening the driver's door,
-
i
f one of the front wheels encounters an
obstacle.
Deactivation is confirmed by a message and an
audible signal.
The driver should then take back control of the
vehicle's steering.
If the system is deactivated during a
manoeuvre, the driver must reactivate it to
resume the current measurement.
Deactivation
The system is switched off automatically:
- w hen towing a trailer, connected electrically,
-
i
f the driver's door is opened,
-
i
f the speed of the vehicle is above 45 mph
(70
km/h).
To switch the system off for a prolonged period,
contact a CITROËN dealer or a qualified
workshop.
Driving