reset CITROEN C3 AIRCROSS 2022 Owners Manual
[x] Cancel search | Manufacturer: CITROEN, Model Year: 2022, Model line: C3 AIRCROSS, Model: CITROEN C3 AIRCROSS 2022Pages: 308, PDF Size: 9.13 MB
Page 10 of 308
8
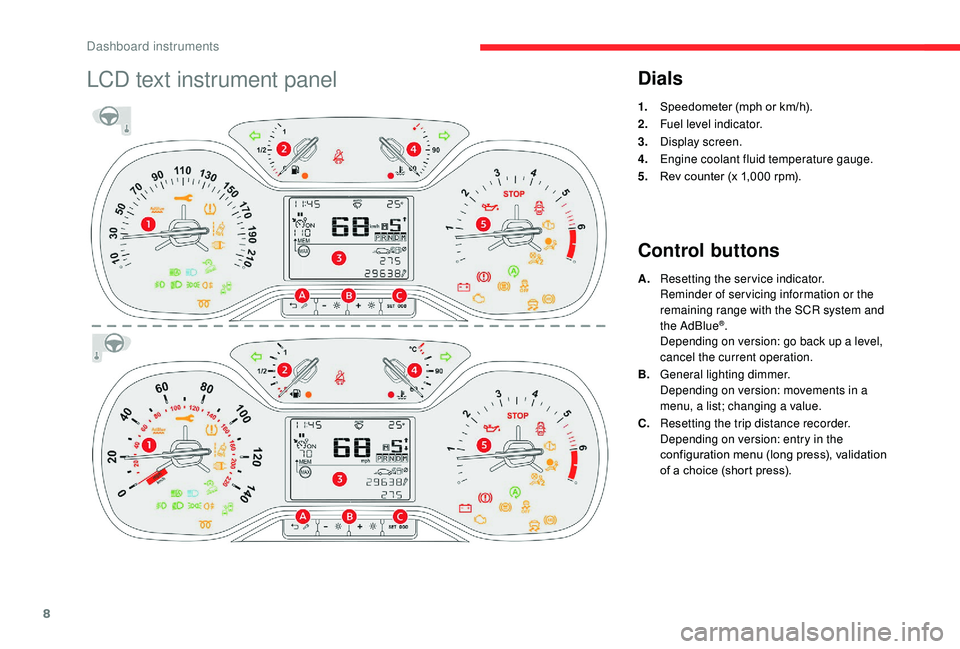
LCD text instrument panelDials
1.Speedometer (mph or km/h).
2. Fuel level indicator.
3. Display screen.
4. Engine coolant fluid temperature gauge.
5. Rev counter (x 1,000
rpm).
Control buttons
A.Resetting the service indicator.
Reminder of servicing information or the
remaining range with the SCR system and
the AdBlue
®.
Depending on version: go back up a level,
cancel the current operation.
B. General lighting dimmer.
Depending on version: movements in a
menu, a list; changing a value.
C. Resetting the trip distance recorder.
Depending on version: entry in the
configuration menu (long press), validation
of a choice (short press).
Dashboard instruments
Page 11 of 308
9
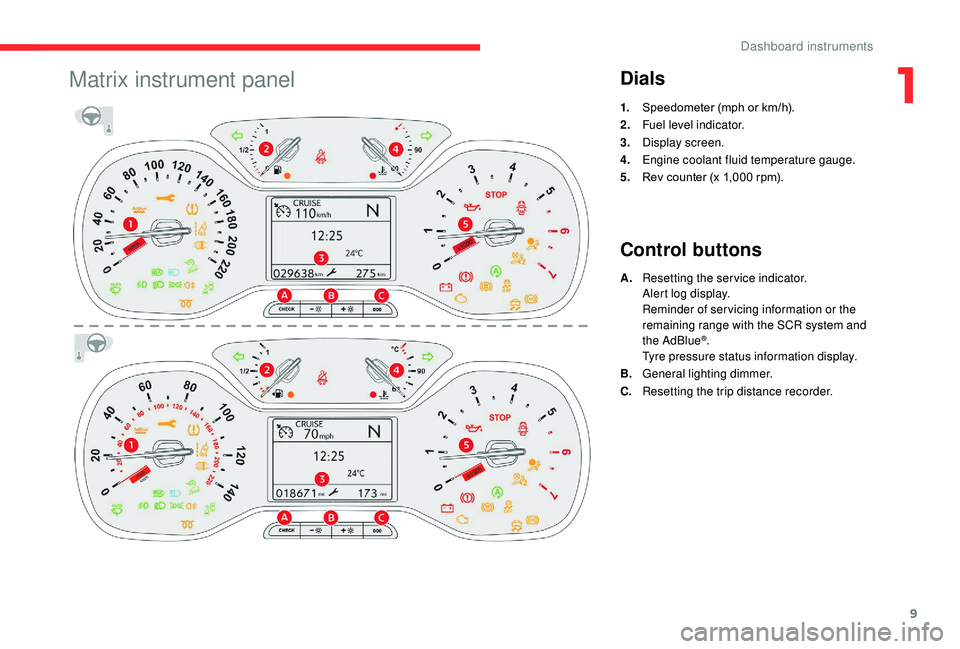
Matrix instrument panelDials
1.Speedometer (mph or km/h).
2. Fuel level indicator.
3. Display screen.
4. Engine coolant fluid temperature gauge.
5. Rev counter (x 1,000
rpm).
Control buttons
A.Resetting the service indicator.
Alert log display.
Reminder of servicing information or the
remaining range with the SCR system and
the AdBlue
®.
Tyre pressure status information display.
B. General lighting dimmer.
C. Resetting the trip distance recorder.
1
Dashboard instruments
Page 30 of 308
28
CHECK
Resetting the service indicator
After each service, the service indicator must
be reset to zero.
If you have carried out the ser vice on your
vehicle yourself, switch off the ignition:
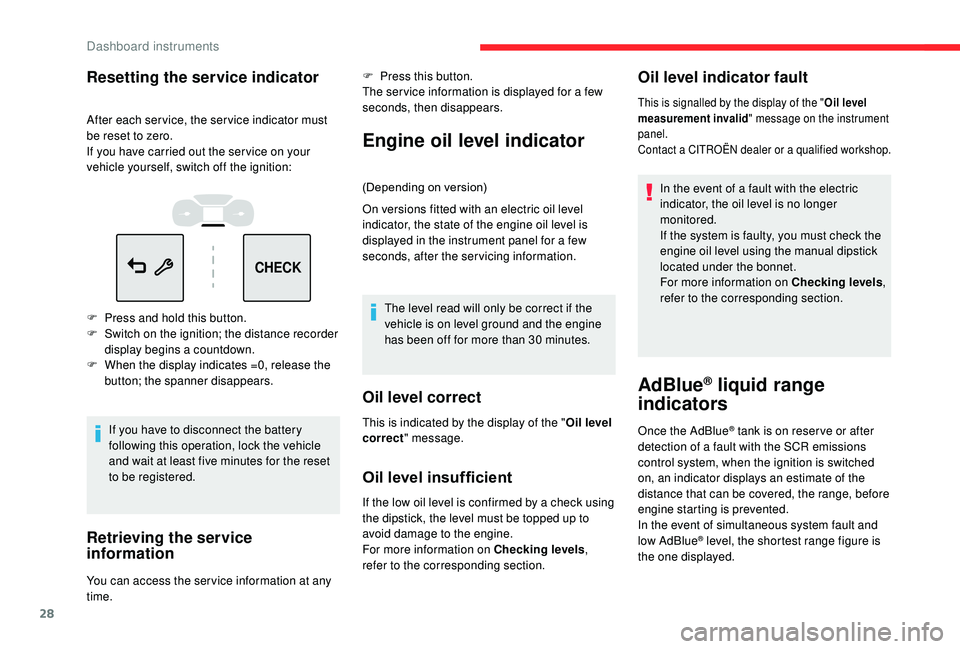
F
P
ress and hold this button.
F
S
witch on the ignition; the distance recorder
display begins a countdown.
F
W
hen the display indicates =0, release the
button; the spanner disappears.
If you have to disconnect the battery
following this operation, lock the vehicle
and wait at least five minutes for the reset
to be registered.
Retrieving the service
information
You can access the ser vice information at any
time. F
P
ress this button.
The ser vice information is displayed for a few
seconds, then disappears.
Engine oil level indicator
(Depending on version)
On versions fitted with an electric oil level
indicator, the state of the engine oil level is
displayed in the instrument panel for a few
seconds, after the servicing information.
The level read will only be correct if the
vehicle is on level ground and the engine
has been off for more than 30
minutes.
Oil level correct
Oil level insufficient
If the low oil level is confirmed by a check using
the dipstick, the level must be topped up to
avoid damage to the engine.
For more information on Checking levels ,
refer to the corresponding section.
Oil level indicator fault
In the event of a fault with the electric
indicator, the oil level is no longer
monitored.
If the system is faulty, you must check the
engine oil level using the manual dipstick
located under the bonnet.
For more information on Checking levels ,
refer to the corresponding section.
AdBlue® liquid range
indicators
Once the AdBlue® tank is on reser ve or after
detection of a fault with the SCR emissions
control system, when the ignition is switched
on, an indicator displays an estimate of the
distance that can be covered, the range, before
engine starting is prevented.
In the event of simultaneous system fault and
low AdBlue
® level, the shortest range figure is
the one displayed.
This is indicated by the display of the "
Oil level
correct " message.
This is signalled by the display of the " Oil level
measurement invalid " message on the instrument
panel.
Contact a CITROËN dealer or a qualified workshop.
Dashboard instruments
Page 33 of 308
31
When travelling abroad, you may have to
change the units of distance: the display
of road speed must be in the official units
(miles or km) for the country.
The change of units is done via the screen
configuration menu, with the vehicle
stationary.
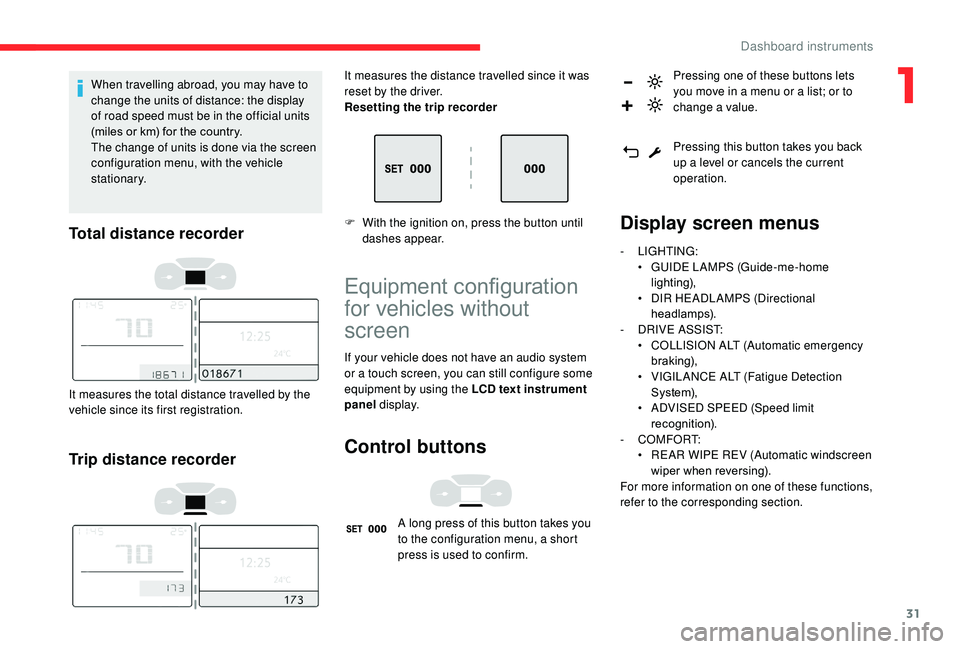
Total distance recorder
It measures the total distance travelled by the
vehicle since its first registration.
Trip distance recorder
It measures the distance travelled since it was
reset by the driver.
Resetting the trip recorder
F
W
ith the ignition on, press the button until
dashes appear.
Equipment configuration
for vehicles without
screen
If your vehicle does not have an audio system
or a touch screen, you can still configure some
equipment by using the LCD text instrument
panel display.
Control buttons
A long press of this button takes you
to the configuration menu, a short
press is used to confirm. Pressing one of these buttons lets
you move in a menu or a list; or to
change a value.
Pressing this button takes you back
up a level or cancels the current
operation.
Display screen menus
-
LIGHTING:
•
G UIDE LAMPS (Guide-me-home
lighting),
•
D
IR HEADLAMPS (Directional
headlamps).
-
D
RIVE ASSIST:
•
C
OLLISION ALT (Automatic emergency
b r ak ing),
•
V
IGILANCE ALT (Fatigue Detection
S yste m),
•
A
DVISED SPEED (Speed limit
recognition).
-
COMFORT:
•
R
EAR WIPE REV (Automatic windscreen
wiper when reversing).
For more information on one of these functions,
refer to the corresponding section.
1
Dashboard instruments
Page 38 of 308
36
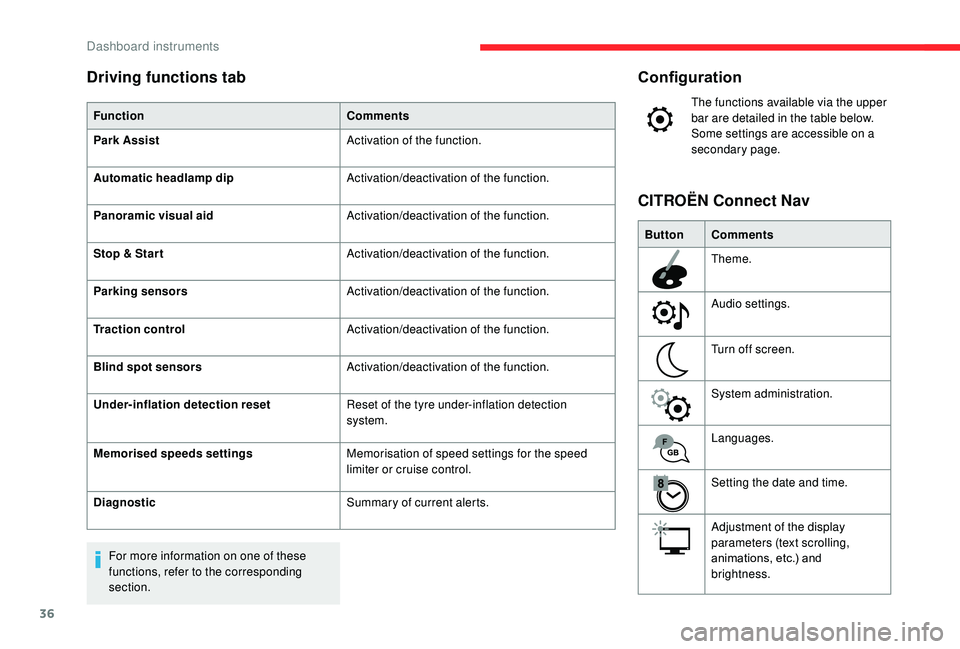
Configuration
The functions available via the upper
bar are detailed in the table below.
Some settings are accessible on a
secondary page.
Button Comments
Theme.
Audio settings.
Turn off screen.
System administration.
Languages.
Setting the date and time.
Adjustment of the display
parameters (text scrolling,
animations, etc.) and
brightness.
CITROËN Connect Nav
Driving functions tab
Function
Comments
Park Assist Activation of the function.
Automatic headlamp dip Activation/deactivation of the function.
Panoramic visual aid Activation/deactivation of the function.
Stop & Star t Activation/deactivation of the function.
Parking sensors Activation/deactivation of the function.
Traction control Activation/deactivation of the function.
Blind spot sensors Activation/deactivation of the function.
Under-inflation detection reset Reset of the tyre under-inflation detection
system.
Memorised speeds settings Memorisation of speed settings for the speed
limiter or cruise control.
Diagnostic Summary of current alerts.
For more information on one of these
functions, refer to the corresponding
section.
Dashboard instruments
Page 40 of 308
38
With LCD text instrument panel
A few definitions…
Range
(miles or km)The distance which can
still be travelled with the
fuel remaining in the tank
(related to the average
fuel consumption over the
last few miles (kilometres)
travelled).
This value may fluctuate if a change
of driving style or terrain results in a
significant change in the current fuel
consumption. After filling with at least 5
litres of fuel, the
range is recalculated and is displayed if it
exceeds 60 miles (100 km).
If dashes instead of figures continue to
be displayed when driving, contact a
CITROËN dealer or a qualified workshop.
Current fuel consumption
(mpg or l/100 km or km/l)
C alculated over the last few
seconds.
This function is only displayed above
20
mph (30 km/h).
Average fuel consumption
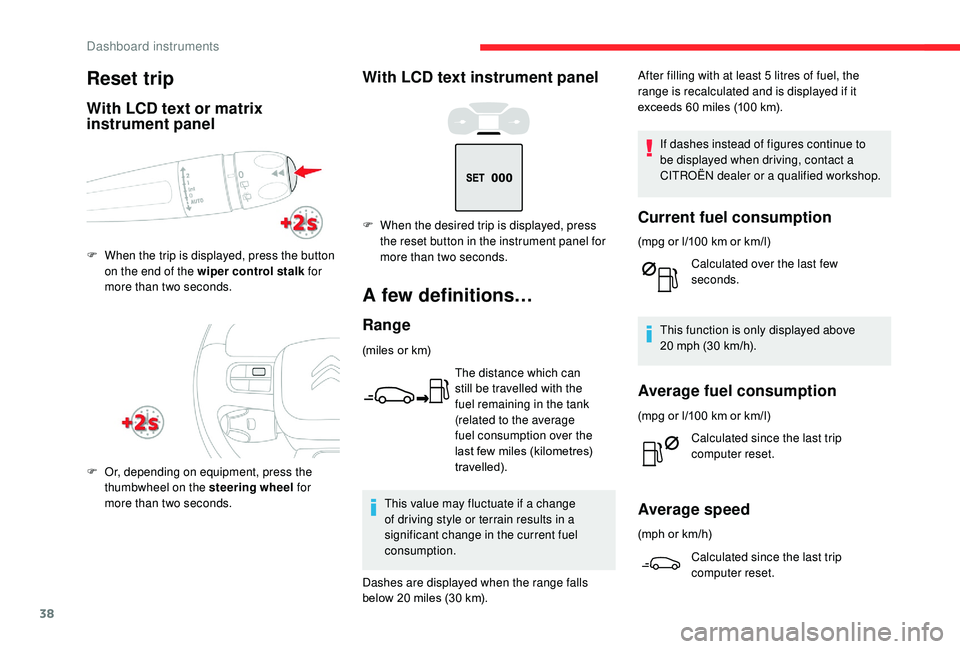
Reset trip
With LCD text or matrix
instrument panel
F When the trip is displayed, press the button on the end of the wiper control stalk for
more than two seconds.
F
O
r, depending on equipment, press the
thumbwheel on the steering wheel for
more than two seconds. F
W
hen the desired trip is displayed, press
the reset button in the instrument panel for
more than two seconds.
(mpg or l/100
km or km/l)
Calculated since the last trip
computer reset.
Average speed
(mph or km/h)
Calculated since the last trip
computer reset.
Dashes are displayed when the range falls
below 20
miles (30
km).
Dashboard instruments
Page 41 of 308
39
Distance travelled
(miles or km)Calculated since the last trip
computer reset.
Stop & Star t time counter
(minutes/seconds or hours/minutes)
A time counter calculates the sum of the
periods in STOP mode during a journey.
It resets to zero every time the ignition is
switched on.
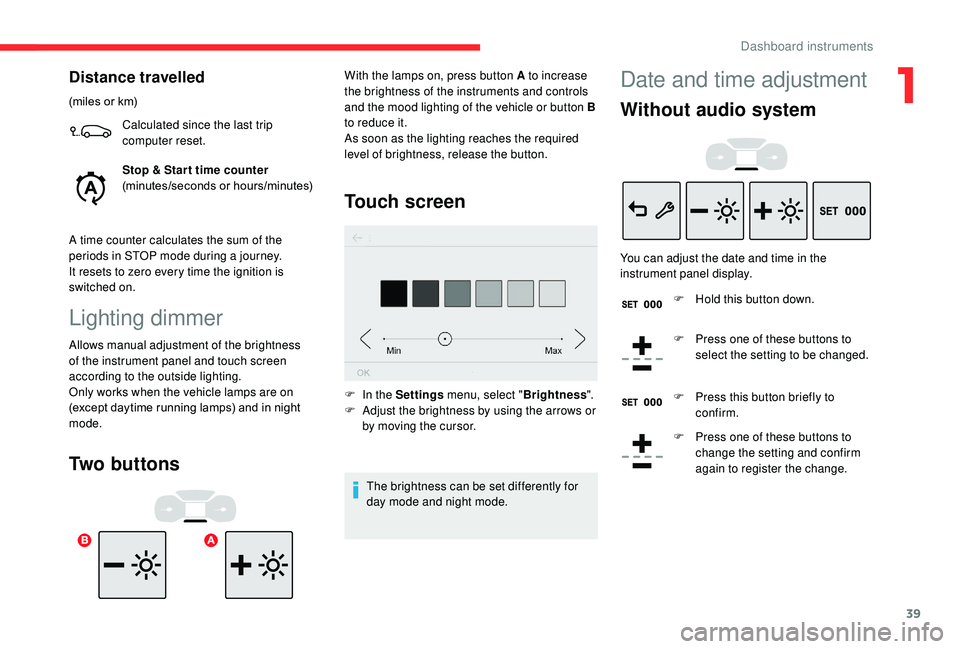
Lighting dimmer
Allows manual adjustment of the brightness
of the instrument panel and touch screen
according to the outside lighting.
Only works when the vehicle lamps are on
(except daytime running lamps) and in night
mode.
Two buttons Touch screen
F In the Settings
menu, select "Brightness".
F A djust the brightness by using the arrows or
by moving the cursor.
The brightness can be set differently for
day mode and night mode.
With the lamps on, press button A to increase
the brightness of the instruments and controls
and the mood lighting of the vehicle or button B
to reduce it.
As soon as the lighting reaches the required
level of brightness, release the button.
Date and time adjustment
Without audio system
You can adjust the date and time in the
instrument panel display.
F
H
old this button down.
F
P
ress one of these buttons to
select the setting to be changed.
F
P
ress this button briefly to
confirm.
F
P
ress one of these buttons to
change the setting and confirm
again to register the change.
1
Dashboard instruments
Page 90 of 308
88
With audio system
In the "Personalisation-
configuration " menu, activate/
deactivate " Rear wipe in reverse
gear ".
With touch screen
F In the Driving/Vehicle menu,
select the " Vehicle settings "
tab, then " Comfort" and
activate/deactivate " Rear wiper
in reverse ".
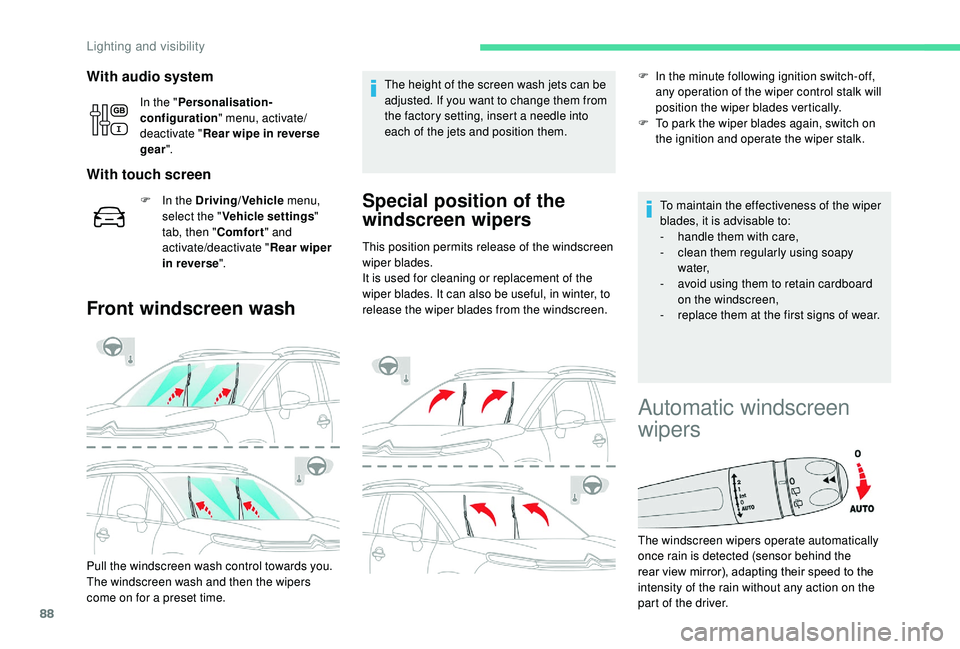
Front windscreen wash
Pull the windscreen wash control towards you.
The windscreen wash and then the wipers
come on for a preset time. The height of the screen wash jets can be
adjusted. If you want to change them from
the factory setting, insert a needle into
each of the jets and position them.
Special position of the
windscreen wipers
This position permits release of the windscreen
wiper blades.
It is used for cleaning or replacement of the
wiper blades. It can also be useful, in winter, to
release the wiper blades from the windscreen.
F
I
n the minute following ignition switch-off,
any operation of the wiper control stalk will
position the wiper blades vertically.
F
T
o park the wiper blades again, switch on
the ignition and operate the wiper stalk.
To maintain the effectiveness of the wiper
blades, it is advisable to:
- h andle them with care,
- c lean them regularly using soapy
water,
-
a
void using them to retain cardboard
on the windscreen,
-
r
eplace them at the first signs of wear.
Automatic windscreen
wipers
The windscreen wipers operate automatically
once rain is detected (sensor behind the
rear view mirror), adapting their speed to the
intensity of the rain without any action on the
part of the driver.
Lighting and visibility
Page 98 of 308
96
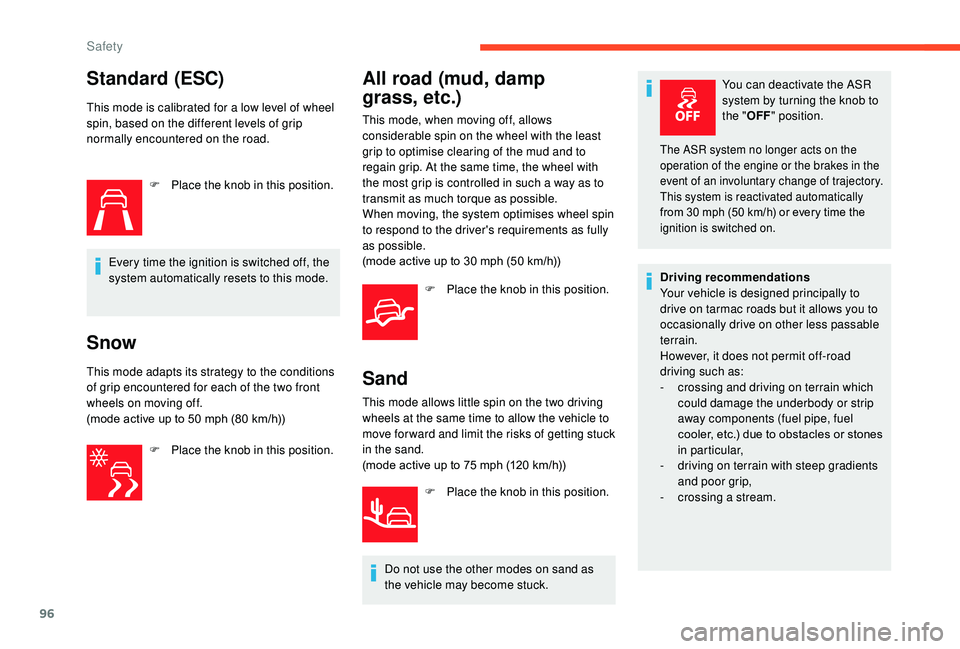
Standard (ESC)
This mode is calibrated for a low level of wheel
spin, based on the different levels of grip
normally encountered on the road.F
P
lace the knob in this position.
Every time the ignition is switched off, the
system automatically resets to this mode.
Snow
This mode adapts its strategy to the conditions
of grip encountered for each of the two front
wheels on moving off.
(mode active up to 50 mph (80 km/h))
F
P
lace the knob in this position.
All road (mud, damp
grass,
etc.)
This mode, when moving off, allows
considerable spin on the wheel with the least
grip to optimise clearing of the mud and to
regain grip. At the same time, the wheel with
the most grip is controlled in such a way as to
transmit as much torque as possible.
When moving, the system optimises wheel spin
to respond to the driver's requirements as fully
as possible.
(mode active up to 30
mph (50 km/h))
F
P
lace the knob in this position.
Sand
This mode allows little spin on the two driving
wheels at the same time to allow the vehicle to
move for ward and limit the risks of getting stuck
in the sand.
(mode active up to 75 mph (120 km/h))
F
P
lace the knob in this position.
Do not use the other modes on sand as
the vehicle may become stuck. You can deactivate the ASR
system by turning the knob to
the "
OFF" position.
The ASR system no longer acts on the
operation of the engine or the brakes in the
event of an involuntary change of trajectory.
This system is reactivated automatically
from 30 mph (50 km/h) or every time the
ignition is switched on.
Driving recommendations
Your vehicle is designed principally to
drive on tarmac roads but it allows you to
occasionally drive on other less passable
terrain.
However, it does not permit off-road
driving such as:
-
c
rossing and driving on terrain which
could damage the underbody or strip
away components (fuel pipe, fuel
cooler, etc.) due to obstacles or stones
in particular,
-
d
riving on terrain with steep gradients
and poor grip,
-
c
rossing a stream.
Safety
Page 132 of 308

130
Going into engine STOP
mode
This indicator lamp comes on in the
instrument panel and the engine
goes into standby automatically.
-
W
ith a manual gearbox , with the vehicle
stationary, when you put the gearbox into
neutral and release the clutch pedal,
-
W
ith an automatic gearbox , with the
vehicle stationary, when you press the
brake pedal or put the gear selector in
position N .
Stop & Star t time counter
(minutes/seconds or hours/minutes)
For your comfort, during parking
manoeuvres, STOP mode is not available
for a few seconds after coming out of
reverse gear.
The Stop & Start system does not affect
the functionality of the vehicle, such as for
example, braking, power steering, etc. Never refuel with the engine in STOP
mode; you must switch off the ignition with
the "START/STOP" button.
If your vehicle is fitted with this system, a time
counter calculates the sum of the periods in
STOP mode during a journey.
It resets to zero every time the ignition is
switched on.
Special cases: STOP mode not
available
STOP mode is not activated when:
- t he vehicle is on a steep slope (uphill or
downhill),
-
t
he driver's door is open,
-
t
he driver's seat belt is not fastened,
-
t
he vehicle has not exceeded 6 mph
(10
km/h) since the last engine start,
-
t
he engine is needed to maintain a
comfortable temperature in the passenger
compartment,
-
d
emisting is active,
-
s
ome special conditions (battery charge,
engine temperature, braking assistance,
exterior temperature, etc.) where the engine
is needed to control the system.
Going into engine START
mode
This indicator lamp goes off and the
engine restarts automatically:
-
W
ith a manual gearbox , when you fully
depress the clutch pedal.
-
W
ith an automatic gearbox:
•
g
ear selector in position D or M , when
you release the brake pedal,
•
o
r gear selector in position N and brake
pedal released, when you place the gear
selector in position D or M ,
•
o
r when you engage reverse gear.
Special cases: START mode
invoked automatically
As a safety measure or to maintain comfort
levels in the vehicle, START mode is invoked
automatically when:
-
y
ou open the driver's door,
-
y
ou unfasten the driver's seat belt,
-
t
he speed of the vehicle exceeds 2 mph
(3
km/h),
-
s
ome temporary conditions (battery charge,
engine temperature, braking assistance,
climate control, etc.) where the engine is
needed to control the system or the vehicle.
In this case, this indicator lamp
flashes for a few seconds then goes
of f.
This operation is perfectly normal.
Driving