head light CITROEN C3 AIRCROSS 2023 Owners Manual
[x] Cancel search | Manufacturer: CITROEN, Model Year: 2023, Model line: C3 AIRCROSS, Model: CITROEN C3 AIRCROSS 2023Pages: 244, PDF Size: 7.09 MB
Page 4 of 244
2
Contents
■
Overview
■
Eco-driving
1InstrumentsInstrument panels 8
Warning and indicator lamps 9
Indicators 14
Distance recorders 17
Equipment configuration for vehicles without
screen
17
Monochrome screen C 18
Touch screen 19
Trip computer 20
Setting the date and time 23
2AccessRemote control / Key 24
Keyless Entry and Start 25
Back-up procedures 27
Doors 29
Boot 30
Central locking 30
Alarm 31
Panoramic sunroof 32
Electric windows 34
3Ease of use and comfortFront seats 36
Rear seats 38
Steering wheel adjustment 41
Mirrors 41
Ventilation 42
Heating/Manual air conditioning 44
Automatic air conditioning 44
Front demist - defrost 46
Heated windscreen 46
Rear screen demist - defrost 47
Front fittings 47
Rear fittings 50
Boot fittings 51
Courtesy lamps 53
Interior ambient lighting 54
4Lighting and visibilityLighting control stalk 55
Direction indicators 56
Automatic illumination of headlamps 57
Guide-me-home and welcome lighting 57
Automatic lighting systems - General
recommendations
58
Automatic headlamp dipping 58
Headlamp beam height adjustment 59
Cornering lighting 59
Wiper control stalk 60
Changing a wiper blade 62
Automatic wipers 62
5SafetyGeneral safety recommendations 64
Hazard warning lamps 64
Horn 65
Emergency or assistance 65
Electronic stability control (ESC) 67
Grip control 68
Hill Assist Descent Control 69
Seat belts 70
Airbags 73
Child seats 75
Deactivating the front passenger airbag 77
ISOFIX child seats 78
i-Size child seats 80
Installing child seats 80
Child lock 83
6DrivingDriving recommendations 84
Starting / Switching off the engine with the key 86
Starting/Switching off the engine with
Keyless Entry and Start
87
Parking brake 89
5-speed manual gearbox 89
6-speed manual gearbox 90
Automatic gearbox (EAT6) 90
Gear shift indicator 92
Hill start assist 93
Stop & Start 93
Tyre under-inflation detection 95
Driving and manoeuvring aids - General
recommendations
97
Head-up display 98
Memorising speeds 99
Road signs recognition 100
Speed limiter 102
Cruise control - Specific recommendations 104
Cruise control 104
Active Safety Brake with Collision Risk Alert and
Intelligent emergency braking assistance
106
Distraction detection 109
Lane departure warning system 11 0
Blind spot monitoring 111
Page 15 of 244
13
Instruments
1Identify the cause of the fault using the message
displayed on the instrument panel.
You may be able to deal with some faults
yourself, such as changing the battery in the
remote control.
For other faults, such as with the tyre under-
inflation detection system, carry out (3).
Fixed, accompanied by the display of a
message.
One or more major faults, for which there is/are
no specific warning lamp(s), have been detected.
Identify the cause of the fault using the message
displayed on the instrument panel, then carry
out (3).
Service warning lamp fixed and
service spanner flashing then
fixed.
The servicing interval has been exceeded.
The vehicle must be serviced as soon as
possible.
Only with BlueHDi Diesel engines.
Engine pre-heating (Diesel)Temporarily on (up to approximately 30 seconds in
severe weather conditions).
When switching on the ignition, if the weather
conditions and the engine temperature make it
necessary.
Wait until the warning lamp goes off before
starting.
When the warning lamp goes off, starting will
occur immediately if you press and hold:
–
the clutch pedal with a manual gearbox. –
the brake pedal with an automatic gearbox.
If the engine does not start, make the engine
starting request again, while keeping your foot
on the pedal.
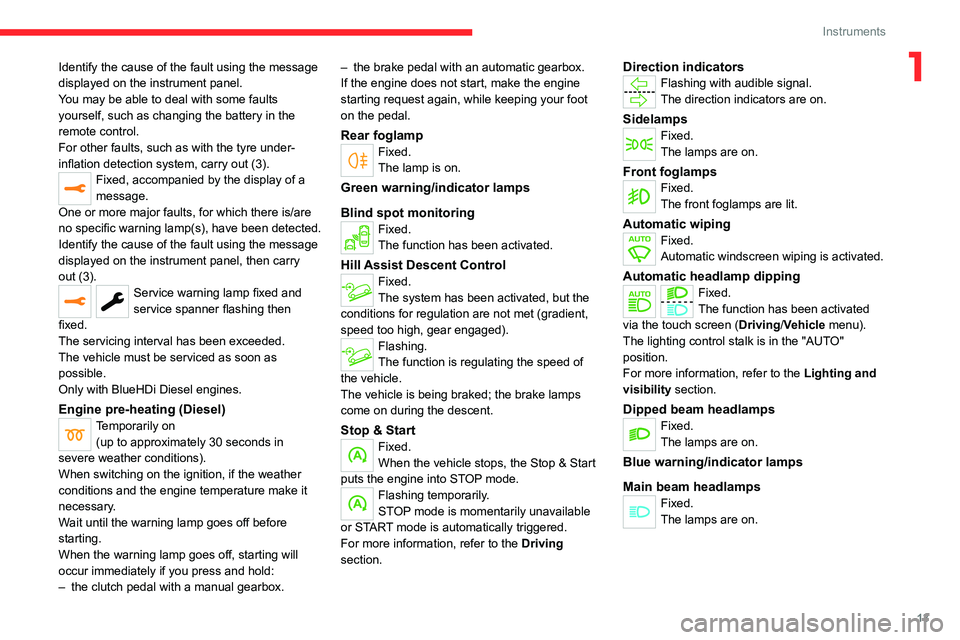
Rear foglampFixed.
The lamp is on.
Green warning/indicator lamps
Blind spot monitoring
Fixed.
The function has been activated.
Hill Assist Descent ControlFixed.
The system has been activated, but the
conditions for regulation are not met (gradient,
speed too high, gear engaged).
Flashing.
The function is regulating the speed of
the vehicle.
The vehicle is being braked; the brake lamps
come on during the descent.
Stop & StartFixed.
When the vehicle stops, the Stop & Start
puts the engine into STOP mode.
Flashing temporarily.
STOP mode is momentarily unavailable
or START mode is automatically triggered.
For more information, refer to the Driving
section.
Direction indicatorsFlashing with audible signal.
The direction indicators are on.
SidelampsFixed.
The lamps are on.
Front foglampsFixed.
The front foglamps are lit.
Automatic wipingFixed.
Automatic windscreen wiping is activated.
Automatic headlamp dippingFixed.
The function has been activated
via the touch screen (Driving/Vehicle menu).
The lighting control stalk is in the "AUTO"
position.
For more information, refer to the Lighting and
visibility section.
Dipped beam headlampsFixed.
The lamps are on.
Blue warning/indicator lamps
Main beam headlamps
Fixed.
The lamps are on.
Page 20 of 244
18
Instruments
Pressing this button takes you back up a
level or cancels the current operation.
Display screen menus
– LIGHTING :
• GUIDE LAMPS (Guide-me-home lighting),
•
DIR HEADLAMPS (Directional headlamps).
–
DRIVE ASSIST
:
•
COLLISION
ALT (Automatic emergency
braking),
•
VIGILANCE
ALT (Fatigue Detection System),
•
ADVISED SPEED (Speed limit recognition).
–
COMFOR
T :
•
REAR WIPE REV (Automatic windscreen
wiper when reversing).
For more information on one of these functions,
refer to the corresponding section.
Monochrome screen C
Displays in the screen
This displays the following information: –
the time,
–
the date,
–
the exterior temperature (this flashes if there is
a risk of ice),
–
visual parking sensor information,
–
the audio source being listened to,
–
telephone or hands-free kit information,
–
alert messages,
–
settings menus for the screen and the vehicle
equipment.
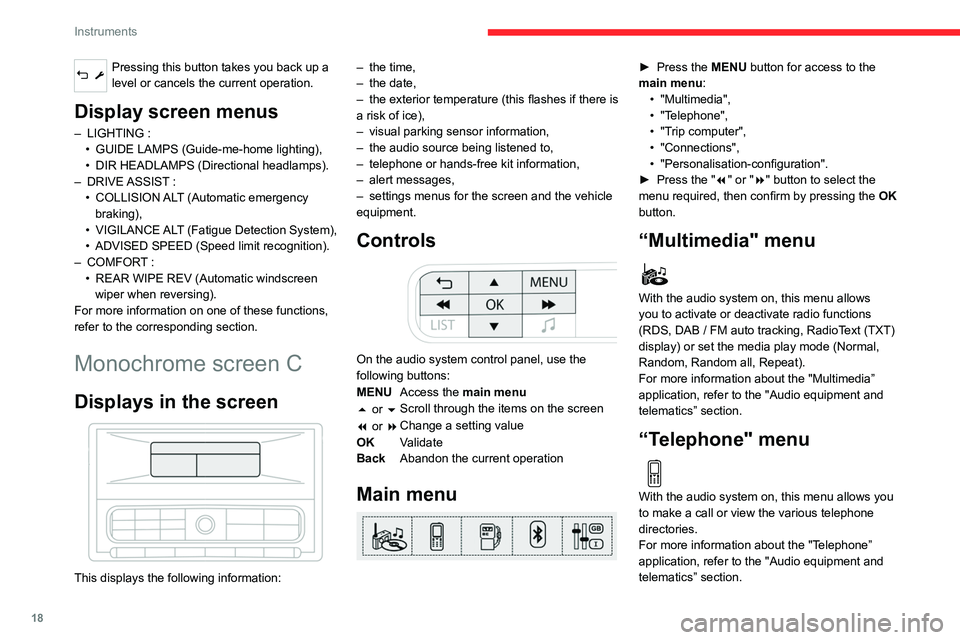
Controls
On the audio system control panel, use the
following buttons:
MENU Access the main menu
5 or 6 Scroll through the items on the screen
7 or 8 Change a setting value
OK Validate
Back Abandon the current operation
Main menu
► Press the MENU button for access to the
main menu: •
"Multimedia",
•
"T
elephone",
•
"T
rip computer",
•
"Connections",
•
"Personalisation-configuration".
►
Press the "
7" or "8" button to select the
menu required, then confirm by pressing the OK
button.
“Multimedia" menu
With the audio system on, this menu allows
you to activate or deactivate radio functions
(RDS, DAB
/ FM auto tracking, RadioText (TXT)
display) or set the media play mode (Normal,
Random, Random all, Repeat).
For more information about the "Multimedia”
application, refer to the "Audio equipment and
telematics” section.
“Telephone" menu
With the audio system on, this menu allows you
to make a call or view the various telephone
directories.
For more information about the "Telephone”
application, refer to the "Audio equipment and
telematics” section.
“Trip computer" menu
This menu allows you to consult information
concerning the status of the vehicle.
Warning log
It summarises the alert messages of the
functions, displaying them on the screen.
“Connections" menu
With the audio system on, this menu allows a
Bluetooth device (telephone, media player) to be
paired and the connection mode to be defined
(hands-free kit, playing of audio files).
For more information about the "Connections”
application, refer to the "Audio equipment and
telematics” section.
“Personalisation-
configuration" menu
This menu gives access to the following
functions:
– “Define the vehicle parameters".
– “Display configuration".
Page 21 of 244
19
Instruments
1“Trip computer" menu
This menu allows you to consult information
concerning the status of the vehicle.
Warning log
It summarises the alert messages of the
functions, displaying them on the screen.
“Connections" menu
With the audio system on, this menu allows a
Bluetooth device (telephone, media player) to be
paired and the connection mode to be defined
(hands-free kit, playing of audio files).
For more information about the "Connections”
application, refer to the "Audio equipment and
telematics” section.
“Personalisation-
configuration" menu
This menu gives access to the following
functions:
–
“Define the vehicle parameters".
–
“Display configuration".
Define the vehicle parameters
This menu allows the following equipment to be
activated / deactivated, depending on the version
and/or country of sale:
"Lighting "
–
"Directional headlamps",
–
"Follow-me-home headlamps",
–
"W
elcome lighting".
"Comfort"
–
"Rear wipe in reverse gear".
"
Driving assistance"
–
Auto. emergency braking,
–
Fatigue Detection System,
–
Speed recommendation.
For more information on the different equipment,
refer to the corresponding sections.
Display configuration
This menu allows you to change the language
used by the display from a defined list.
This menu gives access to the following settings:
–
“Choice of units".
–
“Date and time adjustment".
–
“Display personalisation".
–
“Choice of language".
As a safety measure, the driver must only carry out operations that require
sustained attention when stationary.
Touch screen
The touch screen gives access to:
– the heating / air conditioning controls,
– menus for adjusting settings for vehicle
functions and systems,
–
audio system and telephone controls and the
display of associated information,
and, depending on equipment, allows:
–
the display of alert messages and the visual
parking sensors information,
–
the permanent display of the time and the
exterior temperature (a blue warning lamp
appears when there is a risk of ice),
–
access to the internet services and navigation
system controls and the display of associated
information.
As a safety measure, the driver must
only carry out operations that require
sustained attention with the vehicle
stationary.
Some functions are not accessible when
driving.
Recommendations
This screen is of the capacitive type.
Use is possible in all temperatures.
Do not use pointed objects on the touch screen.
Do not touch the touch screen with wet hands.
Use a soft clean cloth to clean the touch screen.
Page 27 of 244
25
Access
2– The activation of the alarm for other versions.
If one of the doors or the boot is not fully
closed, the locking does not take place.
However, if the vehicle is equipped with the
alarm, it is fully activated after about 45
seconds.
If the vehicle is unlocked inadvertently and
there is then no action on the doors or boot,
the vehicle will automatically lock itself again
after about 30 seconds. If the alarm was
activated beforehand, the alarm is reactivated
automatically.
Locking also deactivates the central locking
button, located on the dashboard.
Deadlocking
Deadlocking renders the interior door
controls inoperative. It also disables the
central locking button.
The horn remains operational.
Never leave anyone inside the vehicle
when it is deadlocked.
►
Press the locking button again within 5
seconds to deadlock the vehicle (confirmed by
the temporary lighting of the direction indicators
for versions without alarm).
Locating the vehicle
This function helps you to spot your vehicle from
a distance, with the vehicle locked:
–
The sidelamps and dipped beam headlamps
come on for 30 seconds.
► Press this button.
Pressing again before the end of the timed
period switches off the lamps immediately.
Advice
Remote control
The remote control is a sensitive, high-
frequency device; avoid handling it in your
pocket, due to the risk of unintentionally
unlocking the vehicle.
Avoid pressing the remote control buttons
while out of range of the vehicle, due to
the risk of rendering the remote control
inoperative. It would then be necessary to
reset it.
The remote control does not work
when the
key is in the ignition switch, even when the
ignition is switched off.
Anti-theft protection
Do not modify the electronic vehicle
immobiliser, as this might result in
malfunctions.
For vehicles with a key ignition switch,
remember to remove the key and turn the
steering wheel to engage the steering lock.
Locking the vehicle
Driving with the doors locked could make
it more difficult for the emergency services
to enter the passenger compartment in an
emergency.
As a safety precaution, remove the key from
the ignition or take the electronic key with you
when leaving the vehicle, even for a short
time.
Purchasing a second-hand vehicle
Have the key codes memorised by a
CITROËN dealer, to ensure that the keys in
your possession are the only ones able to
start the vehicle.
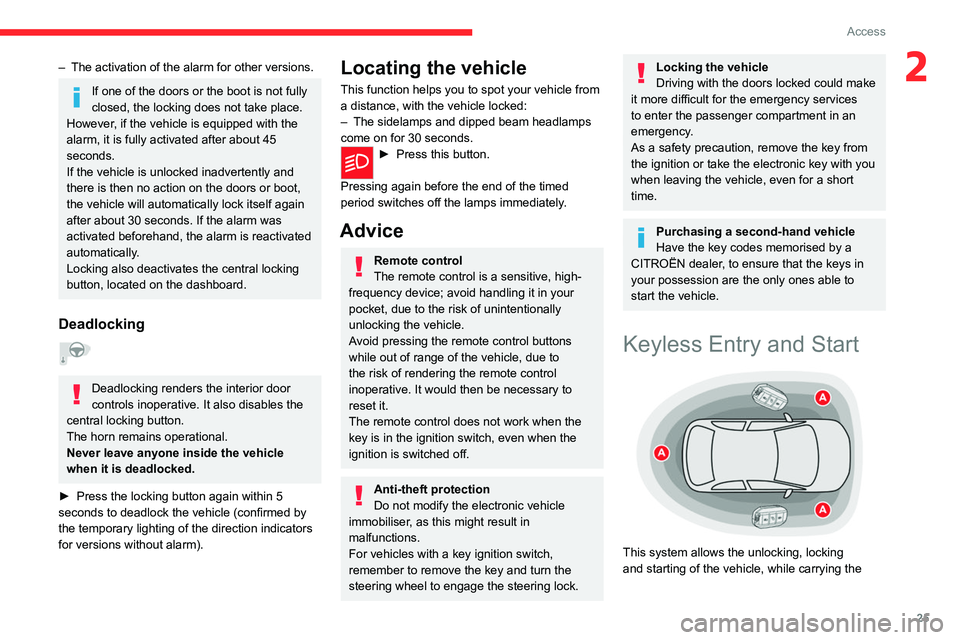
Keyless Entry and Start
This system allows the unlocking, locking
and starting of the vehicle, while carrying the
Page 34 of 244
32
Access
but the exterior perimeter monitoring will be
activated after 45 seconds, at the same time
as the interior volumetric and anti-tilt
monitoring.
Locking the vehicle
with exterior perimeter
monitoring only
Deactivate the interior volumetric and anti-tilt
monitoring to avoid the unwanted triggering of
the alarm, in certain cases such as:
–
Slightly open window
.
–
W
ashing the vehicle.
–
Changing a wheel.
–
T
owing the vehicle.
–
T
ransport on a ship or ferry.
Deactivating the interior volumetric
and anti-tilt monitoring
► Switch off the ignition and within 10 seconds
press the alarm button until its red indicator lamp
is on fixed.
►
Get out of the vehicle.
►
Immediately lock the vehicle using the remote
control or the Keyless Entry and Start system.
Only the exterior perimeter monitoring is
activated; the button's red indicator lamp flashes
once every second.
To take effect, this deactivation must be carried out after each time the ignition is
switched off.
Reactivating the interior volumetric
and anti-tilt monitoring
► Deactivate the exterior perimeter monitoring
by unlocking the vehicle using the remote control
or the Keyless Entry and Start system.
The indicator lamp in the button goes off.
►
Reactivate all monitoring by locking the
vehicle using the remote control or the Keyless
Entry and Start system.
The red indicator lamp in the button once again
flashes every second.
Triggering of the alarm
This is indicated by sounding of the siren
and flashing of the direction indicators for 30
seconds.
The interior volumetric and anti-tilt monitoring
functions remain active until the alarm has been
triggered ten times in succession.
When the vehicle is unlocked, rapid flashing of
the indicator lamp in the button indicates that the
alarm was triggered during your absence. When
the ignition is switched on, this flashing stops
immediately.
Failure of the remote control
To deactivate the monitoring functions:
► Unlock the vehicle using the key in the
driver's door lock.
►
Open the door; the alarm is triggered.
►
Switch on the ignition; this stops the alarm.
The indicator lamp in the button goes off.
Locking the vehicle without
activating the alarm
► Lock or deadlock the vehicle using the key
(built-in the remote control) in the driver's door
lock.
Malfunction
When the ignition is switched on, the fixed
lighting of the red indicator lamp in the button
indicates a system malfunction.
Have it checked by a CITROËN dealer or a
qualified workshop.
Panoramic sunroof
The panoramic sunroof consists of a movable
glass panel that slides over the roof and a blind
that can be opened independently. Opening the
sunroof automatically opens the blind.
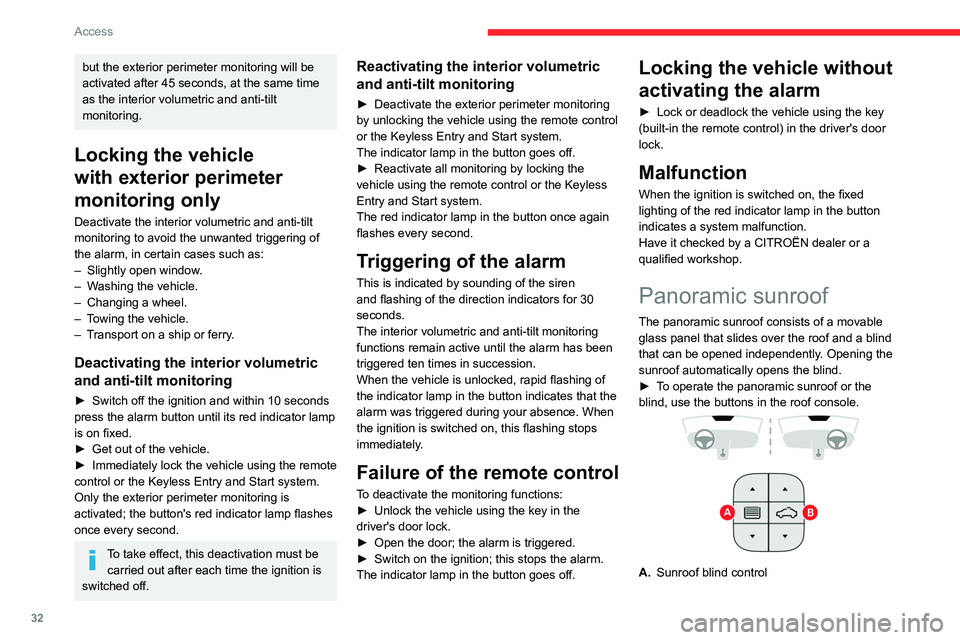
►
T
o operate the panoramic sunroof or the
blind, use the buttons in the roof console.
A. Sunroof blind control
B.Sunroof control
The sunroof or blind can be operated when the
ignition is turned on (if the battery is charged
enough), with the engine running, in STOP mode
of Stop & Start, and up to 45 seconds after
turning off the ignition or after locking the vehicle.
Precautions
Do not put your head or arms through the
sunroof while the vehicle is moving - risk
of serious injury!
Ensure that any luggage or accessories
carried on the roof bars do not interfere
with the movement of the sunroof.
Do not place heavy loads on the movable
glass panel of the sunroof.
If the sunroof is wet, following a rain
shower or washing the vehicle, wait until
it is completely dry before operating it.
Do not operate the sunroof if it is covered by
snow or ice - risk of damage!
Use only plastic scrapers to remove snow or
ice from the sunroof.
Page 41 of 244
39
Ease of use and comfort
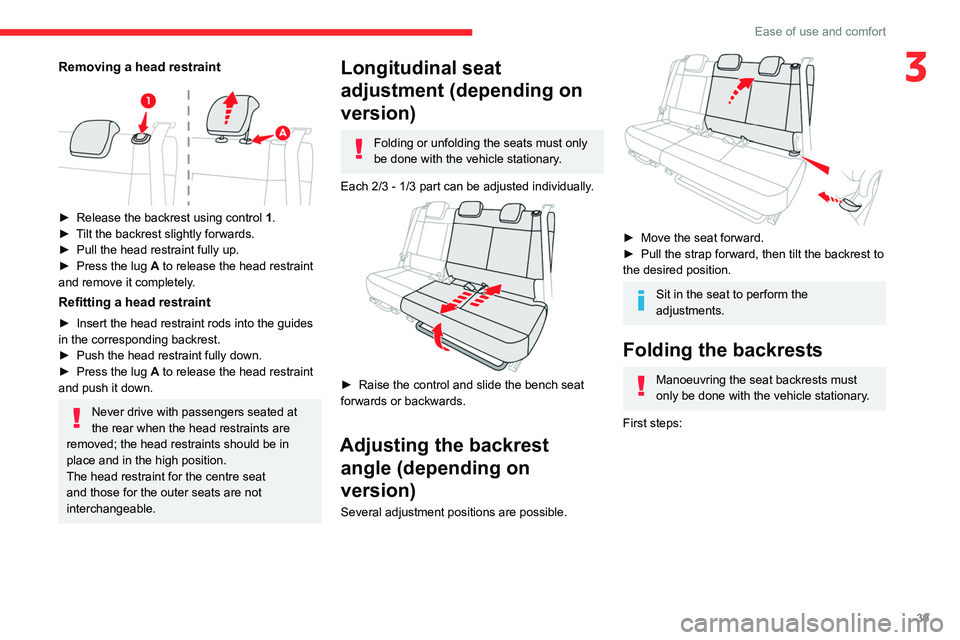
3Removing a head restraint
► Release the backrest using control 1 .
► T ilt the backrest slightly forwards.
►
Pull the head restraint fully up.
►
Press the lug
A to release the head restraint
and remove it completely.
Refitting a head restraint
► Insert the head restraint rods into the guides
in the corresponding backrest.
►
Push the head restraint fully down.
►
Press the lug
A to release the head restraint
and push it down.
Never drive with passengers seated at
the rear when the head restraints are
removed; the head restraints should be in
place and in the high position.
The head restraint for the centre seat
and those for the outer seats are not
interchangeable.
Longitudinal seat
adjustment (depending on
version)
Folding or unfolding the seats must only
be done with the vehicle stationary.
Each 2/3 - 1/3 part can be adjusted individually.
► Raise the control and slide the bench seat
forwards or backwards.
Adjusting the backrest angle (depending on
version)
Several adjustment positions are possible.
► Move the seat forward.
► Pull the strap forward, then tilt the backrest to
the desired position.
Sit in the seat to perform the
adjustments.
Folding the backrests
Manoeuvring the seat backrests must
only be done with the vehicle stationary.
First steps:
Page 44 of 244
42
Ease of use and comfort
Electric folding
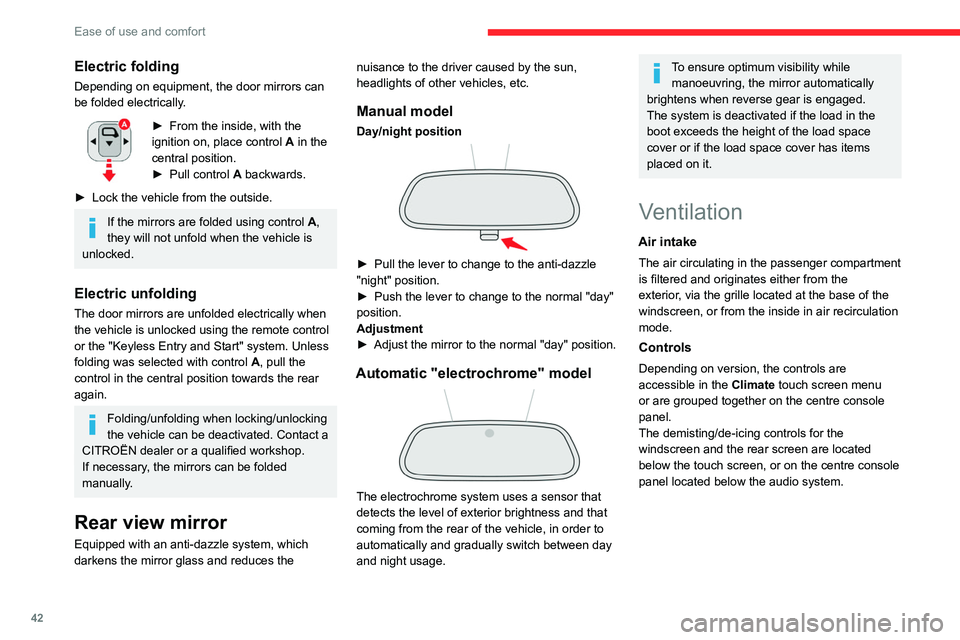
Depending on equipment, the door mirrors can
be folded electrically.
► From the inside, with the
ignition on, place control A
in the
central position.
►
Pull control A
backwards.
►
Lock the vehicle from the outside.
If the mirrors are folded using control A,
they will not unfold when the vehicle is
unlocked.
Electric unfolding
The door mirrors are unfolded electrically when
the vehicle is unlocked using the remote control
or the "Keyless Entry and Start" system. Unless
folding was selected with control A, pull the
control in the central position towards the rear
again.
Folding/unfolding when locking/unlocking
the vehicle can be deactivated. Contact a
CITROËN dealer or a qualified workshop.
If necessary, the mirrors can be folded
manually.
Rear view mirror
Equipped with an anti-dazzle system, which
darkens the mirror glass and reduces the nuisance to the driver caused by the sun,
headlights of other vehicles, etc.
Manual model
Day/night position
► Pull the lever to change to the anti-dazzle
"night" position.
►
Push the lever to change to the normal "day"
position.
Adjustment
►
Adjust the mirror to the normal "day" position.
Automatic "electrochrome" model
The electrochrome system uses a sensor that
detects the level of exterior brightness and that
coming from the rear of the vehicle, in order to
automatically and gradually switch between day
and night usage.
To ensure optimum visibility while manoeuvring, the mirror automatically
brightens when reverse gear is engaged.
The system is deactivated if the load in the
boot exceeds the height of the load space
cover or if the load space cover has items
placed on it.
Ventilation
Air intake
The air circulating in the passenger compartment
is filtered and originates either from the
exterior, via the grille located at the base of the
windscreen, or from the inside in air recirculation
mode.
Controls
Depending on version, the controls are
accessible in the Climate touch screen menu
or are grouped together on the centre console
panel.
The demisting/de-icing controls for the
windscreen and the rear screen are located
below the touch screen, or on the centre console
panel located below the audio system.
Air distribution
1. Windscreen demisting/de-icing vents
2. Front side window demisting/de-icing vents
3. Adjustable and closable side air vents
4. Adjustable and closable central air vents
5. Air outlets to the front footwells
6. Air outlets to the rear footwells
Advice
Using the ventilation and air
conditioning system
► To ensure that air is distributed evenly,
keep the external air intake grilles at the base
of the windscreen, the nozzles, the vents, the
air outlets and the air extractor in the boot
free from obstructions.
► Do not cover the sunshine sensor located
on the dashboard; this sensor is used to
regulate the automatic air conditioning
system.
Page 57 of 244
55
Lighting and visibility
4Lighting control stalk
Never look too closely at the light beam
of LED technology lamps - risk of serious
eye injury!
In some weather conditions (e.g. low
temperature or humidity), misting on the
internal surface of the glass of the headlamps
and rear lamps is normal, and will disappear
after the lamps have been on for a few
minutes.
Travelling abroad
Vehicles equipped with manual
headlamp beam height adjustment:
If planning to use your vehicle in a country
that drives on the other side of the road, the
dipped beam headlamps must be adjusted to
avoid dazzling oncoming drivers. Contact a
CITROËN dealer or a qualified workshop.
If one or more lamps fails, a message
asks you to check the lamp or lamps
concerned.
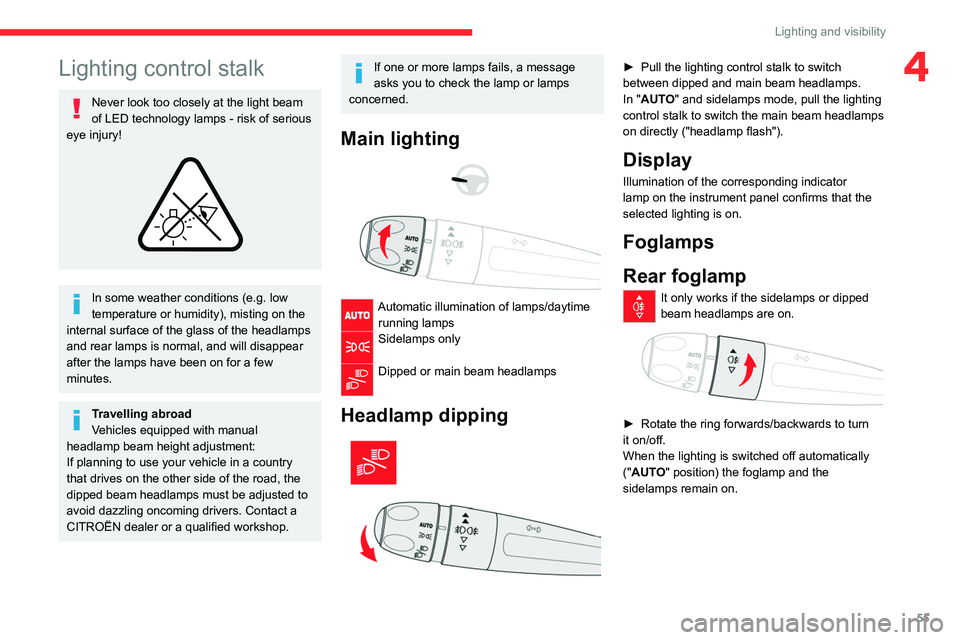
Main lighting
Automatic illumination of lamps/daytime running lamps
Sidelamps only
Dipped or main beam headlamps
Headlamp dipping
► Pull the lighting control stalk to switch
between dipped and main beam headlamps.
In "
AUTO" and sidelamps mode, pull the lighting
control stalk to switch the main beam headlamps
on directly ("headlamp flash").
Display
Illumination of the corresponding indicator
lamp on the instrument panel confirms that the
selected lighting is on.
Foglamps
Rear foglamp
It only works if the sidelamps or dipped
beam headlamps are on.
► Rotate the ring forwards/backwards to turn
it on/off.
When the lighting is switched off automatically
("
AUTO" position) the foglamp and the
sidelamps remain on.
Page 58 of 244
56
Lighting and visibility
upwards or downwards, depending on the side
of the traffic (e.g. when parking on the right, push
the lighting control stalk down to light up on the
left).
This is confirmed by an audible signal and the
lighting of the corresponding direction indicator
lamp on the instrument panel.
► To switch off the parking lamps, return the
lighting control stalk to the central position.
Automatic illumination of lamps
With the lighting control stalk in the “ AUTO”
position and if a low level of exterior brightness
is detected by the rain/sunshine sensor, the
number plate lamps, sidelamps and dipped
beam headlamps are switched on automatically,
without any action on the part of the driver. They
may also come on if rain is detected, at the same
time as automatic operation of the windscreen
wipers.
As soon as the brightness returns to a sufficient
level or after the windscreen wipers are switched
off, the lamps are switched off automatically.
Malfunction
In the event of a malfunction of the rain/
sunshine sensor, the vehicle’s lamps
come on and this warning lamp is displayed on
the instrument panel, accompanied by an
audible signal and/or the display of a message.
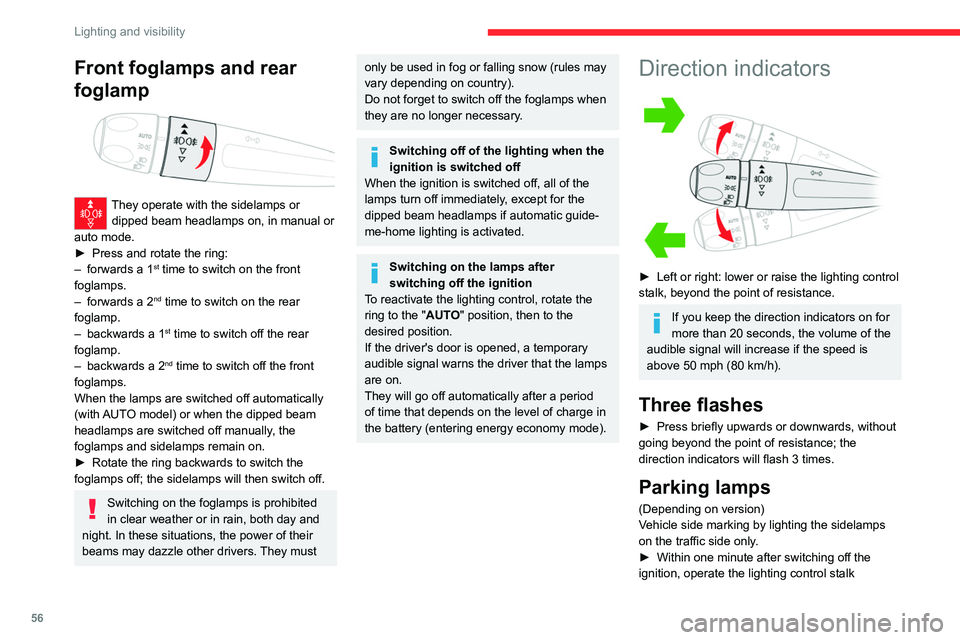
Front foglamps and rear
foglamp
They operate with the sidelamps or dipped beam headlamps on, in manual or
auto mode.
►
Press and rotate the ring:
–
forwards a 1st time to switch on the front
foglamps.
–
forwards a 2nd time to switch on the rear
foglamp.
–
backwards a 1st time to switch off the rear
foglamp.
–
backwards
a 2
nd time to switch off the front
foglamps.
When the lamps are switched off automatically
(with AUTO model) or when the dipped beam
headlamps are switched off manually, the
foglamps and sidelamps remain on.
►
Rotate the ring backwards to switch the
foglamps off; the sidelamps will then switch off.
Switching on the foglamps is prohibited
in clear weather or in rain, both day and
night. In these situations, the power of their
beams may dazzle other drivers. They must
only be used in fog or falling snow (rules may
vary depending on country).
Do not forget to switch off the foglamps when
they are no longer necessary.
Switching off of the lighting when the
ignition is switched off
When the ignition is switched off, all of the
lamps turn off immediately, except for the
dipped beam headlamps if automatic guide-
me-home lighting is activated.
Switching on the lamps after
switching off the ignition
To reactivate the lighting control, rotate the
ring to the "AUTO" position, then to the
desired position.
If the driver's door is opened, a temporary
audible signal warns the driver that the lamps
are on.
They will go off automatically after a period
of time that depends on the level of charge in
the battery (entering energy economy mode).
Direction indicators
► Left or right: lower or raise the lighting control
stalk, beyond the point of resistance.
If you keep the direction indicators on for
more than 20 seconds, the volume of the
audible signal will increase if the speed is
above 50 mph (80 km/h).
Three flashes
► Press briefly upwards or downwards, without
going beyond the point of resistance; the
direction indicators will flash 3 times.
Parking lamps
(Depending on version)
Vehicle side marking by lighting the sidelamps
on the traffic side only.
►
Within one minute after switching off the
ignition, operate the lighting control stalk