engine CITROEN C3 AIRCROSS 2023 Owner's Manual
[x] Cancel search | Manufacturer: CITROEN, Model Year: 2023, Model line: C3 AIRCROSS, Model: CITROEN C3 AIRCROSS 2023Pages: 244, PDF Size: 7.09 MB
Page 47 of 244
45
Ease of use and comfort
3For maximum cooling or heating of the
passenger compartment, press the
temperature setting button up or down until
LO or HI is displayed.
Automatic comfort programme
Activation/Deactivation
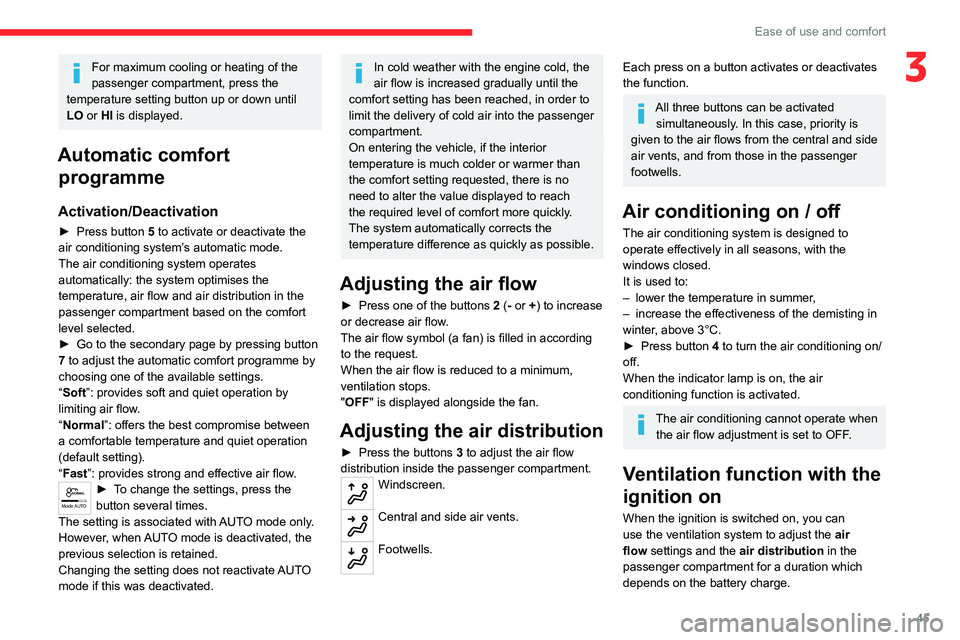
► Press button 5 to activate or deactivate the
air conditioning system’s automatic mode.
The air conditioning system operates
automatically: the system optimises the
temperature, air flow and air distribution in the
passenger compartment based on the comfort
level selected.
►
Go to the secondary page by pressing button
7
to adjust the automatic comfort programme by
choosing one of the available settings.
“Soft”: provides soft and quiet operation by
limiting air flow.
“Normal”: offers the best compromise between
a comfortable temperature and quiet operation
(default setting).
“Fast”: provides strong and effective air flow.
Mode AUTO► To change the settings, press the
button several times.
The setting is associated with AUTO mode only.
However, when AUTO mode is deactivated, the
previous selection is retained.
Changing the setting does not reactivate AUTO
mode if this was deactivated.
In cold weather with the engine cold, the
air flow is increased gradually until the
comfort setting has been reached, in order to
limit the delivery of cold air into the passenger
compartment.
On entering the vehicle, if the interior
temperature is much colder or warmer than
the comfort setting requested, there is no
need to alter the value displayed to reach
the required level of comfort more quickly.
The system automatically corrects the
temperature difference as quickly as possible.
Adjusting the air flow
► Press one of the buttons 2 (- or +) to increase
or decrease air flow.
The air flow symbol (a fan) is filled in according
to the request.
When the air flow is reduced to a minimum,
ventilation stops.
"OFF " is displayed alongside the fan.
Adjusting the air distribution
► Press the buttons 3 to adjust the air flow
distribution inside the passenger compartment.
Windscreen.
Central and side air vents.
Footwells.
Each press on a button activates or deactivates
the function.
All three buttons can be activated simultaneously. In this case, priority is
given to the air flows from the central and side
air vents, and from those in the passenger
footwells.
Air conditioning on / off
The air conditioning system is designed to
operate effectively in all seasons, with the
windows closed.
It is used to:
–
lower the temperature in summer
,
–
increase the effectiveness of the demisting in
winter
, above 3°C.
►
Press button
4 to turn the air conditioning on/
off.
When the indicator lamp is on, the air
conditioning function is activated.
The air conditioning cannot operate when the air flow adjustment is set to OFF.
Ventilation function with the
ignition on
When the ignition is switched on, you can
use the ventilation system to adjust the air
flow settings and the air distribution in the
passenger compartment for a duration which
depends on the battery charge.
Page 48 of 244
46
Ease of use and comfort
This function does not operate the air
conditioning.
Recirculation of interior air
The intake of exterior air helps avoid and
eliminate misting of the windscreen and side
windows.
The recirculation of interior air allows the
passenger compartment to be isolated from
polluted air in areas of heavy traffic and inside
tunnels.
When required, this function also allows
faster heating or cooling of the air in the
passenger compartment.
►
Press button
6 to recirculate the interior air or
allow the intake of exterior air.
Avoid the prolonged recirculation of interior air in order to ensure a good
supply of fresh air and reduce the risk of
misting (especially when several passengers
are on board or when the air is cold/damp,
etc.).
Front demist - defrost
These markings on the control panels indicate the control positions for rapid
demisting or defrosting of the windscreen and
side windows. During the winter period, direct the side air
vents towards the side windows to optimise their
demisting and defrosting.
With control panel on the
centre console
On/Off
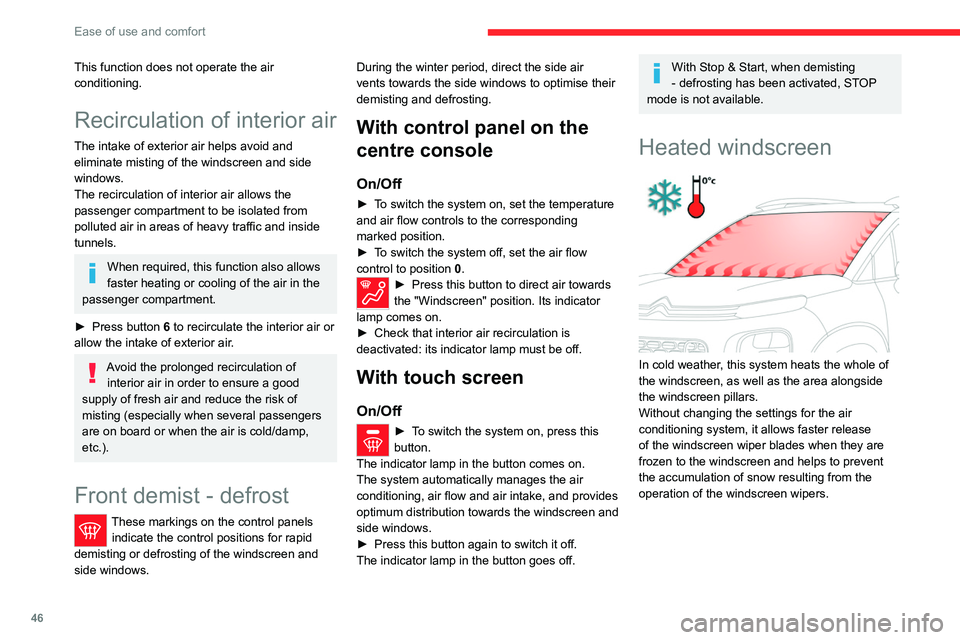
► To switch the system on, set the temperature
and air flow controls to the corresponding
marked position.
►
T
o switch the system off, set the air flow
control to position
0
.
► Press this button to direct air towards
the "Windscreen" position. Its indicator
lamp comes on.
►
Check that interior air recirculation is
deactivated: its indicator lamp must be off.
With touch screen
On/Off
► To switch the system on, press this
button.
The indicator lamp in the button comes on.
The system automatically manages the air
conditioning, air flow and air intake, and provides
optimum distribution towards the windscreen and
side windows.
►
Press this button again to switch it off.
The indicator lamp in the button goes off.
With Stop & Start, when demisting
- defrosting has been activated, STOP
mode is not available.
Heated windscreen
In cold weather, this system heats the whole of
the windscreen, as well as the area alongside
the windscreen pillars.
Without changing the settings for the air
conditioning system, it allows faster release
of the windscreen wiper blades when they are
frozen to the windscreen and helps to prevent
the accumulation of snow resulting from the
operation of the windscreen wipers.
Switching on/off
► With the engine running, press this button to
activate/deactivate the function (confirmed by an
indicator lamp).
The function is activated when the outside
temperature drops below 0°C. It is deactivated
automatically when the engine is switched off.
Rear screen demist
- defrost
Switching on/ off
► To switch the system on, press this button
to defrost the rear screen and, depending on
Page 49 of 244
47
Ease of use and comfort
3Switching on/off
► With the engine running, press this button to
activate/deactivate the function (confirmed by an
indicator lamp).
The function is activated when the outside
temperature drops below 0°C. It is deactivated
automatically when the engine is switched off.
Rear screen demist
- defrost
Switching on/ off
► To switch the system on, press this button
to defrost the rear screen and, depending on
version, the door mirrors. The indicator lamp in
the button comes on.
Defrosting switches off automatically to prevent
an excessive consumption of current.
►
T
o stop the defrosting operation before it
automatically turns off, press this button again.
The indicator lamp in the button goes off.
Switch off the defrosting of the rear
screen and door mirrors as soon as it is
no longer needed, as lower current
consumption results in reduced fuel
consumption.
Rear screen demisting - defrosting can
only be operated when the engine is
running.
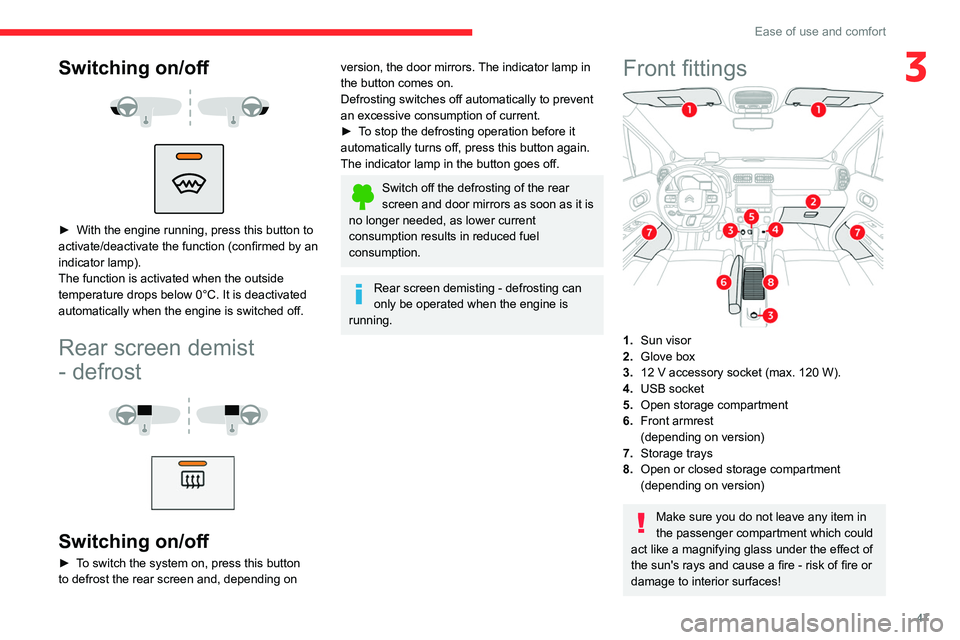
Front fittings
1. Sun visor
2. Glove box
3. 12
V accessory socket (max. 120 W).
4. USB socket
5. Open storage compartment
6. Front armrest
(depending on version)
7. Storage trays
8. Open or closed storage compartment
(depending on version)
Make sure you do not leave any item in
the passenger compartment which could
act like a magnifying glass under the effect of
the sun's rays and cause a fire - risk of fire or
damage to interior surfaces!
Page 50 of 244
48
Ease of use and comfort
Sun visor
The sun visors are fitted with a vanity mirror
with concealing flap and a card holder (or ticket
holder).
Glove box
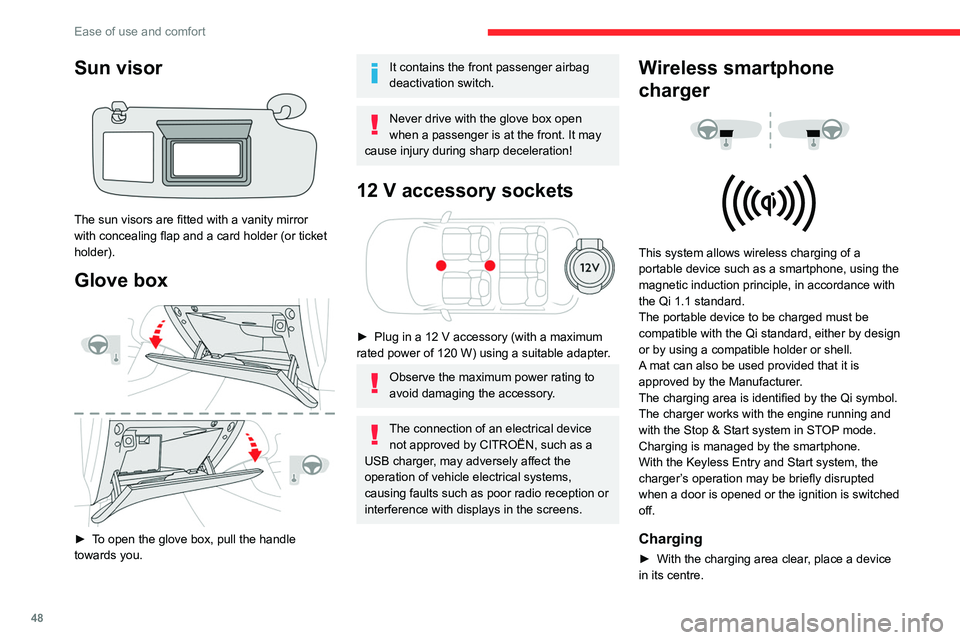
► To open the glove box, pull the handle
towards you.
It contains the front passenger airbag
deactivation switch.
Never drive with the glove box open
when a passenger is at the front. It may
cause injury during sharp deceleration!
12 V accessory sockets
► Plug in a 12 V accessory (with a maximum
rated power of 120 W) using a suitable adapter.
Observe the maximum power rating to
avoid damaging the accessory.
The connection of an electrical device not approved by CITROËN, such as a
USB charger, may adversely affect the
operation of vehicle electrical systems,
causing faults such as poor radio reception or
interference with displays in the screens.
Wireless smartphone
charger
This system allows wireless charging of a
portable device such as a smartphone, using the
magnetic induction principle, in accordance with
the Qi 1.1 standard.
The portable device to be charged must be
compatible with the Qi standard, either by design
or by using a compatible holder or shell.
A mat can also be used provided that it is
approved by the Manufacturer.
The charging area is identified by the Qi symbol.
The charger works with the engine running and
with the Stop & Start system in STOP mode.
Charging is managed by the smartphone.
With the Keyless Entry and Start system, the
charger’s operation may be briefly disrupted
when a door is opened or the ignition is switched
off.
Charging
► With the charging area clear , place a device
in its centre.
When the portable device is detected, the
charger’s indicator lamp lights up green. It
remains lit for the whole time that the battery is
being charged.
The system is not designed to charge multiple devices simultaneously.
Do not leave metal objects (e.g. coins,
keys, vehicle remote control) in the
charging area while a device is being charged
- risk of overheating or interrupting the
charging!
Checking operation
The state of the indicator lamp allows the
operation of the charger to be monitored.
State of the
indicator lamp Meaning
Off Engine switched off.
No compatible devices
detected.
Charging complete.
Fixed green Compatible portable device detected.
Charging.
Page 51 of 244
49
Ease of use and comfort
3
When the portable device is detected, the
charger’s indicator lamp lights up green. It
remains lit for the whole time that the battery is
being charged.
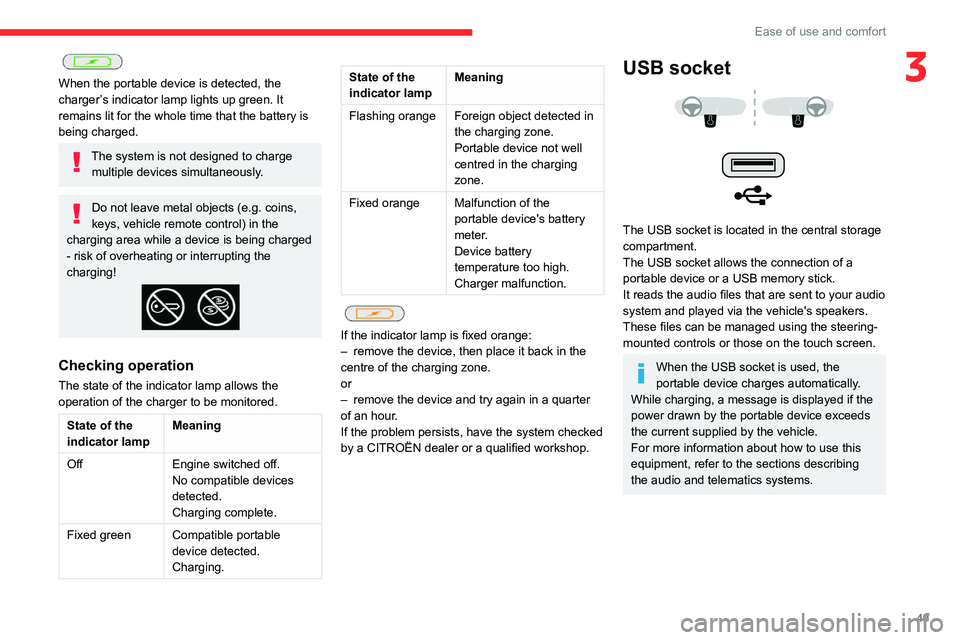
The system is not designed to charge multiple devices simultaneously.
Do not leave metal objects (e.g. coins,
keys, vehicle remote control) in the
charging area while a device is being charged
- risk of overheating or interrupting the
charging!
Checking operation
The state of the indicator lamp allows the
operation of the charger to be monitored.
State of the
indicator lamp Meaning
Off Engine switched off.
No compatible devices
detected.
Charging complete.
Fixed green Compatible portable device detected.
Charging.
State of the
indicator lampMeaning
Flashing orange Foreign object detected in the charging zone.
Portable device not well
centred in the charging
zone.
Fixed orange Malfunction of the
portable device's battery
meter.
Device battery
temperature too high.
Charger malfunction.
If the indicator lamp is fixed orange:
–
remove the device, then place it back in the
centre of the charging zone.
or
–
remove the device and try again in a quarter
of an hour
.
If the problem persists, have the system checked
by a CITROËN dealer or a qualified workshop.
USB socket
The USB socket is located in the central storage
compartment.
The USB socket allows the connection of a
portable device or a USB memory stick.
It reads the audio files that are sent to your audio
system and played via the vehicle's speakers.
These files can be managed using the steering-
mounted controls or those on the touch screen.
When the USB socket is used, the
portable device charges automatically.
While charging, a message is displayed if the
power drawn by the portable device exceeds
the current supplied by the vehicle.
For more information about how to use this
equipment, refer to the sections describing
the audio and telematics systems.
Page 55 of 244
53
Ease of use and comfort
3
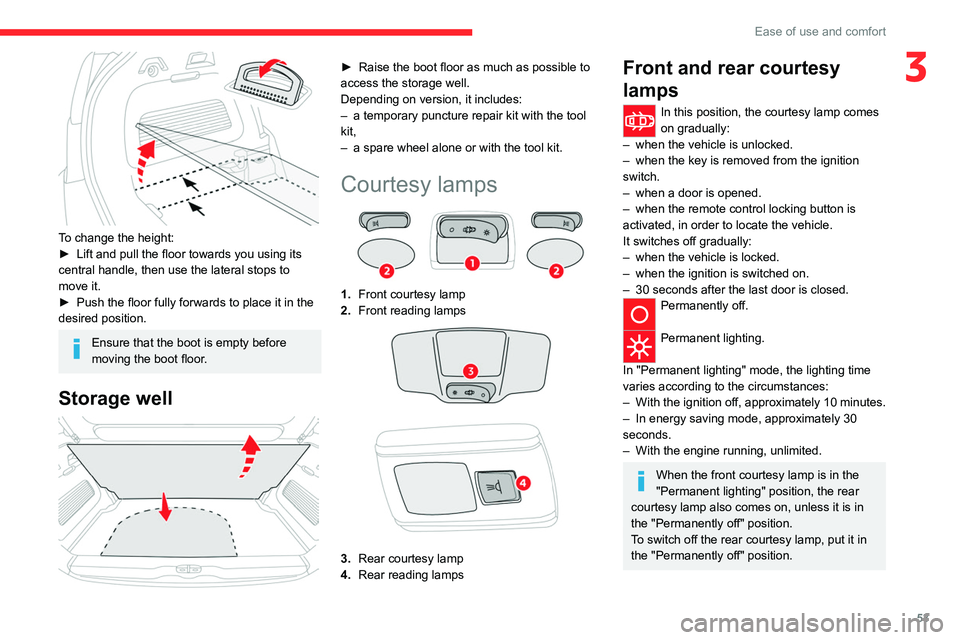
To change the height:
► Lift and pull the floor towards you using its
central handle, then use the lateral stops to
move it.
►
Push the floor fully forwards to place it in the
desired position.
Ensure that the boot is empty before
moving the boot floor.
Storage well
► Raise the boot floor as much as possible to
access the storage well.
Depending on version, it includes:
–
a temporary puncture repair kit with the tool
kit,
–
a spare wheel alone or with the tool kit.
Courtesy lamps
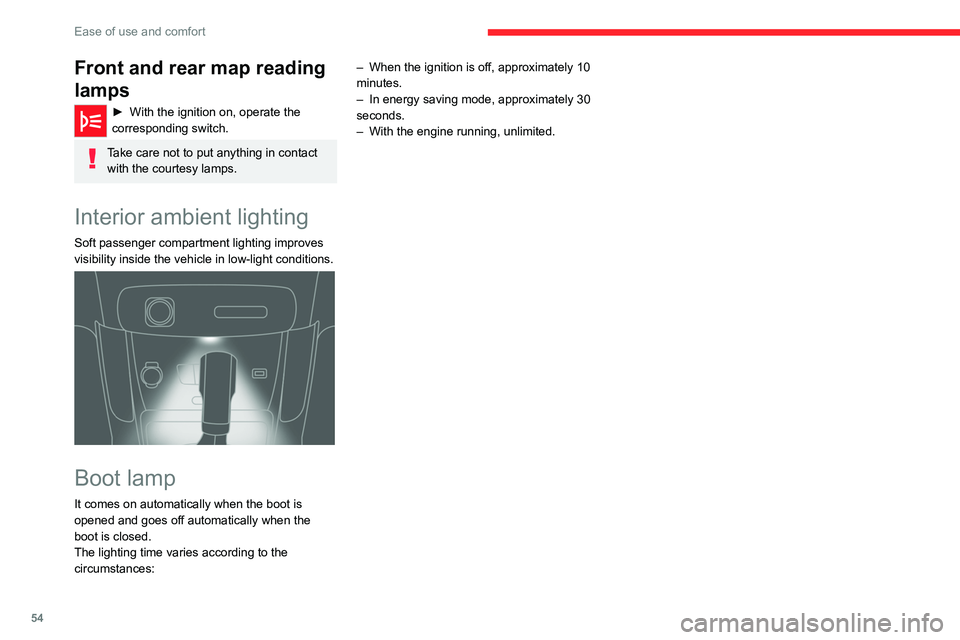
1. Front courtesy lamp
2. Front reading lamps
3.Rear courtesy lamp
4. Rear reading lamps
Front and rear courtesy
lamps
In this position, the courtesy lamp comes
on gradually:
–
when the vehicle is unlocked.
–
when the key is removed from the ignition
switch.
–
when a door is opened.
–
when the remote control locking button is
activated, in order to locate the vehicle.
It switches off gradually:
–
when the vehicle is locked.
–
when the ignition is switched on.
–
30 seconds after the last door is closed.
Permanently off.
Permanent lighting.
In "Permanent lighting" mode, the lighting time
varies according to the circumstances:
–
With
the ignition off, approximately 10 minutes.
–
In energy saving mode, approximately 30
seconds.
–
With the engine running, unlimited.
When the front courtesy lamp is in the
"Permanent lighting" position, the rear
courtesy lamp also comes on, unless it is in
the "Permanently off" position.
To switch off the rear courtesy lamp, put it in
the "Permanently off" position.
Page 56 of 244
54
Ease of use and comfort
Front and rear map reading
lamps
► With the ignition on, operate the
corresponding switch.
Take care not to put anything in contact with the courtesy lamps.
Interior ambient lighting
Soft passenger compartment lighting improves
visibility inside the vehicle in low-light conditions.
Boot lamp
It comes on automatically when the boot is
opened and goes off automatically when the
boot is closed.
The lighting time varies according to the
circumstances: –
When the ignition is off, approximately 10
minutes.
–
In energy saving mode, approximately 30
seconds.
–
With the engine running, unlimited.
Page 59 of 244
57
Lighting and visibility
4upwards or downwards, depending on the side
of the traffic (e.g. when parking on the right, push
the lighting control stalk down to light up on the
left).
This is confirmed by an audible signal and the
lighting of the corresponding direction indicator
lamp on the instrument panel.
►
T
o switch off the parking lamps, return the
lighting control stalk to the central position.
Automatic illumination of lamps
With the lighting control stalk in the “ AUTO”
position and if a low level of exterior brightness
is detected by the rain/sunshine sensor, the
number plate lamps, sidelamps and dipped
beam headlamps are switched on automatically,
without any action on the part of the driver. They
may also come on if rain is detected, at the same
time as automatic operation of the windscreen
wipers.
As soon as the brightness returns to a sufficient
level or after the windscreen wipers are switched
off, the lamps are switched off automatically.
Malfunction
In the event of a malfunction of the rain/
sunshine sensor, the vehicle’s lamps
come on and this warning lamp is displayed on
the instrument panel, accompanied by an
audible signal and/or the display of a message.
Have it checked by a CITROËN dealer or a
qualified workshop.
Do not cover the rain/sunshine sensor
located at the top centre of the
windscreen behind the interior rear view
mirror; the associated functions would no
longer be controlled.
In fog or snow, the rain/sunshine sensor
may detect sufficient light. For this
reason, the lighting will not come on
automatically.
The inner surface of the windscreen may become misted up and affect the proper
operation of the rain/sunshine sensor.
In humid and cold weather, demist the
windscreen regularly.
Daytime running lamps/
Sidelamps
These LED lamps at the front and rear of the
vehicle light up automatically when the engine
starts.
They perform the following functions:
–
Daytime running lamps (lighting control stalk
at position
"AUTO" with adequate ambient light).
–
Sidelamps (lighting control stalk at position
"
AUTO" with low ambient light or "Sidelamps
only" or "Dipped/main beam headlamps").
In daytime running lamps mode, the
diodes are brighter.
Guide-me-home and
welcome lighting
Guide-me-home lighting
Automatic
With the ring of the lighting control stalk in the
"AUTO" position and when the light is poor, the
dipped beam headlamps come on automatically
when the ignition is switched off.
You can activate/deactivate this function and
adjust the guide-me-home lighting duration in the
vehicle configuration menu.
Manual
Page 69 of 244
67
Safety
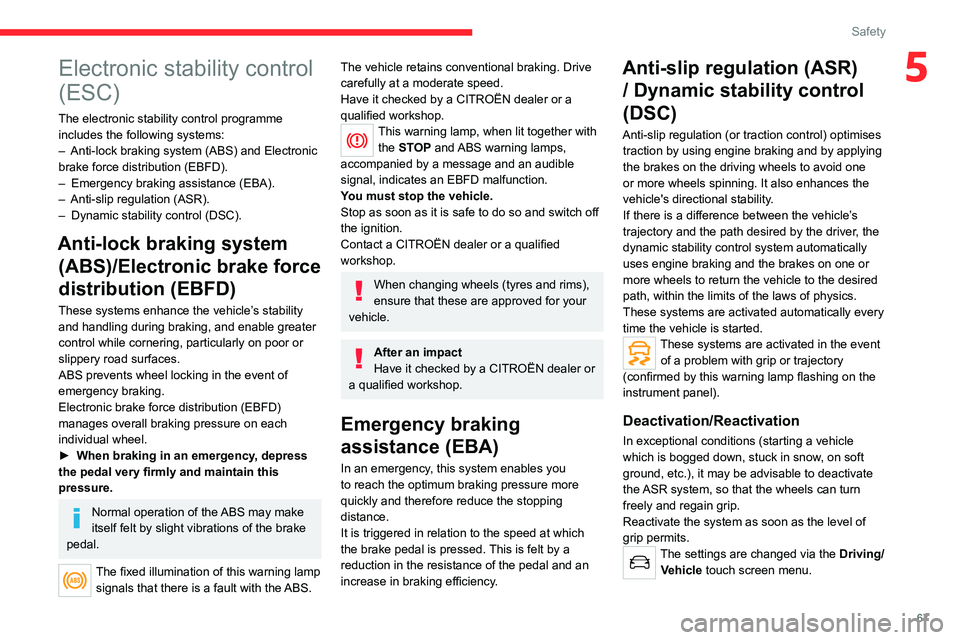
5Electronic stability control
(ESC)
The electronic stability control programme includes the following systems:
–
Anti-lock braking system (ABS) and Electronic
brake force distribution (EBFD).
–
Emergency braking assistance (EBA).
–
Anti-slip regulation (ASR).
–
Dynamic stability control (DSC).
Anti-lock braking system (ABS)/Electronic brake force
distribution (EBFD)
These systems enhance the vehicle’s stability
and handling during braking, and enable greater
control while cornering, particularly on poor or
slippery road surfaces.
ABS prevents wheel locking in the event of
emergency braking.
Electronic brake force distribution (EBFD)
manages overall braking pressure on each
individual wheel.
►
When braking in an emergency
, depress
the pedal very firmly and maintain this
pressure.
Normal operation of the ABS may make
itself felt by slight vibrations of the brake
pedal.
The fixed illumination of this warning lamp signals that there is a fault with the ABS.
The vehicle retains conventional braking. Drive
carefully at a moderate speed.
Have it checked by a CITROËN dealer or a
qualified workshop.
This warning lamp, when lit together with the STOP and ABS warning lamps,
accompanied by a message and an audible
signal, indicates an EBFD malfunction.
You must stop the vehicle.
Stop as soon as it is safe to do so and switch off
the ignition.
Contact a CITROËN dealer or a qualified
workshop.
When changing wheels (tyres and rims),
ensure that these are approved for your
vehicle.
After an impact
Have it checked by a CITROËN dealer or
a qualified workshop.
Emergency braking
assistance (EBA)
In an emergency, this system enables you
to reach the optimum braking pressure more
quickly and therefore reduce the stopping
distance.
It is triggered in relation to the speed at which
the brake pedal is pressed. This is felt by a
reduction in the resistance of the pedal and an
increase in braking efficiency.
Anti-slip regulation (ASR) / Dynamic stability control
(DSC)
Anti-slip regulation (or traction control) optimises
traction by using engine braking and by applying
the brakes on the driving wheels to avoid one
or more wheels spinning. It also enhances the
vehicle's directional stability.
If there is a difference between the vehicle’s
trajectory and the path desired by the driver, the
dynamic stability control system automatically
uses engine braking and the brakes on one or
more wheels to return the vehicle to the desired
path, within the limits of the laws of physics.
These systems are activated automatically every
time the vehicle is started.
These systems are activated in the event of a problem with grip or trajectory
(confirmed by this warning lamp flashing on the
instrument panel).
Deactivation/Reactivation
In exceptional conditions (starting a vehicle
which is bogged down, stuck in snow, on soft
ground, etc.), it may be advisable to deactivate
the ASR system, so that the wheels can turn
freely and regain grip.
Reactivate the system as soon as the level of
grip permits.
The settings are changed via the Driving/
Vehicle touch screen menu.
Page 70 of 244
68
Safety
► Or, depending on version, turn the
"Grip control" knob to this position.
Deactivation is confirmed by the lighting
of this indicator lamp on the instrument
panel and the display of a message.
The ASR system is reactivated automatically
every time the ignition is switched on or at
speeds over 31 mph (50
km/h).
Reactivation is manual below 31 mph (50 km/h).
Malfunction
In the event of a malfunction, this warning
lamp lights up on the instrument panel,
accompanied by the display of a message and
an audible signal.
Have it checked by a CITROËN dealer or a
qualified workshop.
ASR/DSC
These systems enhance safety during
normal driving, but should not encourage
the driver to take extra risks or drive at high
speed.
It is in conditions of reduced grip (rain, snow,
ice) that the risk of loss of grip increases. It
is therefore important for your safety to keep
these systems activated in all conditions, and
particularly in difficult conditions.
Correct operation of these systems depends
on compliance with the manufacturer's
recommendations relating to the wheels
(tyres and rims), braking and electronic
components, as well as the assembly and
repair procedures provided by CITROËN
dealers.
In order to ensure that these systems remain
effective in wintry conditions, the use of snow
or all-season tyres is recommended. All four
wheels must be fitted with tyres approved for
your vehicle.
All tyre specifications are listed on the
tyre/paint label. For more information
on Identification markings , refer to the
corresponding section.
Grip control
(Depending on version)
A special, patented traction control system,
which improves driveability on snow, mud and
sand.
This system, optimised for operation in a range
of conditions, enables you to manoeuvre in most
slippery conditions (encountered during normal
passenger car use).
When combined with all-season Peak Mountain
Snow Flake tyres, this system offers a
compromise between safety, grip and driveability.
The accelerator pedal should be pressed
sufficiently to allow the system to harness the
power of the engine. Operation at high engine
speeds is completely normal.
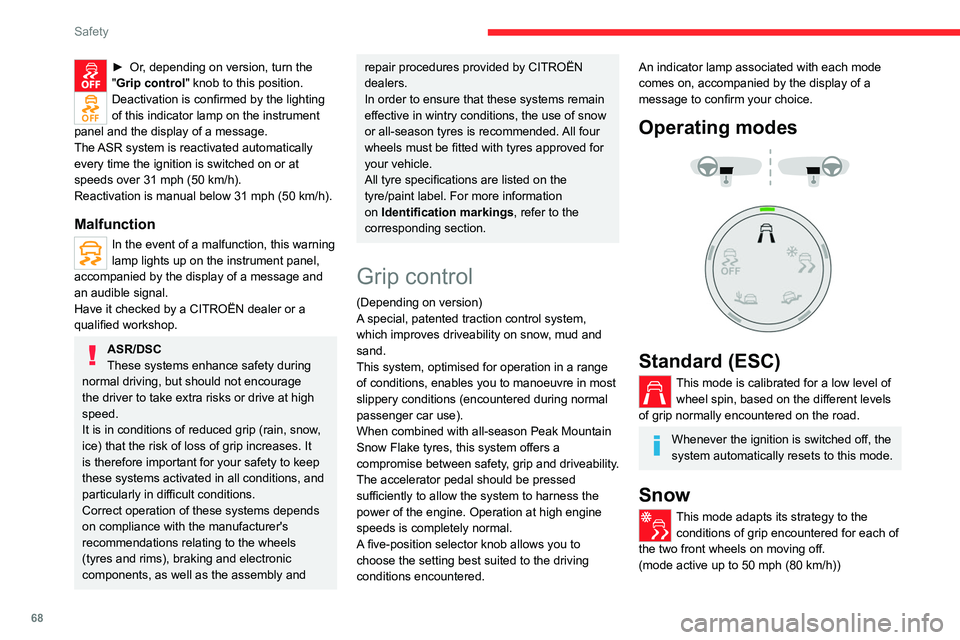
A five-position selector knob allows you to
choose the setting best suited to the driving
conditions encountered.
An indicator lamp associated with each mode
comes on, accompanied by the display of a
message to confirm your choice.
Operating modes
Standard (ESC)
This mode is calibrated for a low level of wheel spin, based on the different levels
of grip normally encountered on the road.
Whenever the ignition is switched off, the
system automatically resets to this mode.
Snow
This mode adapts its strategy to the conditions of grip encountered for each of
the two front wheels on moving off.
(mode active up to 50 mph (80
km/h))
All terrain (mud, damp grass, etc.)
This mode, when moving off, allows
considerable spin on the wheel with the
least grip to optimise clearing of the mud and to
regain grip. At the same time, the wheel with the
most grip is controlled in such a way as to
transmit as much torque as possible.
When moving, the system optimises wheel spin
to respond to the driver's requirements as fully
as possible.
(mode active up to 31 mph (50 km/h))
Sand
This mode allows little spin on the two driving wheels at the same time to allow
the vehicle to move forward and limit the risks of
getting stuck in the sand.
(mode active up to 75 mph (120 km/h))
Do not use the other modes on sand as
the vehicle may become stuck.
You can deactivate the ASR and DSC systems by turning the knob to the "OFF"
position.
The ASR and DSC systems will no longer act on the operation of the engine