lock CITROEN C3 AIRCROSS 2023 Owner's Manual
[x] Cancel search | Manufacturer: CITROEN, Model Year: 2023, Model line: C3 AIRCROSS, Model: CITROEN C3 AIRCROSS 2023Pages: 244, PDF Size: 7.09 MB
Page 42 of 244
40
Ease of use and comfort
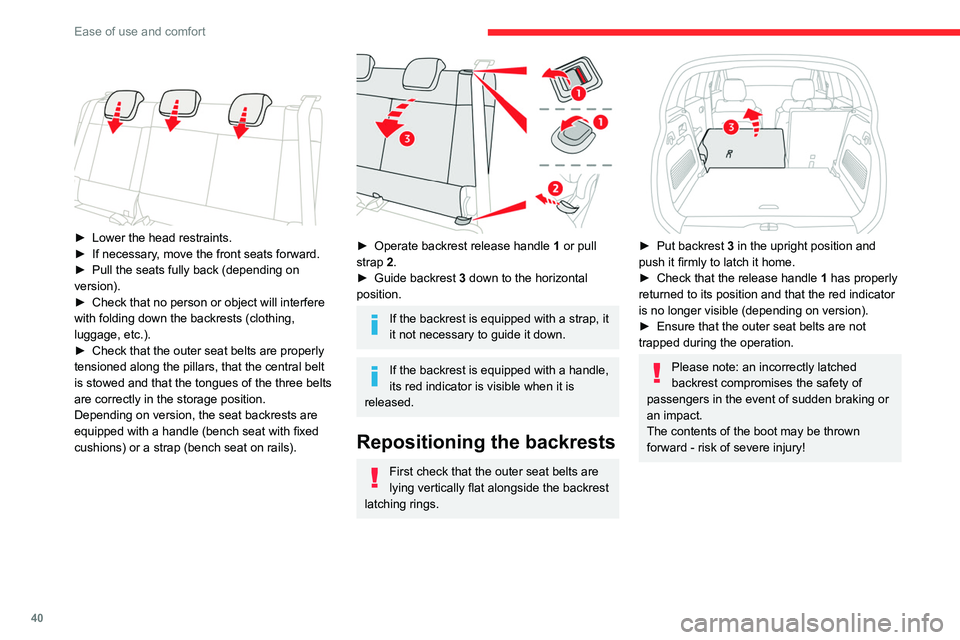
► Lower the head restraints.
► If necessary , move the front seats forward.
►
Pull the seats fully back (depending on
version).
►
Check that no person or object will interfere
with folding down the backrests (clothing,
luggage, etc.).
►
Check that the outer seat belts are properly
tensioned along the pillars, that the central belt
is stowed and that the tongues of the three belts
are correctly in the storage position.
Depending on version, the seat backrests are
equipped with a handle (bench seat with fixed
cushions) or a strap (bench seat on rails).
► Operate backrest release handle 1 or pull
strap 2.
►
Guide backrest
3 down to the horizontal
position.
If the backrest is equipped with a strap, it
it not necessary to guide it down.
If the backrest is equipped with a handle,
its red indicator is visible when it is
released.
Repositioning the backrests
First check that the outer seat belts are
lying vertically flat alongside the backrest
latching rings.
► Put backrest 3 in the upright position and
push it firmly to latch it home.
►
Check that the release handle 1
has properly
returned to its position and that the red indicator
is no longer visible (depending on version).
►
Ensure that the outer seat belts are not
trapped during the operation.
Please note: an incorrectly latched
backrest compromises the safety of
passengers in the event of sudden braking or
an impact.
The contents of the boot may be thrown
forward - risk of severe injury!
Steering wheel
adjustment
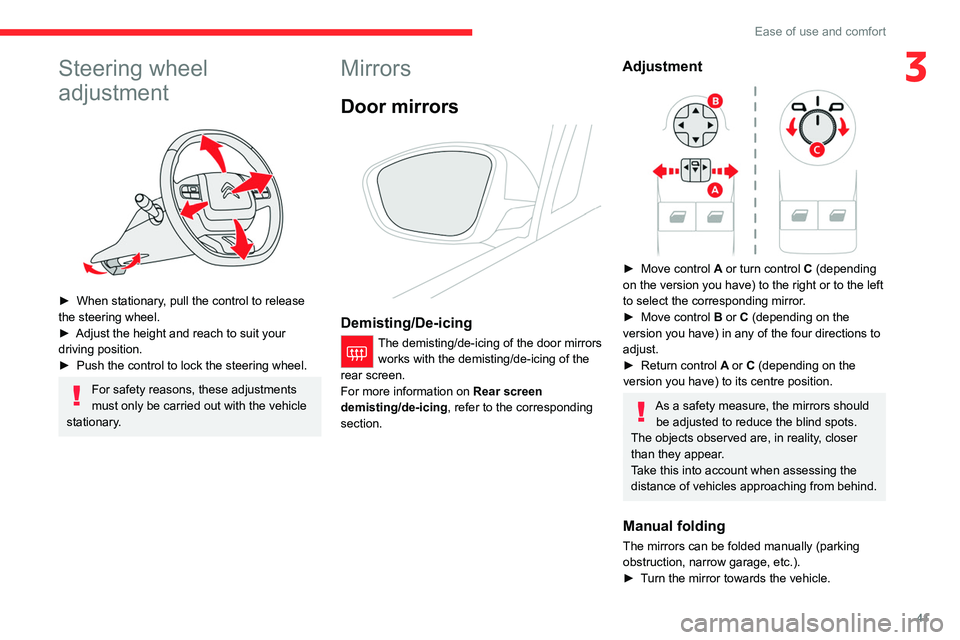
► When stationary, pull the control to release
the steering wheel.
► Adjust the height and reach to suit your
driving position.
► Push the control to lock the steering wheel.
For safety reasons, these adjustments
must only be carried out with the vehicle
stationary.
Page 43 of 244
41
Ease of use and comfort
3Steering wheel
adjustment
► When stationary, pull the control to release
the steering wheel.
►
Adjust the height and reach to suit your
driving position.
►
Push the control to lock the steering wheel.
For safety reasons, these adjustments
must only be carried out with the vehicle
stationary.
Mirrors
Door mirrors
Demisting/De-icing
The demisting/de-icing of the door mirrors works with the demisting/de-icing of the
rear screen.
For more information on Rear screen
demisting/de-icing , refer to the corresponding
section.
Adjustment
► Move control A or turn control C (depending
on the version you have) to the right or to the left
to select the corresponding mirror.
►
Move control
B or C (depending on the
version you have) in any of the four directions to
adjust.
►
Return control A
or C (depending on the
version you have) to its centre position.
As a safety measure, the mirrors should be adjusted to reduce the blind spots.
The objects observed are, in reality, closer
than they appear.
Take this into account when assessing the
distance of vehicles approaching from behind.
Manual folding
The mirrors can be folded manually (parking
obstruction, narrow garage, etc.).
►
T
urn the mirror towards the vehicle.
Page 44 of 244
42
Ease of use and comfort
Electric folding
Depending on equipment, the door mirrors can
be folded electrically.
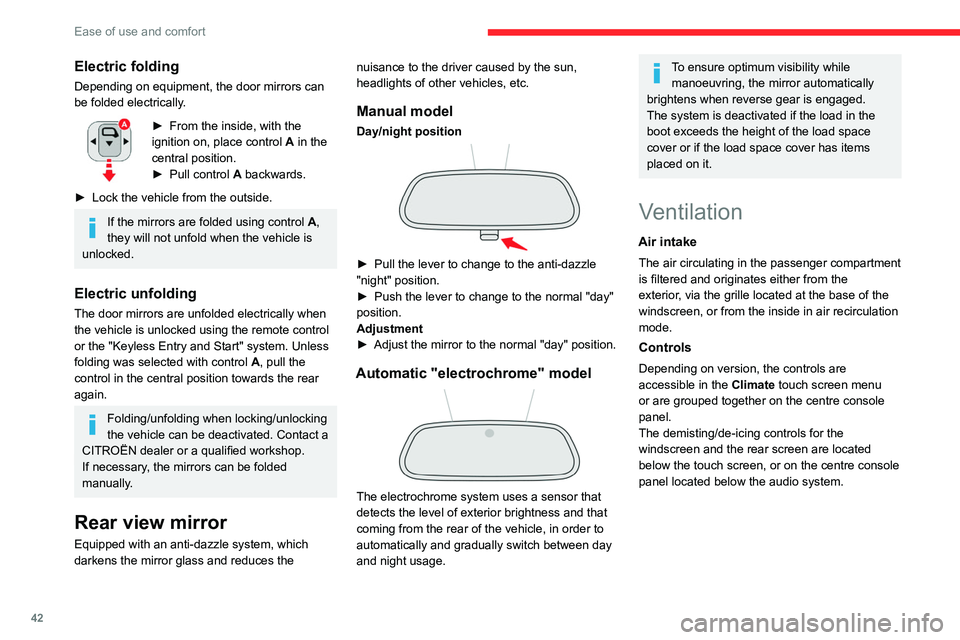
► From the inside, with the
ignition on, place control A
in the
central position.
►
Pull control A
backwards.
►
Lock the vehicle from the outside.
If the mirrors are folded using control A,
they will not unfold when the vehicle is
unlocked.
Electric unfolding
The door mirrors are unfolded electrically when
the vehicle is unlocked using the remote control
or the "Keyless Entry and Start" system. Unless
folding was selected with control A, pull the
control in the central position towards the rear
again.
Folding/unfolding when locking/unlocking
the vehicle can be deactivated. Contact a
CITROËN dealer or a qualified workshop.
If necessary, the mirrors can be folded
manually.
Rear view mirror
Equipped with an anti-dazzle system, which
darkens the mirror glass and reduces the nuisance to the driver caused by the sun,
headlights of other vehicles, etc.
Manual model
Day/night position
► Pull the lever to change to the anti-dazzle
"night" position.
►
Push the lever to change to the normal "day"
position.
Adjustment
►
Adjust the mirror to the normal "day" position.
Automatic "electrochrome" model
The electrochrome system uses a sensor that
detects the level of exterior brightness and that
coming from the rear of the vehicle, in order to
automatically and gradually switch between day
and night usage.
To ensure optimum visibility while manoeuvring, the mirror automatically
brightens when reverse gear is engaged.
The system is deactivated if the load in the
boot exceeds the height of the load space
cover or if the load space cover has items
placed on it.
Ventilation
Air intake
The air circulating in the passenger compartment
is filtered and originates either from the
exterior, via the grille located at the base of the
windscreen, or from the inside in air recirculation
mode.
Controls
Depending on version, the controls are
accessible in the Climate touch screen menu
or are grouped together on the centre console
panel.
The demisting/de-icing controls for the
windscreen and the rear screen are located
below the touch screen, or on the centre console
panel located below the audio system.
Air distribution
1. Windscreen demisting/de-icing vents
2. Front side window demisting/de-icing vents
3. Adjustable and closable side air vents
4. Adjustable and closable central air vents
5. Air outlets to the front footwells
6. Air outlets to the rear footwells
Advice
Using the ventilation and air
conditioning system
► To ensure that air is distributed evenly,
keep the external air intake grilles at the base
of the windscreen, the nozzles, the vents, the
air outlets and the air extractor in the boot
free from obstructions.
► Do not cover the sunshine sensor located
on the dashboard; this sensor is used to
regulate the automatic air conditioning
system.
Page 52 of 244
50
Ease of use and comfort
Front armrest
Height adjustment
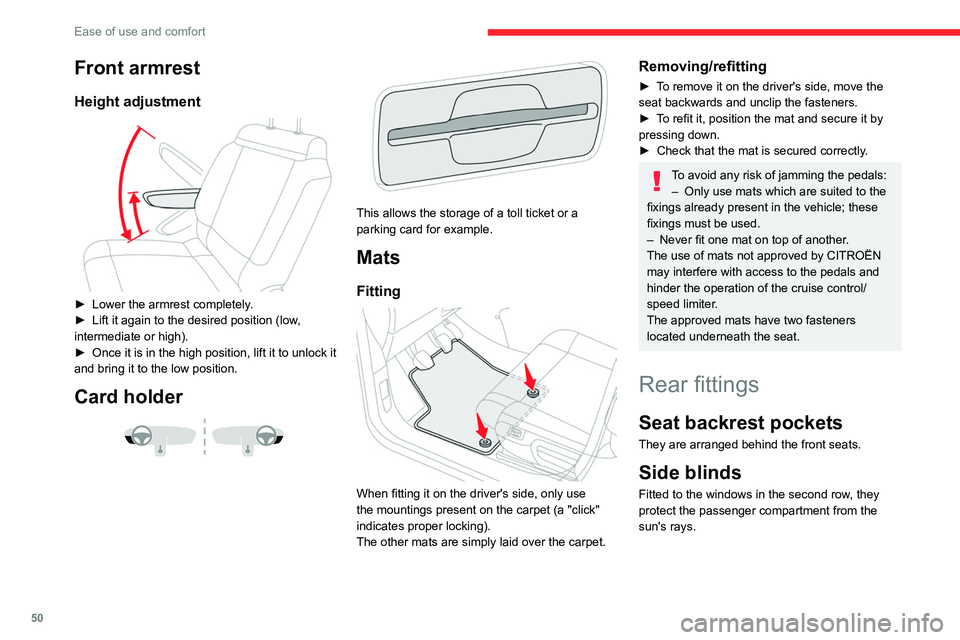
► Lower the armrest completely.
► Lift it again to the desired position (low ,
intermediate or high).
►
Once it is in the high position, lift it to unlock it
and bring it to the low position.
Card holder
This allows the storage of a toll ticket or a
parking card for example.
Mats
Fitting
When fitting it on the driver's side, only use
the mountings present on the carpet (a "click"
indicates proper locking).
The other mats are simply laid over the carpet.
Removing/refitting
► To remove it on the driver's side, move the
seat backwards and unclip the fasteners.
►
T
o refit it, position the mat and secure it by
pressing down.
►
Check that the mat is secured correctly
.
To avoid any risk of jamming the pedals:– Only use mats which are suited to the
fixings already present in the vehicle; these
fixings must be used.
–
Never fit one mat on top of another
.
The use of mats not approved by CITROËN
may interfere with access to the pedals and
hinder the operation of the cruise control/
speed limiter.
The approved mats have two fasteners
located underneath the seat.
Rear fittings
Seat backrest pockets
They are arranged behind the front seats.
Side blinds
Fitted to the windows in the second row, they
protect the passenger compartment from the
sun's rays.
► Pull the tab A and anchor the blind on the
hook B.
Always guide the blind slowly using the tab, both up and down.
Clothes hooks
They are located above each rear door.
Rear armrest and ski flap
It gives direct access to the boot for transporting
long objects.
Page 53 of 244
51
Ease of use and comfort
3
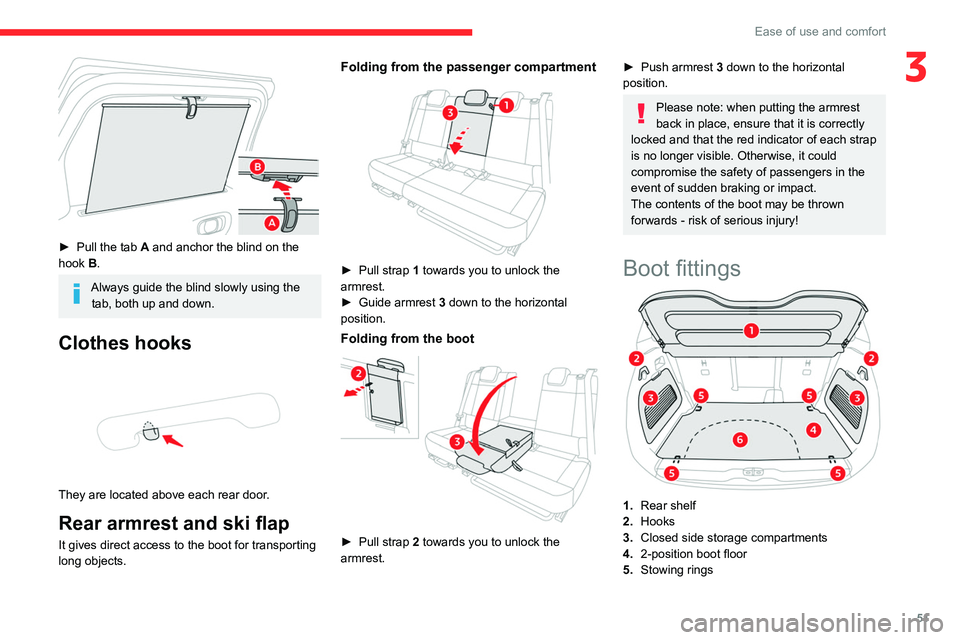
► Pull the tab A and anchor the blind on the
hook B.
Always guide the blind slowly using the tab, both up and down.
Clothes hooks
They are located above each rear door.
Rear armrest and ski flap
It gives direct access to the boot for transporting
long objects.
Folding from the passenger compartment
► Pull strap 1 towards you to unlock the
armrest.
►
Guide armrest
3 down to the horizontal
position.
Folding from the boot
► Pull strap 2 towards you to unlock the
armrest.
► Push armrest 3 down to the horizontal
position.
Please note: when putting the armrest
back in place, ensure that it is correctly
locked and that the red indicator of each strap
is no longer visible. Otherwise, it could
compromise the safety of passengers in the
event of sudden braking or impact.
The contents of the boot may be thrown
forwards - risk of serious injury!
Boot fittings
1. Rear shelf
2. Hooks
3. Closed side storage compartments
4. 2-position boot floor
5. Stowing rings
Page 55 of 244
53
Ease of use and comfort
3
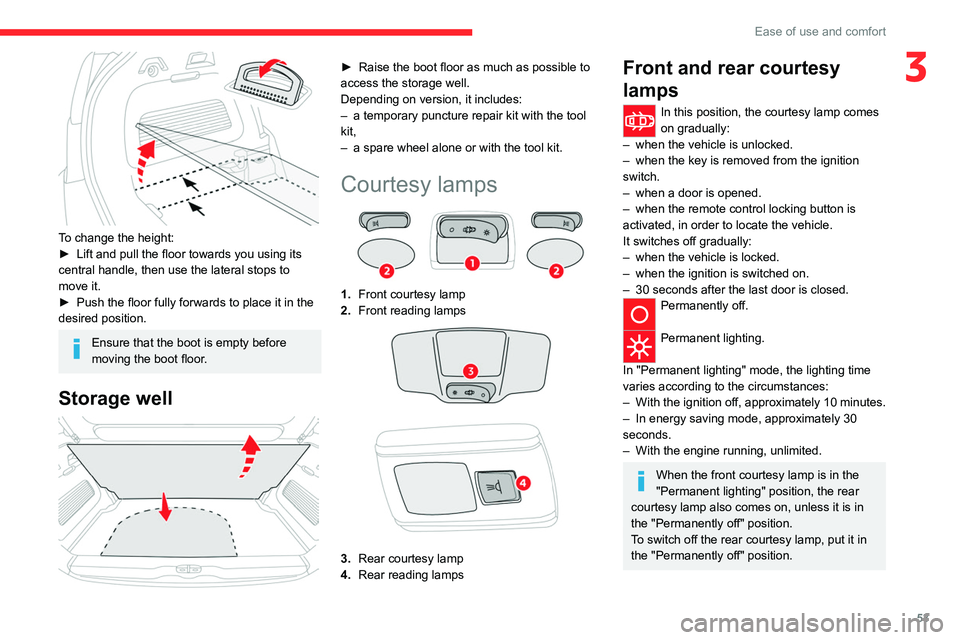
To change the height:
► Lift and pull the floor towards you using its
central handle, then use the lateral stops to
move it.
►
Push the floor fully forwards to place it in the
desired position.
Ensure that the boot is empty before
moving the boot floor.
Storage well
► Raise the boot floor as much as possible to
access the storage well.
Depending on version, it includes:
–
a temporary puncture repair kit with the tool
kit,
–
a spare wheel alone or with the tool kit.
Courtesy lamps
1. Front courtesy lamp
2. Front reading lamps
3.Rear courtesy lamp
4. Rear reading lamps
Front and rear courtesy
lamps
In this position, the courtesy lamp comes
on gradually:
–
when the vehicle is unlocked.
–
when the key is removed from the ignition
switch.
–
when a door is opened.
–
when the remote control locking button is
activated, in order to locate the vehicle.
It switches off gradually:
–
when the vehicle is locked.
–
when the ignition is switched on.
–
30 seconds after the last door is closed.
Permanently off.
Permanent lighting.
In "Permanent lighting" mode, the lighting time
varies according to the circumstances:
–
With
the ignition off, approximately 10 minutes.
–
In energy saving mode, approximately 30
seconds.
–
With the engine running, unlimited.
When the front courtesy lamp is in the
"Permanent lighting" position, the rear
courtesy lamp also comes on, unless it is in
the "Permanently off" position.
To switch off the rear courtesy lamp, put it in
the "Permanently off" position.
Page 68 of 244
66
Safety
Emergency Call" system used with the “112”
European single emergency call number.
The "Localised Emergency Call" system is
able to collect and process only the following
data relating to the vehicle: chassis number,
type (passenger vehicle or light commercial
vehicle), fuel type or power source, most
recent three locations and direction of travel,
and a timestamped log file recording the
automatic activation of the system.
The recipients of the processed data are the
emergency call handling centres designated
by the relevant national authorities in the
territory in which they are located, enabling
priority reception and handling of calls to the
“112” emergency number.
Data storage
Data contained in the system’s memory
is not accessible from outside the system until
a call is made. The system is not traceable
and is not continuously monitored in its
normal operating mode.
The data in the system's internal memory is
automatically and continuously erased. Only
the vehicle’s three most recent locations are
stored.
When an emergency call is triggered, the data
log is stored for no more than 13
hours.
* According to the geographic coverage of ‘Localised Emergency Call’, ‘Localised Assistance Call’ and the official national language chosen by the owner
of the vehicle.
The list of countries covered and telematic services provided is available from dealers or on the website for your country .
Access to data
You have the right to access the data
and, if necessary, submit a request to
rectify, erase or restrict the processing of
any personal information not processed in
accordance with the provisions of Regulation
2016/679 (GDPR). Third parties to which data
has been communicated shall be notified of
any rectification, erasure or restriction carried
out in accordance with the aforementioned
Directive, unless doing so would be
impossible or require a disproportionate effort.
You also have the right to lodge a complaint
with the relevant data protection authority.
Localised Assistance Call
► If the vehicle breaks down, press button 2
for more than 2 seconds to request assistance
(confirmed by a voice message*).
►
Pressing again immediately cancels the
request.
Privacy mode allows you to manage the
level of sharing (data and/or location)
between your vehicle and CITROËN.
It can be configured in the Settings menu on
the touch screen.
By default, depending on equipment,
deactivate/reactivate geolocation by
simultaneously pressing the 2 buttons, then
press the "Localised Assistance Call" button
to confirm.
If you purchased your vehicle outside the
CITROËN dealer network, we invite you
to have a dealer check the configuration of
these services and, if desired, modify them to
suit your wishes. In a multilingual country,
configuration is possible in the official national
language of your choice.
For technical reasons, in particular to
improve the quality of telematic services
for customers, the Manufacturer reserves the
right to carry out updates to the vehicle's
on-board telematic system at any time.
If you benefit from the Citroën Connect
Box offer with the SOS and Assistance
Pack included, there are additional services
available to you in your personal space, via
the website for your country.
For information about the SOS and
Assistance Pack, please refer to the general
conditions for these services.
Electronic stability control
(ESC)
The electronic stability control programme includes the following systems:
– Anti-lock braking system (ABS) and Electronic
brake force distribution (EBFD).
– Emergency braking assistance (EBA).
– Anti-slip regulation (ASR).
– Dynamic stability control (DSC).
Anti-lock braking system
(ABS)/Electronic brake force
distribution (EBFD)
These systems enhance the vehicle’s stability
and handling during braking, and enable greater
control while cornering, particularly on poor or
slippery road surfaces.
ABS prevents wheel locking in the event of
emergency braking.
Electronic brake force distribution (EBFD)
manages overall braking pressure on each
individual wheel.
► When braking in an emergency, depress
the pedal very firmly and maintain this
pressure.
Normal operation of the ABS may make
itself felt by slight vibrations of the brake
pedal.
The fixed illumination of this warning lamp signals that there is a fault with the ABS.
Page 69 of 244
67
Safety
5Electronic stability control
(ESC)
The electronic stability control programme includes the following systems:
–
Anti-lock braking system (ABS) and Electronic
brake force distribution (EBFD).
–
Emergency braking assistance (EBA).
–
Anti-slip regulation (ASR).
–
Dynamic stability control (DSC).
Anti-lock braking system (ABS)/Electronic brake force
distribution (EBFD)
These systems enhance the vehicle’s stability
and handling during braking, and enable greater
control while cornering, particularly on poor or
slippery road surfaces.
ABS prevents wheel locking in the event of
emergency braking.
Electronic brake force distribution (EBFD)
manages overall braking pressure on each
individual wheel.
►
When braking in an emergency
, depress
the pedal very firmly and maintain this
pressure.
Normal operation of the ABS may make
itself felt by slight vibrations of the brake
pedal.
The fixed illumination of this warning lamp signals that there is a fault with the ABS.
The vehicle retains conventional braking. Drive
carefully at a moderate speed.
Have it checked by a CITROËN dealer or a
qualified workshop.
This warning lamp, when lit together with the STOP and ABS warning lamps,
accompanied by a message and an audible
signal, indicates an EBFD malfunction.
You must stop the vehicle.
Stop as soon as it is safe to do so and switch off
the ignition.
Contact a CITROËN dealer or a qualified
workshop.
When changing wheels (tyres and rims),
ensure that these are approved for your
vehicle.
After an impact
Have it checked by a CITROËN dealer or
a qualified workshop.
Emergency braking
assistance (EBA)
In an emergency, this system enables you
to reach the optimum braking pressure more
quickly and therefore reduce the stopping
distance.
It is triggered in relation to the speed at which
the brake pedal is pressed. This is felt by a
reduction in the resistance of the pedal and an
increase in braking efficiency.
Anti-slip regulation (ASR) / Dynamic stability control
(DSC)
Anti-slip regulation (or traction control) optimises
traction by using engine braking and by applying
the brakes on the driving wheels to avoid one
or more wheels spinning. It also enhances the
vehicle's directional stability.
If there is a difference between the vehicle’s
trajectory and the path desired by the driver, the
dynamic stability control system automatically
uses engine braking and the brakes on one or
more wheels to return the vehicle to the desired
path, within the limits of the laws of physics.
These systems are activated automatically every
time the vehicle is started.
These systems are activated in the event of a problem with grip or trajectory
(confirmed by this warning lamp flashing on the
instrument panel).
Deactivation/Reactivation
In exceptional conditions (starting a vehicle
which is bogged down, stuck in snow, on soft
ground, etc.), it may be advisable to deactivate
the ASR system, so that the wheels can turn
freely and regain grip.
Reactivate the system as soon as the level of
grip permits.
The settings are changed via the Driving/
Vehicle touch screen menu.
Page 72 of 244
70
Safety
its lamp lights up; this indicator lamp appears in
green on the instrument panel.
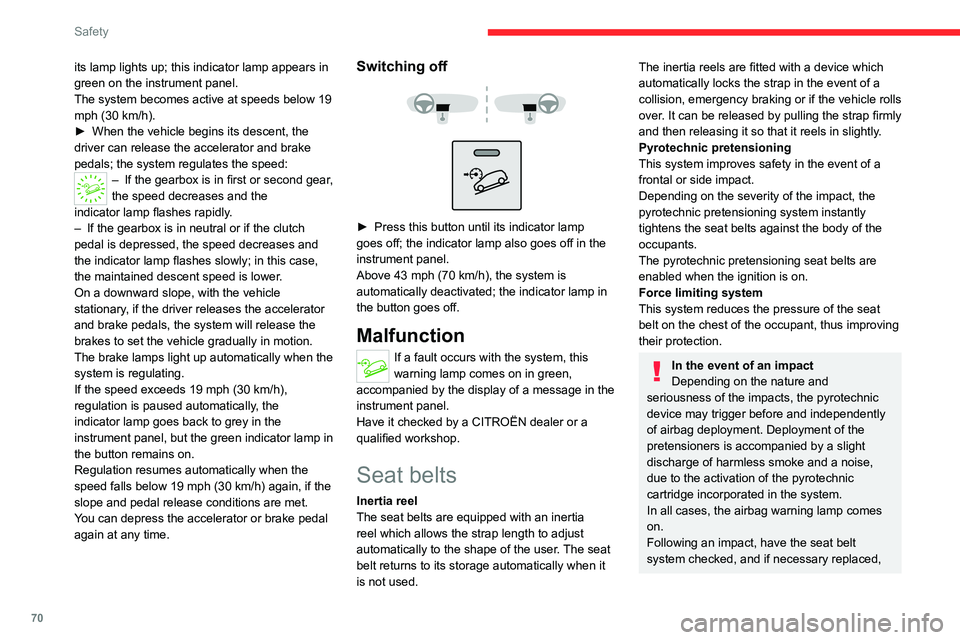
The system becomes active at speeds below 19
mph (30
km/h).
►
When the vehicle begins its descent, the
driver can release the accelerator and brake
pedals; the system regulates the speed:
– If the gearbox is in first or second gear ,
the speed decreases and the
indicator
lamp flashes rapidly.
–
If the gearbox is in neutral or if the clutch
pedal is depressed, the speed decreases and
the indicator
lamp flashes slowly; in this case,
the maintained descent speed is lower.
On a downward slope, with the vehicle
stationary, if the driver releases the accelerator
and brake pedals, the system will release the
brakes to set the vehicle gradually in motion.
The brake lamps light up automatically when the
system is regulating.
If the speed exceeds 19 mph (30
km/h),
regulation is paused automatically, the
indicator
lamp goes back to grey in the
instrument panel, but the green indicator lamp in
the button remains on.
Regulation resumes automatically when the
speed falls below 19 mph (30
km/h) again, if the
slope and pedal release conditions are met.
You can depress the accelerator or brake pedal
again at any time.
Switching off
► Press this button until its indicator lamp
goes off; the indicator lamp also goes off in the
instrument panel.
Above 43 mph (70 km/h), the system is
automatically deactivated; the indicator lamp in
the button goes off.
Malfunction
If a fault occurs with the system, this
warning lamp comes on in green,
accompanied by the display of a message in the
instrument panel.
Have it checked by a CITROËN dealer or a
qualified workshop.
Seat belts
Inertia reel
The seat belts are equipped with an inertia
reel which allows the strap length to adjust
automatically to the shape of the user. The seat
belt returns to its storage automatically when it
is not used.
The inertia reels are fitted with a device which
automatically locks the strap in the event of a
collision, emergency braking or if the vehicle rolls
over. It can be released by pulling the strap firmly
and then releasing it so that it reels in slightly.
Pyrotechnic pretensioning
This system improves safety in the event of a
frontal or side impact.
Depending on the severity of the impact, the
pyrotechnic pretensioning system instantly
tightens the seat belts against the body of the
occupants.
The pyrotechnic pretensioning seat belts are
enabled when the ignition is on.
Force limiting system
This system reduces the pressure of the seat
belt on the chest of the occupant, thus improving
their protection.
In the event of an impact
Depending on the nature and
seriousness of the impacts, the pyrotechnic
device may trigger before and independently
of airbag deployment. Deployment of the
pretensioners is accompanied by a slight
discharge of harmless smoke and a noise,
due to the activation of the pyrotechnic
cartridge incorporated in the system.
In all cases, the airbag warning lamp comes
on.
Following an impact, have the seat belt
system checked, and if necessary replaced,
by a CITROËN dealer or a qualified
workshop.
Front seat belts
The front seat belts are fitted with a pyrotechnic
pretensioning system and a force limiting
system.
Height adjustment
Page 78 of 244
76
Safety
Make sure that the seat belt is correctly
positioned and tightened.
For child seats with a support leg, ensure that
the support leg is in firm and steady contact
with the floor.
Advice
An incorrectly installed child seat in a vehicle compromises the child's safety in
the event of an accident.
Ensure that there is no seat belt or seat belt
buckle under the child seat, as this could
destabilise it.
Remember to fasten the seat belts or the
child seat harness keeping the slack relative
to the child's body to a minimum, even for
short journeys.
When installing a child seat using the seat
belt, ensure that the seat belt is tightened
correctly on the child seat and that it secures
the child seat firmly on the vehicle seat. If
the passenger seat is adjustable, move it
forwards if necessary.
Remove the head restraint before
installing a child seat with a backrest on a
passenger seat.
Ensure that the head restraint is stored or
attached securely to prevent it from being
thrown around the vehicle in the event of
sharp braking. Refit the head restraint once
the child seat has been removed.
Installing a booster seat
The chest part of the seat belt must be
positioned on the child's shoulder without
touching the neck.
Ensure that the lap part of the seat belt
passes correctly over the child's thighs.
Use a booster seat with a backrest, equipped
with a belt guide at shoulder level.
Additional protections
To prevent accidental opening of the
doors and rear windows, use the "Child lock".
Take care not to open the rear windows by
more than one third.
To protect young children from the rays of the
sun, fit side blinds on the rear windows.
As a safety measure, do not leave:
–
a child alone and unsupervised inside a
vehicle,
–
a child or an animal in a vehicle which is
exposed to the sun, with the windows closed,
–
the keys within reach of children inside the
vehicle.
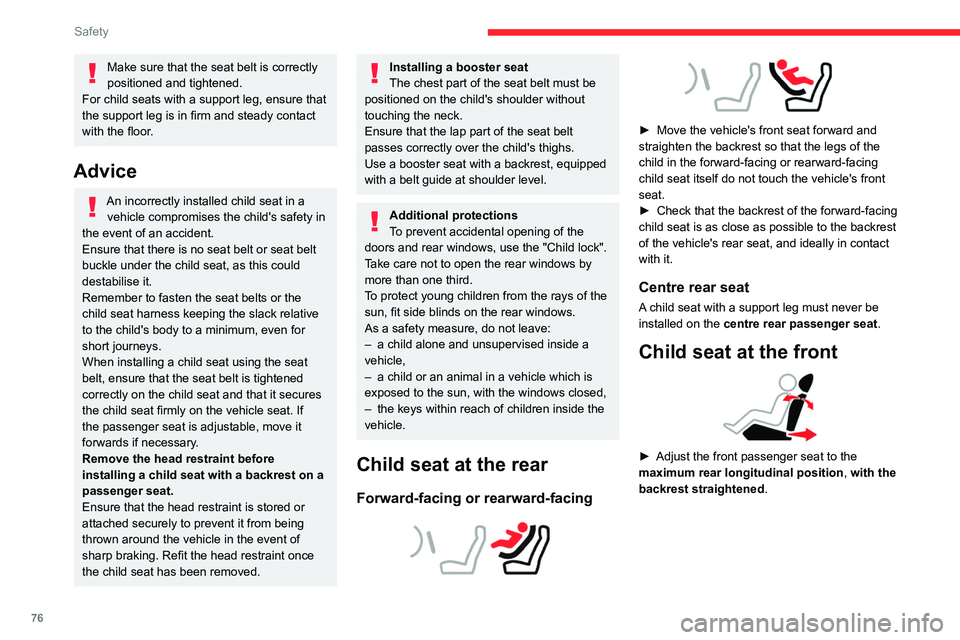
Child seat at the rear
Forward-facing or rearward-facing
► Move the vehicle's front seat forward and
straighten the backrest so that the legs of the
child in the forward-facing or rearward-facing
child seat itself do not touch the vehicle's front
seat.
►
Check that the backrest of the forward-facing
child seat is as close as possible to the backrest
of the vehicle's rear seat, and ideally in contact
with it.
Centre rear seat
A child seat with a support leg must never be
installed on the centre rear passenger seat .
Child seat at the front
► Adjust the front passenger seat to the
maximum rear longitudinal position ,
with the
backrest straightened .
"Forward facing"
You must leave the front passenger
airbag active.
"Rearward facing"
The front passenger airbag must be deactivated before installing a rearward
facing child seat. Otherwise, the child risks
being seriously injured or killed if the
airbag is deployed .