Citroen C3 PICASSO RHD 2014 1.G Owner's Guide
Manufacturer: CITROEN, Model Year: 2014, Model line: C3 PICASSO RHD, Model: Citroen C3 PICASSO RHD 2014 1.GPages: 288, PDF Size: 8.38 MB
Page 31 of 288
29
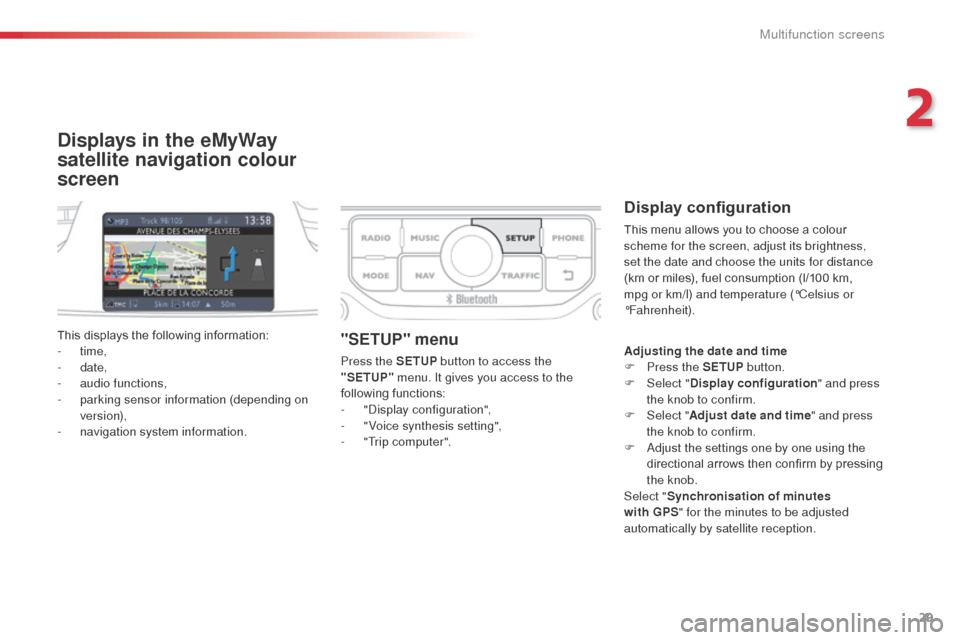
Displays in the eMyWay
satellite navigation colour
screen
Display configuration
This menu allows you to choose a colour
scheme for the screen, adjust its brightness,
set the date and choose the units for distance
(km or miles), fuel consumption (l/100 km,
mpg or km/l) and temperature (°Celsius or
°Fahrenheit).
This displays the following information:
-
time,
-
date,
-
a
udio functions,
-
p
arking sensor information (depending on
version),
-
n
avigation system information.
"SETUP" menu
Press the SETUP button to access the
"SETUP" menu. It gives you access to the
following functions:
-
"di
splay configuration",
-
"
Voice synthesis setting",
-
"
Trip computer". Adjusting the date and time
F
P ress the SETUP button.
F
Sel
ect "Display configuration " and press
the knob to confirm.
F
Sel
ect "Adjust date and time " and press
the knob to confirm.
F
a
d
just the settings one by one using the
directional arrows then confirm by pressing
the knob.
Select " Synchronisation of minutes
with GPS " for the minutes to be adjusted
automatically by satellite reception.
2
Multifunction screens
Page 32 of 288
30
Voice synthesis setting
This menu allows you to adjust the volume for
navigation instructions and choose the type of
voice (male or female).
For more information, refer to the a
u
dio and
telematics section.
Trip computer
This menu allows you to view information on
the state of the vehicle. You can choose from
the following functions:
-
"al
ert log"
L
ist of active alerts.
-
"
State of functions"
L
ist of the state of functions (activated,
deactivated or faulty).
For safety reasons, configuration of the
multifunction screen by the driver must
only be done when stationary.
Multifunction screens
Page 33 of 288
31
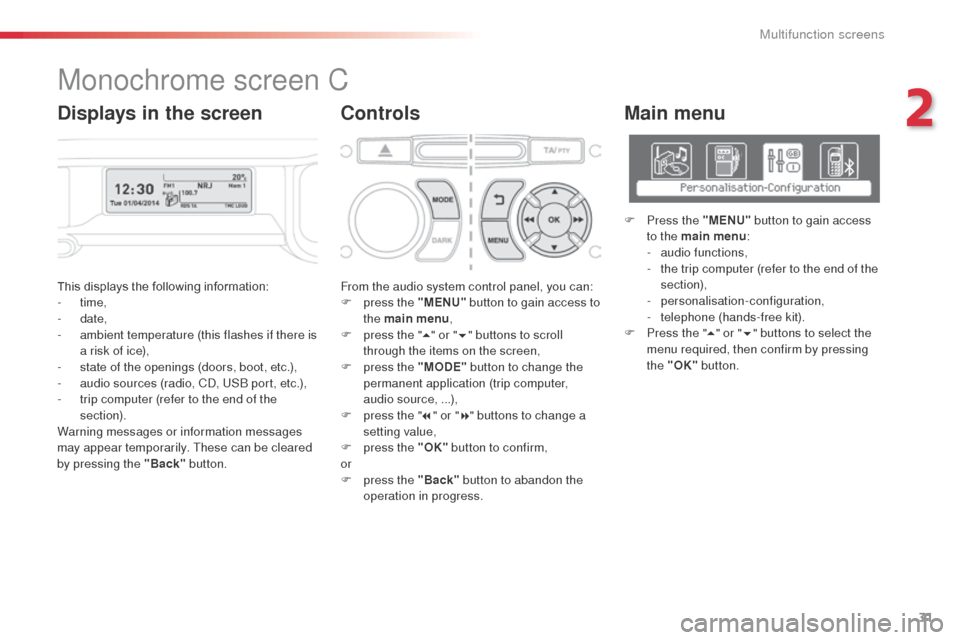
This displays the following information:
- time,
-
date,
-
a
mbient temperature (this flashes if there is
a risk of ice),
-
s
tate of the openings (doors, boot, etc.),
-
a
udio sources (radio, C
d, U
S
b
port, etc.),
-
t
rip computer (refer to the end of the
section).
Warning messages or information messages
may appear temporarily. These can be cleared
by pressing the "Back" button. From the audio system control panel, you can:
F
p ress the "MENU" button to gain access to
the main menu ,
F
p
ress the "5" or " 6" buttons to scroll
through the items on the screen,
F
p
ress the "MODE" button to change the
permanent application (trip computer,
audio source, ...),
F
p
ress the "7" or " 8" buttons to change a
setting value,
F
p
ress the "OK" button to confirm,
or
F
p
ress the "Back" button to abandon the
operation in progress.
Main menu
F Press the "MENU" button to gain access
to the main menu :
-
a
udio functions,
-
t
he trip computer (refer to the end of the
section),
-
personalisation-configuration,
-
t
elephone (hands-free kit).
F
P
ress the " 5" or " 6" buttons to select the
menu required, then confirm by pressing
the "OK" button.
Monochrome screen C
ControlsDisplays in the screen
2
Multifunction screens
Page 34 of 288
32
"Trip computer" menu
Alert log
This summarises the active warning messages,
displaying them in succession in the
multifunction screen.
on
ce this menu has been selected, you can
consult information concerning the status of the
vehicle (alert log, status of functions, etc.)
Status of functions
This summarises the status (active or inactive)
of the vehicle's functions.
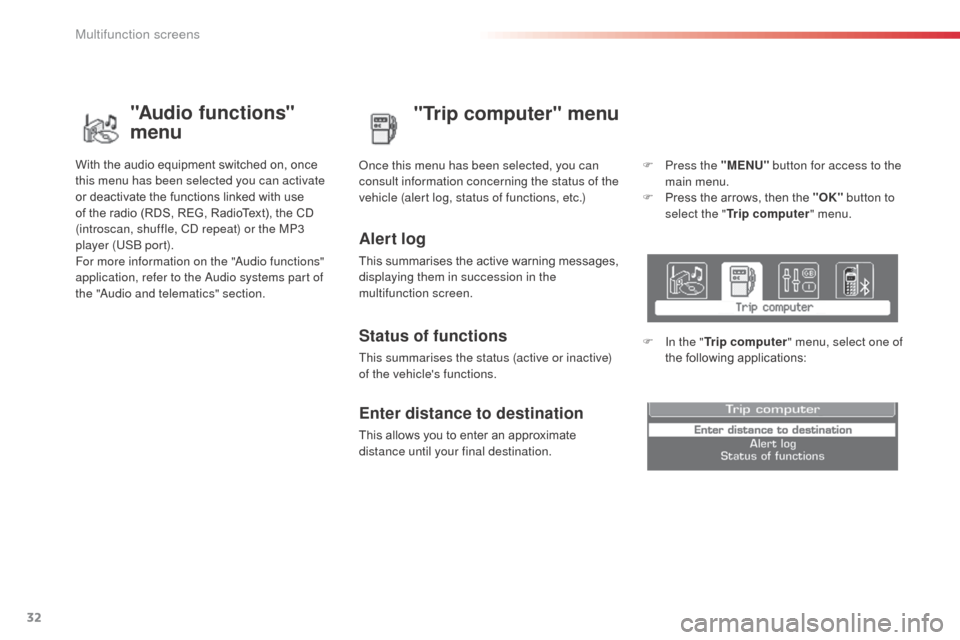
Enter distance to destination
This allows you to enter an approximate
distance until your final destination. F
P
ress the "MENU"
button for access to the
main menu.
F
P
ress the arrows, then the "OK"
button to
select the " Trip computer " menu.
F
I
n the "
Trip computer " menu, select one of
the following applications:
"Audio functions"
menu
With the audio equipment switched on, once
this menu has been selected you can activate
or deactivate the functions linked with use
of the radio (RDS, REG, RadioText), the CD
(introscan, shuffle, C
d
repeat) or the MP3
player (US
b
port).
For more information on the "
au
dio functions"
application, refer to the
a
u
dio systems part of
the "
aud
io and telematics" section.
Multifunction screens
Page 35 of 288
33
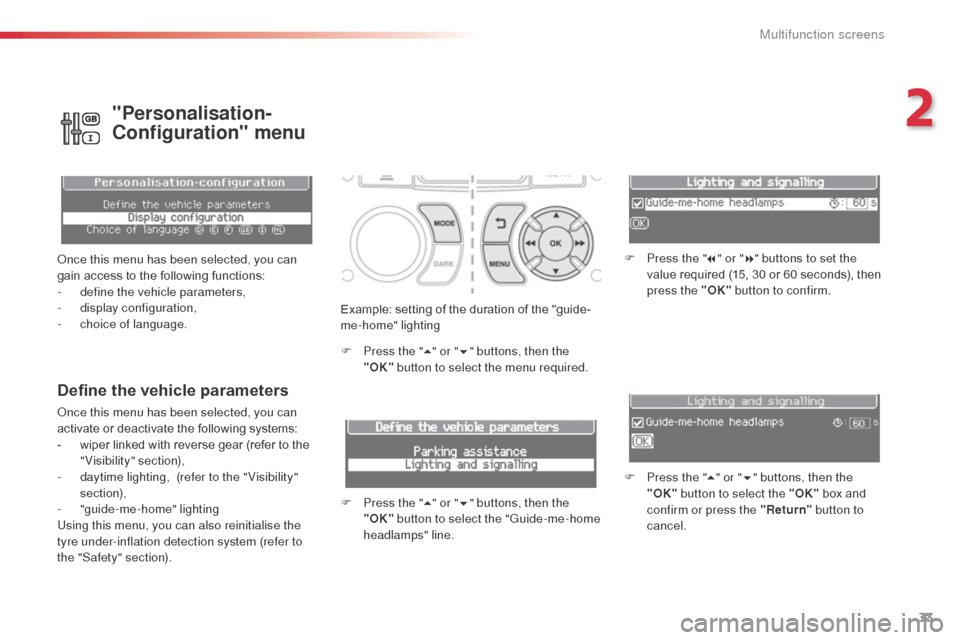
Example: setting of the duration of the "guide-
me-home" lighting
F
P
ress the " 5" or " 6" buttons, then the
"OK" button to select the menu required.
F
P
ress the " 5" or " 6" buttons, then the
"OK" button to select the "Guide-me-home
headlamps" line. F
P
ress the "
7" or " 8" buttons to set the
value required (15, 30 or 60 seconds), then
press the "OK" button to confirm.
F
P
ress the "5" or " 6" buttons, then the
"OK" button to select the "OK" box and
confirm or press the "Return" button to
cancel.
Define the vehicle parameters
once this menu has been selected, you can
activate or deactivate the following systems:
-
w
iper linked with reverse gear (refer to the
"Visibility" section),
-
d
aytime lighting, (refer to the " Visibility"
section),
-
"
guide-me-home" lighting
Using this menu, you can also reinitialise the
tyre under-inflation detection system (refer to
the "Safety" section).
"Personalisation-
Configuration" menu
once this menu has been selected, you can
gain access to the following functions:
-
d
efine the vehicle parameters,
-
d
isplay configuration,
-
c
hoice of language.
2
Multifunction screens
Page 36 of 288
34
Choice of language
once this menu has been selected, you can
change the language used by the display by
selecting a new language from the list offered.
Telephone menu
With the Audio system on, with this menu
s elected, you can configure your bl uetooth
hands-free kit (pairing), view the various
telephone directories (call log, services...) and
manage your calls (call, hang up, double call,
secret mode...).
For more information on the "Telephone"
application, refer to the
a
u
dio system section in
"
aud
io and telematics".
For safety reasons, configuration of the
multifunction screen by the driver must
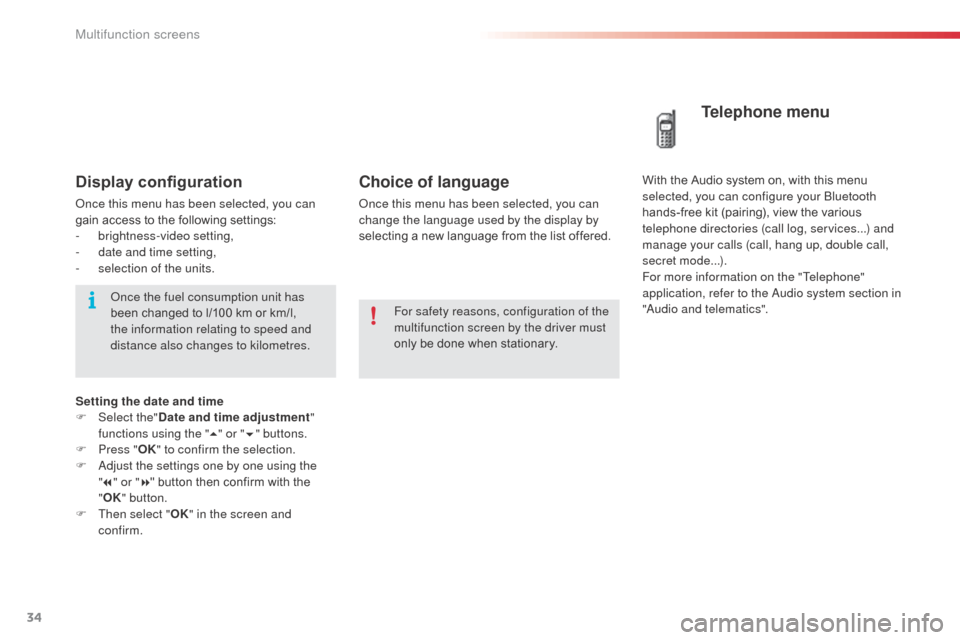
only be done when stationary.Display configuration
once this menu has been selected, you can
gain access to the following settings:
-
b
rightness-video setting,
-
d
ate and time setting,
-
s
election of the units.
on
ce the fuel consumption unit has
been changed to l/100 km or km/l,
the information relating to speed and
distance also changes to kilometres.
Setting the date and time
F
Sel
ect the" Date and time adjustment "
functions using the " 5" or " 6" buttons.
F
P
ress " OK" to confirm the selection.
F
a
d
just the settings one by one using the
" 7 " or " 8" button then confirm with the
" OK " button.
F
T
hen select " OK" in the screen and
confirm.
Multifunction screens
Page 37 of 288
35
Tr i p c o m p u t e r
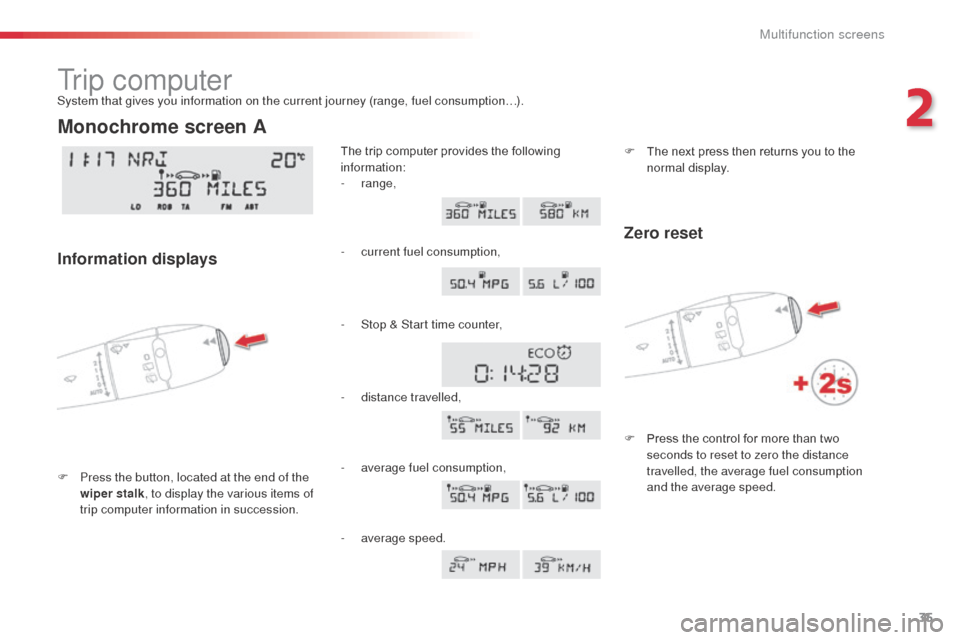
F Press the button, located at the end of the wiper stalk , to display the various items of
trip computer information in succession. The trip computer provides the following
information:
System that gives you information on the current journey (range, fuel consumption…).
Monochrome screen A
Information displays
-
range,
-
c
urrent fuel consumption,
-
S
top & Start time counter,
-
d
istance travelled,
-
a
verage fuel consumption, F
T
he next press then returns you to the
normal display.
-
a
verage speed.
Zero reset
F Press the control for more than two seconds to reset to zero the distance
travelled, the average fuel consumption
and the average speed.
2
Multifunction screens
Page 38 of 288
36
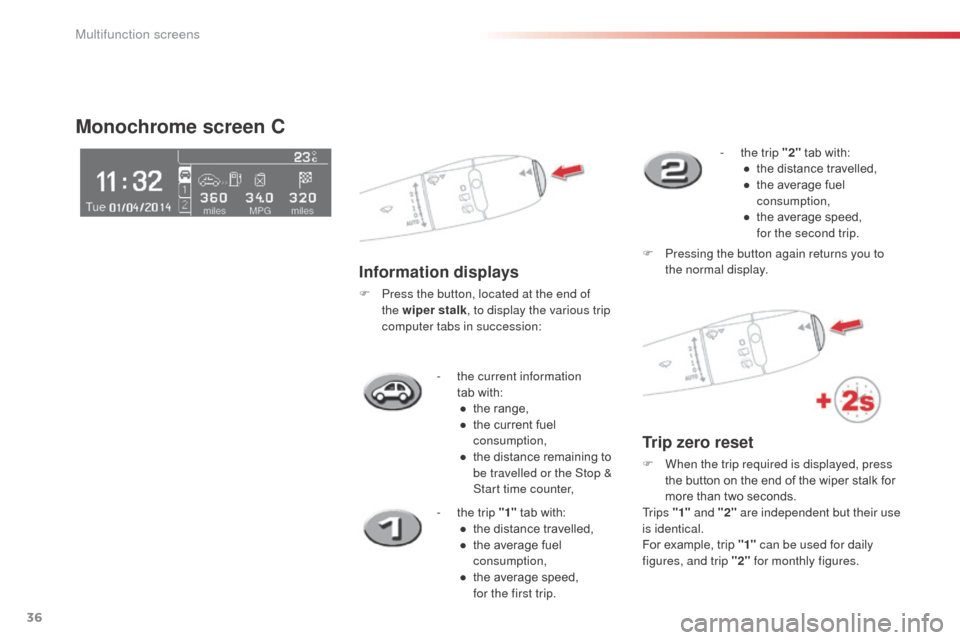
- the current information tab with:●
t
he range,
●
t
he current fuel
consumption,
●
t
he distance remaining to
be travelled or the Stop &
Start time counter,
Monochrome screen C
Information displays
F Press the button, located at the end of the wiper stalk , to display the various trip
computer tabs in succession:
-
t
he trip "1" tab with:
●
t
he distance travelled,
●
t
he average fuel
consumption,
●
t
he average speed,
for the first trip. -
t
he trip "2"
tab with:
●
t
he distance travelled,
●
t
he average fuel
consumption,
●
t
he average speed,
for the second trip.
F
P
ressing the button again returns you to
the normal display.
Trip zero reset
F When the trip required is displayed, press the button on the end of the wiper stalk for
more than two seconds.
Tr i p s "1" and "2" are independent but their use
is identical.
For example, trip "1" can be used for daily
figures, and trip "2" for monthly figures.
Multifunction screens
Page 39 of 288
37
Trip computer, a few definitions
When the range falls below 20 miles (30 km),
dashes are displayed. After filling with at least
5 litres of fuel, the range is recalculated and is
displayed when it exceeds 60 miles (100 km).
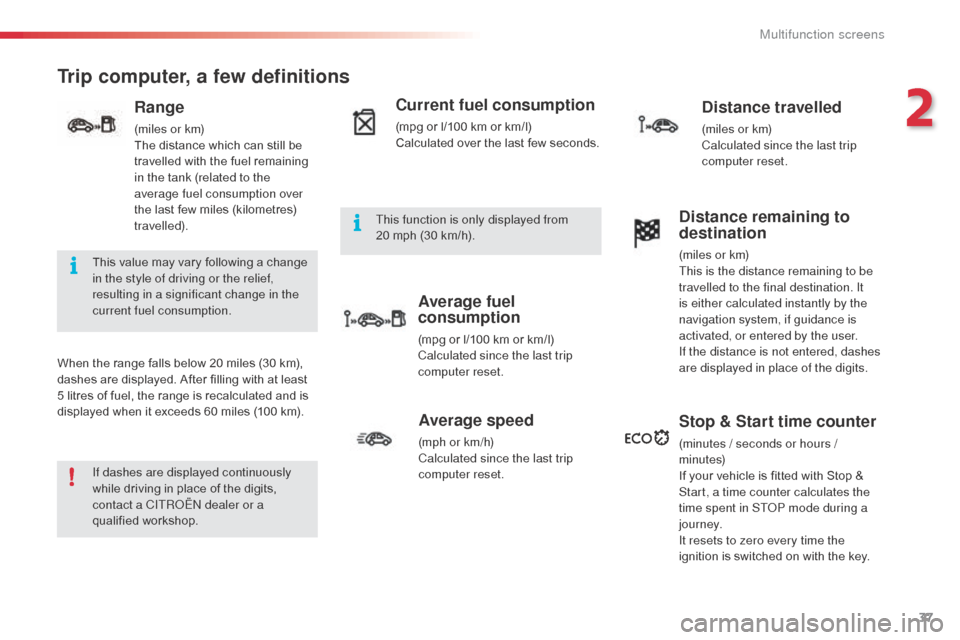
Range
(miles or km)
The distance which can still be
travelled with the fuel remaining
in the tank (related to the
average fuel consumption over
the last few miles (kilometres)
travelled).
Current fuel consumption
(mpg or l/100 km or km/l)
Calculated over the last few seconds.
Average fuel
consumption
(mpg or l/100 km or km/l)
Calculated since the last trip
computer reset.
Distance travelled
(miles or km)
Calculated since the last trip
computer reset.
Average speed
(mph or km/h)
Calculated since the last trip
computer reset.
Distance remaining to
destination
(miles or km)
This is the distance remaining to be
travelled to the final destination. It
is either calculated instantly by the
navigation system, if guidance is
activated, or entered by the user.
If the distance is not entered, dashes
are displayed in place of the digits.
Stop & Start time counter
(minutes / seconds or hours /
minutes)
If your vehicle is fitted with Stop &
Start, a time counter calculates the
time spent in ST
oP m
ode during a
j o u r n ey.
It resets to zero every time the
ignition is switched on with the key.
If dashes are displayed continuously
while driving in place of the digits,
contact a CITR
oËn
dealer or a
qualified workshop. This value may vary following a change
in the style of driving or the relief,
resulting in a significant change in the
current fuel consumption. This function is only displayed from
20
mph (30 km/h).
2
Multifunction screens
Page 40 of 288
38
Ventilation
Air flow paths
The incoming air follows various routes
depending on the controls selected by the
driver:
-
d
irect arrival in the passenger
compartment (air intake),
-
p
assage through a heating circuit (heating),
-
p
assage through a cooling circuit (air
conditioning).
The temperature control enables you to obtain
the level of comfort required by mixing the air of
the various circuits.
The air distribution control enables you to
diffuse the air in the passenger compartment
combining several air vents.
The air flow control enables you to increase or
reduce the speed of the ventilation fan.
Air intake
The air circulating in the passenger compartment
is filtered and originates either from the outside
via the grille located at the base of the windscreen
or from the inside in air recirculation mode.
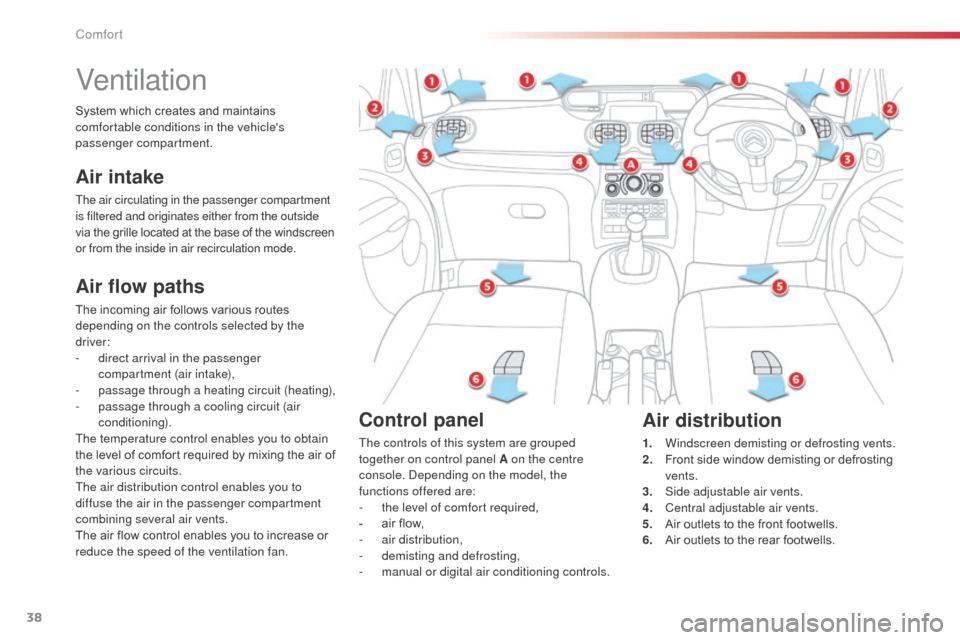
Control panel
The controls of this system are grouped
together on control panel A on the centre
console.
d
e
pending on the model, the
functions offered are:
-
t
he level of comfort required,
-
a
ir flow,
-
a
ir distribution,
-
d
emisting and defrosting,
-
m
anual or digital air conditioning controls.
Air distribution
1. Windscreen demisting or defrosting vents.
2. Front side window demisting or defrosting
vents.
3.
S
ide adjustable air vents.
4.
C
entral adjustable air vents.
5.
A
ir outlets to the front footwells.
6.
A
ir outlets to the rear footwells.
System which creates and maintains
comfortable conditions in the vehicle's
passenger compartment.
Comfort