ECO mode Citroen C3 PICASSO RHD 2015 1.G Owner's Manual
[x] Cancel search | Manufacturer: CITROEN, Model Year: 2015, Model line: C3 PICASSO RHD, Model: Citroen C3 PICASSO RHD 2015 1.GPages: 292, PDF Size: 8.16 MB
Page 5 of 292

.
.
Direction indicators 107
Hazard warning lamps
1
07
Horn
10
8
Under-inflation detection
1
08
Braking assistance systems
1
12
Trajectory control systems
1
13
Front seat belts
1
14
Airbags
1
18
Safety
Driving recommendations 122
Starting-switching off the engine
1
23
Parking brake
1
25
Electronic gearbox
1
26
Gear ef ficiency indicator
1
30
Hill start assist
1
31
Speed limiter
1
32
Cruise control
1
34
Rear parking sensors
1
36
Reversing camera
1
38
Driving
eMyWay 2 01
Audio system
2
55
Audio and telematics
Alphabetical index Visual search
Bonnet 14
0
Running out of fuel (Diesel)
1
41
Petrol engines
1
42
Diesel engine
1
43
Checking levels
1
44
Checks
14
7
Checks
Temporary puncture repair kit 149
Spare wheel
1
54
Snow chains
1
61
AdBlue
® additive and SCR system
(BlueHDi Diesel) 1 62
Changing a bulb
1
69
Changing a fuse
1
77
Battery
1
84
Energy economy mode
1
86
Changing a wiper blade
1
87
Towing the vehicle
1
88
Towing a trailer
1
90
Fitting roof bars
1
91
Accessories
1
92
Practical information Technical data
Petrol engines 1
94
Petrol weights
1
95
Diesel engines
1
96
Diesel weights
1
97
Dimensions
1
98
Identification markings
1
99
Contents
Page 10 of 292

8
Eco-driving
Optimise the use of your gearbox
With a manual gearbox, move off gently and change up without waiting.
During acceleration change up early.
With an automatic or electronic gearbox, give preference to automatic
mode and avoid pressing the accelerator pedal heavily or suddenly.
The gear efficiency indicator invites you engage the most suitable gear:
as soon as the indication is displayed in the instrument panel, follow it
straight away.
For vehicles fitted with an electronic or automatic gearbox, this indicator
appears only in manual mode.
Drive smoothly
Maintain a safe distance between vehicles, use engine braking rather
than the brake pedal, and press the accelerator progressively. These
practices contribute towards a reduction in fuel consumption and CO
2
emissions and also helps reduce the background traffic noise.
Control the use of your electrical
equipment
Before moving off, if the passenger compartment is too warm, ventilate it
by opening the windows and air vents before using the air conditioning.
Above 30 mph (50 km/h), close the windows and leave the air vents
open.
Remember to make use of equipment that can help keep the
temperature in the passenger compartment down (sunroof and window
blinds...).
Switch off the air conditioning, unless it has automatic regulation, as
soon as the desired temperature is attained.
Switch off the demisting and defrosting controls, if not automatic.
Switch off the heated seat as soon as possible.
Switch off the headlamps and front foglamps when the level of light
does not require their use.
Avoid running the engine before moving off, particularly in winter; your
vehicle will warm up much faster while driving.
As a passenger, if you avoid connecting your multimedia devices
(film, music, video game...), you will contribute towards limiting the
consumption of electrical energy, and so of fuel.
Disconnect your portable devices before leaving the vehicle.
Eco-driving is a range of everyday practices that allow the motorist to optimise their fuel consumption and CO
2 emissions.
If your vehicle has cruise control, make use of the system at speeds
above 25 mph (40 km/h) when the traffic is flowing well.
Eco-driving
Page 13 of 292

11
Indicator and warning lamps
Visual indicators informing the driver that a system is in operation (operation or deactivation indicator lamps) or of the occurrence of a fault (warning lamp).
Associated warnings
The illumination of certain warning lamps may
be accompanied by an audible signal and a
message in the multifunction screen.
The warning lamps may come on continuously
(fixed) or flash.
When the ignition is switched on
Certain warning lamps come on for a few
seconds when the vehicle's ignition is switched
on.
When the engine is started, these same
warning lamps should go off.
If they remain on, before moving off, refer to the
information on the warning lamp concerned.Certain warning lamps may come on
in one of two different modes. Only by
relating the type of illumination to the
operating status of the vehicle can it
be ascertained whether the situation is
normal or whether a fault has occurred.
Operation indicator lamps
If one of the following indicator lamps comes on, this confirms that the corresponding system has come into operation.
Warning
/indicator lampis on Cause Action / Observations
Left-hand
direction indicatorflashing with buzzer.The lighting stalk is pushed down.
Right-hand
direction indicatorflashing with buzzer.The lighting stalk is pushed up.
Sidelamps fixed. The lighting stalk is in the
"Sidelamps" position.
Dipped beam
headlamps fixed.
The lighting stalk is in the "Dipped
beam headlamps" position.
Main beam
headlamps fixed.
The lighting stalk is pulled towards you. Pull the stalk to return to dipped beam headlamps.
1
Monitoring
Page 28 of 292

26
Distance recordersLighting dimmer
The total and trip distances are displayed for
thirty seconds when the ignition is switched off,
when the driver's door is opened and when the
vehicle is locked or unlocked.It measures the total distance travelled by the
vehicle since its first registration.
Activation
When the lighting is on:
F
p ress the button to change the brightness
of the instruments and controls,
F
w
hen the level of brightness required is
reached, release the button.
Deactivation
When the lighting is off, or in day mode on
vehicles fitted with daytime running lamps,
pressing the button does not have any effect.
Total distance recorder
When travelling abroad, you may
have to change the units of distance:
the display of road speed must be in
the official units (miles or km) for the
country. The change of units is done via
the screen configuration menu, with the
vehicle stationary. System for manual adjustment of the
brightness of the instruments and controls to
suit the ambient light level.
Trip distance recorder
It measures the distance travelled since it was
reset to zero by the driver.
F
W
ith the ignition on, press the button until
zeros appear.
Monitoring
Page 30 of 292

28
Display settings
F Once you have selected a setting, press the " 7" or " 8" buttons to change its value.
F
P
ress the " 5" or " 6" buttons to switch
respectively to the previous or next setting.
F
P
ress the "OK" button to record the
change and return to the normal display or
press the "Back" button to cancel.
Options
Once the "Options" menu has been selected,
you can start diagnostics of the status of the
equipment (active, not active, faulty).
Vehicle configuration
Once the " Vehicle Configuration " menu has
been selected, you can activate or deactivate
the following equipment:
-
w
iper linked with reverse gear (refer to the
"Visibility" section),
-
"
guide-me-home" lighting (refer to the
"Visibility" section).
Using this menu, you can also reinitialise the
tyre under-inflation detection system (refer to
the "Safety" section).
Once the " Display settings " menu has been
selected, you can gain access to the following settings:
- year,
- month,
-
d ay,
-
h o u r,
-
minutes,
-
1
2 or 24 hour mode. Setting the date and time
F
P
ress the MENU
button.
F Select "
Display adjust " using the "5" or " 6"
button.
F Press OK to confirm the selection.
F S elect the "Year" function using the " 5" or
" 6 " button.
F
P
ress OK to confirm the selection.
F
D
efine the desired value, using the " 7" or
" 8 " buttons.
F
P
ress OK to confirm the selection.
F
R
epeat the procedure for the "Month",
"Day", "Hours", and "Minutes" functions.
Multifunction screens
Page 48 of 292

46
The air conditioning only operates when the engine is running.The driver and front passenger can
each adjust the temperature to their
requirements.
F
Turn control 2 or 3 to the left or to the right
respectively to decrease or increase this value.
A setting around the value 21 provides
optimum comfort. However, depending on your
requirements, a setting between 18 and 24 is
normal.
You are advised to avoid a left / right setting
difference of more than 3.
Automatic operation
F Press the "AUTO" button. The
indicator lamp in the button
comes on.
2. Driver's side adjustment
Dual-zone digital air conditioning
We recommend the use of this mode: it permits
automatic and optimised adjustment of all
of the functions, passenger compartment
temperature, air flow, air distribution and air
recirculation, in accordance with the comfort
value that you have chosen.
This system is designed to operate effectively
in all seasons, with the windows closed. The value indicated on the display corresponds
to a level of comfort and not to a temperature in
degrees Celsius or Fahrenheit.
1. Automatic comfort
programme 3. Passenger's side adjustment
On entering the vehicle, if the interior
temperature is much colder or warmer
than the comfort value, there is no
need to change the value displayed in
order to obtain the comfort required.
The system corrects the difference
in temperature automatically and as
quickly as possible.
When the engine is cold, to prevent
too great a distribution of cold air, the
air flow will reach its optimum level
gradually.
In cold weather, it favours the
distribution of warm air to the
windscreen, side windows and footwells
o n l y.
Comfort
Page 63 of 292

61
Window controls
1. Driver's electric window.
2. Passenger's electric window.
3.
R
ear right electric window.
4.
R
ear left electric window.
5.
D
eactivating the rear electric window and
door controls.
Electric windows
F Press or pull the switch. The window stops as soon as the
switch is released.
One-touch electric
windows
There are two methods
of operation:
-
m
anual mode
F
P
ress or pull the switch gently. The
window stops as soon as the switch is
released.
-
a
utomatic mode
F
P
ress or pull the switch fully. The window
opens or closes completely when the
switch is released.
F
P
ressing the switch again stops the
movement of the window.
The electric window switches
remain operational for approximately
45
seconds after the ignition is switched
off or until a front door is opened.
The electric window switches
remain operational for approximately
45
seconds after the ignition is switched
off or until a front door is opened.
System which opens or closes a window
manually or automatically. It is fitted with
anti-pinch protection if an obstacle is detected
on the one-touch models and a deactivation
system to prevent misuse of the rear switches
on all models.
4
Access
Page 74 of 292

72
Model with rear foglamp only
Rear foglamp
F
T
o switch on the foglamp, turn the ring C
forwards.
When the lighting is switched off automatically
(with AUTO model), the foglamp and the dipped
beam headlamps will remain on.
F
T
o switch off all of the lighting, turn the
ring
C rearwards.
Model with front foglamps
and a rear foglampFront and rear foglamps
Rotate and release the ring C :
F
f
or wards a first time to switch on the front
foglamps,
F
f
or wards a second time to switch on the
rear foglamp,
F
r
ear wards a first time to switch off the rear
foglamp,
F
r
ear wards a second time to switch of the
front fog lamps.
C.
F
oglamp selection ring.
The foglamps operate with the dipped and main
beam headlamps. When the lighting is switched off automatically
(with AUTO model) or when the dipped
headlamps are switched off manually, the
foglamps and sidelamps will remain on.
F
T
urn the ring rear wards to switch off the
foglamps, the sidelamps will then switch off.
In good or rainy weather, by both day
and night, the front foglamps and the
rear foglamp are prohibited. In these
situations, the power of their beams
may dazzle other drivers.
Do not forget to switch off the front
foglamps and the rear foglamp when
they are no longer necessary.
Visibility
Page 83 of 292

81
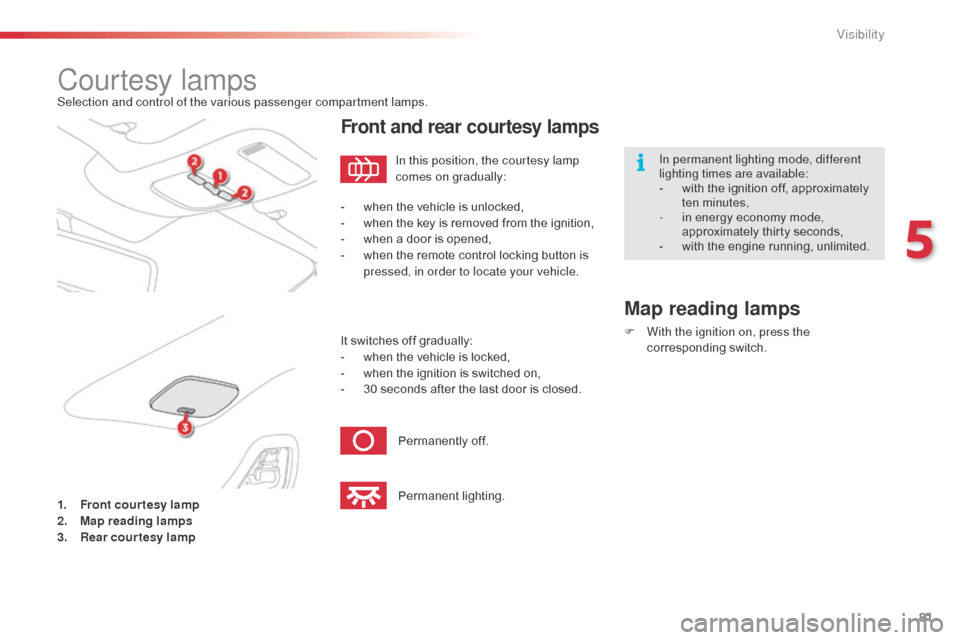
Courtesy lampsSelection and control of the various passenger compartment lamps.
1.
F
ront courtesy lamp
2.
M
ap reading lamps
3.
R
ear courtesy lamp
Front and rear courtesy lamps
Map reading lamps
F With the ignition on, press the corresponding switch.
In this position, the courtesy lamp
comes on gradually:
Permanently off.
Permanent lighting.
It switches off gradually:
-
w
hen the vehicle is locked,
-
w
hen the ignition is switched on,
-
3
0 seconds after the last door is closed.
-
w
hen the vehicle is unlocked,
-
w
hen the key is removed from the ignition,
-
w
hen a door is opened,
-
w
hen the remote control locking button is
pressed, in order to locate your vehicle. In permanent lighting mode, different
lighting times are available:
-
w
ith the ignition off, approximately
ten minutes,
-
i
n energy economy mode,
approximately thirty seconds,
-
w
ith the engine running, unlimited.
5
Visibility
Page 84 of 292

82
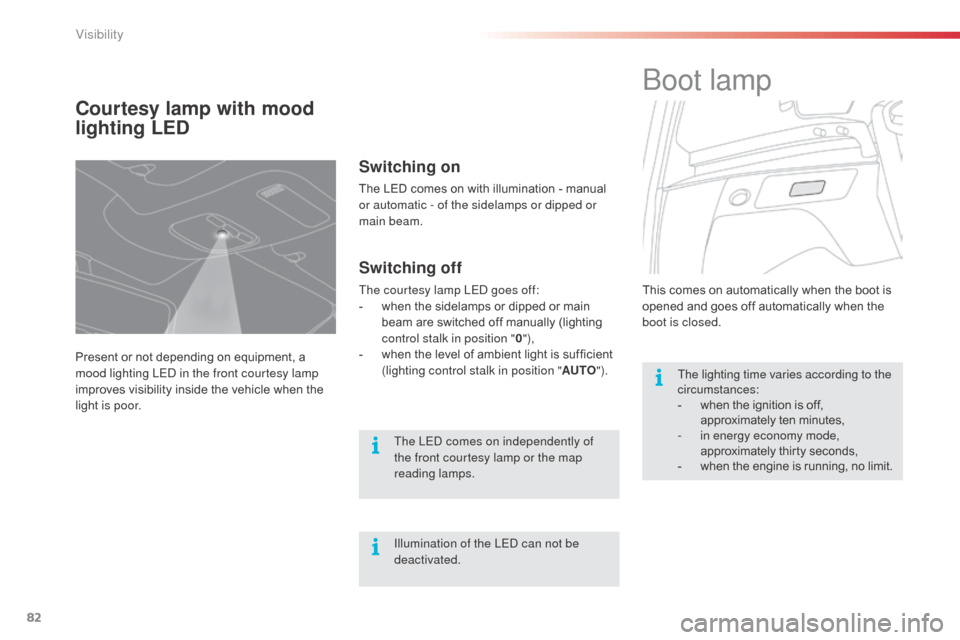
Courtesy lamp with mood
lighting LED
Present or not depending on equipment, a
mood lighting LED in the front courtesy lamp
improves visibility inside the vehicle when the
light is poor.
Switching on
The LED comes on with illumination - manual
or automatic - of the sidelamps or dipped or
main beam.
Switching off
The courtesy lamp LED goes off:
- w hen the sidelamps or dipped or main
beam are switched off manually (lighting
control stalk in position " 0"),
-
w
hen the level of ambient light is sufficient
(lighting control stalk in position " AUTO").
The LED comes on independently of
the front courtesy lamp or the map
reading lamps.
Illumination of the LED can not be
deactivated. This comes on automatically when the boot is
opened and goes off automatically when the
boot is closed.
Boot lamp
The lighting time varies according to the
circumstances:
-
w
hen the ignition is off,
approximately ten minutes,
-
i
n energy economy mode,
approximately thirty
seconds,
-
w
hen the engine is running, no limit.
Visibility