engine Citroen C3 RHD 2014 2.G Workshop Manual
[x] Cancel search | Manufacturer: CITROEN, Model Year: 2014, Model line: C3 RHD, Model: Citroen C3 RHD 2014 2.GPages: 284, PDF Size: 8.99 MB
Page 141 of 284
139
Checking levels
Engine oil level
The check is carried out either when
the ignition is switched on using the
oil level indicator in the instrument
panel for vehicles with an electric oil
level gauge, or using the dipstick.
Checking using the dipstick
Refer to the "Petrol engine" or "di esel engine"
section for the location of the dipstick in the
engine compartment of your vehicle.
F
T
ake the dipstick by its coloured grip and
remove it completely.
F
W
ipe the end of the dipstick using a clean
non-fluffy cloth.
F
R
efit the dipstick and push fully down, then
pull it out again to make the visual check:
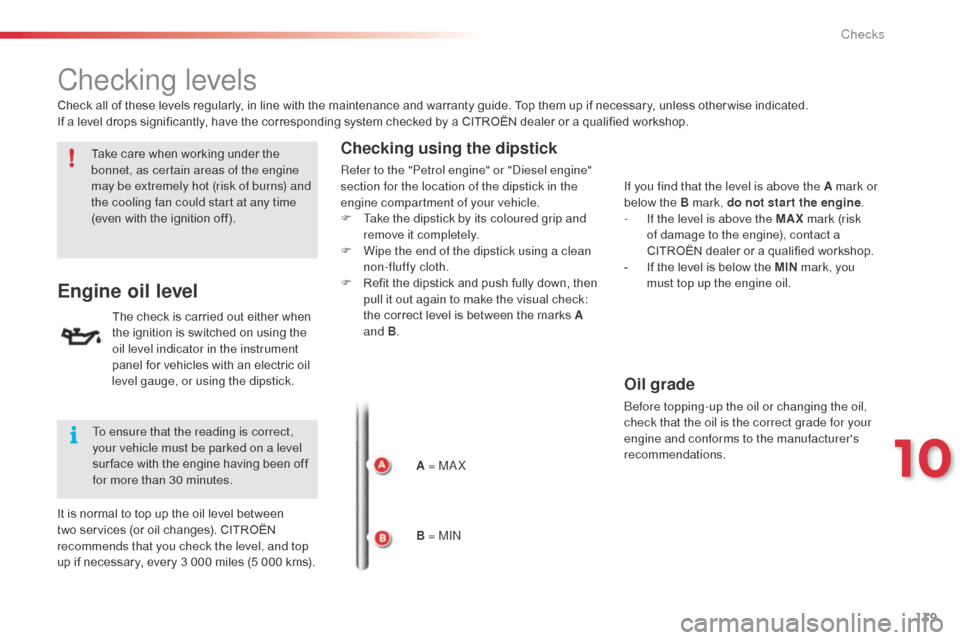
the correct level is between the marks A
and B .
To ensure that the reading is correct,
your vehicle must be parked on a level
sur face with the engine having been off
for more than 30 minutes.
Check all of these levels regularly, in line with the maintenance and warranty guide. Top them up if necessary, unless other wise indicated.
If a level drops significantly, have the corresponding system checked by a CITROËN dealer or a qualified workshop.
Take care when working under the
bonnet, as certain areas of the engine
may be extremely hot (risk of burns) and
the cooling fan could start at any time
(even with the ignition off).
It is normal to top up the oil level between
two services (or oil changes). CITROËN
recommends that you check the level, and top
up if necessary, every 3 000 miles (5 000 kms). A = M
aX
B
= MI
n
I
f you find that the level is above the A mark or
below the B mark, do not star t the engine .
-
I
f the level is above the MAX mark (risk
of damage to the engine), contact a
CITROËN dealer or a qualified workshop.
-
I
f the level is below the MIN mark, you
must top up the engine oil.
Oil grade
before topping-up the oil or changing the oil,
check that the oil is the correct grade for your
engine and conforms to the manufacturer's
recommendations.
10
Checks
Page 142 of 284
140
The brake fluid level should be close
to the "MaX" mark. If it is not, check
the brake pad wear.
Brake fluid level
Changing the fluid
Refer to the maintenance and warranty guide
for details of the interval for this operation.
Fluid specification
The brake fluid must conform to the
manufacturer's recommendations.
Topping up the engine oil level
Refer to the "Petrol engine" or "di esel engine"
section for the location of the oil filler cap in the
engine compartment of your vehicle.
F
U
nscrew the oil filler cap to reveal the filler
aperture.
F
a
d
d oil in small quantities, avoiding any
spills on engine components (risk of fire).
F
W
ait a few minutes before checking the
level again using the dipstick.
F
a
d
d more oil if necessary.
F
a
f
ter checking the level, carefully refit the
oil filler cap and the dipstick in its tube.
After topping up the oil, the check when
switching on the ignition with the oil level
indicator in the instrument panel is not valid
during the 30 minutes after topping up.
Engine oil change
Refer to the maintenance and warranty guide
for details of the interval for this operation.
In order to maintain the reliability of the engine
and emission control system, never use
additives in the engine oil.
Checks
Page 143 of 284

141
Additive level (Diesel with
particle emissions filter)
according to your version of instrument panel,
the additive reservoir low level is indicated by:
To p p i n g u p
The reservoir must be topped up without delay
by a CITROËN dealer or a qualified workshop.
Used products
- fixed illumination of the particle emissions filter warning lamp,
accompanied by an audible signal,
or
-
fixed illumination of the service
warning lamp, accompanied by
do not discard used oil or fluids into
sewers or onto the ground.
Take used oil to a CITR
oËn
dealer or
a qualified workshop (France) or to an
authorised waste disposal site.
av
oid prolonged contact of used oil or
fluids with the skin.
Most of these fluids are harmful to
health or indeed very corrosive.
Coolant level
The coolant level should be close
to the "MaX " mark but should never
exceed it.
When the engine is warm, the temperature of
the coolant is regulated by the fan.
Changing the coolant
The coolant does not have to be replaced at routine services.
Fluid specification
The coolant must conform to the
manufacturer's recommendations. Top up the level when necessary.
The cooling fan may star t after
switching off the engine: take care
with articles and clothing that might
be caught by the fan blades.
In addition, as the cooling system is pressurised,
wait at least one hour after switching off the
engine before carrying out any work.
To avoid any risk of scalding, unscrew the cap
by two turns to allow the pressure to drop. When
the pressure has dropped, remove the cap and
top up the level.
Screenwash fluid level
Fluid specification
For optimum cleaning and to avoid freezing,
this fluid must not be topped up or replaced
with plain water.
In wintry conditions, it is recommended that you
use an ethyl alcohol or methanol based fluid.
an
audible signal and a message that the
particle emissions filter additive level is too low.
10
Checks
Page 144 of 284
142
according to your version of instrument panel, the start of
saturation of the particle emissions filter is indicated by:
- fixed illumination of the particle emissions filter warning lamp,
accompanied by an audible signal,
or
-
t
emporary illumination of
the
service warning lamp,
as s
oon as the traffic conditions permit,
regenerate the filter by driving at a speed of at
least 40
mph (60 km/h) until the warning lamp
goes off.
If the warning lamp stays on, refer to the
"
ad
ditive level" section.
Checks
12 V battery
The battery does not require any maintenance.
However, check that the terminals are clean
and correctly tightened, particularly in summer
and winter.
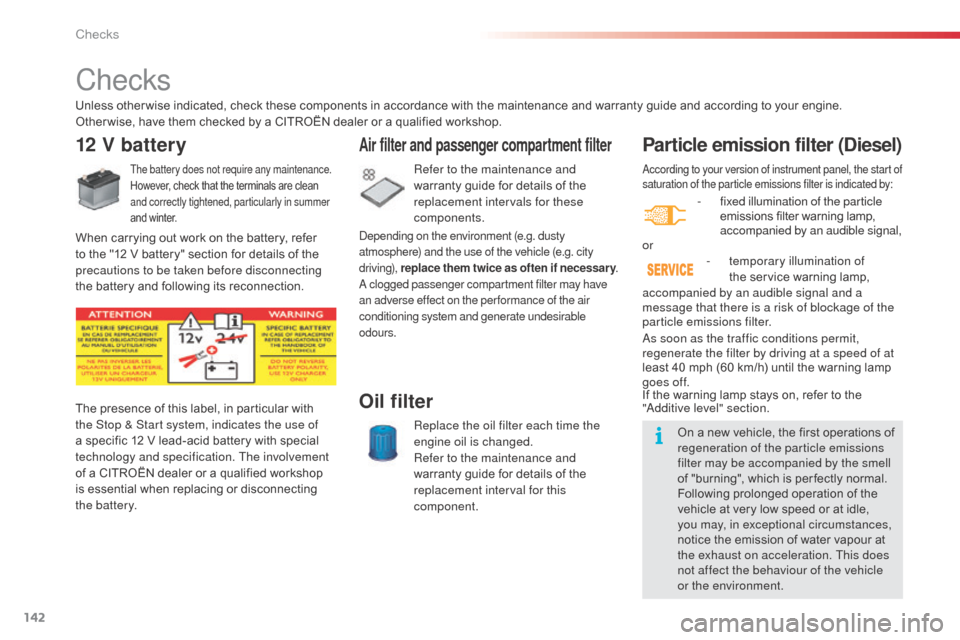
The presence of this label, in particular with
the Stop & Start system, indicates the use of
a specific 12 V lead-acid battery with special
technology and specification. The involvement
of a CITROËN dealer or a qualified workshop
is essential when replacing or disconnecting
the battery. When carrying out work on the battery, refer
to the "12 V battery" section for details of the
precautions to be taken before disconnecting
the battery and following its reconnection. Unless other wise indicated, check these components in accordance with the maintenance and warranty guide and according to your engine.
Other wise, have them checked by a CITROËN dealer or a qualified workshop.
On a new vehicle, the first operations of
regeneration of the particle emissions
filter may be accompanied by the smell
of "burning", which is per fectly normal.
Following prolonged operation of the
vehicle at very low speed or at idle,
you may, in exceptional circumstances,
notice the emission of water vapour at
the exhaust on acceleration. This does
not affect the behaviour of the vehicle
or the environment.
Particle emission filter (Diesel)
accompanied by an audible signal and a
message that there is a risk of blockage of the
particle emissions filter.
Air filter and passenger compartment filter
Refer to the maintenance and
warranty guide for details of the
replacement intervals for these
components.
depending on the environment (e.g. dusty
atmosphere) and the use of the vehicle (e.g. city
driving), replace them twice as often if necessar y .
a c
logged passenger compartment filter may have
an adverse effect on the per formance of the air
conditioning system and generate undesirable
odours.
Replace the oil filter each time the
engine oil is changed.
Refer to the maintenance and
warranty guide for details of the
replacement interval for this
component.
Oil filter
Checks
Page 168 of 284
166
Fuse N°Rating Functions
F8 20 AMultifunction screen, audio system, navigation radio, instrument
panel with clock, alarm control unit, alarm siren, audio system
(after-market), portable navigation system carrier supply.
F9 30 AMultifunction screen, audio system, navigation audio unit,
instrument pnael with clock, alarm control unit, alarm siren,
audio system (after-market), 12 V socket, portable navigation
support supply, locking.
F10 15 ASteering mounted controls.
F11 15 AIgnition, diagnostic socket, automatic gearbox control unit.
F12 15 ARain / sunshine sensor, trailer relay unit, driving school module.
F13 5 AMain stop switch, engine relay unit, electronic gearbox gear
l eve r.
F14 15 AParking sensors control unit, airbag control unit, instrument
panel, automatic air conditioning, US
b
b
o
x, HiFi amplifier,
reversing camera.
F15 30 ALocking.
F16 -
no
t used.
F17 40 ARear screen and door mirrors demisting/defrosting.
SH -P
aR
C shunt.
Practical information
Page 169 of 284
167
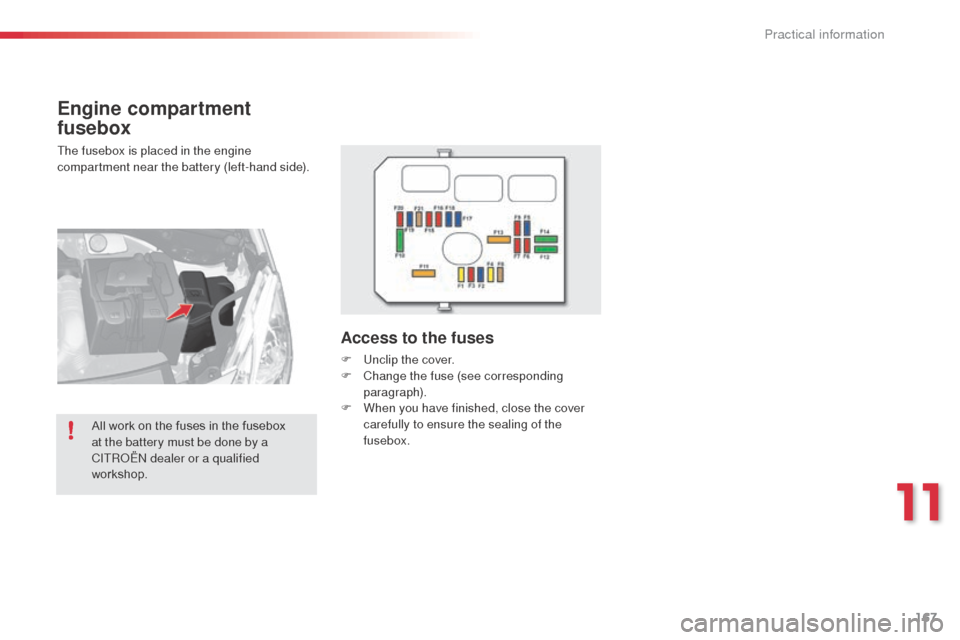
Engine compartment
fusebox
The fusebox is placed in the engine
compartment near the battery (left-hand side).
Access to the fuses
F Unclip the cover.
F C hange the fuse (see corresponding
paragraph).
F
W
hen you have finished, close the cover
carefully to ensure the sealing of the
fusebox.
All work on the fuses in the fusebox
at the battery must be done by a
CITR
oËn
dealer or a qualified
workshop.
11
Practical information
Page 170 of 284
168
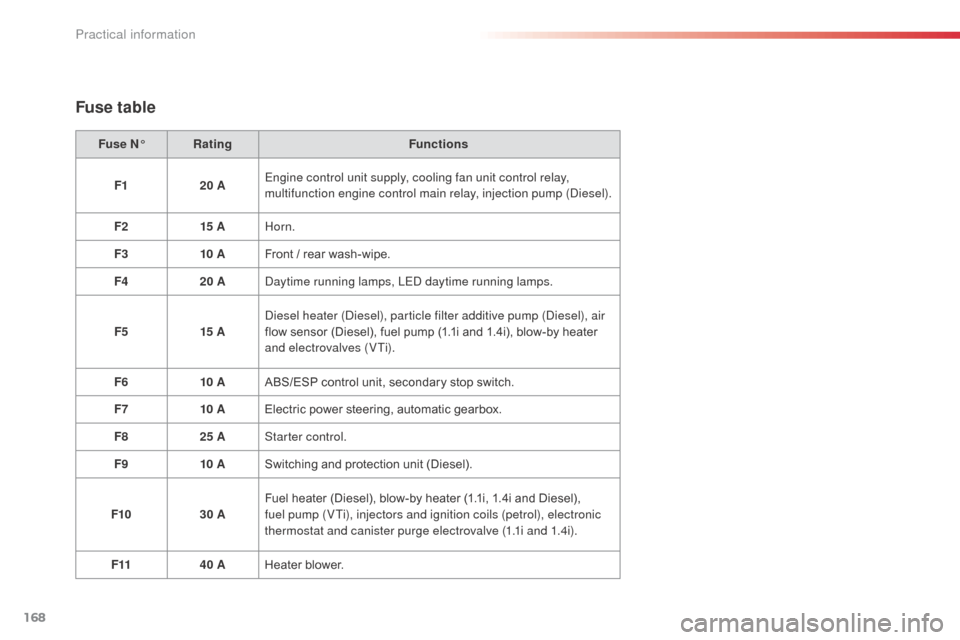
Fuse N°Rating Functions
F1 20 AEngine control unit supply, cooling fan unit control relay,
multifunction engine control main relay, injection pump (
die
sel).
F2 15 AHorn.
F3 10 AFront / rear wash-wipe.
F4 20 A
da
ytime running lamps, LE
d d
aytime running lamps.
F5 15 A
di
esel heater (
di
esel), particle filter additive pump (
di
esel), air
flow sensor (Diesel), fuel pump (1.1i and 1.4i), blow-by heater
and electrovalves (VTi).
F6 10 AABS/ESP control unit, secondary stop switch.
F7 10 AElectric power steering, automatic gearbox.
F8 25 AStarter control.
F9 10 ASwitching and protection unit (Diesel).
F10 30 AFuel heater (Diesel), blow-by heater (1.1i, 1.4i and Diesel),
fuel pump (VTi), injectors and ignition coils (petrol), electronic
thermostat and canister purge electrovalve (1.1i and 1.4i).
F11 40 AHeater blower.
Fuse table
Practical information
Page 173 of 284
171
battery
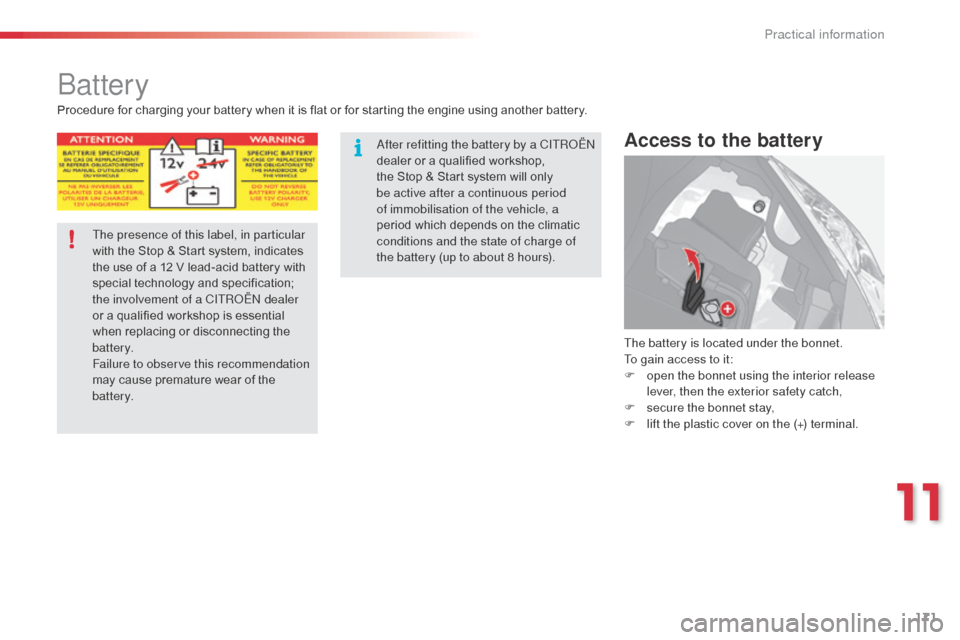
Access to the battery
The battery is located under the bonnet.
To gain access to it:
F
o
pen the bonnet using the interior release
lever, then the exterior safety catch,
F
s
ecure the bonnet stay,
F
l
ift the plastic cover on the (+) terminal.
The presence of this label, in particular
with the Stop & Start system, indicates
the use of a 12 V lead-acid battery with
special technology and specification;
the involvement of a CITR
oËn
dealer
or a qualified workshop is essential
when replacing or disconnecting the
battery.
Failure to observe this recommendation
may cause premature wear of the
battery.
af
ter refitting the battery by a CITR
oËn
dealer or a qualified workshop,
the Stop
& Start system will only
be active after a continuous period
of immobilisation of the vehicle, a
period which depends on the climatic
conditions and the state of charge of
the battery (up to about 8
hours).
Procedure for charging your battery when it is flat or for starting the engine using another battery.
11
Practical information
Page 174 of 284

172
Starting using another
batteryCharging the battery using
a battery charger
When the battery on your vehicle is discharged,
the engine can be started using a slave battery
(external or on another vehicle) and jump leads. F
F ollow the instructions for use provided by
the manufacturer of the charger.
First check that the slave battery has a nominal
voltage of 12 V and a capacity at least equal to
that of the discharged battery.
do n
ot try to start the engine by connecting a
battery charger.
Do not disconnect the (+) terminal when the
engine is running.
F
C
onnect the red cable to the positive
terminal (+) of the flat battery A , then to the
positive terminal (+) of the slave battery B.
F
C
onnect one end of the green or black
cable to the negative terminal (-) of the
slave battery B (or earth point on the other
vehicle).
F
C
onnect the other end of the green or
black cable to the negative terminal C (or
the engine mounting) of the broken-down
vehicle.
F
S
tart the engine of the other vehicle and
allow it to run for a few minutes.
do n
ot disconnect the battery to charge it.
F
O
perate the starter of the broken-down
vehicle and let the engine run.
I
f the engine does not start immediately,
switch off the ignition and wait a few
moments before trying again.
F
W
ait until the engine returns to idle, then
disconnect the jump leads in reverse order.
ba
tteries contain harmful substances such
as sulphuric acid and lead. They must be
disposed of in accordance with regulations
and must not, in any circumstances, be
discarded with household waste.
Take used remote control batteries and
vehicle batteries to a special collection
point.
Practical information
Page 175 of 284
173
Protect your eyes and face before
handling the battery.
al
l operations on the battery must be
carried out in a well ventilated area
away from naked flames and sources
of sparks, so as to avoid the risk of
explosion and fire.
Do not try to charge a frozen battery;
the battery must first be thawed out to
avoid the risk of explosion. If the battery
has been frozen, before charging have
it checked by a CITR
oËn
dealer or a
qualified workshop who will check that
the internal components have not been
damaged and the casing is not cracked,
which could cause a leak of toxic and
corrosive acid.
do n
ot reverse the polarity and use only
a 12 V charger.
Do not disconnect the terminals while
the engine is running.
Do not charge the batteries without
disconnecting the terminals first.
Wash your hands after wards.do n ot push the vehicle to start the
engine if you have an electronic
gearbox or automatic gearbox.
Some functions are not available if the
battery is not sufficiently charged.
11
Practical information