sensor Citroen C3 RHD 2014 2.G Owner's Manual
[x] Cancel search | Manufacturer: CITROEN, Model Year: 2014, Model line: C3 RHD, Model: Citroen C3 RHD 2014 2.GPages: 284, PDF Size: 8.99 MB
Page 5 of 284
.
.
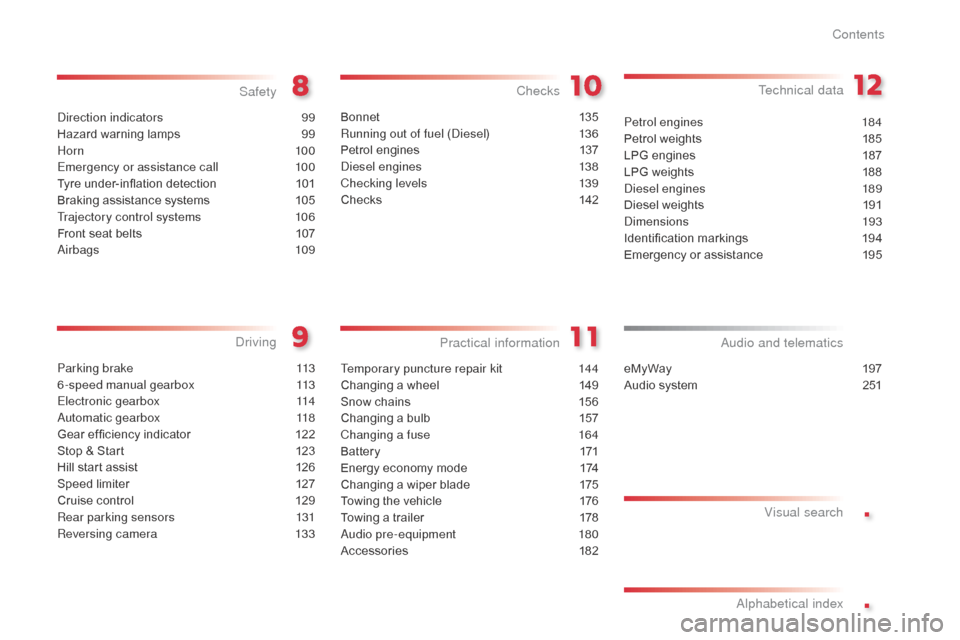
direction indicators 99
Hazard warning lamps
9
9
Horn
10 0
Emergency or assistance call
1
00
Tyre under-inflation detection
1
01
Braking assistance systems
1
05
Trajectory control systems
1
06
Front seat belts
1
07
air
bags
1
09
Safety
Parking brake 1 13
6-speed manual gearbox
1
13
Electronic gearbox
1
14
au
tomatic gearbox
1
18
Gear ef ficiency indicator
1
22
Stop & Start
1
23
Hill start assist
1
26
Speed limiter
1
27
Cruise control
1
29
Rear parking sensors
1
31
Reversing camera
1
33
driving
eMyWay 19 7
Audio system
2
51
audio and telematics
al
phabetical index
Bonnet 13 5
Running out of fuel (
di
esel)
1
36
Petrol engines
1
37
di
esel engines
1
38
Checking levels
1
39
Checks
14
2
Checks
Temporary puncture repair kit 144
Changing a wheel
1
49
Snow chains
1
56
Changing a bulb
1
57
Changing a fuse
1
64
Battery
1
71
Energy economy mode
1
74
Changing a wiper blade
1
75
Towing the vehicle
1
76
Towing a trailer
1
78
a
udio pre-equipment
1
80
Accessories
1
82
Practical information Technical data
Petrol engines 1
84
Petrol weights
1
85
LPG engines
1
87
LPG weights
1
88
di
esel engines
1
89
Diesel weights
1
91
di
mensions
193
Identification markings
1
94
Emergency or assistance
1
95
Visual search
Contents
Page 6 of 284
4
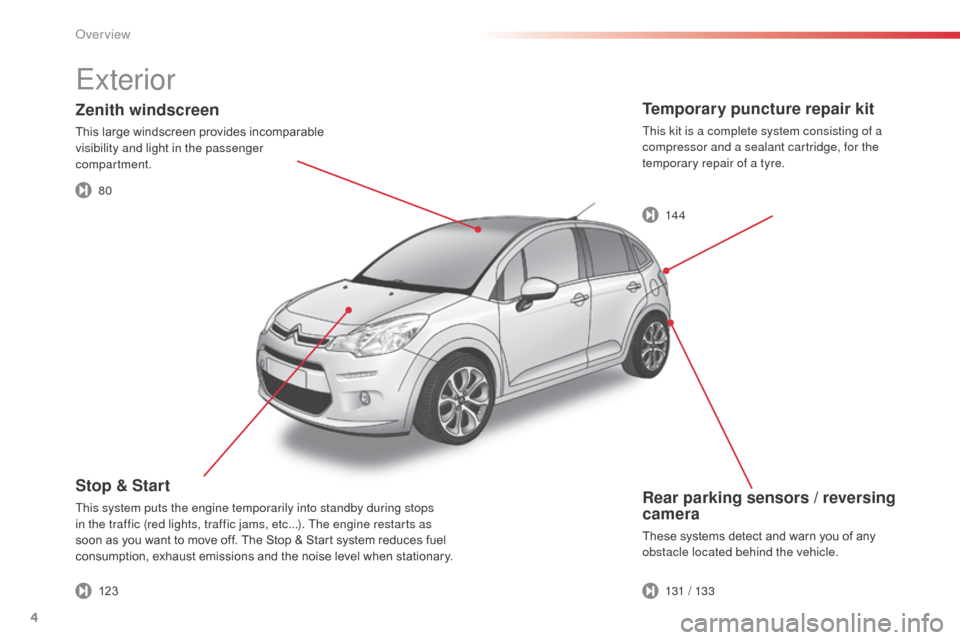
Rear parking sensors / reversing
camera
These systems detect and warn you of any
obstacle located behind the vehicle.
Stop & Start
This system puts the engine temporarily into standby during stops
in the traffic (red lights, traffic jams, etc...). The engine restarts as
soon as you want to move off. The Stop & Start system reduces fuel
consumption, exhaust emissions and the noise level when stationary.
Temporary puncture repair kit
This kit is a complete system consisting of a
compressor and a sealant cartridge, for the
temporary repair of a tyre.
Zenith windscreen
This large windscreen provides incomparable
visibility and light in the passenger
compartment.
Exterior
80
123131 / 13 3 14 4
Over view
Page 9 of 284
7
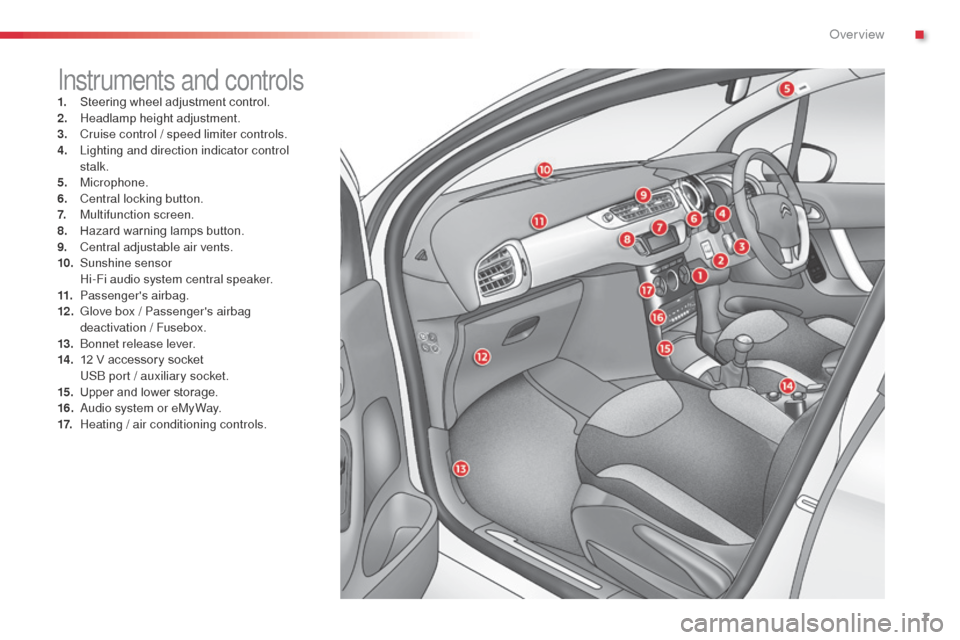
Instruments and controls1. Steering wheel adjustment control.
2. Headlamp height adjustment.
3.
C
ruise control / speed limiter controls.
4.
L
ighting and direction indicator control
stalk.
5.
Microphone.
6.
C
entral locking button.
7.
M
ultifunction screen.
8.
H
azard warning lamps button.
9.
C
entral adjustable air vents.
10.
S
unshine sensor
H
i-Fi audio system central speaker.
11.
P
assenger's airbag.
12 .
G
love box / Passenger's airbag
deactivation / Fusebox.
13.
b
o
nnet release lever.
14 .
1
2 V accessory socket
U
S
b
port / auxiliary socket.
15.
U
pper and lower storage.
16.
a
u
dio system or eMyWay.
17.
H
eating / air conditioning controls.
.
over view
Page 33 of 284

31
Vehicle configuration
once the " Vehicle Configuration" menu has
been selected, you can activate or deactivate
the following equipment:
-
w
iper linked with reverse gear (refer to the
"Visibility"),
-
g
uide-me-home lighting (refer to the
"Visibility"),
-
p
arking sensors (refer to the "
dr
iving" section).
Using this menu, you can also reinitialise the
tyre under-inflation detection system (see the
"Safety" section).
Options
once the "op tions" menu has been selected,
you can start diagnostics of the status of the
equipment (active, not active, faulty).
Display settings
once the "di splay settings" menu has been selected,
you can gain access to the following settings:
- year,
- month,
-
d ay,
-
h o u r,
-
minutes,
-
1
2 or 24 hour mode.
F
o
n
ce you have selected a setting, press
the " 7" or " 8" buttons to change its value.
F
P
ress the " 5" or " 6" buttons to switch
respectively to the previous or next setting.
F
P
ress the "OK" button to save the change
and return to the normal display or press
the "Back" button to cancel.
Setting the date and time
F
P ress the MENU button.
F
S
elect "
di
splay settings" using the " 5"
or
"6 " button.
F
Press "OK" to confirm the selection.
F
S
elect the "Year" function using the " 5"
or
"6 " button.
F
Press "OK" to confirm the selection.
F
C
hoose the desired value, using the " 7"
or
"8 " button.
F
Press "OK" to confirm the selection.
F
R
epeat the procedure to set the "Month",
"
da
y", "Hours", and "Minutes".
2
Multifunction screens
Page 37 of 284

35
Example: setting of the duration of the guide-
me-home lighting
F
P
ress the " 5" or " 6" buttons, then
the
"OK" button to select the menu
required.
F
P
ress the " 5" or " 6" buttons, then
the
"OK" button to select the "Guide-me-
home headlamps" line.
F
P
ress the " 7" or " 8" buttons to set the
value required (15, 30 or 60 seconds), then
press the "OK" button to confirm. F
P
ress the "
5" or " 6" buttons, then
the "OK"
button to select the "OK" box
and confirm or press the "Back" button to
cancel.
"Personalisation-
Configuration" menu
Define the vehicle parameters
once this menu has been selected, you can
activate or deactivate the following equipment:
-
w
iper linked to reverse gear (refer to the
"Visibility"),
-
g
uide-me-home lighting and duration (see
"Visibility"),
-
p
arking sensors (refer to the "
dr
iving"
section).
Using this menu, you can also reinitialise the
tyre under-inflation detection system (see the
"Safety") section.
on
ce this menu has been selected, you can
gain access to the following functions:
-
d
efine the vehicle parameters,
-
d
isplay configuration,
-
c
hoice of language.
2
Multifunction screens
Page 39 of 284
37
16/9 colour screen (eMyWay)
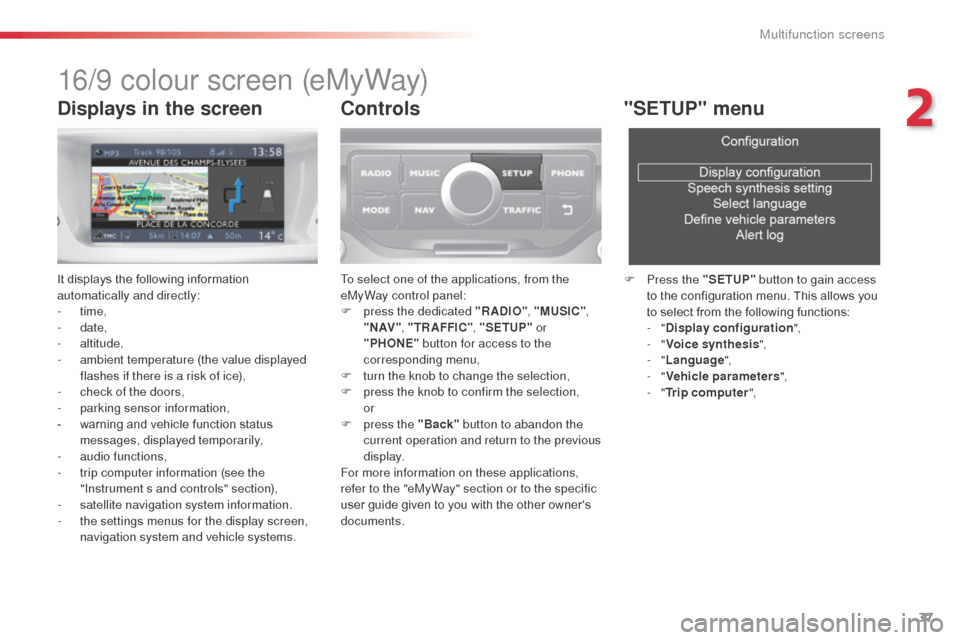
It displays the following information
automatically and directly:
- time,
-
date,
-
altitude,
-
a
mbient temperature (the value displayed
flashes if there is a risk of ice),
-
c
heck of the doors,
-
par
king sensor information,
-
w
arning and vehicle function status
messages, displayed temporarily,
-
a
udio functions,
-
t
rip computer information (see the
"Instrument s and controls" section),
-
sa
tellite navigation system information.
-
t
he settings menus for the display screen,
navigation system and vehicle systems.
Controls
To select one of the applications, from the
eMyWay control panel:
F
p
ress the dedicated "RADIO" , "MUSIC",
" N AV " , "TR AFFIC" , "SETUP" or
"PHONE" button for access to the
corresponding menu,
F
t
urn the knob to change the selection,
F
p
ress the knob to confirm the selection,
or
F
p
ress the "Back" button to abandon the
current operation and return to the previous
display.
For more information on these applications,
refer to the "eMyWay" section or to the specific
user guide given to you with the other owner's
documents.
"SETUP" menu
F Press the "SETUP" button to gain access
to the configuration menu. This allows you
to select from the following functions:
-
"Display configuration ",
-
"Voice synthesis ",
-
"Language ",
-
"Vehicle parameters ",
-
"Trip computer ",
Displays in the screen
2
Multifunction screens
Page 40 of 284
38
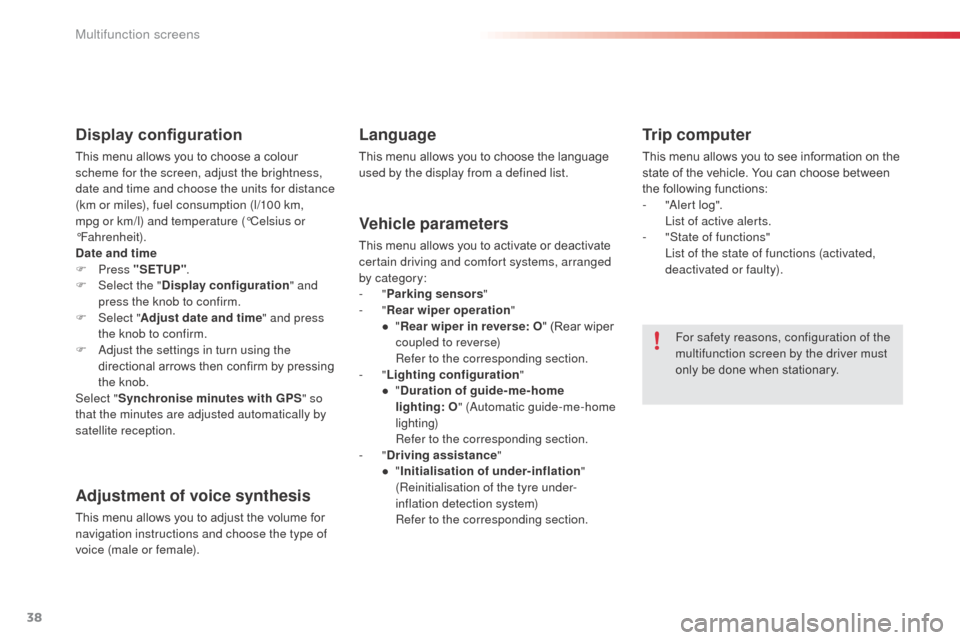
Display configuration
This menu allows you to choose a colour
scheme for the screen, adjust the brightness,
date and time and choose the units for distance
(km or miles), fuel consumption (l/100 km,
mpg or km/l) and temperature (°Celsius or
°Fahrenheit).
Date and time
F Press "SETUP" .
F
Sel
ect the " Display configuration " and
press the knob to confirm.
F
Sel
ect "Adjust date and time " and press
the knob to confirm.
F
a
d
just the settings in turn using the
directional arrows then confirm by pressing
the knob.
Select " Synchronise minutes with GPS " so
that the minutes are adjusted automatically by
satellite reception.
Adjustment of voice synthesis
This menu allows you to adjust the volume for
navigation instructions and choose the type of
voice (male or female).
Language
This menu allows you to choose the language
used by the display from a defined list.
Vehicle parameters
This menu allows you to activate or deactivate
certain driving and comfort systems, arranged
by category:
-
"Parking sensors "
-
"Rear wiper operation "
●
"R
ear wiper in reverse: O " (Rear wiper
coupled to reverse)
R
efer to the corresponding section.
-
"Lighting configuration "
●
"D
uration of guide-me-home
lighting:
O" (
au
tomatic guide-me-home
lighting)
R
efer to the corresponding section.
-
"Driving assistance "
●
"I
nitialisation of under-inflation "
(Reinitialisation of the tyre under-
inflation detection system)
R
efer to the corresponding section.
Trip computer
This menu allows you to see information on the
state of the vehicle. You can choose between
the following functions:
-
"al
ert log".
L
ist of active alerts.
-
"
State of functions"
L
ist of the state of functions (activated,
deactivated or faulty).
For safety reasons, configuration of the
multifunction screen by the driver must
only be done when stationary.
Multifunction screens
Page 42 of 284
40
If after an extended stop in sunshine,
the interior temperature is very
high, first ventilate the passenger
compartment for a few moments.
Put the air flow control at a setting high
enough to quickly change the air in the
passenger compartment.
The air conditioning system does not
contain chlorine and does not present
any danger to the ozone layer.The condensation created by the air
conditioning results in a discharge
of water under the vehicle which is
perfectly normal.Recommendations for ventilation and
air conditioning
In order for these systems to be fully effective, follow the operation and maintenance
guidelines below:
F
T
o obtain an even air distribution, take care not to obstruct the exterior air intake grilles
located at the base of the windscreen, the nozzles, the vents and the air outlets, as well
as the air extractor located in the boot.
F
D
o not cover the sunshine sensor, located on the dashboard; this is used for regulation
of the air conditioning system.
F
O
perate the air conditioning system for at least 5 to 10 minutes, once or twice a month
to keep it in per fect working order.
F
E
nsure that the passenger compartment filter is in good condition and have the filter
elements replaced regularly.
W
e recommend the use of a combined passenger compartment filter. Thanks to its
special active additive, it contributes to the purification of the air breathed by the
occupants and the cleanliness of the passenger compartment (reduction of allergic
symptoms, bad odours and greasy deposits).
F
T
o ensure correct operation of the air conditioning system, you are also advised to have
it checked regularly as recommended in the maintenance and warranty guide.
F
I
f the system does not produce cold air, switch it off and contact a CITROËN dealer or a
qualified workshop.
When towing the maximum load on a steep gradient in high temperatures, switching off the
air conditioning increases the available engine power and so improves the towing ability.
Comfort
Page 54 of 284

52
Steering wheel adjustment
F When stationary, pull the control lever to
release the adjustment mechanism.
F
a
d
just the height and reach to suit your
driving position.
F
P
ush the control lever to lock the
adjustment mechanism.
Rear view mirror
Adjustable mirror providing a central rear ward
view.
Equipped with an anti-dazzle system, which
darkens the mirror glass and reduces the
nuisance to the driver caused by the sun,
headlamps from other vehicles...
Adjustment
F adjust the mirror so that the glass is directed correctly in the "day" position.
Day / night position
F Pull the lever to change to the "night" anti-dazzle position.
F
P
ush the lever to change to the normal
"day" position.
Automatic day/night model
By means of a sensor, which measures the
light from the rear of the vehicle, this system
automatically and progressively changes
between the day and night uses.
Manual day/night model
as a safety measure, the mirrors should
be adjusted to reduce the "blind spot". In order to ensure optimum visibility
during your manoeuvres, the mirror
lightens automatically when reverse
gear is engaged.
as a s
afety precaution, these
operations should only be carried out
with the vehicle stationary.
Comfort
Page 74 of 284

72
Association with the automatic
"Guide-me-home" lighting
Association with the automatic illumination of
headlamps provides "guide-me-home" lighting
with the following additional options:
-
s
election of the lighting duration to 15, 30 or
60 seconds in the functions that can be set
in the vehicle configuration menu (except in
the case of the monochrome screen
a
, f
or
which the duration is set: 60 seconds),
-
a
utomatic activation of "guide-me-home"
lighting when automatic illumination of
headlamps is in operation.
Operating fault
In the event of a fault with the
sunshine sensor, the lighting
come on, this warning lamp is displayed in the
instrument panel and/or a message appears in
the screen, accompanied by an audible signal.
Contact a CITR
oËn
dealer or a qualified
workshop.
In fog or snow, the sunshine sensor
may detect sufficient light. Therefore,
the lighting will not come on
automatically.
do n
ot cover the sunshine sensor,
coupled with the rain sensor and
located in the centre of the windscreen
behind the rear view mirror; the
associated functions would no longer
be controlled.
Automatic illumination of headlamps
Activation
F Turn ring to the "AUTO" position. The
automatic illumination of headlamps is
accompanied by a message in the screen.
Deactivation
F Turn ring to a position other than "AUTO" . de
activation is accompanied by a message
in the screen.
The sidelamps and dipped beam headlamps
are switched on automatically, without any
action on the part of the driver, when a low level
of external light is detected or in certain cases
of activation of the windscreen wipers.
as s
oon as the brightness returns to a sufficient
level or after the windscreen wipers are switched
off, the lamps are switched off automatically.
Visibility