window Citroen C4 2014 2.G User Guide
[x] Cancel search | Manufacturer: CITROEN, Model Year: 2014, Model line: C4, Model: Citroen C4 2014 2.GPages: 340, PDF Size: 28.99 MB
Page 71 of 340
3
COMFORT
69
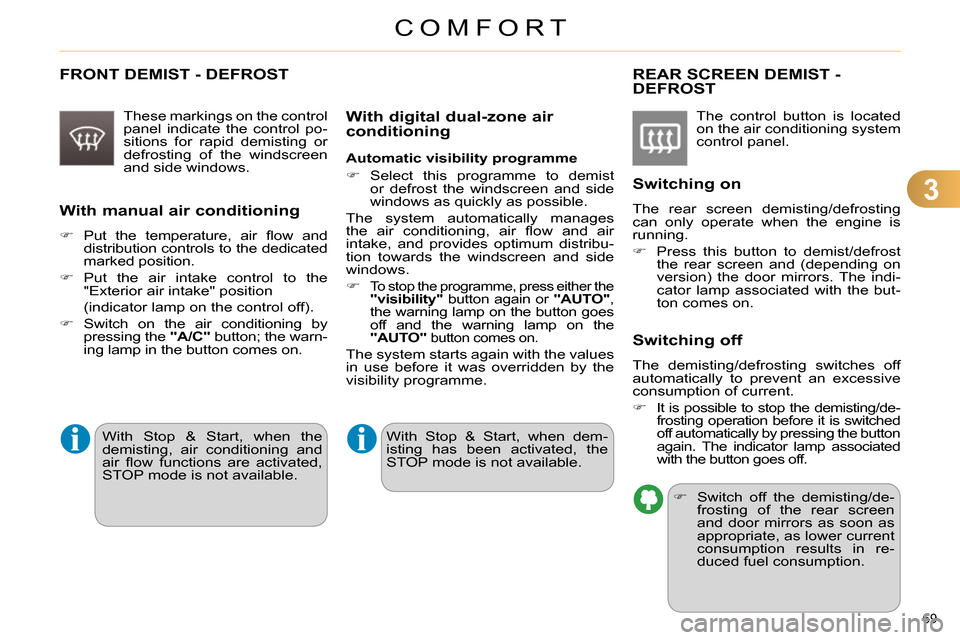
FRONT DEMIST - DEFROST
These markings on the control
panel indicate the control po-
sitions for rapid demisting or
defrosting of the windscreen
and side windows.
With manual air conditioning
Put the temperature, air fl ow and
distribution controls to the dedicated
marked position.
Put the air intake control to the
"Exterior air intake" position
(indicator lamp on the control off).
Switch on the air conditioning by
pressing the "A/C"
button; the warn-
ing lamp in the button comes on.
REAR SCREEN DEMIST -
DEFROST
The control button is located
on the air conditioning system
control panel.
Switching on
The rear screen demisting/defrosting
can only operate when the engine is
running.
Press this button to demist/defrost
the rear screen and (depending on
version) the door mirrors. The indi-
cator lamp associated with the but-
ton comes on.
Switching off
The demisting/defrosting switches off
automatically to prevent an excessive
consumption of current.
It is possible to stop the demisting/de-
frosting operation before it is switched
off automatically by pressing the button
again. The indicator lamp associated
with the button goes off.
Switch off the demisting/de-
frosting of the rear screen
and door mirrors as soon as
appropriate, as lower current
consumption results in re-
duced fuel consumption.
With digital dual-zone air
conditioning
Automatic visibility programme
Select this programme to demist
or defrost the windscreen and side
windows as quickly as possible.
The system automatically manages
the air conditioning, air fl ow and air
intake, and provides optimum distribu-
tion towards the windscreen and side
windows.
To stop the programme, press either the
"visibility"
button again or "AUTO"
,
the warning lamp on the button goes
off and the warning lamp on the
"AUTO"
button comes on.
The system starts again with the values
in use before it was overridden by the
visibility programme.
With Stop & Start, when dem-
isting has been activated, the
STOP mode is not available.
With Stop & Start, when the
demisting, air conditioning and
air fl ow functions are activated,
STOP mode is not available.
Page 82 of 340
4
ACCESS
80
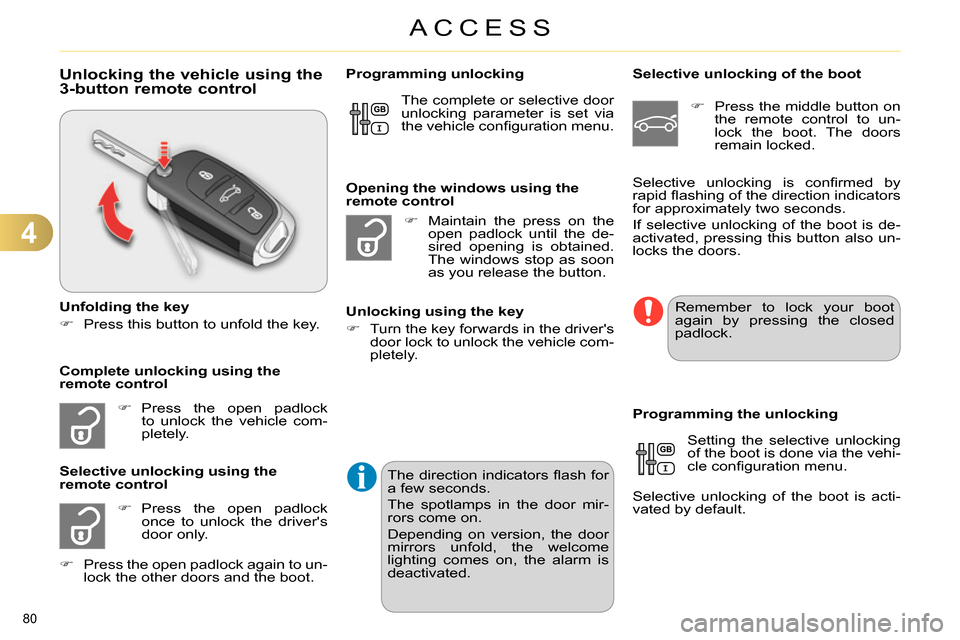
Unlocking the vehicle using the
3-button remote control
Unfolding the key
Press this button to unfold the key.
Press the open padlock
to unlock the vehicle com-
pletely.
Press the open padlock
once to unlock the driver's
door only.
Selective unlocking using the
remote control
Maintain the press on the
open padlock until the de-
sired opening is obtained.
The windows stop as soon
as you release the button.
Opening the windows using the
remote control
Unlocking using the key
Turn the key forwards in the driver's
door lock to unlock the vehicle com-
pletely.
Programming unlocking
Selective unlocking of the boot
Press the middle button on
the remote control to un-
lock the boot. The doors
remain locked.
Setting the selective unlocking
of the boot is done via the vehi-
cle confi guration menu.
Selective unlocking of the boot is acti-
vated by default.
Programming the unlocking
Complete unlocking using the
remote control Selective unlocking is confi rmed by
rapid fl ashing of the direction indicators
for approximately two seconds.
If selective unlocking of the boot is de-
activated, pressing this button also un-
locks the doors. The complete or selective door
unlocking parameter is set via
the vehicle confi guration menu.
Remember to lock your boot
again by pressing the closed
padlock.
Press the open padlock again to un-
lock the other doors and the boot.
The direction indicators fl ash for
a few seconds.
The spotlamps in the door mir-
rors come on.
Depending on version, the door
mirrors unfold, the welcome
lighting comes on, the alarm is
deactivated.
Page 83 of 340
4
ACCESS
81
Locking the vehicle
Press the closed padlock to
lock the vehicle.
Normal locking using the remote
control
Normal locking using the key
Turn the key towards the rear in the
driver's door lock to lock the vehicle.
Locating your vehicle
This function allows you to identify your
vehicle from a distance, particularly in
poor light. Your vehicle must be locked.
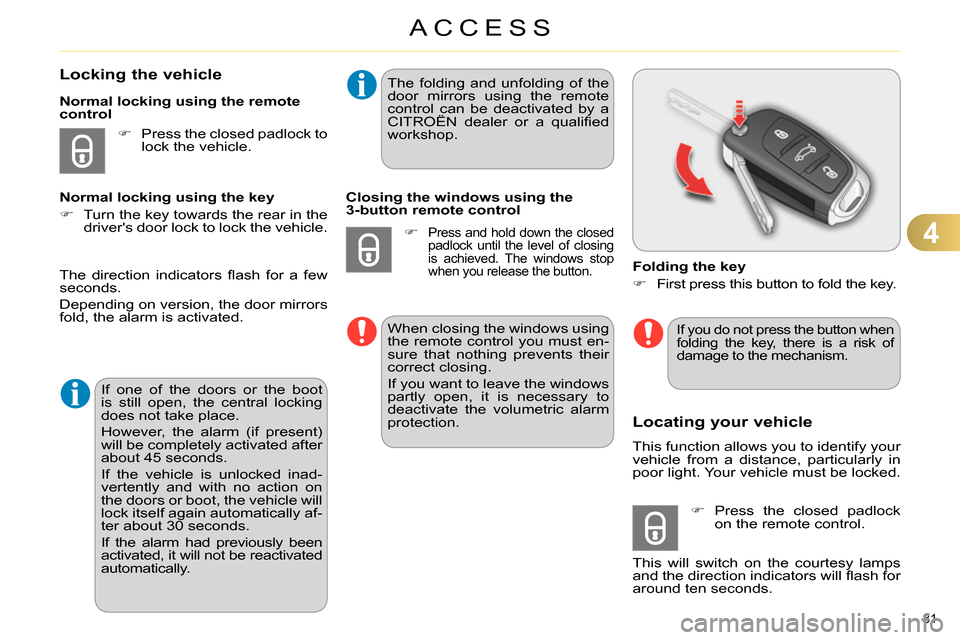
Folding the key
First press this button to fold the key.
Press the closed padlock
on the remote control.
This will switch on the courtesy lamps
and the direction indicators will fl ash for
around ten seconds.
The direction indicators fl ash for a few
seconds.
Depending on version, the door mirrors
fold, the alarm is activated.
If one of the doors or the boot
is still open, the central locking
does not take place.
However, the alarm (if present)
will be completely activated after
about 45 seconds.
If the vehicle is unlocked inad-
vertently and with no action on
the doors or boot, the vehicle will
lock itself again automatically af-
ter about 30 seconds.
If the alarm had previously been
activated, it will not be reactivated
automatically.
The folding and unfolding of the
door mirrors using the remote
control can be deactivated by a
CITROËN dealer or a qualifi ed
workshop.
Closing the windows using the
3-button remote control
Press and hold down the closed
padlock until the level of closing
is achieved. The windows stop
when you release the button.
When closing the windows using
the remote control you must en-
sure that nothing prevents their
correct closing.
If you want to leave the windows
partly open, it is necessary to
deactivate the volumetric alarm
protection.
If you do not press the button when
folding the key, there is a risk of
damage to the mechanism.
Page 90 of 340
4
ACCESS
88
*
According to country.
ALARM *
System which protects and provides a
deterrent against theft and break-ins. It
provides the following types of monitoring.
- exterior perimeter
The system checks for opening of the
vehicle.
The alarm is triggered if anyone tries to
open a door, the boot, the bonnet...
- interior volumetric
The system checks for any variation in the
volume in the passenger compartment.
The alarm is triggered if anyone breaks a
window, enters the passenger compart-
ment or moves inside the vehicle.
- tilt
The system checks for any change in
the attitude of the vehicle.
The alarm is triggered if the vehicle is
lifted, moved or knocked.
Self-protection function
The system checks for the putting out
of service of its components.
The alarm is triggered if the battery, the
central control or the siren wiring are
put out of service or damaged.
For all work on the alarm sys-
tem, contact a CITROËN dealer
or a qualifi ed workshop.
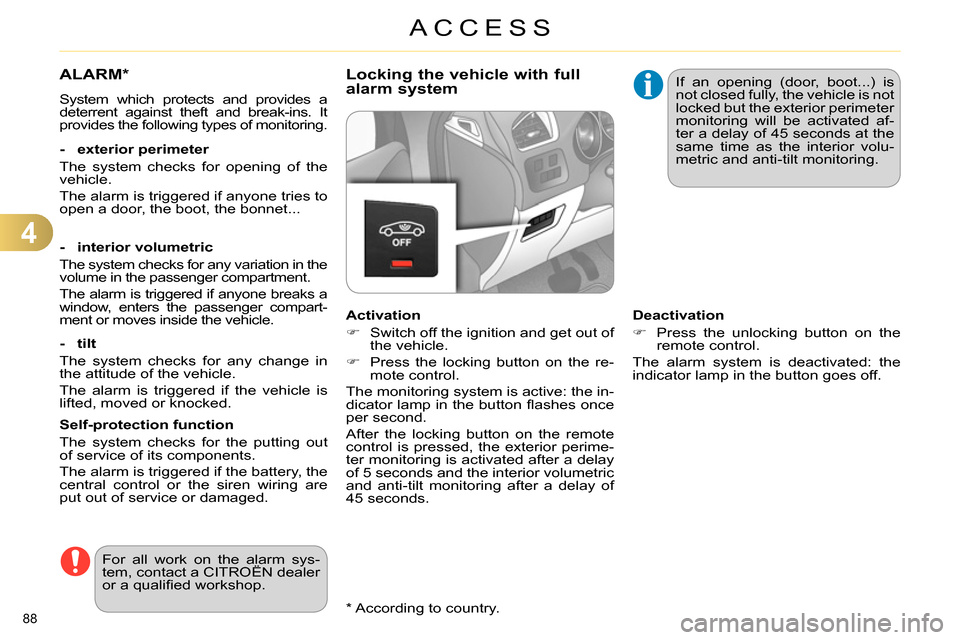
Locking the vehicle with full
alarm system
Activation
Switch off the ignition and get out of
the vehicle.
Press the locking button on the re-
mote control.
The monitoring system is active: the in-
dicator lamp in the button fl ashes once
per second.
After the locking button on the remote
control is pressed, the exterior perime-
ter monitoring is activated after a delay
of 5 seconds and the interior volumetric
and anti-tilt monitoring after a delay of
45 seconds. If an opening (door, boot...) is
not closed fully, the vehicle is not
locked but the exterior perimeter
monitoring will be activated af-
ter a delay of 45 seconds at the
same time as the interior volu-
metric and anti-tilt monitoring.
Deactivation
Press the unlocking button on the
remote control.
The alarm system is deactivated: the
indicator lamp in the button goes off.
Page 91 of 340
4
ACCESS
89
Operating fault
When the ignition is switched on, fi xed
illumination of the indicator lamp in the
button indicates a fault with the system.
Have it checked by a CITROËN dealer
or a qualifi ed workshop.
Locking the vehicle with exterior
perimeter monitoring only
Deactivate the interior volumetric and
anti-tilt monitoring to avoid unwanted
triggering of the alarm in certain cases
such as:
- leaving a pet in the vehicle,
- leaving a window partially open,
- washing your vehicle,
- changing a wheel,
- having your vehicle towed,
- transport by sea.
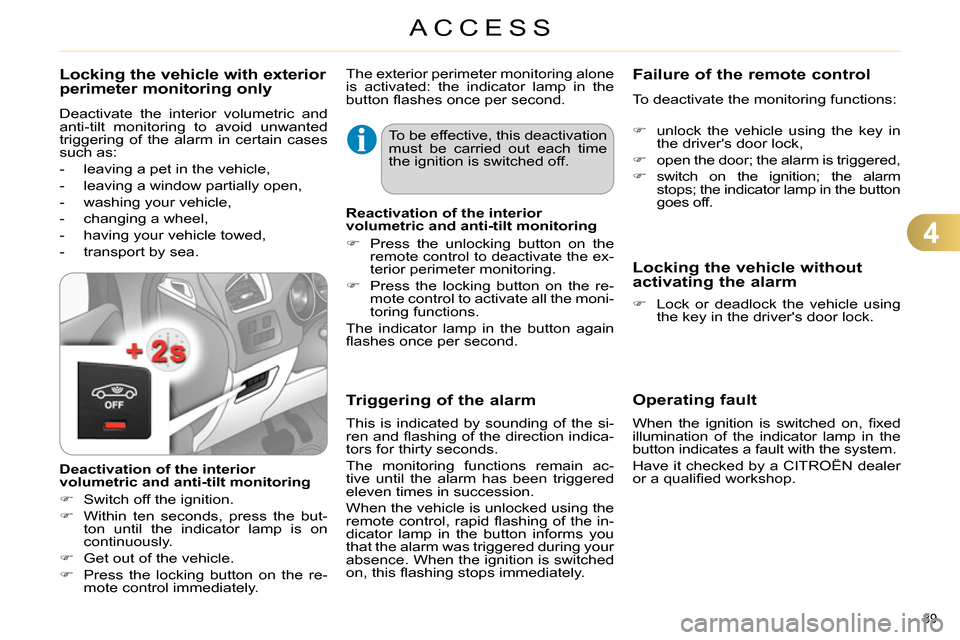
Deactivation of the interior
volumetric and anti-tilt monitoring
Switch off the ignition.
Within ten seconds, press the but-
ton until the indicator lamp is on
continuously.
Get out of the vehicle.
Press the locking button on the re-
mote control immediately. The exterior perimeter monitoring alone
is activated: the indicator lamp in the
button fl ashes once per second.
To be effective, this deactivation
must be carried out each time
the ignition is switched off.
Reactivation of the interior
volumetric and anti-tilt monitoring
Press the unlocking button on the
remote control to deactivate the ex-
terior perimeter monitoring.
Press the locking button on the re-
mote control to activate all the moni-
toring functions.
The indicator lamp in the button again
fl ashes once per second.
Triggering of the alarm
This is indicated by sounding of the si-
ren and fl ashing of the direction indica-
tors for thirty seconds.
The monitoring functions remain ac-
tive until the alarm has been triggered
eleven times in succession.
When the vehicle is unlocked using the
remote control, rapid fl ashing of the in-
dicator lamp in the button informs you
that the alarm was triggered during your
absence. When the ignition is switched
on, this fl ashing stops immediately.
Failure of the remote control
To deactivate the monitoring functions:
unlock the vehicle using the key in
the driver's door lock,
open the door; the alarm is triggered,
switch on the ignition; the alarm
stops; the indicator lamp in the button
goes off.
Locking the vehicle without
activating the alarm
Lock or deadlock the vehicle using
the key in the driver's door lock.
Page 94 of 340
4
ACCESS
92
ELECTRIC WINDOWS
Fitted with a safety anti-pinch system
and a deactivation system for the rear
controls.
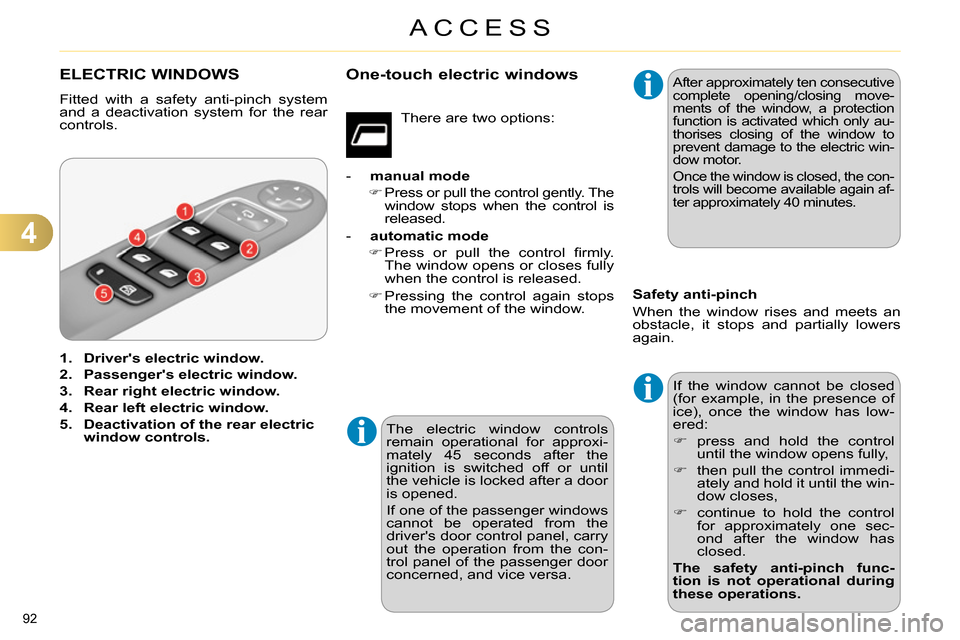
1.
Driver's electric window.
2.
Passenger's electric window.
3.
Rear right electric window.
4.
Rear left electric window.
5.
Deactivation of the rear electric
window controls.
The electric window controls
remain operational for approxi-
mately 45 seconds after the
i gnition is switched off or until
the vehicle is locked after a door
is opened.
If one of the passenger windows
cannot be operated from the
driver's door control panel, carry
out the operation from the con-
trol panel of the passenger door
concerned, and vice versa.
After approximately ten consecutive
complete opening/closing move-
ments of the window, a protection
function is activated which only au-
thorises closing of the window to
prevent damage to the electric win-
dow motor.
Once the window is closed, the con-
trols will become available again af-
ter approximately 40 minutes.
If the window cannot be closed
(for example, in the presence of
ice), once the window has low-
ered:
press and hold the control
until the window opens fully,
then pull the control immedi-
ately and hold it until the win-
dow closes,
continue to hold the control
for approximately one sec-
ond after the window has
closed.
The safety anti-pinch func-
tion is not operational during
these operations.
There are two options:
- manual mode
Press or pull the control gently. The
window stops when the control is
released.
- automatic mode
Press or pull the control fi rmly.
The window opens or closes fully
when the control is released.
Pressing the control again stops
the movement of the window.
Safety anti-pinch
When the window rises and meets an
obstacle, it stops and partially lowers
again.
One-touch electric windows
Page 95 of 340
4
ACCESS
93
Reinitialisation
After reconnecting the battery or a fault,
you must be reinitialise the operation of
the electric windows. For each of the
control switches on the driver's side
control panel:
pull the control until the window
stops,
release the control and pull it again
until the window closes fully,
continue to hold the control for ap-
proximately one second after the
window has closed,
press the control to lower the win-
dow automatically to the low posi-
tion,
when the window has reached the
low position, press the control again
for approximately one second.
The safety anti-pinch function is not
operational during these operations.
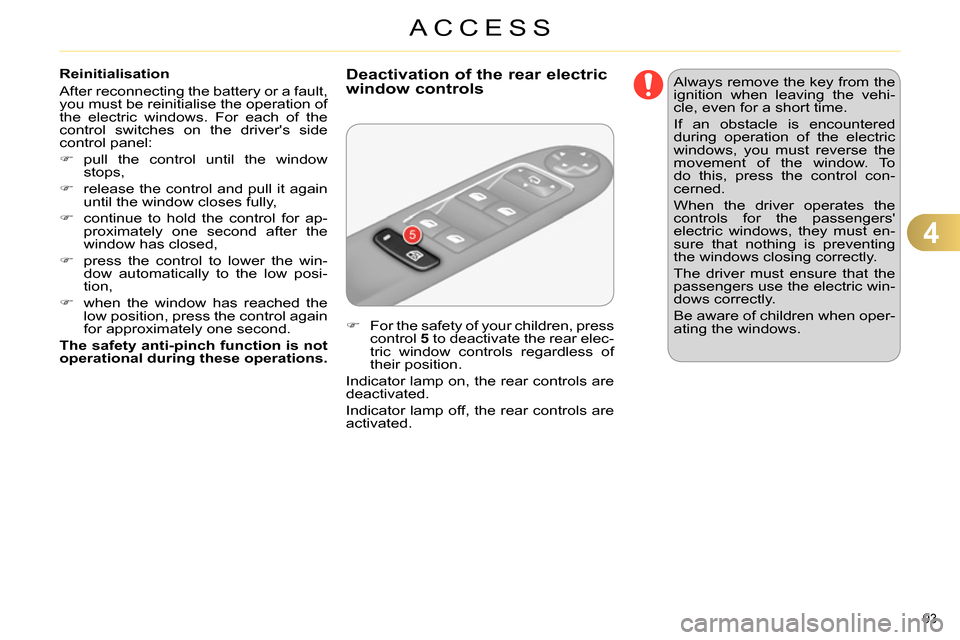
For the safety of your children, press
control 5
to deactivate the rear elec-
tric window controls regardless of
their position.
Indicator lamp on, the rear controls are
deactivated.
Indicator lamp off, the rear controls are
activated.
Deactivation of the rear electric
window controls
Always remove the key from the
ignition when leaving the vehi-
cle, even for a short time.
If an obstacle is encountered
during operation of the electric
windows, you must reverse the
movement of the window. To
do this, press the control con-
cerned.
When the driver operates the
controls for the passengers'
electric windows, they must en-
sure that nothing is preventing
the windows closing correctly.
The driver must ensure that the
passengers use the electric win-
dows correctly.
Be aware of children when oper-
ating the windows.
Page 139 of 340
7
CHILD SAFETY
137
For optimum installation of the "for-
ward-facing" child seat, ensure that
the back of the child seat is as close
as possible to the backrest of the ve-
hicle's seat , in contact if possible.
You mst remove the head restraint
before installing a child seat with
backrest to a passenger seat.
Ensure that the head restraint is
stored or attached securely to pre-
vent it from being thrown around the
vehicle in the event of sharp brak-
ing. Refi t the head restraint when the
child seat is removed.
ADVICE ON CHILD SEATS
Installing a booster seat
Children at the front
The incorrect installation of a child
seat in a vehicle compromises the
child's protection in the event of an
accident.
Ensure that there is no seat belt or
seat belt buckle under the child seat,
as this could destabilise it.
Remember to fasten the seat belts or
the child seat harnesses keeping the
slack relative to the child's body to a
minimum, even for short journeys.
When installing a child seat using the
seat belt, ensure that the seat belt is
tightened correctly on the child seat
and that it secures the child seat fi rm-
ly on the seat of your vehicle. If your
passenger seat is adjustable, move it
forwards if necessary.
The legislation on carrying children on
the front passenger seat is specifi c to
each country. Refer to the legislation
in force in your country.
Deactivate the passenger airbag
when a "rearward-facing" child seat
is installed on the front seat.
Otherwise, the child would risk being
seriously injured or killed if the airbag
were to infl ate.
The chest part of the seat belt must
be positioned on the child's shoulder
without touching the neck.
Ensure that the lap part of the seat
belt passes correctly over the child's
thighs.
CITROËN recommends the use of
a booster seat which has a back, fi t-
ted with a seat belt guide at shoulder
level.
As a safety precaution, do not leave:
- a child or children alone and un-
supervised in a vehicle,
- a child or an animal in a vehicle
which is exposed to the sun, with
the windows closed,
- the keys within reach of children
inside the vehicle.
At rear seating positions, always
leave suffi cient space between the
front seat and:
- a "rearwards facing" child seat,
- the child's feet for a child seat fi t-
ted "forwards facing".
To do this, move the front seat for-
wards and, if necessary, move its
backrest into the upright position. To prevent accidental opening of the
doors and rear windows, use the
"Child lock".
Take care not to open the rear win-
dows by more than one third.
To protect young children from the
rays of the sun, fi t side blinds on the
rear windows.
Page 150 of 340
8
SAFETY
148
Lateral airbags
System which protects the driver and
front passenger in the event of a seri-
ous side impact in order to limit the risk
of injury to the chest, between the hip
and the shoulder.
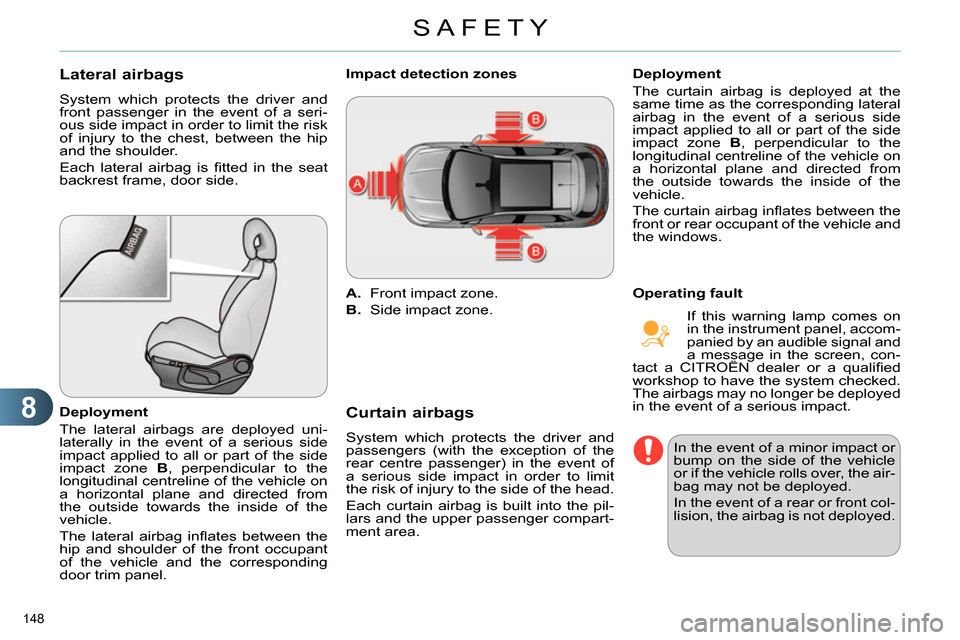
Each lateral airbag is fi tted in the seat
backrest frame, door side.
Deployment
The lateral airbags are deployed uni-
laterally in the event of a serious side
impact applied to all or part of the side
impact zone B
, perpendicular to the
longitudinal centreline of the vehicle on
a horizontal plane and directed from
the outside towards the inside of the
vehicle.
The lateral airbag infl ates between the
hip and shoulder of the front occupant
of the vehicle and the corresponding
door trim panel.
A.
Front impact zone.
B.
Side impact zone.
Impact detection zones
Curtain airbags
System which protects the driver and
passengers (with the exception of the
rear centre passenger) in the event of
a serious side impact in order to limit
the risk of injury to the side of the head.
Each curtain airbag is built into the pil-
lars and the upper passenger compart-
ment area.
Deployment
The curtain airbag is deployed at the
same time as the corresponding lateral
airbag in the event of a serious side
impact applied to all or part of the side
impact zone B
, perpendicular to the
longitudinal centreline of the vehicle on
a horizontal plane and directed from
the outside towards the inside of the
vehicle.
The curtain airbag infl ates between the
front or rear occupant of the vehicle and
the windows.
Operating fault
If this warning lamp comes on
in the instrument panel, accom-
panied by an audible signal and
a message in the screen, con-
tact a CITROËN dealer or a qualifi ed
workshop to have the system checked.
The airbags may no longer be deployed
in the event of a serious impact.
In the event of a minor impact or
bump on the side of the vehicle
or if the vehicle rolls over, the air-
bag may not be deployed.
In the event of a rear or front col-
lision, the airbag is not deployed.
Page 216 of 340
11
PRACTICAL INFORMATION
214
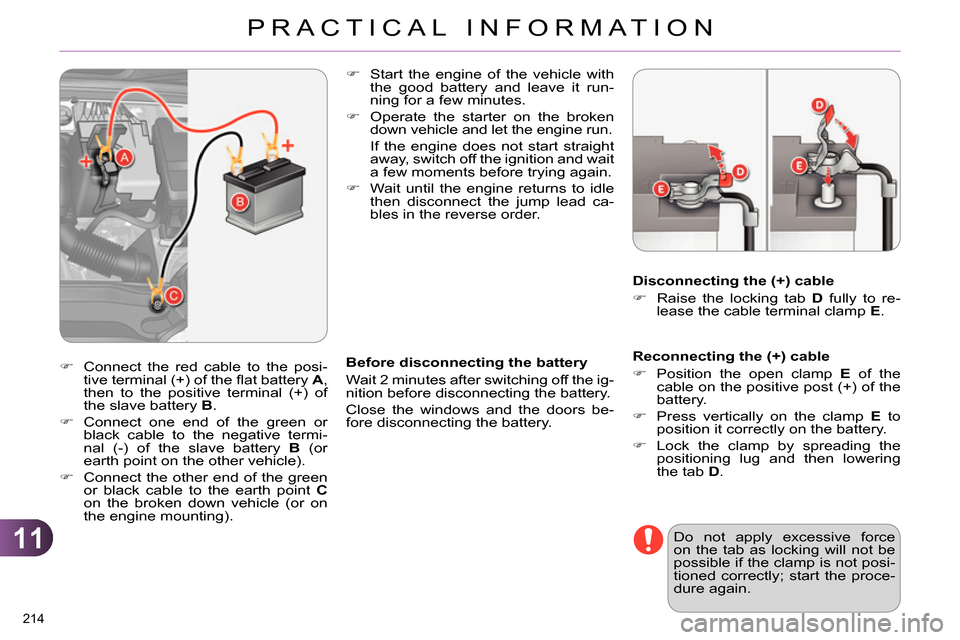
Reconnecting the (+) cable
Position the open clamp E
of the
cable on the positive post (+) of the
battery.
Press vertically on the clamp E
to
position it correctly on the battery.
Lock the clamp by spreading the
positioning lug and then lowering
the tab D
.
Start the engine of the vehicle with
the good battery and leave it run-
ning for a few minutes.
Operate the starter on the broken
down vehicle and let the engine run
.
If the engine does not start straight
away, switch off the ignition and wait
a few moments before trying again.
Wait until the engine returns to idle
then disconnect the jump lead ca-
bles in the reverse order.
Before disconnecting the battery
Wait 2 minutes after switching off the ig-
nition before disconnecting the battery.
Close the windows and the doors be-
fore disconnecting the battery.
Disconnecting the (+) cable
Raise the locking tab D
fully to re-
lease the cable terminal clamp E
.
Do not apply excessive force
on the tab as locking will not be
possible if the clamp is not posi-
tioned correctly; start the proce-
dure again.
Connect the red cable to the posi-
tive terminal (+) of the fl at battery A
,
then to the positive terminal (+) of
the slave battery B
.
Connect one end of the green or
black cable to the negative termi-
nal (-) of the slave battery B
(or
earth point on the other vehicle).
Connect the other end of the green
or black cable to the earth point C
on the broken down vehicle (or on
the engine mounting).