jack CITROEN C4 2022 Owners Manual
[x] Cancel search | Manufacturer: CITROEN, Model Year: 2022, Model line: C4, Model: CITROEN C4 2022Pages: 292, PDF Size: 7.79 MB
Page 183 of 292
181
In the event of a breakdown
8List of tools
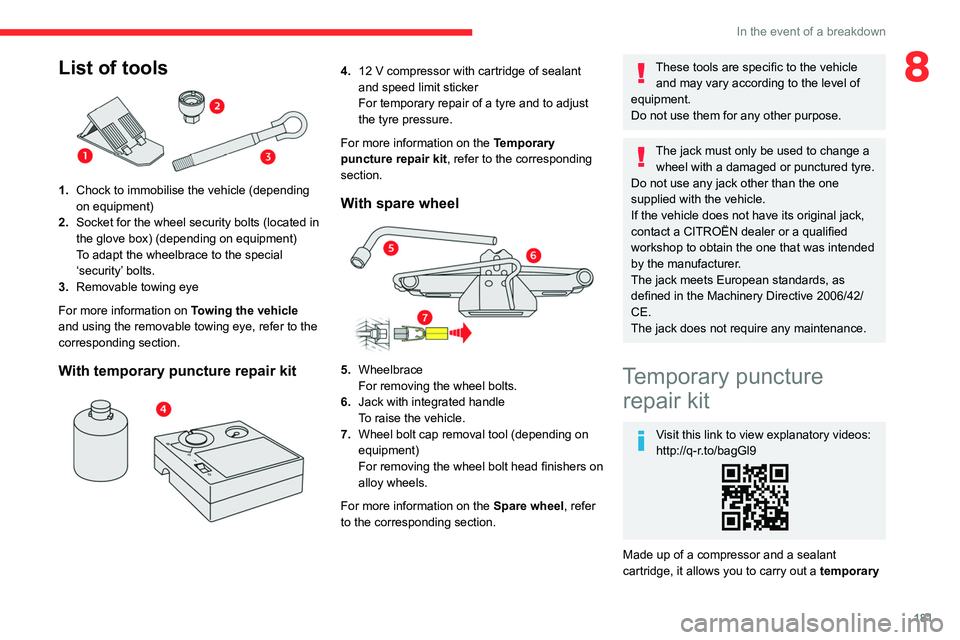
1.Chock to immobilise the vehicle (depending
on equipment)
2. Socket for the wheel security bolts (located in
the glove box) (depending on equipment)
To adapt the wheelbrace to the special
‘security’ bolts.
3. Removable towing eye
For more information on Towing the vehicle
and using the removable towing eye, refer to the
corresponding section.
With temporary puncture repair kit
4. 12 V compressor with cartridge of sealant
and speed limit sticker
For temporary repair of a tyre and to adjust
the tyre pressure.
For more information on the Temporary
puncture repair kit, refer to the corresponding
section.
With spare wheel
5. Wheelbrace
For removing the wheel bolts.
6. Jack with integrated handle
To raise the vehicle.
7. Wheel bolt cap removal tool (depending on
equipment)
For removing the wheel bolt head finishers on
alloy wheels.
For more information on the Spare wheel, refer
to the corresponding section.
These tools are specific to the vehicle and may vary according to the level of
equipment.
Do not use them for any other purpose.
The jack must only be used to change a wheel with a damaged or punctured tyre.
Do not use any jack other than the one
supplied with the vehicle.
If the vehicle does not have its original jack,
contact a CITROËN dealer or a qualified
workshop to obtain the one that was intended
by the manufacturer.
The jack meets European standards, as
defined in the Machinery Directive 2006/42/
CE.
The jack does not require any maintenance.
Temporary puncture repair kit
Visit this link to view explanatory videos:
http://q-r.to/bagGl9
Made up of a compressor and a sealant
cartridge,
it allows you to carry out a temporary
Page 184 of 292
182
In the event of a breakdown
repair of the tyre so that you can drive to the
nearest garage.
It is designed to repair most punctures located
on the tyre tread.
The vehicle's electric system allows the connection of the compressor to the 12 V
power supply for long enough to repair a tyre
after a puncture.
For more information on the Tool kit,
refer to the corresponding section.
Tyre inflation pressures are indicated on this label.
For more information on Identification
markings, particularly this label, refer to the
corresponding section.
Should the pressure of one or more tyres
be adjusted, it is necessary to reinitialise
the under-inflation detection system.
For more information on Tyre under-inflation
detection, refer to the corresponding section.
Repair procedure
Do not remove any foreign body
(e.g. nail, screw) which has penetrated
the tyre.
►
Park the vehicle without obstructing traffic
and apply the parking brake.
►
Follow the safety instructions (hazard
warning lamps, warning triangle, high visibility
jacket, etc.) according to the legislation in force
in the country in which you are driving.
►
Switch the ignition off.
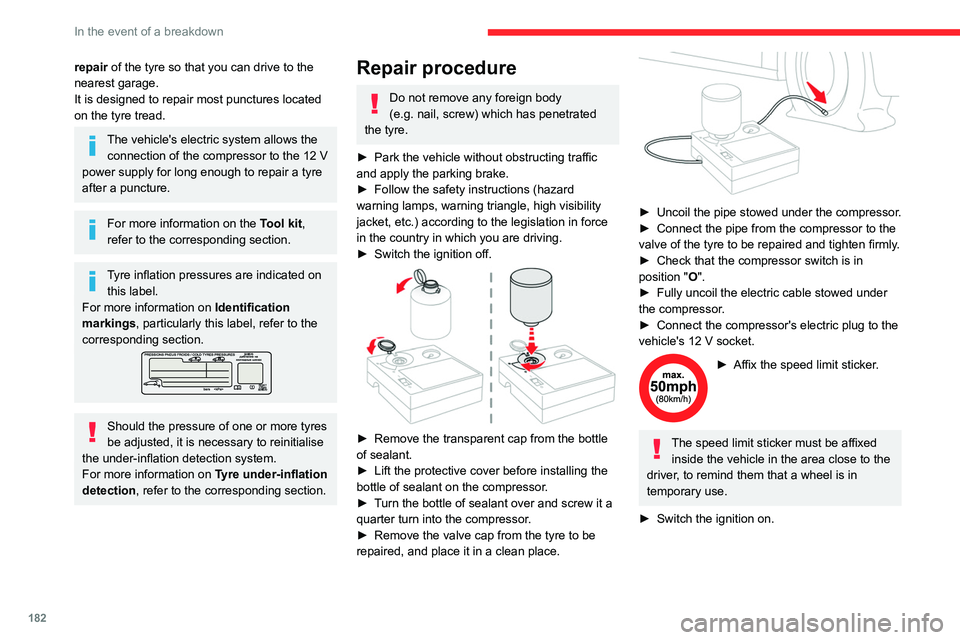
► Remove the transparent cap from the bottle
of sealant.
►
Lift the protective cover before installing the
bottle of sealant on the compressor
.
►
T
urn the bottle of sealant over and screw it a
quarter turn into the compressor.
►
Remove the valve cap from the tyre to be
repaired, and place it in a clean place.
► Uncoil the pipe stowed under the compressor.
► Connect the pipe from the compressor to the
valve of the tyre to be repaired and tighten firmly
.
►
Check that the compressor switch is in
position
"O".
►
Fully uncoil the electric cable stowed under
the compressor
.
►
Connect the compressor's electric plug to the
vehicle's 12
V socket.
► Affix the speed limit sticker .
The speed limit sticker must be affixed
inside the vehicle in the area close to the
driver, to remind them that a wheel is in
temporary use.
►
Switch the ignition on.
Page 187 of 292

185
In the event of a breakdown
8► Position the fastening device (nut and bolt) in
the middle of the wheel.
►
T
ighten the central nut sufficiently to retain
the wheel correctly.
►
Depending on version, put the tool box back
in place in the middle of the wheel and clip it in
place.
Removing a wheel
Parking the vehicle
Immobilise the vehicle where it does
not obstruct traffic: the ground must be level,
stable and non-slippery.
With a manual gearbox, engage first gear
to lock the wheels, apply the parking brake,
unless it is set to automatic mode, and switch
off the ignition.
With an automatic gearbox, select mode
P
to lock the wheels, apply the parking brake,
unless it is set to automatic mode, and switch
off the ignition.
Check that the parking brake indicator lamps
on the instrument panel are on fixed.
The occupants must get out of the vehicle
and wait where they are safe.
If necessary, place a chock under the wheel
diagonally opposite the wheel to be changed.
Never go underneath a vehicle raised using a
jack; use an axle stand.
Wheel with wheel trim
When removing the wheel , first remove
the wheel trim by pulling at the valve aperture
using the wheelbrace.
When refitting the wheel , refit the wheel
trim, starting by placing its aperture in line
with the valve and then pushing it into place
all round its edge with the palm of your hand.
Wheel trims are identified by a "LEFT" mark
on the left-hand side and a "RIGHT" mark
on the right-hand side. Do not reverse these
when removing/refitting the wheel.
► To remove the wheel bolt cover on each of
the bolts, use tool 7 (alloy wheels).
►
Fit security socket
2 on wheelbrace
5
to
slacken the security bolt.
►
Slacken the other bolts using the
wheelbrace
5
only.
Never use an impact wrench on the
security bolt socket.
► Place the foot of jack 6 on the ground and
ensure that it is directly below the front A or
rear
B jacking point on the underbody, whichever
is closest to the wheel to be changed.
► Extend jack 6 until its head comes into
contact with jacking point A or B; contact area A
or B on the vehicle must be properly inserted
into the central part of the head of the jack.
Page 188 of 292

186
In the event of a breakdown
► Raise the vehicle until there is sufficient
space between the wheel and the ground to
easily admit the spare (not punctured) wheel.
Ensure that the jack is stable. If the
ground is slippery or loose, the jack may
slip or collapse - risk of injury!
Take care to position the jack strictly at
one of the jacking points
A
or B under the
vehicle, ensuring that the head of the jack is
centred under the contact area on the vehicle.
Otherwise, there is a risk of damage to the
vehicle and/or of the jack collapsing - risk of
injury!
► Remove the bolts and store them in a clean
place.
►
Remove the wheel.
Fitting a wheel
Fitting a steel or "space-saver" type
spare wheel
If the vehicle is fitted with alloy wheels, the
washers A do not make contact with the steel
or "space-saver" type spare wheel. The wheel
is held in place by the conical contact surface
B of each bolt.
► Fit the wheel on the hub.
► Screw in the bolts by hand as far as possible.
►
Pre-tighten the security bolt using the
wheelbrace
5
equipped with a security socket
2
.
►
Pre-tighten the other bolts using the
wheelbrace
5
only.
► Lower the vehicle again fully .
► Fold jack 6 and remove it.
► Tighten the security bolt using the
wheelbrace 5 equipped with a security socket 2 .
►
T
ighten the other bolts using the
wheelbrace
5
only.
►
Refit the bolt covers to each of the bolts
(depending on equipment).
►
Store the tools.
Page 209 of 292
207
Touch screen BLUETOOTH audio system
10DAB (Digital Audio
Broadcasting) radio
Terrestrial Digital Radio
Choosing the DAB radio
Terrestrial digital radio (DAB) provides higher
quality reception.
The different "multiplexes/ensembles" offer a
choice of radio stations arranged in alphabetical
order.
Press the "Radio" menu.
Press the "SOURCE" button.
In the list of available sources, choose " DAB
Radio".
Activating FM-DAB Tracking
"DAB" does not cover 100% of the territory.
When the digital radio signal is poor, the
"FM-DAB tracking" allows you to continue
listening to the same station, by automatically
switching to the corresponding "FM" analogue
station (if there is one).
Press the "Radio Settings " button.
Activate "DAB-FM".
If "FM-DAB tracking" is activated, there
may be a difference of a few seconds
when the system switches to "FM" analogue
radio with sometimes a variation in volume.
Once the digital signal quality is restored, the
system automatically changes back to "DAB".
If the "DAB" station being listened to is
not available on "FM", or if the "FM-DAB
tracking" is not activated, the sound will cut
out while the digital signal is too weak.
Media
Selecting the source
Press the "Media" menu.
Press the "SOURCE" button.
Select the source (USB, Bluetooth or AUX,
depending on equipment).
USB port
Insert the USB memory stick into the USB
port or connect the USB device to the
USB port using a suitable cable (not supplied).
To protect the system, do not use a USB hub.
The system builds playlists (in temporary
memory); this operation can take from a
few seconds to several minutes at the first
connection. Playlists are updated whenever a USB memory
stick is connected or the contents of a particular
USB memory stick are changed. The lists
are memorised: if they are not modified, the
subsequent loading time will be shorter.
Auxiliary (AUX) jack socket
Depending on equipmentConnect a portable device (MP3 player,
etc.) to the auxiliary jack socket using an
audio cable (not supplied).
This source is only available if " Aux
Amplification " has been selected in the audio
settings.
First adjust the volume on the portable device
(to a high level). Then adjust the volume of the
audio system.
Controls are managed via the portable device.
Bluetooth®streaming
Streaming allows you to listen to music from your
smartphone.
The Bluetooth profile must be activated, first
adjust the volume on the portable device (to a
high level).
Then adjust the volume of the system.
If play does not start automatically, it may be
necessary to start the audio playback from the
smartphone.
Control is from the portable device or by using
the system's touch buttons.
Page 210 of 292
208
Touch screen BLUETOOTH audio system
Once connected in Streaming mode, the
smartphone is considered to be a media
source.
Connecting Apple® players
Connect the Apple® player to the USB socket
using a suitable cable (not supplied).
Play starts automatically.
Control is via the audio system.
The classifications available are those of the portable device connected (artists/
albums/genres/playlists/audio books/
podcasts). It is also possible to use a
classification structured in the form of a
library.
The default classification used is by artist. To
modify the classification used, return to the
first level of the menu then select the desired
classification (playlists for example) and
confirm to go down through the menu to the
desired track.
The version of software in the audio system may
not be compatible with the generation of the
Apple
® player.
Media settings
Press the "Media Settings" button.
Activate/deactivate track playback options and
access the audio settings.
The audio settings are the same as the audio settings for the radio. For more
information on the " Audio settings", refer to
the corresponding section.
Information and advice
The system supports USB mass storage
devices, BlackBerry® devices or Apple® players
via the USB ports. The adapter cable is not
supplied.
Devices are managed using the audio system
controls.
Other devices, not recognised on connection,
must be connected to the auxiliary socket using
a jack cable (not supplied) or via Bluetooth
streaming, if compatible.
To protect the system, do not use a USB hub.
The audio system will only play audio files with
".wav", ".wma", ".aac", ".mp3", ".mp4", ".m4a",
".flac", ".ogg" file extensions and with a bit rate
of between 32 Kbps and 320 Kbps (300 Kbps
maximum for ".flac" files).
It also supports VBR (Variable Bit Rate) mode.
All ".wma" files must be standard WMA 9 files.
The supported sampling rates are 11, 22, 44 and
48 KHz.
To avoid reading and display problems, we
recommend choosing file names less than 20
characters long that do not contain any special
characters (e.g. “ ? .
; ù).
Use only USB memory sticks in FAT or FAT32
format (File Allocation Table).
We recommend using the original USB
cable for the portable device.
Telephone
Pairing a Bluetooth®
telephone
Up to 10 phones can be paired to the system.
Activate the Bluetooth function on the telephone
beforehand and ensure that it is "visible to all"
(telephone configuration).
To complete the pairing, whichever procedure is
used (from the telephone or from the system),
ensure that the code is the same in the system
and in the telephone.
The services available depend on the
network, the SIM card and the
compatibility of the Bluetooth devices used.
Check for services availability in the phone's
manual and with the operator.
The profiles compatible with the system are: HFP, OPP, PBAP, DID, A2DP,
AVRCP, SPP and PAN.
Go to the Brand's website for more information
(compatibility, additional help, etc.).
Page 244 of 292
242
MyCitroën Drive
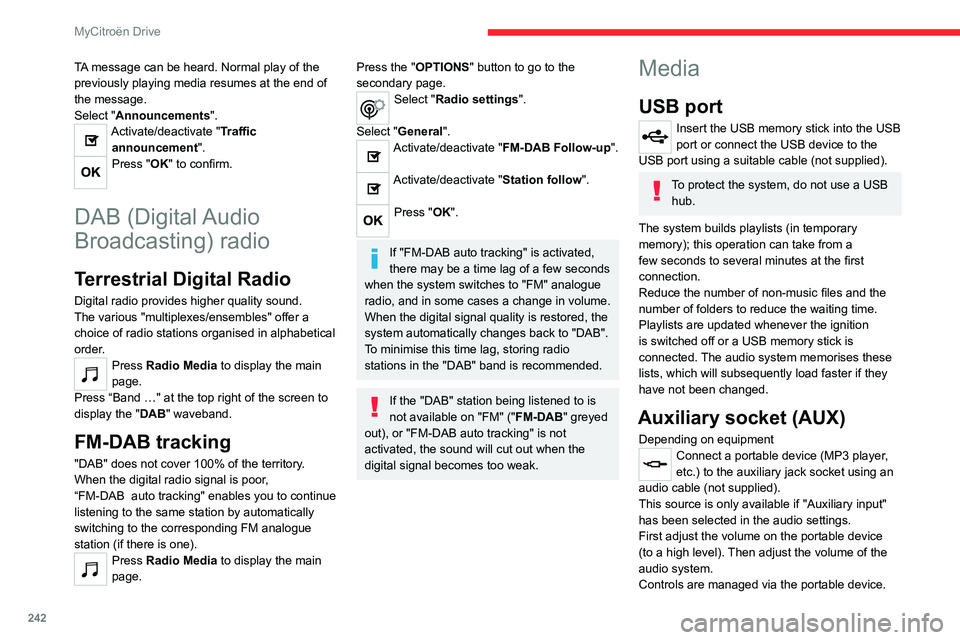
TA message can be heard. Normal play of the
previously playing media resumes at the end of
the message.
Select "Announcements".
Activate/deactivate "Traffic announcement".
Press "OK" to confirm.
DAB (Digital Audio
Broadcasting) radio
Terrestrial Digital Radio
Digital radio provides higher quality sound.
The various "multiplexes/ensembles" offer a
choice of radio stations organised in alphabetical
order.
Press Radio Media to display the main
page.
Press “Band …" at the top right of the screen to
display the " DAB" waveband.
FM-DAB tracking
"DAB" does not cover 100% of the territory.
When the digital radio signal is poor,
“FM-DAB
auto tracking" enables you to continue
listening to the same station by automatically
switching to the corresponding FM analogue
station (if there is one).
Press Radio Media to display the main
page.
Press the "OPTIONS " button to go to the
secondary page.
Select "Radio settings".
Select "General".
Activate/deactivate "FM-DAB Follow-up ".
Activate/deactivate "Station follow".
Press "OK".
If "FM-DAB auto tracking" is activated,
there may be a time lag of a few seconds
when the system switches to "FM" analogue
radio, and in some cases a change in volume.
When the digital signal quality is restored, the
system automatically changes back to "DAB".
To minimise this time lag, storing radio
stations in the "DAB" band is recommended.
If the "DAB" station being listened to is
not available on "FM" (" FM-DAB" greyed
out), or "FM-DAB auto tracking" is not
activated, the sound will cut out when the
digital signal becomes too weak.
Media
USB port
Insert the USB memory stick into the USB
port or connect the USB device to the
USB port using a suitable cable (not supplied).
To protect the system, do not use a USB hub.
The system builds playlists (in temporary
memory); this operation can take from a
few seconds to several minutes at the first
connection.
Reduce the number of non-music files and the
number of folders to reduce the waiting time.
Playlists are updated whenever the ignition
is switched off or a USB memory stick is
connected. The audio system memorises these
lists, which will subsequently load faster if they
have not been changed.
Auxiliary socket (AUX)
Depending on equipmentConnect a portable device (MP3 player,
etc.) to the auxiliary jack socket using an
audio cable (not supplied).
This source is only available if "Auxiliary input"
has been selected in the audio settings.
First adjust the volume on the portable device
(to a high level). Then adjust the volume of the
audio system.
Controls are managed via the portable device.
Page 245 of 292
243
MyCitroën Drive
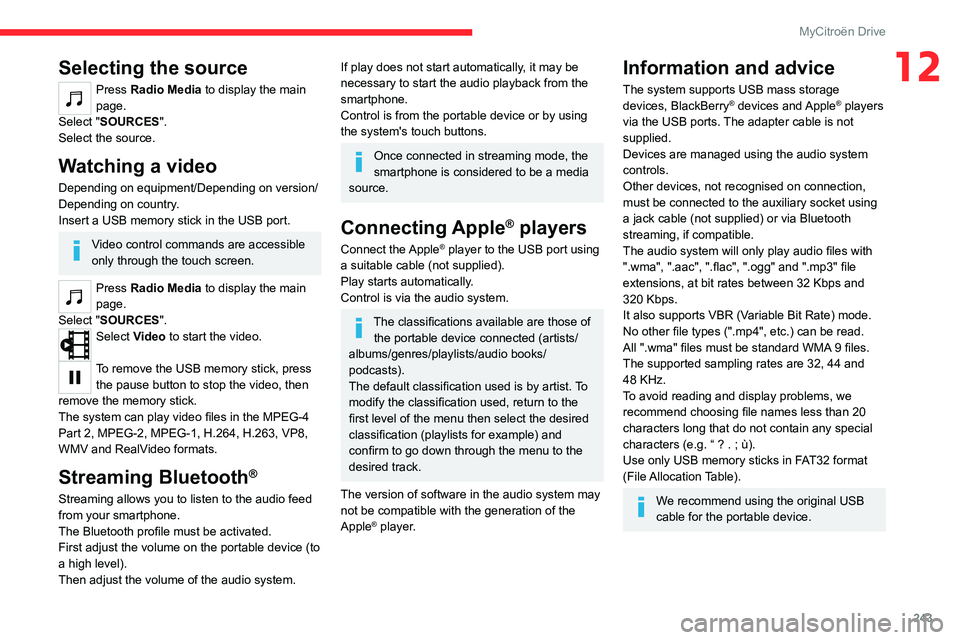
12Selecting the source
Press Radio Media to display the main
page.
Select "SOURCES".
Select the source.
Watching a video
Depending on equipment/Depending on version/
Depending on country.
Insert a USB memory stick in the USB port.
Video control commands are accessible
only through the touch screen.
Press Radio Media to display the main
page.
Select "SOURCES".
Select Video to start the video.
To remove the USB memory stick, press the pause button to stop the video, then
remove the memory stick.
The system can play video files in the MPEG-4
Part 2, MPEG-2, MPEG-1, H.264, H.263, VP8,
WMV and RealVideo formats.
Streaming Bluetooth®
Streaming allows you to listen to the audio feed
from your smartphone.
The Bluetooth profile must be activated.
First adjust the volume on the portable device (to
a high level).
Then adjust the volume of the audio system.
If play does not start automatically, it may be
necessary to start the audio playback from the
smartphone.
Control is from the portable device or by using
the system's touch buttons.
Once connected in streaming mode, the
smartphone is considered to be a media
source.
Connecting Apple® players
Connect the Apple® player to the USB port using
a suitable cable (not supplied).
Play starts automatically.
Control is via the audio system.
The classifications available are those of the portable device connected (artists/
albums/genres/playlists/audio books/
podcasts).
The default classification used is by artist. To
modify the classification used, return to the
first level of the menu then select the desired
classification (playlists for example) and
confirm to go down through the menu to the
desired track.
The version of software in the audio system may
not be compatible with the generation of the
Apple
® player.
Information and advice
The system supports USB mass storage
devices, BlackBerry® devices and Apple® players
via the USB ports. The adapter cable is not
supplied.
Devices are managed using the audio system
controls.
Other devices, not recognised on connection,
must be connected to the auxiliary socket using
a jack cable (not supplied) or via Bluetooth
streaming, if compatible.
The audio system will only play audio files with
".wma", ".aac", ".flac", ".ogg" and ".mp3" file
extensions, at bit rates between 32 Kbps and
320 Kbps.
It also supports VBR (Variable Bit Rate) mode.
No other file types (".mp4", etc.) can be read.
All ".wma" files must be standard WMA 9 files.
The supported sampling rates are 32, 44 and
48 KHz.
To avoid reading and display problems, we
recommend choosing file names less than 20
characters long that do not contain any special
characters (e.g. “ ? .
; ù).
Use only USB memory sticks in FAT32 format
(File Allocation Table).
We recommend using the original USB
cable for the portable device.
Page 260 of 292
258
MyCitroën Drive Plus
► Press the button located on the steering
wheel.
or
►
Press the touch screen button.
To ensure that voice commands are always recognised by the system, please
follow these recommendations:
–
Use natural language in a normal tone
without breaking up words or raising your
voice.
–
After opening voice recognition with the
steering wheel-mounted button or the button
on the touch screen, always wait for the
"beep" (audible signal) before talking. No
"beep" sounds when voice recognition is
opened using "Hello Citroën".
–
For optimal operation, it is recommended
that you close the windows and the sunroof
(depending on equipment) to avoid any
external interference, and switch the
ventilation off.
–
Before speaking the voice commands, ask
the other passengers not to speak.
Voice command example for air
conditioning:
"raise the fan speed"
"Turn on air conditioning"
"i'm too hot"
Voice command example for radio and
media:
"I want to listen to michael jackson"
"switch to radio"
"tune to 88.5"
Media voice commands are only
available with a USB connection.
Voice command example for navigation:
"navigate home"
"Navigate me to gabrielle's house"
"search for public parking nearby"
Depending on the country, give
destination (address) instructions in the
language configured for the system.
Voice command example for telephone:
"Call Matthew's mobile"
"call 0113 345 9869"
"Call jonathan"
If there is no telephone connected by
Bluetooth®, a voice message announces:
"Connect a telephone by Bluetooth®", and the
voice session will be closed.
Voice command example for the weather:
"do i need a raincoat"
"how is the weather tonight"
"what is today's humidity level"
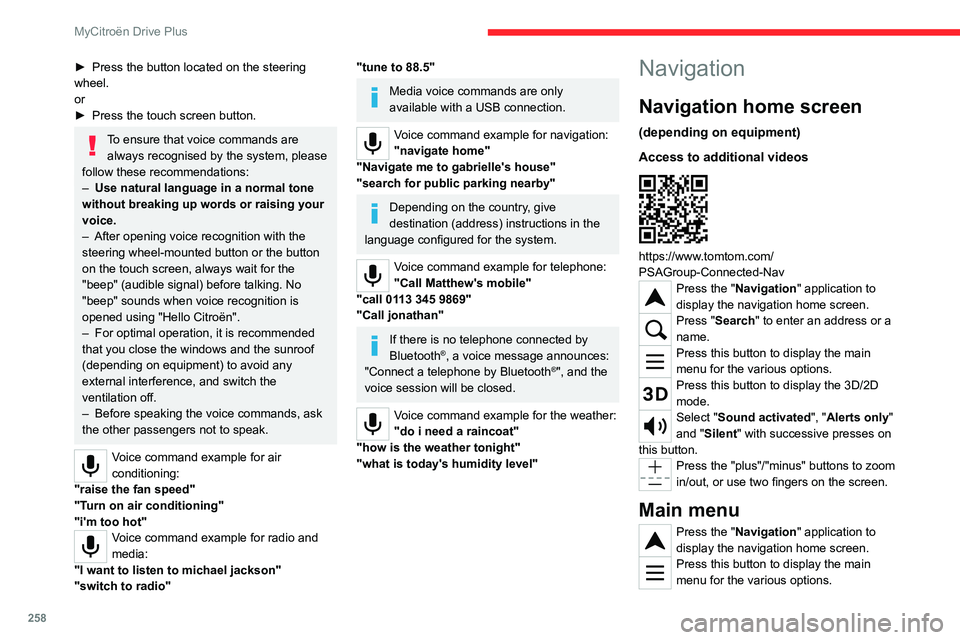
Navigation
Navigation home screen
(depending on equipment)
Access to additional videos
https://www.tomtom.com/
PSAGroup-Connected-Nav
Press the "Navigation" application to
display the navigation home screen.
Press "Search" to enter an address or a
name.
Press this button to display the main
menu for the various options.
Press this button to display the 3D/2D
mode.
Select "Sound activated", "Alerts only"
and "Silent" with successive presses on
this button.
Press the "plus"/"minus" buttons to zoom
in/out, or use two fingers on the screen.
Main menu
Press the "Navigation" application to
display the navigation home screen.
Press this button to display the main
menu for the various options.
Page 273 of 292

271
Alphabetical index
360 Vision 141
A
ABS 77
Accelerated charging unit (Wallbox)
156
Accessories
74
Active Safety Brake
132–133, 135
AdBlue®
21, 175
AdBlue® tank
176
Additive, Diesel
173
Adjusting headlamps
67
Adjusting head restraints
45
Adjusting seat
45–46
Adjusting the air distribution
54–56
Adjusting the air flow
54–56
Adjusting the date
224, 247
Adjusting the headlamp beam height
67
Adjusting the height and reach of the
steering wheel
47
Adjusting the lumbar support
46
Adjusting the seat angle
46
Adjusting the temperature
53, 55
Adjusting the time
210, 223, 248, 266
Advice on care and maintenance
154, 177
Advice on driving
8, 93–94
Airbags
82, 84, 86
Airbags, curtain
83–84
Airbags, front
83–84, 86
Airbags, lateral
83–84
Air conditioning
51–52, 57
Air conditioning, automatic 57
Air conditioning, dual-zone
automatic
53, 55, 57
Air conditioning, manual
52, 57
Air intake
55, 57
Air vents
51
Alarm
40–41
Amplifier, audio
61
Anti-lock braking system (ABS)
77
Antitheft / Immobiliser
34
Applications
29, 239
Assistance call
75–76
Assistance, emergency braking
78, 135
Audio streaming (Bluetooth)
207, 217, 243, 263
B
Battery, 12 V 168, 173, 191–194
Battery, ancillaries
191–192
Battery, charging
191, 193
Battery, remote control
38
Blind
43–44
Blind spot monitoring
131
BlueHDi
21, 173, 180
Bluetooth (hands-free)
208–209,
218–219, 244, 260
Bluetooth (telephone)
208–209, 218–219, 244–245, 260–261
Bodywork
178
Bonnet
169–170
Boot 40, 64
Boot (opening)
33
Brake discs
174
Brake lamps
189
Brakes
174
Braking
104
Braking assistance system
77–78
Braking, automatic emergency
132–133, 135
Braking, dynamic emergency
99–101
Brightness
210, 223
Bulbs
188
Bulbs (changing)
187–189
C
Cable, audio 242
Cable, Jack
242
Capacity, fuel tank
152
Cap, fuel filler
152
Care of the bodywork
178
CD
207
CD, MP3
207
Central locking
36
Changing a bulb
187–190
Changing a fuse
191
Changing a wheel
184
Changing a wiper blade
72–73
Changing the remote control battery
38
Changing to free-wheeling
195
Charge level indicator (Electric)
23
Charger, induction
60