display CITROEN C4 2023 Owners Manual
[x] Cancel search | Manufacturer: CITROEN, Model Year: 2023, Model line: C4, Model: CITROEN C4 2023Pages: 292, PDF Size: 7.79 MB
Page 163 of 292
161
Practical information
7For a full charge, follow the desired charging
procedure without pausing it, until it ends
automatically. Charging can be either immediate
or deferred (except fast public charger, mode 4).
You can stop domestic or accelerated charging
at any time by unlocking the vehicle and
removing the nozzle. For superfast charging,
refer to the fast public charger.
For more information on the charging displays
on the Instrument panel and the Touch screen,
refer to the corresponding section.
It is also possible to monitor the charging
progress using the MyCitroën App
application.
For more information on Remotely
operable additional functions , refer to the
corresponding section.
As a safety measure, the engine will not start if the charging cable is plugged into
the connector on the vehicle. A warning is
displayed on the instrument panel.
Cooling the traction battery
The cooling fan in the engine
compartment comes on during charging to
cool the on-board charger and the traction
battery.
Low load / Driving
Driving when the charge level of the
traction battery is too low can lead to the
vehicle breaking down and can lead to
accidents or serious injuries. ALWAYS make
sure the traction battery has a sufficient
charge level.
Low load / Parking
If the outside temperature is negative,
it is recommended not to park your vehicle
outside for several hours at a low load (less
than 20%).
Vehicle in storage for more than
1 month
In the event of a long period of non-use of
the vehicle (beyond 4
weeks) without the
possibility of charging when restarting, the
self-discharge may make it impossible to
restart if the traction battery charge level
is a low or very low, especially at negative
ambient temperatures. ALWAYS make sure
that the traction battery has a charge between
20% and 40% if you do not plan to use your
vehicle for several weeks.
Do not connect the charging cable.
Always park the vehicle in a place with
temperatures between -10°C and 30°C
(parking in a place with extreme temperatures
can damage the traction battery).
Disconnect the cable from the (+) terminal
of the accessory battery in the engine
compartment.
Connect a 12 V battery charger to the (+)
and (-) terminals of the accessory battery
about every 3 months in order to recharge the
accessory battery and maintain an operating
voltage.
Precautions
Our electric vehicles have been developed in
accordance with the recommendations on the
maximum limits for electromagnetic fields, as
issued by the International Commission on Non-
Ionizing Radiation Protection
(ICNIRP - 1998
Guidelines).
Wearers of pacemakers or equivalent
devices
Ask your doctor about what precautions you should take, or ask the manufacturer
of your implanted electro-medical device about
whether its operation is guaranteed in an
environment which complies with the ICNIRP
recommendations.
If in doubt
Domestic or accelerated charging: do
not remain inside or near the vehicle, or near
the charging cable or charging unit, even for
a short time.
Superfast charging: do not use the system
yourself and avoid approaching public fast
charging points. Leave the area and ask a
third party to recharge the vehicle.
Page 165 of 292
163
Practical information
7the driver's door will display the charge level
on the instrument panel for about 20 seconds.
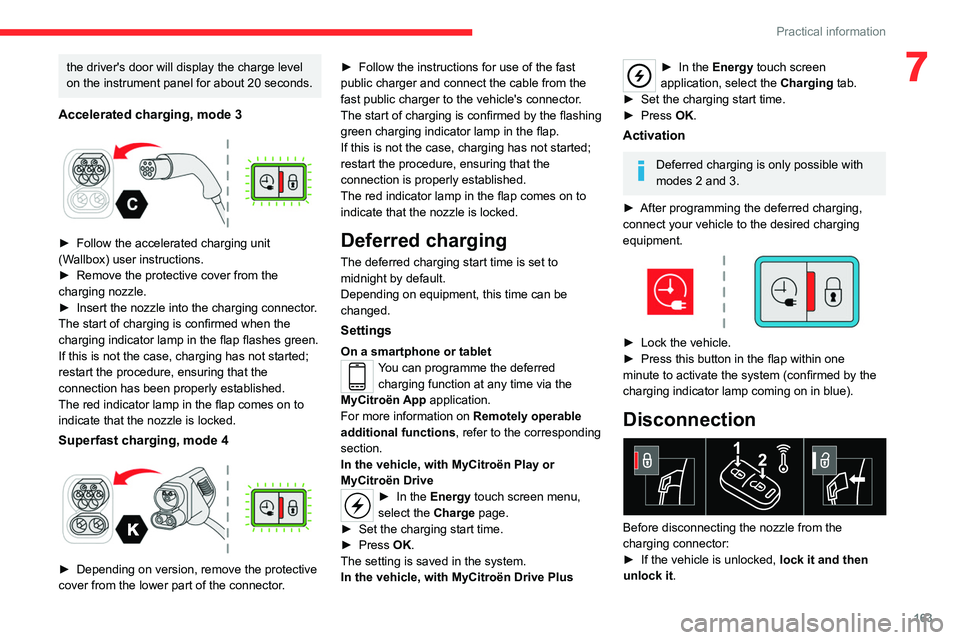
Accelerated charging, mode 3
► Follow the accelerated charging unit
(W allbox) user instructions.
►
Remove the protective cover from the
charging nozzle.
►
Insert the nozzle into the charging connector
.
The start of charging is confirmed when the
charging indicator lamp in the flap flashes green.
If this is not the case, charging has not started;
restart the procedure, ensuring that the
connection has been properly established.
The red indicator lamp in the flap comes on to
indicate that the nozzle is locked.
Superfast charging, mode 4
► Depending on version, remove the protective
cover from the lower part of the connector .►
Follow the instructions for use of the fast
public charger and connect the cable from the
fast public charger
to the vehicle's connector.
The start of charging is confirmed by the flashing
green charging indicator lamp in the flap.
If this is not the case, charging has not started;
restart the procedure, ensuring that the
connection is properly established.
The red indicator lamp in the flap comes on to
indicate that the nozzle is locked.
Deferred charging
The deferred charging start time is set to
midnight by default.
Depending on equipment, this time can be
changed.
Settings
On a smartphone or tabletYou can programme the deferred charging function at any time via the
MyCitroën App application.
For more information on Remotely operable
additional functions , refer to the corresponding
section.
In the vehicle, with MyCitroën Play or
MyCitroën Drive
► In the Energy touch screen menu,
select the Charge page.
►
Set the charging start time.
►
Press
OK.
The setting is saved in the system.
In the vehicle, with MyCitroën Drive Plus
► In the Energy touch screen
application, select the Charging tab.
►
Set the charging start time.
►
Press
OK.
Activation
Deferred charging is only possible with
modes 2 and 3.
►
After programming the deferred charging,
connect your vehicle to the desired charging
equipment.
► Lock the vehicle.
► Press this button in the flap within one
minute to activate the system (confirmed by the
charging indicator lamp coming on in blue).
Disconnection
Before disconnecting the nozzle from the
charging connector:
►
If the vehicle is unlocked, lock it and then
unlock it .
Page 171 of 292
169
Practical information
7continue to use functions such as the audio and
telematics system, dipped beam headlamps or
courtesy lamps.
Selecting the mode
A confirmation message is displayed when
energy economy mode is entered, and the active
functions are placed on standby.
If a telephone call is in progress at the
time, it will be maintained for around 10
minutes via the audio system’s hands-free
system.
Exiting the mode
These functions are automatically reactivated the
next time the vehicle is used.
To restore the use of these functions
immediately, start the engine and let it run:
–
For less than 10 minutes, to use the
equipment for approximately 5 minutes.
–
For more than 10 minutes, to use the
equipment for approximately 30 minutes.
Let the engine run for the specified duration to
ensure that the battery charge is sufficient.
T
o recharge the battery, avoid repeatedly or
continuously restarting the engine.
A flat battery prevents the engine from starting.
For more information on the 12
V battery/
Accessories battery /, refer to the
corresponding section.
Load reduction mode
This system manages the use of certain
functions according to the level of charge
remaining in the battery.
When the vehicle is being driven, the load
reduction function temporarily deactivates certain
functions, such as the air conditioning and the
heated rear screen.
The deactivated functions are reactivated
automatically as soon as conditions permit.
Bonnet
Stop & Start
Before doing anything under the bonnet,
you must switch off the ignition to avoid any
risk of the engine restarting automatically.
Take care with objects or clothing that could
be caught in the blades of the cooling fan
or in certain moving components - risk of
strangulation and serious injury!
Electric motor
Take care with objects or clothing that
could be caught in the blades of the cooling
fan or in certain moving components - risk of
strangulation and serious injury!
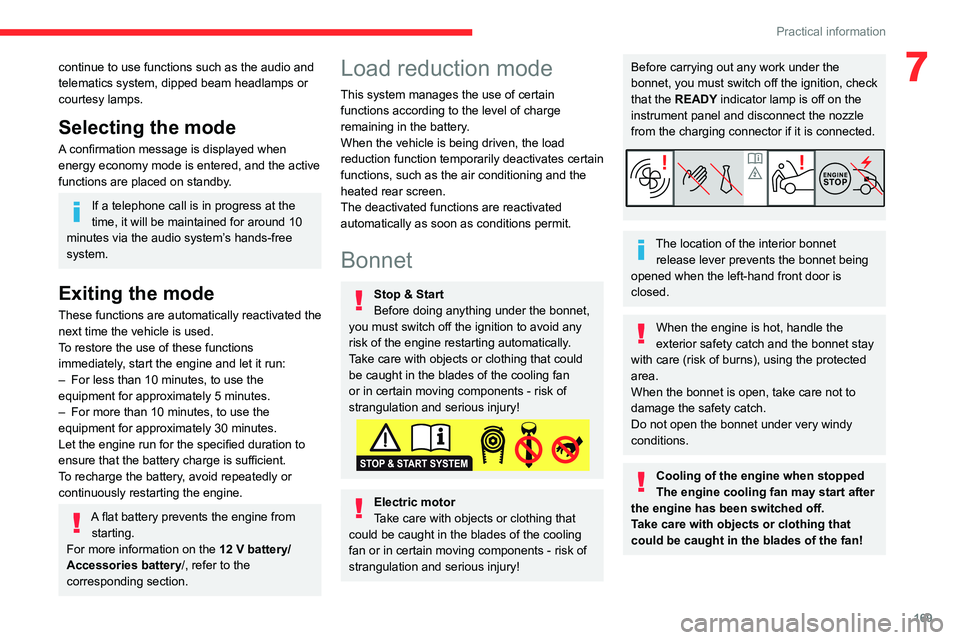
Before carrying out any work under the
bonnet, you must switch off the ignition, check
that the READY indicator lamp is off on the
instrument panel and disconnect the nozzle
from the charging connector if it is connected.
The location of the interior bonnet release lever prevents the bonnet being
opened when the left-hand front door is
closed.
When the engine is hot, handle the
exterior safety catch and the bonnet stay
with care (risk of burns), using the protected
area.
When the bonnet is open, take care not to
damage the safety catch.
Do not open the bonnet under very windy
conditions.
Cooling of the engine when stopped
The engine cooling fan may start after
the engine has been switched off.
Take care with objects or clothing that
could be caught in the blades of the fan!
Page 174 of 292
172
Practical information
Oil grade
Before topping up or changing the
engine oil, check that the oil is suitable
for your engine and complies with the
recommendations in the service schedule
supplied with the vehicle (or available from
your CITROËN dealer or qualified workshop).
Use of non-recommended oil may invalidate
your warranty in the event of engine failure.
Topping up the engine oil level
For the location of the engine oil filler cap, please
refer to the corresponding engine compartment
illustration.
►
Add oil in small quantities, avoiding any spills
on engine components (risk of fire).
►
W
ait a few minutes before checking the level
again using the dipstick.
►
T
op up the level if necessary.
►
After checking the level, carefully screw the
oil filler cap back on
and replace the dipstick in
its tube.
The oil level indication displayed on the instrument panel when the ignition is
switched on is not valid for 30 minutes
following an addition of oil.
Brake fluid
The level of this fluid should be close to
the "MAX" mark. If not, check the brake
pads for wear.
To know how often the brake fluid should be
replaced, refer to the manufacturer's servicing
schedule.
Clean the cap before removing it to refill.
Use only DOT4 brake fluid from a sealed
container.
Engine coolant
(Petrol or Diesel)
It is normal to top up this fluid between
two services.
The check and top-up must only be done with
the engine cold.
A level of coolant that is too low risks causing
major damage to the engine; the coolant level
must be close to the "MAX" mark without ever
going above it.
If the level is close to or below the " MIN" mark, it
is essential to top it up.
When the engine is hot, the temperature of the
coolant is regulated by the fan.
As the cooling system is pressurised, wait at
least one hour after switching off the engine
before carrying out any work.
In order to avoid the risk of scalding if you need
to top up in an emergency, wrap a cloth around
the cap and unscrew the cap by two turns to
allow the pressure to drop.
Once the pressure has dropped, remove the cap
and top up to the required level.
(Electric)
Do not top up the coolant.
If the level is close to or below
the "MIN" mark, it is essential to contact a
CITROËN dealer or a qualified workshop.
Screenwash fluid
Top up to the required level when necessary.
Fluid specification
The fluid must be topped up with a pre-mixed
product.
In winter (temperatures below zero), a fluid
containing an anti-freeze agent which is
appropriate for the temperature conditions
must be used in order to protect the system's
components (pump, tank, ducts, jets).
Filling with pure water is prohibited in all
circumstances (risk of freezing,
limescale, etc.).
Page 179 of 292

177
Practical information
7The system only registers AdBlue®
intermediate top-ups of 5
litres or more.
If the AdBlue® tank is completely empty
– which is confirmed by the message
“Top up AdBlue: Starting impossible ” – it is
essential to add at least 10
litres.
Top-up detection may not be instantaneous
after addition. It may take a few minutes of
driving before the top-up detection is effective.
Changing to free-wheeling
In certain situations, it is necessary to put the
vehicle into free-wheeling mode (e.g. towing, on
a rolling road, automatic car wash (Wash mode),
rail or sea transport).
The procedure varies according to the type of
gearbox and parking brake.
Never leave the vehicle unattended with
the vehicle into free-wheeling mode.
Keyless Entry and Start
You must not depress the brake pedal
while switching the ignition on again, then
switching it off. If you do, the engine will start,
requiring you to restart the procedure.
With a manual gearbox and
electric parking brake
/
To release them
► With the engine running and while depressing
the brake pedal, move the gear selector to the
neutral position.
►
While depressing the brake pedal, switch off
the engine.
►
Release the brake pedal, then switch on the
ignition.
►
While depressing the brake pedal, press the
control to release the parking brake.
►
Release the brake pedal, then switch off the
ignition.
Reverting to normal operation
► While depressing the brake pedal, restart the
engine and apply the parking brake.
With EAT8 automatic
gearbox or drive selector
and electric parking brake
/
Release procedure
► With the vehicle stationary and the engine
running, depress the brake pedal and select
mode
N.
Within 5 seconds:
► Depress and hold the brake pedal, then
observe this order: switch off the engine and
move the push selector forwards or backwards.
►
Release the brake pedal, then switch on the
ignition.
►
Place your foot on the brake and press the
electric parking brake control to release it.
►
Release the brake pedal, then switch off the
ignition.
A message is displayed on the instrument panel to confirm the unlocking
of the wheels for 15
minutes.
After 15 minutes or reverting to normal
operation
► While depressing the brake pedal, restart the
engine and select mode P .
Advice on care and maintenance
General recommendations
Observe the following recommendations to avoid
damaging the vehicle.
Page 180 of 292
178
Practical information
Exterior
Never use a high-pressure jet wash in
the engine compartment - risk of
damaging the electrical components!
Do not wash the vehicle in bright sunshine or
extremely cold conditions.
When washing the vehicle in an
automatic roller-brush car wash, be sure
to lock the doors and, depending on version,
move the electronic key away.
When using a pressure washer, keep the jet
nozzle at a minimum distance of 30 cm from
the vehicle (particularly when cleaning areas
containing chipped paint, sensors or seals).
Promptly clean up any stains containing
chemicals liable to damage the vehicle's
paintwork (including tree resin, bird
droppings, insect secretions, pollen and tar).
Depending on the environment, clean the
vehicle frequently to remove salty deposits
(in coastal areas), soot (in industrial areas)
and mud/salts (in wet or cold areas). These
substances can be highly corrosive.
Contact a CITROËN dealer or a qualified
workshop for advice on removing stubborn
stains requiring special products (such as tar
or insect removers).
Preferably, have paint touch-ups performed
by a CITROËN dealer or a qualified
workshop.
Interior
When washing the vehicle, never use a
water hose or high-pressure jet to clean
the interior.
Liquids carried in cups or other open
containers can spill, presenting a risk of
damage to the instruments and controls and
the controls located on the centre console. Be
vigilant!
To clean instrument panels, touch screens
or other displays, wipe gently with a soft,
dry cloth. Do not use products (e.g. alcohol,
disinfectant) or soapy water directly on these
surfaces - risk of damage!
Bodywork
High-gloss paint
Do not use abrasive products, solvents,
petrol or oil to clean the bodywork.
Never use an abrasive sponge to clean
stubborn stains - risk of scratching the
paintwork!
Do not apply polish in strong sunshine, or to
plastic or rubber parts.
Use a soft cloth and soapy water or a pH
neutral product.
Gently wipe the bodywork with a clean
microfibre cloth.
Apply polish with the vehicle clean and dry.
Comply with the instructions for use stated on
the product.
Decals
(Depending on version)
Do not use a high-pressure washer to
clean the vehicle - risk of damaging or
detaching the decals!
Use a high-flow hose (temperature
between 25°C and 40°C).
Place the jet of water perpendicular to the
surface to be cleaned.
Rinse the vehicle with demineralised water.
Textile
The dashboard, door panels and seats may
contain parts made of textile material.
Maintenance
Do not use aggressive cleaning products
(e.g. alcohol, solvent or ammonia).
Do not use steam-cleaning systems - risk of
affecting the adhesion of the fabrics!
Remove dust from the textile parts
regularly with a dry cloth, soft brush or
vacuum cleaner
.
Rub down the
textile parts once per year with
a clean, damp cloth. After leaving overnight to
dry, brush with a soft-bristled brush.
Page 206 of 292
204
Touch screen BLUETOOTH audio system
Touch screen BLUETOOTH audio
system
Multimedia audio system -
Bluetooth
® telephone
The functions and settings described
vary according to the vehicle version and
configuration.
For safety reasons and because they
require sustained attention by the driver,
the following operations must be carried out
with the vehicle stationary and the ignition
on:
–
Pairing the smartphone with the system in
Bluetooth mode.
–
Using the smartphone.
–
Changing the system settings and
configuration.
The system is protected in such a way that it will only operate in the vehicle.
The Energy Economy Mode message is
displayed when the system is about to enter
the corresponding mode.
First steps
With the engine running, a press mutes
the sound.
With the ignition off, a press turns the system on.
Increase or decrease the volume using
the thumbwheel on the left-hand side.
To access the menus, press this button on the touch screen.
Press the back arrow to go back a level.
To clean the screen, use a soft, non-abrasive cloth (e.g. spectacles cloth)
with no additional product.
Do not use sharp objects on the screen.
Do not touch the screen with wet hands.
Certain information is displayed permanently in
the upper bar of the touch screen:
–
Air conditioning information (depending on
version).
–
Bluetooth connection.
–
Indication of location data sharing.
Selection of the audio source:
–
FM/AM/DAB radio stations (depending on
equipment).
–
T
elephone connected via Bluetooth and
Bluetooth multimedia broadcast (streaming).
–
USB memory stick.
–
Media player connected via the auxiliary
socket (depending on equipment).
In very hot conditions, the volume may
be limited to protect the system. It may
go into standby (screen and sound off) for at
least 5 minutes.
The return to normal takes place when the
temperature in the passenger compartment
has dropped.
Steering mounted controls
Voice control: smartphone voice
commands.
Increase volume.
Decrease volume.
Mute by pressing the volume increase
and decrease buttons simultaneously.
Restore the sound by pressing one of the two
volume buttons.
Incoming call (short press): accept the
call.
Incoming call (long press): refuse the incoming
call.
Call in progress (short press): hang up.
Out of call (short press): access the call log of
the telephone connected via
Bluetooth
®.Radio (up/down): automatic search for
the next/previous station (in the list of
radio stations sorted by name or by frequencies).
Media (up/down): next/previous track, movement
in the lists.
Phone (up/down): browse the telephone's call
log.
Page 207 of 292
205
Touch screen BLUETOOTH audio system
10Short press: validate a selection. Out of
selection, display the lists.
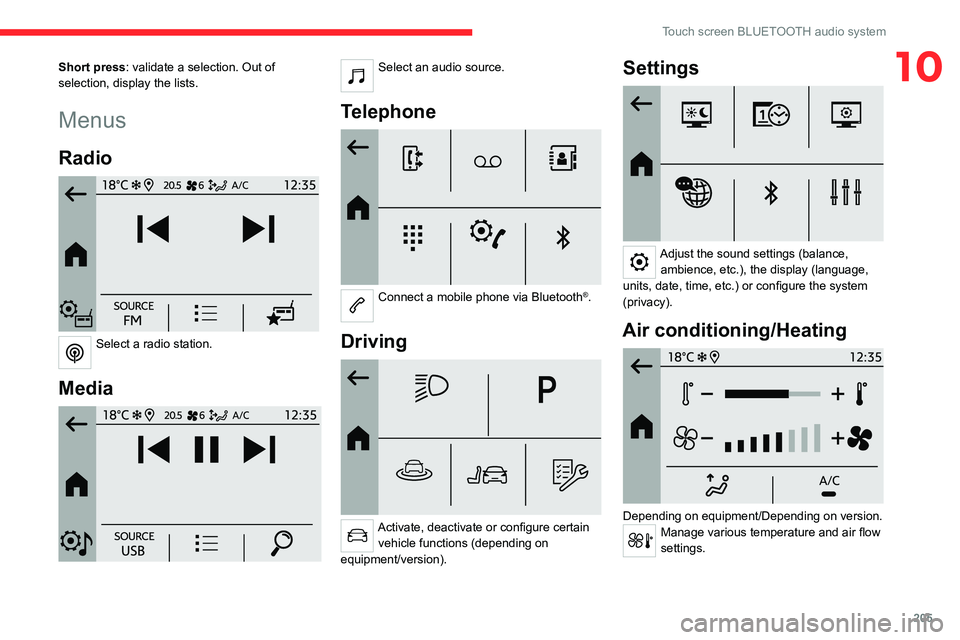
Menus
Radio
Select a radio station.
Media
Select an audio source.
Telephone
Connect a mobile phone via Bluetooth®.
Driving
Activate, deactivate or configure certain vehicle functions (depending on
equipment/version).
Settings
Adjust the sound settings (balance, ambience, etc.), the display (language,
units, date, time, etc.) or configure the system
(privacy).
Air conditioning/Heating
Depending on equipment/Depending on version.Manage various temperature and air flow
settings.
Page 208 of 292

206
Touch screen BLUETOOTH audio system
Radio
Choose the band
Press the "Radio" menu.
Press the "SOURCE" button.
Choose the band: FM, AM or DAB, depending
on equipment.
Selecting a station
Press one of the buttons for an automatic
search for radio stations.
Or
Press on the displayed frequency.
Enter the FM and AM waveband values
using the virtual keypad.
Or
Press this button to display the list of
stations received and available on the
waveband.
Radio reception may be affected by the
use of electrical equipment not approved
by the Brand, such as a USB charger
connected to the 12 V socket.
The exterior environment (hills, buildings,
tunnels, basement car parks, etc.) may block
reception, including in RDS mode. This
behaviour is normal in propagation of radio
waves and does not indicate any failure of the
audio system.
Presetting a station
Select a radio station or frequency.Press the "Presets " button.
Make a long press on an empty line to preset the
station. An audible signal confirms the presetting
of the station.
It is possible to preset up to 16
stations.
To replace a preset station by the currently playing station, make a long
press on the preset station.
Activating/Deactivating RDS
RDS, if activated, allows you to continue
listening to the same station by automatically
retuning to alternative frequencies.
In certain conditions, tracking may not be
assured throughout the entire country as
radio stations do not cover 100% of the
territory. This explains the loss of reception of
the station during a journey.
Press the "Radio Settings " button.
Activate/Deactivate "RDS options".
Playing TA messages
The TA (Traffic Announcement) function gives
priority to TA alert messages.
To operate, this function needs good reception
of a radio station that transmits this type of
message. While traffic information is being
broadcast, the current media is automatically
interrupted so that the TA message can be
heard. Normal play of the media previously
playing is resumed at the end of the message.
Press the "Radio Settings" button.
Activate/Deactivate "Traffic
announcement (TA)".
Audio settings
Press the "Radio Settings " button.
In the list, select "Audio Settings ".
Activate/deactivate and configure the available
options (sound balance, ambiances, etc.).
The sound balance/distribution is audio processing that allows the quality of the
sound to be adapted according to where the
passengers are sitting in the vehicle.
Page 210 of 292
208
Touch screen BLUETOOTH audio system
Once connected in Streaming mode, the
smartphone is considered to be a media
source.
Connecting Apple® players
Connect the Apple® player to the USB socket
using a suitable cable (not supplied).
Play starts automatically.
Control is via the audio system.
The classifications available are those of the portable device connected (artists/
albums/genres/playlists/audio books/
podcasts). It is also possible to use a
classification structured in the form of a
library.
The default classification used is by artist. To
modify the classification used, return to the
first level of the menu then select the desired
classification (playlists for example) and
confirm to go down through the menu to the
desired track.
The version of software in the audio system may
not be compatible with the generation of the
Apple
® player.
Media settings
Press the "Media Settings" button.
Activate/deactivate track playback options and
access the audio settings.
The audio settings are the same as the audio settings for the radio. For more
information on the " Audio settings", refer to
the corresponding section.
Information and advice
The system supports USB mass storage
devices, BlackBerry® devices or Apple® players
via the USB ports. The adapter cable is not
supplied.
Devices are managed using the audio system
controls.
Other devices, not recognised on connection,
must be connected to the auxiliary socket using
a jack cable (not supplied) or via Bluetooth
streaming, if compatible.
To protect the system, do not use a USB hub.
The audio system will only play audio files with
".wav", ".wma", ".aac", ".mp3", ".mp4", ".m4a",
".flac", ".ogg" file extensions and with a bit rate
of between 32 Kbps and 320 Kbps (300 Kbps
maximum for ".flac" files).
It also supports VBR (Variable Bit Rate) mode.
All ".wma" files must be standard WMA 9 files.
The supported sampling rates are 11, 22, 44 and
48 KHz.
To avoid reading and display problems, we
recommend choosing file names less than 20
characters long that do not contain any special
characters (e.g. “ ? .
; ù).
Use only USB memory sticks in FAT or FAT32
format (File Allocation Table).
We recommend using the original USB
cable for the portable device.
Telephone
Pairing a Bluetooth®
telephone
Up to 10 phones can be paired to the system.
Activate the Bluetooth function on the telephone
beforehand and ensure that it is "visible to all"
(telephone configuration).
To complete the pairing, whichever procedure is
used (from the telephone or from the system),
ensure that the code is the same in the system
and in the telephone.
The services available depend on the
network, the SIM card and the
compatibility of the Bluetooth devices used.
Check for services availability in the phone's
manual and with the operator.
The profiles compatible with the system are: HFP, OPP, PBAP, DID, A2DP,
AVRCP, SPP and PAN.
Go to the Brand's website for more information
(compatibility, additional help, etc.).