start stop button CITROEN C4 2023 User Guide
[x] Cancel search | Manufacturer: CITROEN, Model Year: 2023, Model line: C4, Model: CITROEN C4 2023Pages: 292, PDF Size: 7.79 MB
Page 98 of 292

96
Driving
Switching off the engine
► Immobilise the vehicle.
► With the engine at idle, turn the key to
position 1
.
►
Remove the key from the ignition switch.
►
T
o lock the steering column, turn the steering
wheel until it locks.
To facilitate unlocking of the steering column, it is recommended that the
wheels be returned to the straight ahead
position before switching off the engine.
Never switch off the ignition before the
complete immobilisation of the vehicle.
With the engine off, the braking and steering
assistance systems are also cut off - risk of
loss of control of the vehicle!
Check that the parking brake is correctly
applied, particularly on sloping ground.
When leaving the vehicle, keep the key in
your possession and lock the vehicle.
Energy economy mode
After the engine has stopped (position 1. Stop),
for a maximum combined duration of 30 minutes,
you can still use functions such as the audio and
telematics system, courtesy lamps or dipped
beam headlamps.
For more information on Energy
economy mode, refer to the
corresponding section.
Key left in
When the driver's door is opened, a
message is displayed, accompanied by an
audible signal, if the key has been left in the
ignition switch in position 1.
If the key has been left in the ignition switch
in position 2, the ignition will be switched off
automatically after one hour.
To switch the ignition back on, turn the key to
position 1, then back to position 2.
Starting/switching off the
engine with Keyless Entry
and Start
The electronic key must be present in the
passenger compartment.
The electronic key is also detected in the
boot.
If the electronic key is not detected, a
message is displayed.
Move the electronic key so that the engine
can be started or switched off.
If there is still a problem, refer to the "Key
not detected - Back-up starting or Back-up
switch-off" section.
Starting
► With a manual gearbox, place the gear lever
in neutral and fully depress the clutch pedal.
►
With an
automatic gearbox, select mode P
or
N and press the brake pedal.
►
Press the "
START/STOP" button while
maintaining pressure on the pedal until the
engine starts.
Diesel engines
In negative temperatures and/or when the
engine is cold, starting takes place only after the
preheating warning lamp goes out.
If this warning lamp comes on after
pressing the " START/STOP" button:
►
Keep the pedal fully depressed and do not
press the "
START/STOP" button again until the
engine is running.
In all circumstances, if one of the starting
conditions is not met, a message is displayed.
In some circumstances, a message indicates
that it is necessary to turn the steering wheel
Page 99 of 292

97
Driving
6while pressing the "START/STOP" button to
assist unlocking of the steering column.
Petrol engines
With Petrol engines, after a cold start,
pre-heating the catalytic converter can cause
noticeable engine vibrations, for anything up
to 2 minutes (accelerated idle speed).
If the engine stalls, release the clutch
pedal and fully depress it again, the
engine will restart automatically.
Switching off
► Immobilise the vehicle using the parking
brake.
►
With a
manual gearbox, ideally put the gear
lever into neutral.
►
With an
automatic gearbox, ideally select
mode
P or N.
►
Press the "
START/STOP" button.
In some circumstances, it is necessary to turn
the steering wheel to lock the steering column.
On certain versions with an automatic gearbox
(EAT8), the steering column does not lock, but
the gearbox locks in mode P.
If the vehicle is not immobilised, the
engine will not stop.
With the engine off, the braking and
steering assistance systems are also cut
off - risk of loss of control of the vehicle!
Never leave your vehicle with the
electronic key still inside.
Switching on the ignition
without starting the engine
With the electronic key in the passenger
compartment, pressing the " START/STOP"
button, without depressing any of the pedals ,
allows the ignition to be switched on without
starting the engine.
►
Press this button again to switch off the
ignition and allow the vehicle to be locked.
Key not detected
Back-up starting
A back-up reader is fitted to the steering column,
to enable the engine to be started if the system
fails to detect the key in the recognition zone, or
if the battery in the electronic key is flat.
► Place and hold the remote control against the
reader .
►
W
ith a manual gearbox, place the gear lever
in neutral, then fully depress the clutch pedal.
►
W
ith an automatic gearbox or a drive
selector, select mode
P, then depress the brake
pedal.
►
Press the "
START/STOP" button.
The engine starts.
Back-up switch-off
If the electronic key is not detected or is no
longer in the recognition zone, a message
Page 100 of 292

98
Driving
appears in the instrument panel when closing a
door or trying to switch off the engine.
►
T
o confirm the instruction to switch off the
engine, press the " START/STOP" button for
approximately 5
seconds.
In the event of a fault with the electronic key,
contact a CITROËN dealer or a qualified
workshop.
Emergency switch-off
In case of emergency only, the engine can be
switched off without conditions (even when
driving).
►
Press the "
START/STOP" button for about
5
seconds.
In this case, the steering column locks as soon
as the vehicle stops.
Starting/Switching off the
electric motor
Starting
The drive selector must be in mode P.
► If using a remote control key , depress the
brake pedal and turn the key until it reaches
position 3 (Start).
►
If using
Keyless Entry and Start, depress the
brake pedal and briefly press the "START/STOP"
button.
►
Keep your foot on the brake pedal until the
READY
indicator lamp comes on and an audible
signal is emitted, indicating that the vehicle is
ready to drive.
►
With your foot on the brake, select mode
D
or R.
►
Release the brake pedal, then accelerate.
On starting, the instrument panel lights up and
the power indicator cursor moves to the "neutral"
position.
The steering column automatically
unlocks (you may hear a sound and feel the
steering wheel move).
Switching off
► If using a remote control key , turn the key
fully to position 1 (Stop).
►
If using Keyless Entry and Start, press the
"
START/STOP" button.
Before exiting the vehicle, check that:
–
The drive selector is in mode P
.
–
The READY indicator lamp is off.
The drive selector moves automatically
to mode P when the motor is switched off
or when the driver's door is opened.
If the driver's door is opened while the
required conditions for switching off are
not met, an audible signal is emitted,
accompanied by the display of a warning
message.
For the procedures for switching on the
ignition without starting the engine and
those for back-up starting/switching off using
the Keyless Entry and Start system, refer to
the Starting/Switching off the engine
using
Keyless Entry and Start section.
Manual parking brake
Release
► Pull the parking brake lever up slightly , press
the release button, then lower the lever fully.
/ When driving the vehicle, if this
warning lamp and the STOP
warning lamp come on, accompanied by an
audible signal and the display of a message, this
means that the parking brake is still applied or
has not been fully released.
Application
► Pull the parking brake lever up to immobilise
the vehicle.
When parking on a slope, turn the
wheels against the kerb, apply the
parking brake, engage a gear and switch off
the ignition.
Page 103 of 292
101
Driving
6From this point onwards, only the manual
functions, using the control, allow the parking
brake to be applied and released.
►
Follow this procedure again to reactivate
automatic operation (confirmed by the indicator
lamp on the instrument panel going out).
Emergency braking
If depressing the brake pedal fails to provide
effective braking or in exceptional circumstances
(e.g.
driver unwell, assisted driving), the vehicle
can be braked by sustained pulling on the
electric parking brake control. Braking continues
for as long as the control is kept pulled, and
ceases when the control is released.
The ABS and DSC systems stabilise the vehicle
during emergency braking.
If emergency braking malfunctions, the message
"Parking brake fault" will be displayed on the
instrument panel.
If the ABS and DSC systems
malfunction, indicated by lighting
one or both warning lamps on the instrument
panel, the vehicle’s stability is no longer ensured.
►
In this case, ensure the vehicle's stability by
successive and repeated "pull-release" actions
on the electric parking brake control until the
vehicle comes to a complete stop.
6-speed manual gearbox
Engaging 5th or 6th gear
► Move the gear selector fully to the right to
engage 5th or 6th gear.
Failure to follow this instruction could
cause permanent damage to the gearbox
(inadvertent engagement of 3
rd or 4th gear).
Engaging reverse gear
► Raise the ring under the knob and move the
gear selector to the left, then forwards.
Only engage reverse gear when the
vehicle is stationary with the engine at
idle.
As a safety precaution and to facilitate starting the engine:
–
Always select neutral.
–
Press the clutch pedal.
Automatic gearbox
Automatic 8-speed gearbox with push selector. It also offers a manual mode with gear changes
via control paddles located
behind the steering
wheel.
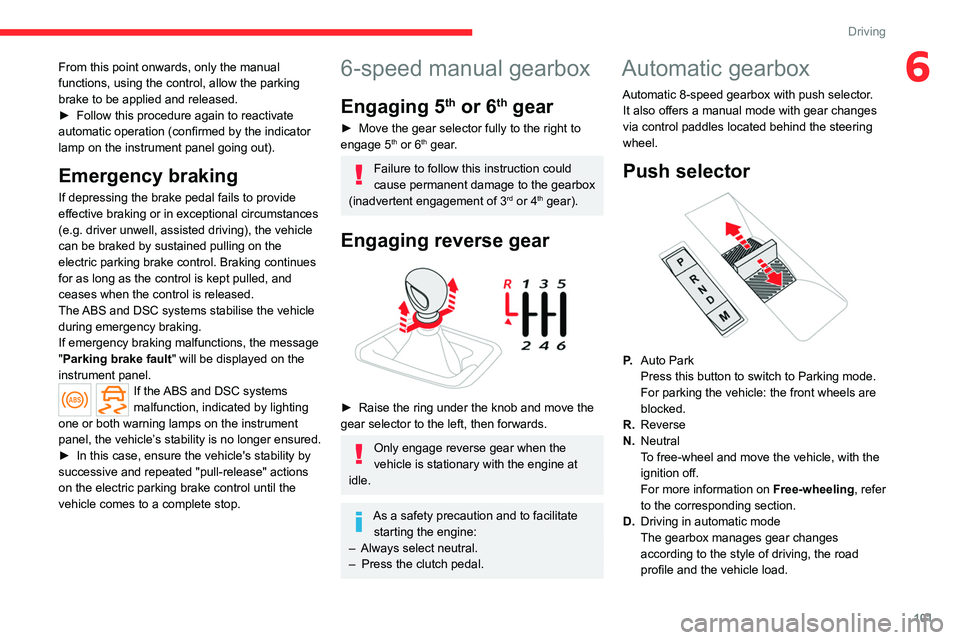
Push selector
P. Auto Park
Press this button to switch to Parking mode.
For parking the vehicle: the front wheels are
blocked.
R. Reverse
N. Neutral
To free-wheel and move the vehicle, with the
ignition off.
For more information on Free-wheeling, refer
to the corresponding section.
D. Driving in automatic mode
The gearbox manages gear changes
according to the style of driving, the road
profile and the vehicle load.
Page 109 of 292

107
Driving
6Driving on flooded roads
Before entering into a flooded area, it is
strongly recommended that you deactivate
the Stop & Start system.
For more information on Driving
recommendations, particularly on flooded
roads, refer to the corresponding section.
Operation
Main conditions for operation
– The driver ’s door must be closed.
– The driver's seat belt must be fastened.
–
The level of charge in the battery must be
sufficient.
–
The temperature of the engine must be within
its nominal operating range.
–
The outside temperature must be between
0°C and 35°C.
Putting the engine into standby
(STOP mode)
The engine automatically enters standby mode
as soon as the driver indicates their intention to
stop:
–
W
ith a manual gearbox: with the gear lever
in neutral and the clutch pedal released.
–
W
ith an automatic gearbox: with the gear
selector in mode D or M, the brake pedal
depressed until the vehicle stops or the gear
selector in mode N, with the vehicle stationary.
Time counter
A time counter adds up the time spent in standby
during the journey. It is reset to zero every time
the ignition is switched on.
Special cases:
The engine will not go into standby if the
conditions for operation are not met and in the
following cases:
–
Steep slope (ascending or descending).
–
V
ehicle has not exceeded 6 mph (10 km/h)
since the last engine start (with the key or the
START/STOP button).
–
Needed
to maintain a comfortable temperature
in the passenger compartment.
–
Demisting active.
In these cases, this indicator lamp flashes
for a few seconds, then goes off.
After the engine has restarted, STOP mode is not available until the vehicle
has reached a speed of 5 mph (8
km/h).
During parking manoeuvres, STOP mode
is not available for a few seconds after
coming out of reverse gear or turning the
steering wheel.
Restarting the engine (START mode)
The engine automatically restarts as soon as the
driver indicates the intention of moving off again: With a manual gearbox: with the clutch pedal
fully depressed.
With an automatic gearbox:
–
With the selector in mode
D or M: with the
brake pedal released.
–
With the selector in mode
N and the brake
pedal released: with the selector at D or M.
–
With the selector in mode
P and the brake
pedal depressed: with the selector at R, N, D
or M.
–
With reverse gear engaged.
Special cases
The engine will restart automatically if the
conditions for operation are met again and in the
following cases:
–
With a manual gearbox: vehicle speed
exceeds 2.5 mph (4
km/h).
–
With an automatic gearbox, in mode N
, vehicle
speed exceeds 0.6 mph (1
km/h).
In these cases, this indicator lamp flashes
for a few seconds, then goes off.
Malfunctions
In the event of a fault with the system, this
warning lamp flashes for a few moments
on the instrument panel, then remains on,
accompanied by the display of a message.
Have it checked by a CITROËN dealer or a
qualified workshop.
Page 110 of 292

108
Driving
The vehicle stalls in STOP mode
All of the instrument panel warning lamps come
on if there is a fault.
►
Switch off the ignition then start the engine
again with the key or the " ST
ART/STOP" button.
12 V battery
The Stop & Start system requires a
12 V battery of specific technology and
specification.
All work must be carried out only by a
CITROËN dealer or a qualified workshop
Tyre under-inflation detection
This system alerts the driver if one or more tyres
suffer a drop in pressure.
The alert is raised when the vehicle is moving,
not when stationary.
It compares the information given by the wheel
speed sensors with reference values, which
must be reinitialised every time the tyre
pressures are adjusted or a wheel changed.
It takes into account the last values stored
during the reinitialisation request. It is therefore
essential that the tyre pressure is correct during
the operation. This operation is the driver’s
responsibility.
The tyre under-inflation detection cannot, in any circumstances, replace the need
for vigilance on the part of the driver.
This system does not avoid the need to
regularly check the tyre pressures (including
the spare wheel), especially before a long
journey.
Driving with under-inflated tyres, particularly
in adverse conditions (heavy load, high
speed, long journey):
–
worsens road-holding.
–
lengthens braking distances.
–
causes premature wear of the tyres.
–
increases energy consumption.
The inflation pressures defined for the vehicle can be found on the tyre pressure
label.
For more information on the Identification
markings, refer to the corresponding section.
Checking tyre pressures
This check should be done monthly
when the tyres are "cold" (vehicle stopped for
1 hour or after a journey of less than 6 miles
(10
km) at moderate speeds).
Otherwise, add 0.3 bar to the pressures
shown on the label.
Snow chains
The system does not have to be
reinitialised after fitting or removing snow
chains.
Under-inflation alert
This is signalled by the fixed illumination of this warning lamp, accompanied by an
audible signal and, depending on equipment, the
display of a message.
►
Reduce speed immediately
, avoid excessive
steering movements and avoid sudden braking.
►
Stop the vehicle as soon as it is safe to do
so.
The loss of pressure detected may not always cause visible deformation of the
tyre.
Do not rely on just a visual check.
►
Using a compressor
, such as the one in
the temporary puncture repair kit, check the
pressures of all four tyres when cold.
►
If it is not possible to carry out this check
immediately
, drive carefully at reduced speed.
►
In the event of a puncture, use the
temporary puncture repair kit or the spare wheel
(depending on equipment).
Driving too slowly may not ensure
optimum monitoring.
The alert is not immediately triggered in the
event of a sudden loss of pressure or tyre
Page 113 of 292
111
Driving
6Units of speed
Ensure that the units of speed displayed
on the instrument panel (mph or km/h) are
those for the country you are driving in.
If this is not the case, when the vehicle is
stationary, set the display to the required
units of speed so that it complies with what is
authorised locally.
In case of doubt, contact a CITROËN dealer
or a qualified workshop.
Shortcuts for driving aids
With MyCitroën Drive Plus
The full list of available driving aids can be found
in the Functions tab.
Driving aids can be accessed directly to quickly
activate/deactivate them.
By default, driving aids are already stored in the
Shortcuts tab (e.g.
Stop & Start, Lane keeping
assist).
Other driving aids can be added or deleted from
this tab.
It is configured in the ADAS>Functions
touch screen application.
► Press the button corresponding to the
driving assistance concerned:
•
Full symbol: the function is added to the
Shortcuts
tab.
•
Empty symbol: the function is deleted from
the
Shortcuts tab.
►
Check the modification in the Shortcuts
tab.
► Press this button to access directly to the
Shortcuts tab.
Multiple deactivation
It is possible to deactivate several driver
assistance functions simultaneously.
This is done in two steps:
–
First of all, the selection of all the functions
that you want to deactivate.
–
Secondly
, the simultaneous deactivation of all
these functions.
Selection of functions
► Press this button on the dashboard to
display the ADAS
tabs.
►
Select the
Functions tab.
► Press this button to display the list of
available functions.
►
Select the functions to deactivate
(e.g.
Stop - Start, Lane Keeping Assist, Automatic
Braking System (Active Safety Brake)).
► Press this button to return to the
previous page.
The functions to deactivate are saved in the
system.
Deactivation of these functions
► Press and hold this bu tton on
the dashboard.
All previously selected functions are deactivated
until the vehicle is next restarted (confirmed by
an audible signal).
Road signs recognition
For more information, refer to the
General recommendations on the use
of driving and manoeuvring aids .
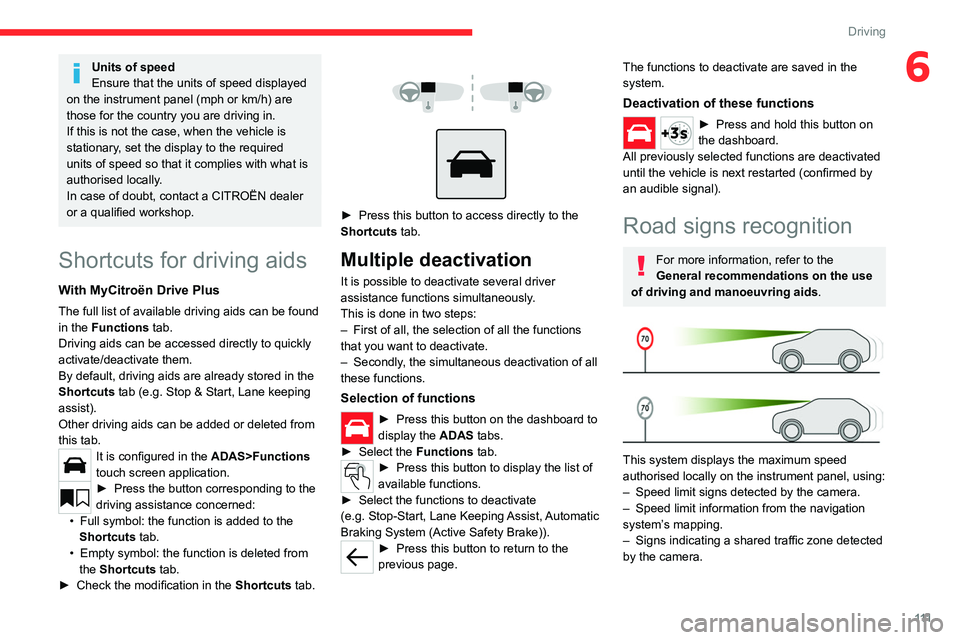
This system displays the maximum speed
authorised locally on the instrument panel, using:
–
Speed limit signs detected by the camera.
–
Speed limit information from the navigation
system’
s mapping.
–
Signs indicating a shared traffic zone detected
by the camera.
Page 119 of 292
11 7
Driving
6Cruise control
For more information, refer to the
General recommendations on the use
of driving and manoeuvring aids and the
Cruise control - particular
recommendations.
This system automatically maintains the vehicle’s speed at the value programmed
by the driver (speed setting), without the use of
the accelerator pedal.
Cruise control is switched on manually.
It requires a minimum vehicle speed of 25 mph
(40
km/h).
With a manual gearbox, third gear or higher must
be engaged.
With an automatic gearbox, mode
D
or second
gear or higher in mode
M
must be engaged.
With a drive selector, mode
D or B must be
engaged.
Cruise control remains active after
changing gear, regardless of the gearbox
type, on engines fitted with the Stop & Start
function.
Switching off the ignition cancels any
speed setting.
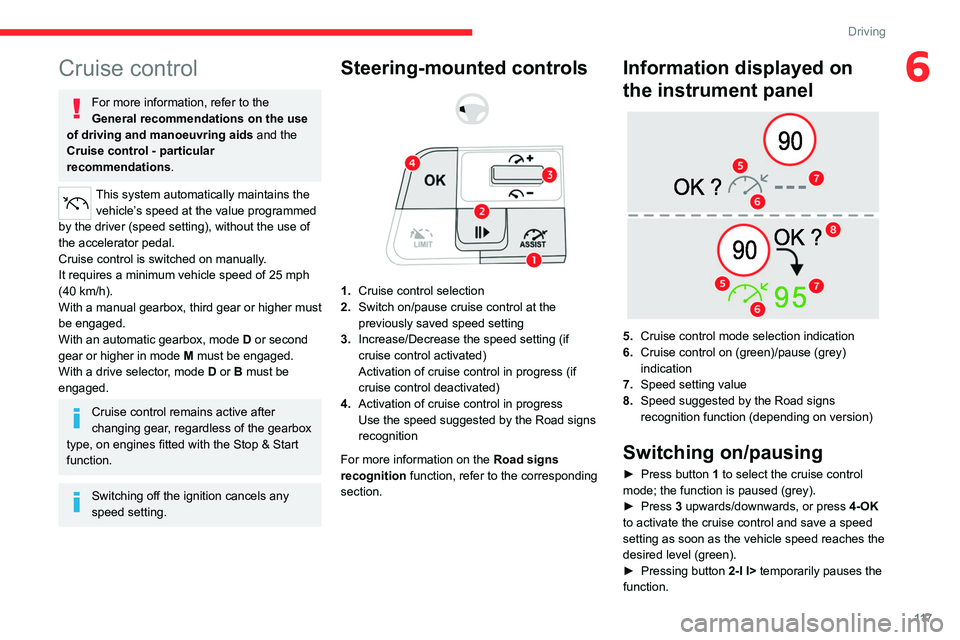
Steering-mounted controls
1. Cruise control selection
2. Switch on/pause cruise control at the
previously saved speed setting
3. Increase/Decrease the speed setting (if
cruise control activated)
Activation of cruise control in progress (if
cruise control deactivated)
4. Activation of cruise control in progress
Use the speed suggested by the Road signs
recognition
For more information on the Road signs
recognition
function, refer to the corresponding
section.
Information displayed on
the instrument panel
5. Cruise control mode selection indication
6. Cruise control on (green)/pause (grey)
indication
7. Speed setting value
8. Speed suggested by the Road signs
recognition function (depending on version)
Switching on/pausing
► Press button 1 to select the cruise control
mode; the function is paused (grey).
►
Press
3 upwards/downwards, or press 4-OK
to activate the cruise control and save a speed
setting as soon as the vehicle speed reaches the
desired level (green).
►
Pressing button 2-I I>
temporarily pauses the
function.
Page 121 of 292
11 9
Driving
6Selecting/Deselecting the
system
ASSIST
► Press this button successively until the
Highway Driver Assist mode is displayed on the
instrument panel.
►
After a few seconds, the Highway Driver
Assist mode is selected.
The Driving aids mini-
view is displayed on the instrument panel.
The colour of the symbols, representing the
steering wheel and the side lines, depends on
the operating state of the system:
(grey)
One or more operating conditions is not
met; the system is paused.
(green)
All operating conditions are met; the
system is active.
(orange)
System malfunction.
► Press this button successively again until the
OFF mode is displayed on the instrument panel.
►
After a few seconds, the Highway Driver
Assist mode is deselected.
The Driving aids
mini-view disappears.
Adaptive cruise control
For more information, refer to the
General recommendations on the use
of driving and manoeuvring aids and the
Cruise control - particular
recommendations.
This system automatically maintains the vehicle
speed at a value set by the driver (speed
setting), while respecting a safety distance from
the vehicle in front (target vehicle) previously set
by the driver. The system automatically manages
the acceleration and deceleration of the vehicle.
With the Stop function , the system manages
braking until the vehicle comes to a complete
stop.
With the Stop
& Go function , the system
manages braking until the vehicle comes to a
complete stop and restarts the vehicle.
The brake lamps come on if the vehicle is slowed down by the system.
It can be dangerous to drive if the brake
lamps are not in perfect working order.
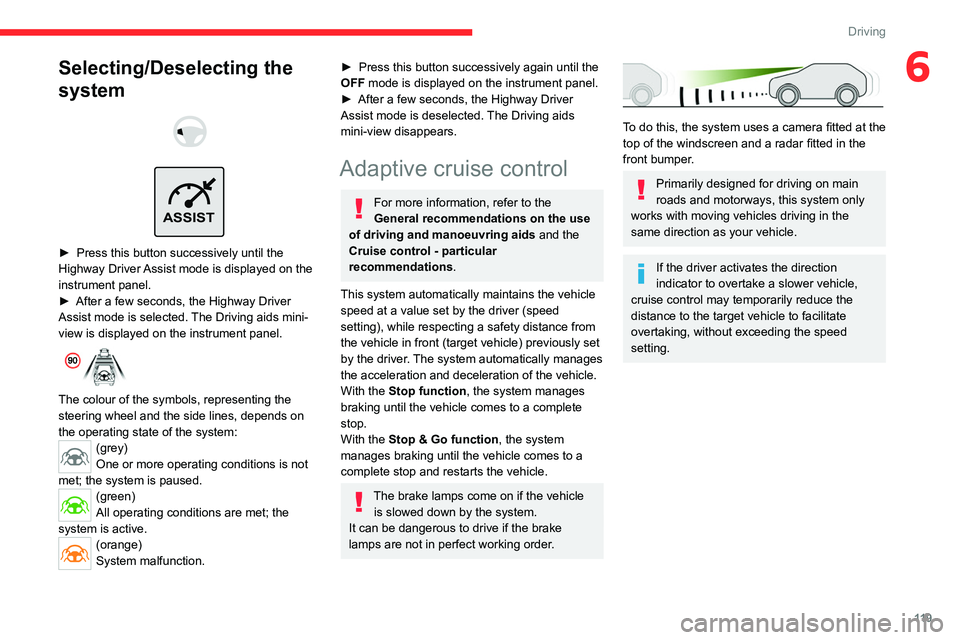
To do this, the system uses a camera fitted at the
top of the windscreen and a radar fitted in the
front bumper.
Primarily designed for driving on main
roads and motorways, this system only
works with moving vehicles driving in the
same direction as your vehicle.
If the driver activates the direction
indicator to overtake a slower vehicle,
cruise control may temporarily reduce the
distance to the target vehicle to facilitate
overtaking, without exceeding the speed
setting.
Page 164 of 292
162
Practical information
For domestic or accelerated charging
Before charging
Depending on the context:
►
Have a professional check that the
electrical system to be used complies with
applicable standards and is compatible with
the vehicle.
►
Have a professional electrician install
a dedicated domestic power socket or
accelerated charging unit (W
allbox)
compatible with the vehicle.
You should preferably use the charging cable
available as an accessory.
For more information, contact a CITROËN
dealer or a qualified workshop.
During charging
While charging is in progress, unlocking
the vehicle will cause the charging to stop.
If no action is taken on one of the openings
(door or boot) or on the charging nozzle, the
vehicle will lock again after 30 seconds and
charging will resume automatically.
Never work under the bonnet:
–
Some areas remain very hot, even an hour
after charging ends - risk of burns!
–
The fan may start at any time - risk of cuts
or strangulation!
After charging
Check that the charging flap is closed.
Do not leave the cable connected to the
domestic power socket - risk of short-circuit
or electrocution in the event of contact with or
immersion in water!
For superfast charging
Before charging
Check that the fast public charging
station and its charging cable are compatible
with the vehicle.
If the exterior temperature is below:
–
0°C, charging times may be extended.
–
-20°C, charging is still possible, but
charging times may be extended even further
(the battery has to be heated first).
After charging
Check that the charging flap is closed.
Connection
► Before charging, check that the drive selector
is in mode P, otherwise charging is not possible.
►
Open the charging flap by pressing the
push-button, and check that there are no foreign
bodies on the charging connector
.
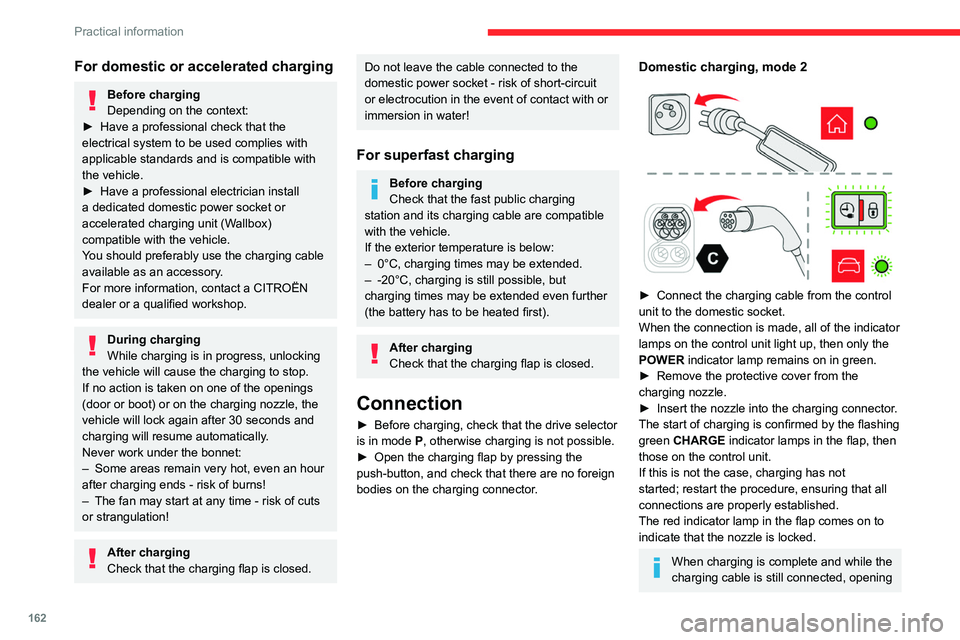
Domestic charging, mode 2
► Connect the charging cable from the control
unit to the domestic socket.
When the connection is made, all of the indicator
lamps on the control unit light up, then only the
POWER
indicator lamp remains on in green.
►
Remove the protective cover from the
charging nozzle.
►
Insert the nozzle into the charging connector
.
The start of charging is confirmed by the flashing
green CHARGE indicator lamps in the flap, then
those on the control unit.
If this is not the case, charging has not
started; restart the procedure, ensuring that all
connections are properly established.
The red indicator lamp in the flap comes on to
indicate that the nozzle is locked.
When charging is complete and while the
charging cable is still connected, opening